
How to make a tablet cover, a handmade gift idea by Nienke
This content contains affiliate links or sponsored elements, read our Disclosure Policy.
Hi, this is Nienke, from the Dutch blog Pienkel! I’m very happy to be here and meet all of you. In this lovely series of handmade gifts, I’ve got a tutorial for a tablet cover for you. Since I’m as much addicted to my gadgets as anyone nowadays, I carry them along anywhere. However, being a mom of three little ones as well, my tablet in my handbag usually is in the messy company of babywipes, biscuits and sippy cups. I do have a fancy book cover for my tablet, which neatly protects it from scratches, but after opening that cover recently only to find a biscuit squashed onto the screen, I decided I really needed another cover when taking my tablet with me. It’s perfect as a gift, since it’s a fast sew that only asks for a few small pieces of fabric. Plus, it leaves lots of room for personalising. You could make it in patchwork, add an applique or embroidery, piping or lace, use laminate for the outside, anything!

Requirements, for a 10″ tablet:
– Fabric for the outside, two 13″ squares. If you make the cover for a different sized tablet, use the width of the tablet plus 3″ for seam allowances and some ease.
– Fleece for the lining, a 23.5×13″ rectangle. For a different sized tablet you use the width used for the outer fabric. For the heigth, you use twice this amount, minus 2.5″.
– Fusible interfacing, for the outer fabric. If you use a sturdy fabric, like canvas, you can omit this.
– Fold-over elastic, two pieces of approximately 14″ each.
– Matching thread.
– Regular sewing notions.
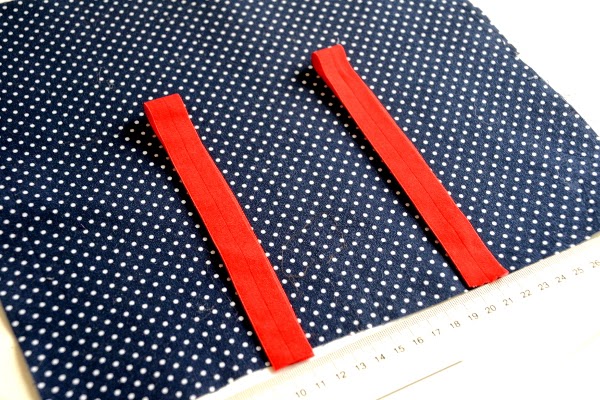
Iron the interfacing onto the wrong side of the outer fabric. Mark the places for the elastic on the bottom of one piece of outer fabric. I placed mine at one third each, so a little over 4″ from each side. Fold the elastic in half, right sides together.
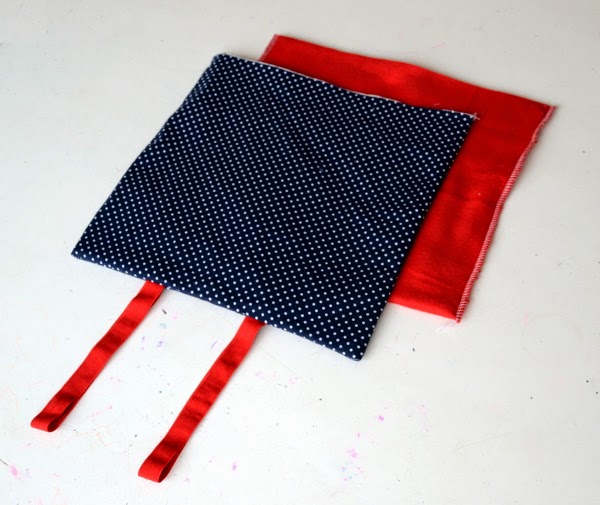
Place the elastic onto the marks on the right side of the outer fabric, the raw edges of the elastic matching the raw edge of the fabric. Place the other piece of outer fabric on top of this, right sides together. So now the elastic is in between the two pieces of outer fabric. Pin into place. Sew the three sides of the square with a 3/8″ seam allowance, leaving only the top side open. Turn right side out and press.
Fold the rectangle of fleece in half, right sides together, pin and sew the two sides to create a pocket just like the one of main fabric.
Fold the top edge of the outer fabric, the open side, 1/4″ towards the inside. Press. Check the measurement of the fleece inner pocket next to the outer pocket. It should be approximately 3/8″ shorter at the top than the outer pocket. If not, trim a bit off the top of the fleece.
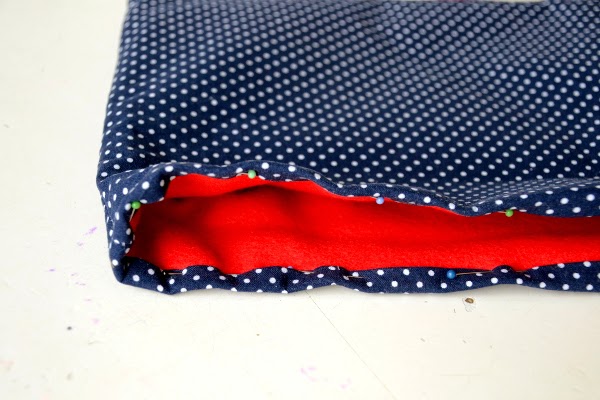
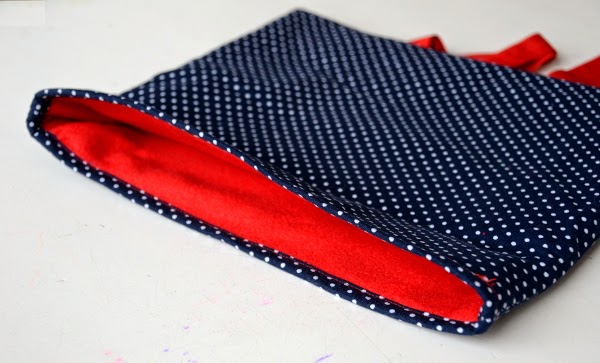
Place the fleece inner pocket, that still has its wrong side out, inside the outer pocket that has its right side out and the top hem pressed. Now fold the top of the outer pocket over the fleece pocket. Pin into place.
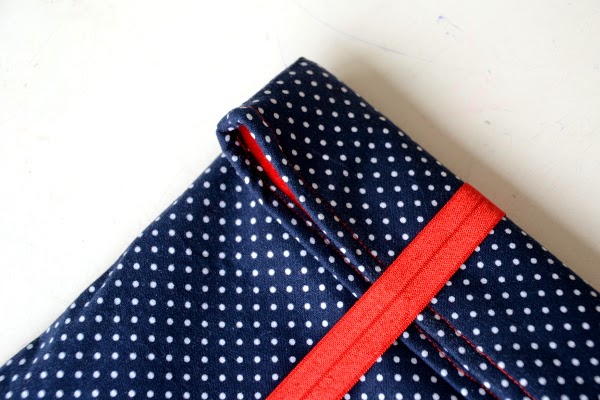
Topstitch the top hem you just pinned.
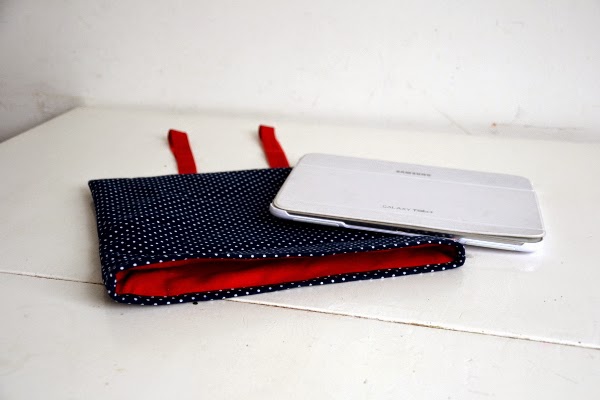
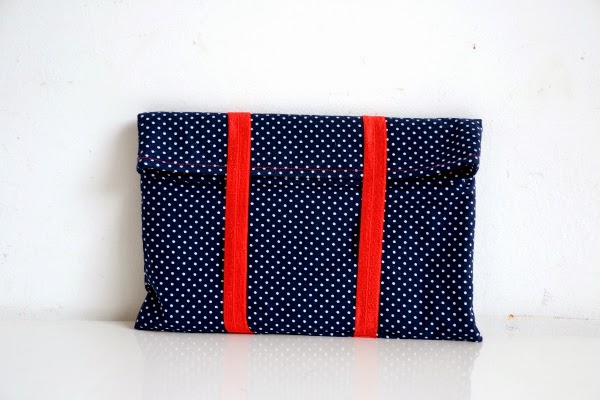
Done!

If you’d like to see more, you’re very welcome to visit me at my blog, or follow me at social media: Facebook, Instagram or Twitter.


Other Free Bag Patterns:
- All of the Free Bag and Purse Patterns available
- No Sew Hobo
- The Blogger Bag
- Leather Tote Bag
- Quick Sew Hobo
- Wine Bottle Gift Bag
- The Easy Book Bag
- Diaper Bag Tutorial
- The Man Satchel
- Shave Kit Case
- Quilted Leather Clutch
- Little Purse Tutorial
- Child Sheep Purse Tutorial
- Drawstring Backpack Tutorial
- Sleeping Bag Pack
I love this design!! I’ve got a Craft Gossip post scheduled for later this morning that links to your tutorial;
http://sewing.craftgossip.com/tutorial-elastic-strap-tablet-case/2014/10/27/
–Anne
I don’t see how this cover is fastened. Do you use velcro or buttons for the ends of the elastic. I didn’t understand that part of the instructions. Otherwise, very clear. Plan to make covers for out new phones. Need one for mine so can keep the face clean. We just got Samsung Galexy IV phones and I use mine more than my laptop or tablet.
Hi Virginia – the straps are elastic so they wrap around the cover to hold it in place.
Thanks for sharing this wonderful gift idea. Its great