
My Little Pony Inspired Stick Ponies
This content contains affiliate links or sponsored elements, read our Disclosure Policy.

It’s for handmade Saturday! Today we’re starting the week off with Gemia from Phat Quarters . She has an awesome tutorial that I know you’ll love! Take it away Gemia!
I am so excited to be here on Fleece Fun and to be able to share this great tutorial with you. My family loves to be outdoor and create unique imaginary adventures. With three girls and two boys we are never short on adventures, imagination, or the props that go along with that. One of my children’s favorite props are Stick Ponies!  I adored the cartoon My Little Pony as a child and I am so delighted that my children have found joy in it too. With that in mind, today, I am going to share with you a fun spin on the traditional Stick Pony. These felt stick ponies are not headed to the Wild West but rather to Ponyville!

One of my favorite things about this project is that it can be completed with or by children (who are capable with scissors). We made a few different characters and so that each of my kids could pick out their favorite characters to recreate into Stick Ponies. Another great aspect of this DIY Project is that it is not just for girls; there are boy ponies and dragons in Ponyville too, just waiting to be created! So join me as I show you how to create your own MLP Inspired Stick Pony!
For this project you will need:
Stick or Dowel
Fabric Glue
Black Marker
Scissors: pinking & regular
Stuffing: an old pillow or knit scraps work too!
Basic Sewing Supplies
Felt Pieces
Pony Head: 2 sheets or 1/4 Yard
Hair (one color): 2 sheets or 1/8 Yard
Eye: Scraps of Black & White and desired eye color
Download the free pattern here, tutorial below.

1- Getting started
 First things first; download, print, and cut the provided Template. You also will need to choose which pony you would like to create… first that is. I am going to use my favorite character; Apple Jack, for this tutorial. Gather the supplies.
2- Pony Eyes
 This is where the character of the pony is truly expressed! The template provides you with two different eye shapes. One is for a Teardrop Eye and the other, an Oval Eye. You will only need to choose one, but you will need both pieces (the ‘White’ & ‘Color’) and the the center ‘Black’ piece.
 Once you have chosen your eye shape take your three template pieces and cut out 2 of each specified color. When you are done you should have 2 black pieces, 2 colored pieces, and 2 white pieces. Place one of your white and colored eye pieces in front of you. You are going to glue the color piece on top of the white. Apply glue to (or stitch) the colored eye piece onto the white eye piece. Repeat for the second set. Then take the black eye piece and glue (or stitch) it to the color eye piece. Repeat for the other set. You should now have two eyes. Set them aside so that they can dry. If you have chosen to stitch the eyes onto the pony head, you will want to do that now. You should mark the eye placement on both halves and double check it before sewing.
 The character Apple Jack has sweet round checks that cause her eyes to squint when she smiles. Due to this I am going to cut a small crescent off the base of each eye. If you choose to do this optional step, make sure that you cut your crescents MIRRORED of each other. If you do not you will end up with two left eyes, or two right eyes, or one eye that is looking backwards… trust me, I know!
3 – Pony Hair
 Now we need to cut the hair. Grab your Hair Felt and the pinking scissors. (Pinking the felt is optional but will help with the wear and tear of the finished pony.) You simply need to cut out stripes of the felt. Make them about 1-1.5″ in width and 8-10″ long. Cut 12-16 pieces and set them aside.
4 – Pony Head and Ears
 It is now time for the pony head. Using the provided template cut two head pieces and two ear pieces out of your Pony Head Felt using the Pinking scissors. (Pinking the felt is optional but will help with the wear and tear of the finished pony.) Mark, with a small dot or pin, the ear placement from the template onto the head piece.
 Set the head pieces aside and grab an Ear piece. Hold it with the tip of the ear facing away from you and the flat base towards you. Create a pleat in the base of the ears by folding both outer edges towards the center of the ear. Pin the pleat to secure it. Repeat for the second ear piece.
 Find the placement for the ear on your pony head (as marked earlier) and pin the ear in place. Using coordinating thread color and a medium Zig-Zag stitch, sew the ear onto the head piece. Repeat for the other side.
Once your ears are attached to the head fold each ear piece towards the cheeks of your pony head and secure them with pins. This will prevent you from accidentally sewing them in the next step.
 Now take one head piece and lay it flat on the table. Grab the hair pieces that you set aside and place them on TOP of the head piece. Use the full length of the hair pieces at the back of the neck and work your way up to the ears. From the ears forward fold the hair pieces in half – but NOT equally, and continue to place them on the head until you hit the crest of the forehead. Shift these around until you are happy with how they look.
 For this Apple Jack I wanted to include her hair-tie and the fact that her hair is always in a ponytail (he he he). For this optional step, I cut a small red piece of fabric and wrapped it around the ends of the hair pieces and then glued it all together. I used a pin to secure it while the glue dried.
 Now you will take your second head piece and place it on top of the first with the hair sandwiched in between the two. Pin the layers in place. Using coordinating thread and a medium Zig-Zag stitch, sew the layers together. You will start at the BASE of the front neck and sew up the perimeter of the head and down to the BASE of the back neck. You must leave the base of the neck open! This is where you will place the stick.
 It is now time to glue the eyes on. Take one eye and place it on the head where you want it to be. Once you are happy with this placement mark the location and remove the eye. Place glue on the wrong side of the white felt and align the eye on the head over your mark. Allow the glue to set before repeating this process on the opposite side.
  Now we are ready for details. If you have left over black felt you are welcome to cut out and glue on your detail pieces. I chose to use a black marker…much easier! For this pony some of the details include freckles, check marks, and eyelashes. Have fun with it and finish off your pony by adding character details.
 There are two more steps to completing the perfect Stick Pony; filling it and attaching it to a stick. You simply need to press filling into the head until you are happy with the shape that you have. We used a variety of ‘Fillings’ for our ponies, including an old pillow and some leftover knit scraps.
 Finally you can find a nice stick to place your pony head on. We used some sturdy branches from our yard, but if you have a stick or dowel that is smaller than the neck hole, all you need to do is find some ribbon, twine, or yarn and wrap it and tie it off. We have found that our children have less galloping issues when they are only trying to hold the stick, so we have chosen not to use anything.
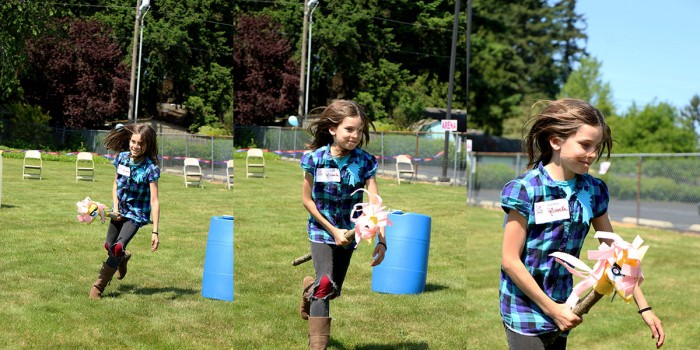
We recently had the opportunity to attend a Stick Horse Rodeo with our Stick Ponies. It was so much fun! The kids had a blast doing barrel races, roping cattle, and parading around with their favorite My Little Pony characters.
We also have had many fine adventures in the wildlands of our backyard, pulling Cinderella’s carriage to the Ball, and even protecting the blanket fort from robbers in the deserts of the family room. I hope that this project can bring your family as many sweet memories and hours of imaginative fun, as it has for ours!
If you would like to visit with me again, you can find me over in our shop, Phat Quarters, blogging at Phat Quarters, on Facebook, Pinterest, and Instagram, or at VFT designing new patterns. I only occasionally sleep, but when I do it is wonderful! I would also like to share with you some of my favorite projects from this year. I hope that you will check them out and say hello. Have a great week.

