
How to make a Softie Baby Block
This content contains affiliate links or sponsored elements, read our Disclosure Policy.
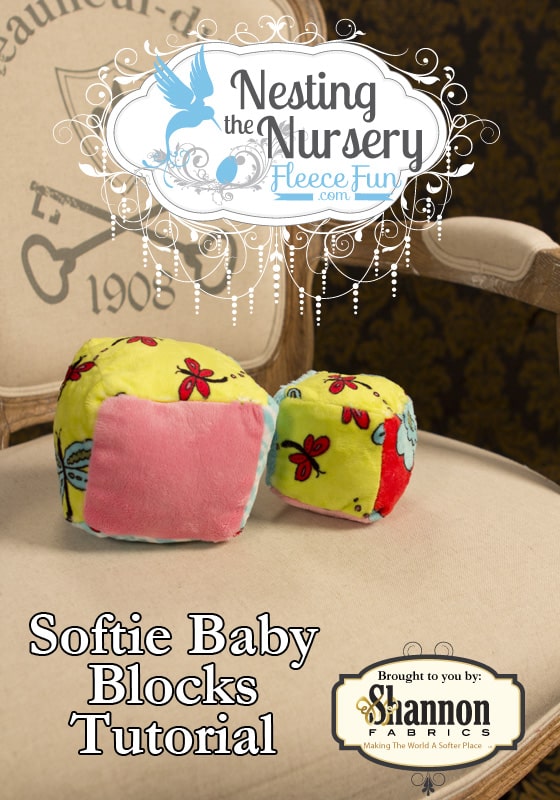
Making a soft baby block is easy using this step by step tutorial.
You will need:
Remaining cuddle strips from kit ( Unfortunately the exact kit used in the series is no longer available – but you can find a similar kit here)
Stretch needle
Walking foot
Rotary cutter, ruler and mat
Jingle bell (optional)
Poly fill
Sewing Essentials (pins, scissors, etc.)
Sewing Machine
Disclaimer: This is a paid for tutorial by Shannon Fabrics.
Video tutorial here, written below:

Step 1
Take the remaining pieces from your cuddle strip kit and cut out six 5 inch by 5 inch blocks. To make different sizes simple cut out six squares all the same size.
Step 2
Arrange the blocks in a cross shape. Sew the shape together block by block using a half inch seam allowance.
Step 3
Now it’s time to make the block 3D. Take the top corner of the left corner of the cross and pin to to the top left corner of the left block together to begin to make a cube. Continue in this manner to make an inside out cube, be sure to leave a section of 2 inches open for turning. Sew the seams together using a half inch seam allowance. Trim corners and turn right side out.
Step 4
Stuff the block with poly fill to the firmness desired. Half way through stuffing the block add a jingle bell if you like. Hand sew the gap shut.
Fun Baby Softies and Toy Tutorials:
- Monster Softie Pattern (Free)
- Ladybug Softie
- Sunshine Softie – Free Baby Toy Sewing Pattern
- ABC Baby Blocks Free Pattern and Tutorial
- Softie Book Baby Toy Tutorial
- Fun Felt Guitar Softie Toy (Free Pattern)
- Easy Block Pillow Tutorial
- Monster Finger Puppets Tutorial
- Pumpkin Finger Puppet Tutorial
- Toddler Bean Bags – Handmade Gift Idea by Chrissy from Muse Morning
- Fleece Eggs and Fleece Basket Pattern
- Kawaii Candy Corn Softie
- Reindeer Softie
- My Little Pony Inspired Stick Ponies
- DIY Nursery Wall Hanging – Lovely Rainbow with Cloud