
How to paint stripes on walls: tips, tricks and tutorials
This content contains affiliate links or sponsored elements, read our Disclosure Policy.
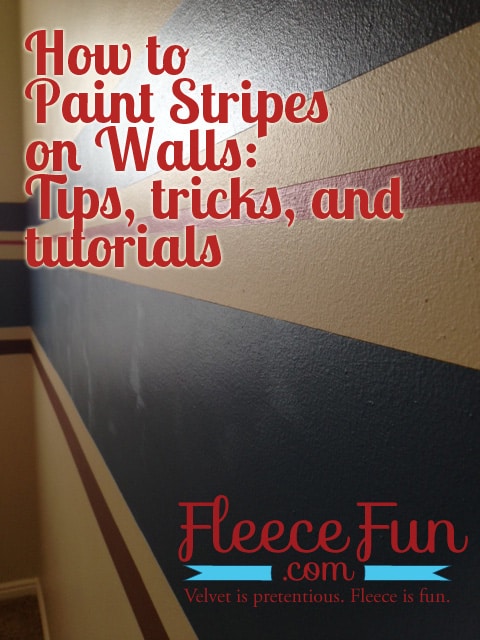
I went bold with stripes in the nursery. It adds a fun accent of color without being overwhelming . It’s extremely masculine and adds interest. However if you are painting bold blue, brown and red stripes on the wall you better know what you’re doing! Fortunately I really researched how to paint stripes before I taped a single wall. Here are the tutorials that I found the most useful:
Classy Clutter has a few posts on painting wall stripes. Her tutorial mentions two different methods on getting perfect stripes and her thoughts on comparing the two. You can see that tutorial here – https://www.classyclutter.net/2012/02/stripe-wars.html
Unskinny Boppy also has some great pointers that I used – https://unskinnyboppy.com/2012/02/lazy-girls-timesaving-tips-for-painting/

Here’s the process I ended using to get my stripes.

Using a laser level that could mount to the wall I taped off the walls. Note: to work around corners and pop-outs you really want to use a laser level because it makes it so much easier. However on some level models ( like the one I was using) you can tilt the laser so be sure to check that the light is level.
After taping the walls ( and this took the most time) I pushed down on the tape with a paint stick ( and truth is I wish I took a little more time with this step and used the credit card).

I then painted along the edges of the tape with the base paint and let it dry to seal the tape.
Then to be extra safe I dry brushed the edges in the color the stripe was going to be.
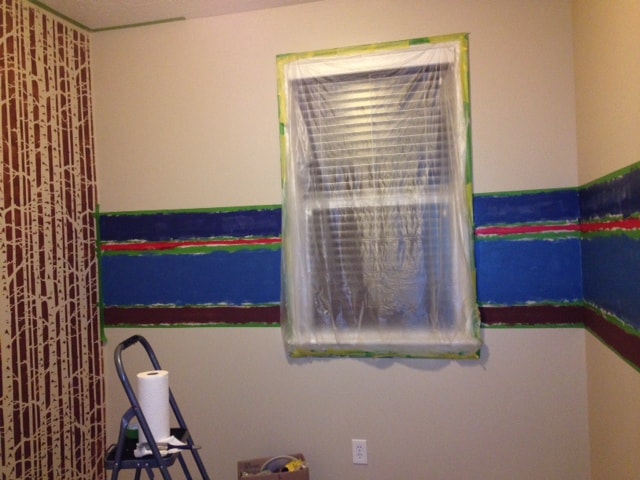
Then I grabbed my husband and we painted the stripes alternating between rolling and painting to get the nice solid color. For the red thin strip we found that a craft brush worked best. We ended up doing three coats total. While the paint was still wet we took a deep breath and pulled the tape off the wall.

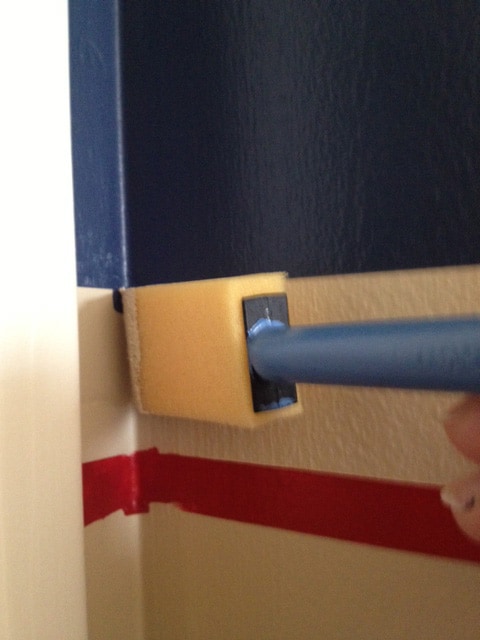
It worked! We were very happy with the results. There were only a couple of spots that needed some touch up. The corners bled under the tape – fixing it was simple. A wedge craft paintbrush worked perfectly for touch ups.
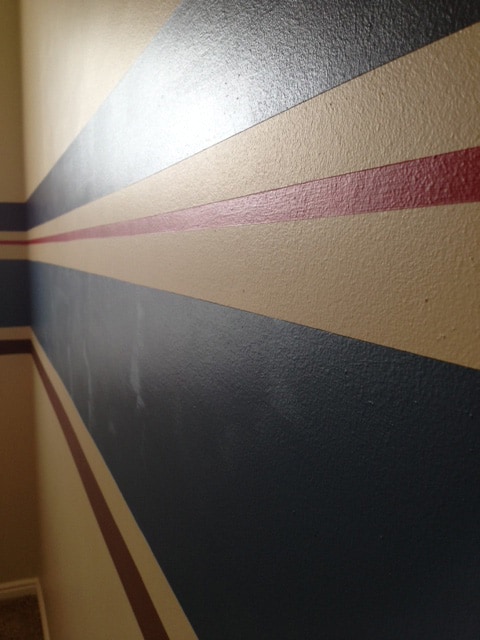
I am very happy with the end result! Tomorrow I’ll show you a video that shows the room in all it’s painted glory!
More tutorials for Organizers!
- Origami Fabric Basket Tutorial
- IKEA Fabric Stool
- Sewing Machine Mat Tutorial
- Craft Room Hanging Organizer Tutorial
- How to Make a Giant Pegboard for Your Craft Room
- How to Make a Pin Cushion Tutorial (Bracelet Style)
- Cute Trash Can DIY Craft Room Decor
- Make Giant Buttons Wall Decor
- Painting a Chalkboard Wall – 5 Things to Know
- See all of our Organizer Tutorials
Love these Craft Room Makeovers and Decor Ideas!
- Craft Closet Organization: The Ultimate Guide
- Sewing Room Ideas: My Studio Makeover (Part 1 of the Makeover Series)
- How to Choose Colors for Your Sewing Studio (Part 2 of the Makeover Series)
- Sewing Room Ideas: How to Pick Furniture (Part 3 of the Makeover Series)
- Cute Craft Room Decor Ideas (Part 4 of the Makeover Series)
- Craft Room Ideas: Makeover Final Reveal (Part 5 of the Makeover Series)
- Honest Craft Room Tour!
- See all Studio Space and Decor Tutorials!
Awesome job! What paint brand did you use? Also, I see that your walls are semi-textured, what kinds of rollers worked best?
Thank you.
Hi Sammi,
When you look at different rollers in teh store you can buy ones that are for “lightly tectured walls” which is what I used. I used Sherwin williams latex paint on the red and blue stirpes, the brown stripe is actually accylic craft pain (which is what I used on the stencil wall).
Thanks,
Angel