
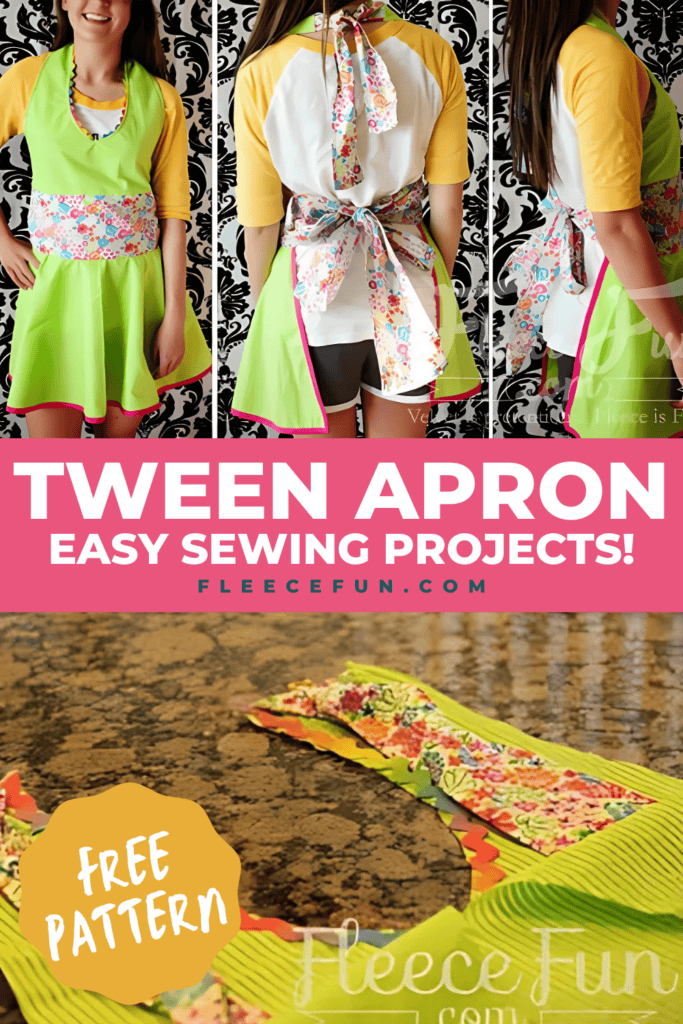
Free apron pattern for teens and tweens
This content contains affiliate links or sponsored elements, read our Disclosure Policy.


You can make this fun teen apron using this free pattern! The perfect size for those that are larger than a kids size, but still too tiny for adult size aprons. With it’s flirty halter style and circle skirt it’s the cutest apron for your aspiring chef.
YOU WILL NEED:
- 1 yard fabric “a” in cotton
- 1 yard in fabric “b” in cotton
- jumbo ric rac (optional)
- Thread
- Iron
- Sewing Essentials (pins, scissors, etc.)
- Get the free sewing pattern here.
Free apron pattern for teens and tweens tutorial
Step 1 – Cut the Apron Fabric Using the Free Sewing Pattern

Print up the pattern (you can get assembly instructions here)

Cut out pattern pieces. You will need to cut 2 of the top.
In addition to the top you will need to cut the following:

Cut 2 of the waist. Cut 2 of the tie/neck straps on fold for the waist ties. Then cut 2 of the tie/neck straps not on the fold for the neck straps.

Cut 1 of the skirt place it on the fold.
step 2 – Begin to build the free apron


Pin and sew the bias tape all around the apron skirt – except for the small curve at the top – that stays raw. (The green in the free apron pattern picture should be covered with bias tape.


For the waist tie straps – Turn under .25 inches twice and press with an iron the edges of the rectangle that will be exposed (see green in picture).
Quick Tip
One easy way is to sew a straight stitch .25 away from the edge of the cloth – it’s an easy line to follow while ironing and it reinforces the fabric from fraying.

I know that finishing like this a is a pain – but it will make the garment able to take a lot of abuse and can be thrown in the washer without a second thought.


While you have the iron out take one of the waist pieces and iron under the bottom .5 inches
step 3 – prepare the neck straps

Taking the two strips that will be the neck ties, fold one right sides together and sew, using .25 seam allowance.

Using a safety pint on one end, Turn right side out, press. Repeat with other strip.

Take one end of the strip and tuck the raw edges in on itself, about an inch and top stitch shut. Top stitch around the strap .25 inches away from the edge all the way around. Set aside.
Repeat with other neck strap. Next step of the free apron pattern is to make the bodice!
step 4 – Make the Bodice

If you desire ric rac on the front pin it in place now and sew down. Then place the strap at the top of the once of the bodice pieces and sew down using a .25 inch seam allowance for reinforcement.

Then pin straps out of the way of the seam allowance and place the other bodice piece on top so right sides are together and the straps are sandwiched in between..


Sew all around the bodice using a .25 seam allowance, taking care not to get the straps, leave the bottom open. (only sew where the green is in the picture)

Snip slits into the curves (taking care not to snip through seam allowance) and turn right side out (remove pins from straps if you pinned them out of the way). Top stich around the .25 from the edge (this is optional, but really looks nice) Set bodice aside
step 5 – Make the waist

Now we’re going to make the waist and waist strap section. The waist piece with the .5 inch that you iron under is the front waist piece. Place Lay this down first, then take of the waist straps, and line it up with the bottom of the waist piece, right sides together.

Do the same with the other piece of the free apron pattern. Sew together using a .25 seam allowance for reinforcement. The place the other waist piece on top, so waist pieces are right sides together, line up the tops (the bottoms won’t line up because of .5 inch being ironed under on the front piece) and sew together on the ends using a .25 seam allowance. You should have a loop of the two waist pieces connected at each end, with the straps sandwiched in between.
step 6 – Attach the bodice to the waist.

Take the Bodice and the waist piece, with right sides together, match up the bottom of the bodice with the top of the waist piece. Sandwich the bodice in between the waist pieces (the loop) keep the waist ties out of the way.

Pin and then sew together using a .5 seam allowance. Flip the waist section down so it’s right side out.
Step 7 – Attach the Skirt and Finish Your Handmade Apron

Taking the skirt section of the apron, pin right sides together the skirt to the back section (the part that is not ironed under) of the waist piece (it will make sense in a minute) depending on the quality of fabric you might need to gather the skirt a little to make it fit.

Sew the skirt to just the back piece of the waist using a .5 inch seam allowance.

Then Pin the waist front to the skirt (pin well for best results) Then top stitch the front waist piece to the skirt, going along the edge of the waist (about 1/8 to 1/4 inch from the edge) to secure the skit to the front the waist.

Trim you thread, you’re finished!
Download the free apron pattern below:
You can get a free copy of Adobe reader here. By downloading you are agreeing to pattern terms of use. Click the picture below and fill out the form to download the free pattern .pdf !
Other Free Apron Patterns to Enjoy:
More Girl Patterns:
- The Fall Cape for Girls
- Flannel Nightgown Pattern
- Fingerless Gloves Pattern
- The Bow Tie Headband
- Satin Flower Hair Clips
- Drawstring Back Pack
- Upcycled Sweater Skirt
- See more Fall Sewing Projects here!

I just wanted to know can I make this apron without the bias tape? I am new to sewing so I am learning as I go.
the bias tape finishes the edges of the skirt. You can turn the edges under and finish it that way if you prefer. Good luck!
Thank you for the cute pattern!
I love the apron. I plan to use old, but still usable t-shirts to make them for every day of the week. Add 2 pockets. And away we go. Great idea.