
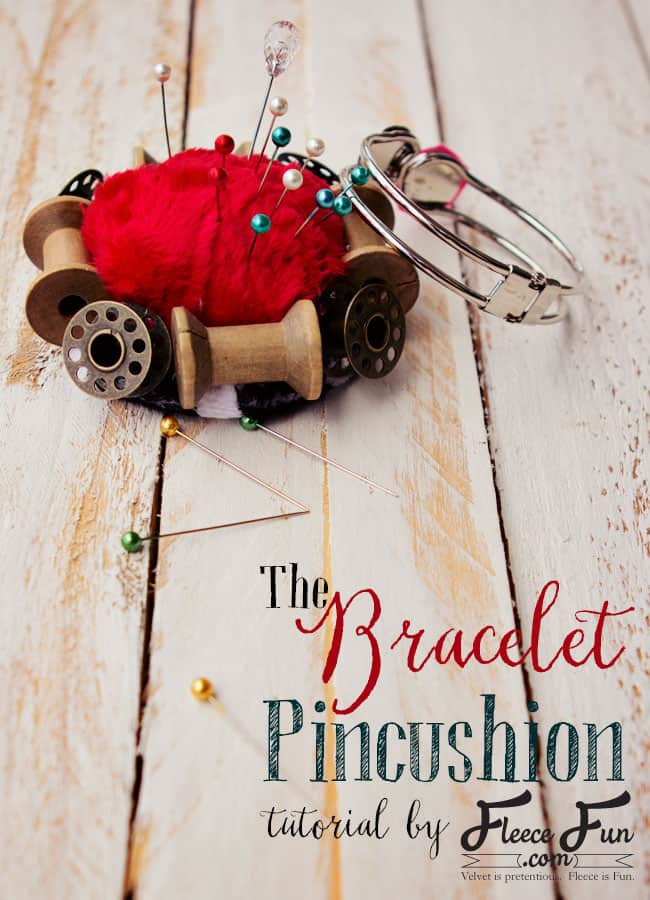
How to make a Pin Cushion Tutorial (Bracelet style)
This content contains affiliate links or sponsored elements, read our Disclosure Policy.
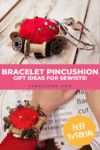


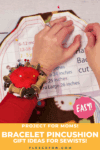
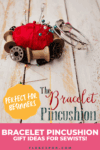
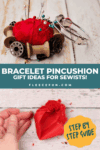
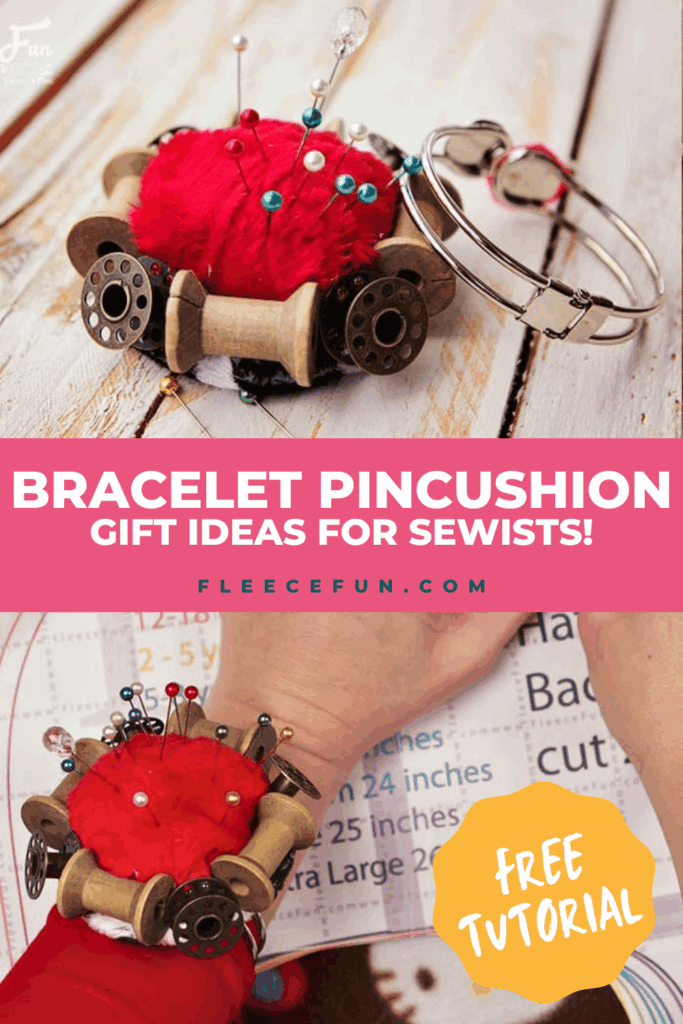
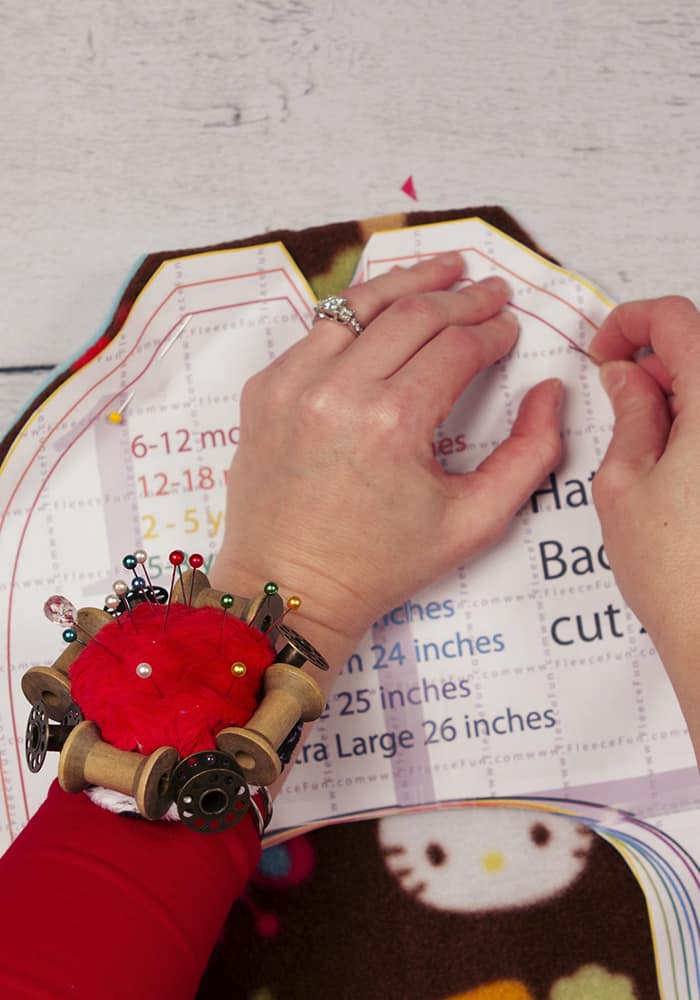
Today I’m sharing with you the Bracelet Style Pin Cushion! A fun handmade gift you can make for your sewist friend. It’s extremely practical – I can’t tell you how many times I have to move my pin cushion so it’s in reach. This pincushion stays with you – so a pin is there right when you need it!
YOU WILL NEED:
- 2 Five inch squares of fleece, cuddle or flannel
- Hinge bracelet (found in jewelry section of hobby store)
- Steel wool (fine)
- Mason jar lid (can substitute sturdy cardboard)
- Sewing charms, knick knacks, upcycled jewelry
- Xacto knife
- Scrap of Velcro ( about ¾ an inch long)
- Glue gun and glue sticks
- Sewing Essentials (pins, scissors, etc.)
Bracelet Style Pin Cushion tutorial:
Step 1 – Form the cushion section
This doesn’t need to be perfect – cut off the corners of the 5 inch square so it’s a roughly round shape.
Then take you needle and thread and quickly sew a running stitch around the edge.
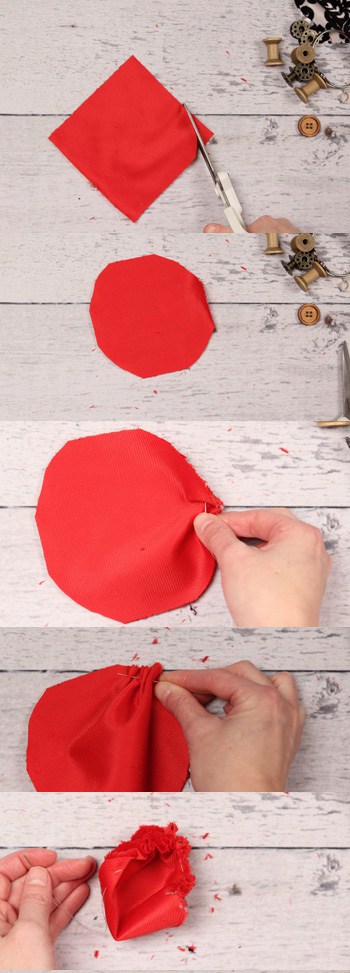
It doesn’t need to be exact, keep it about a quarter of an inch from the edge.
Start to gather the the fabric together, but leave a gap.
Now stuff the center with steel wool. Fill it to the desired firmness.
Then sew the gap shut.
Step 2 – Form the base of the pin cushion
Using the mason jar lid or cardboard circle lay it on the other fabric square and trace an
inch border around it and cut out the circle.
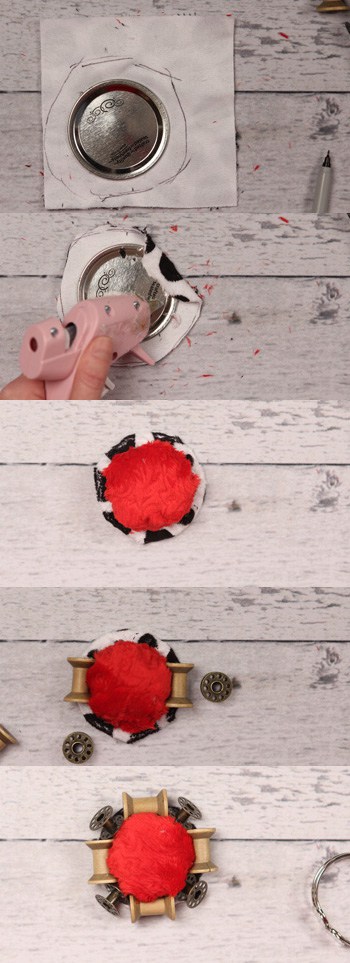
Then glue the edge of the circle over the lip of the jar.
Then glue the pin cushion to the top, covering the rest of the lid.
Glue knick knacks and embellishments around the edge to finish.
Step 3 – Add velcro to complete the Bracelet Style Pin Cushion
Flip the Pincushion over and cut a slit in the fabric large enough for the bracelet top to fit through.
Take the loop section of the Velcro and glue onto the lid behind the fabric.
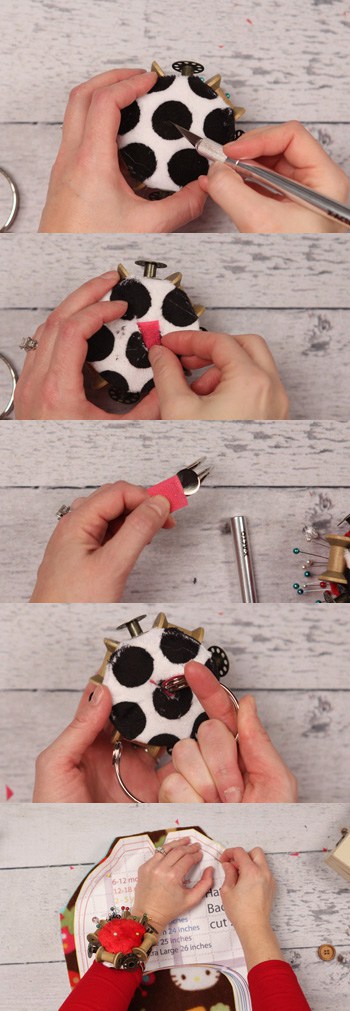
Then glue the hook section to the top of the bracelet.
Now the pincushion can come off the bracelet or stay on it.

This is perfect for sewing. You’ve completed the Bracelet Style Pin Cushion tutorial!
More tutorials for Organizers!
- Origami Fabric Basket Tutorial
- IKEA Fabric Stool
- How to Make a Binder Pouch Tutorial
- Ribbon Book Mark
- Sewing Machine Mat Tutorial
- Craft Room Hanging Organizer Tutorial
- How to Make a Giant Pegboard for Your Craft Room
- Cricut Maker Cover Tutorial
- Cute Trash Can DIY Craft Room Decor
- Make Giant Buttons Wall Decor
- Tips on How to Paint Stripes on Walls
- Painting a Chalkboard Wall – 5 Things to Know
- See all of our Organizer Tutorials
Love this Bracelet Style Pin Cushion? see more craft and Decor Ideas!
- Craft Closet Organization: The Ultimate Guide
- Sewing Room Ideas: My Studio Makeover (Part 1 of the Makeover Series)
- How to Choose Colors for Your Sewing Studio (Part 2 of the Makeover Series)
- Sewing Room Ideas: How to Pick Furniture (Part 3 of the Makeover Series)
- Cute Craft Room Decor Ideas (Part 4 of the Makeover Series)
- Craft Room Ideas: Makeover Final Reveal (Part 5 of the Makeover Series)
- Honest Craft Room Tour!
- See all Studio Space and Decor Tutorials!
