
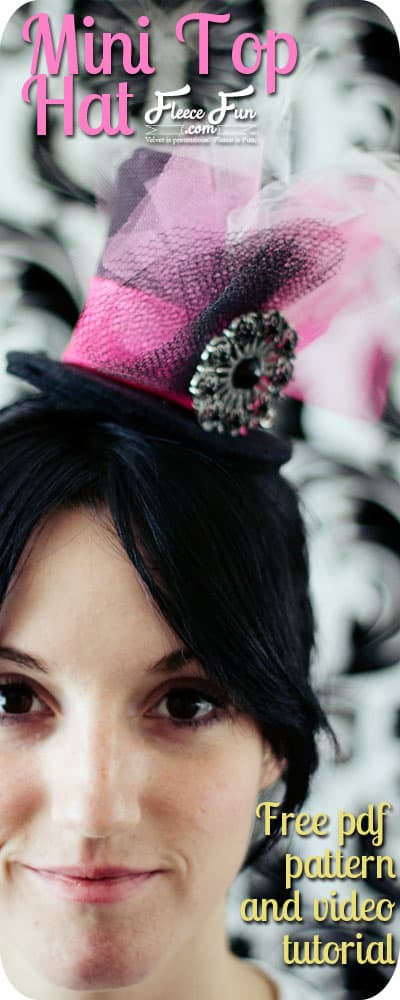
How to Make a Mini Top Hat (free pattern/ template)
This content contains affiliate links or sponsored elements, read our Disclosure Policy.


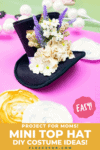


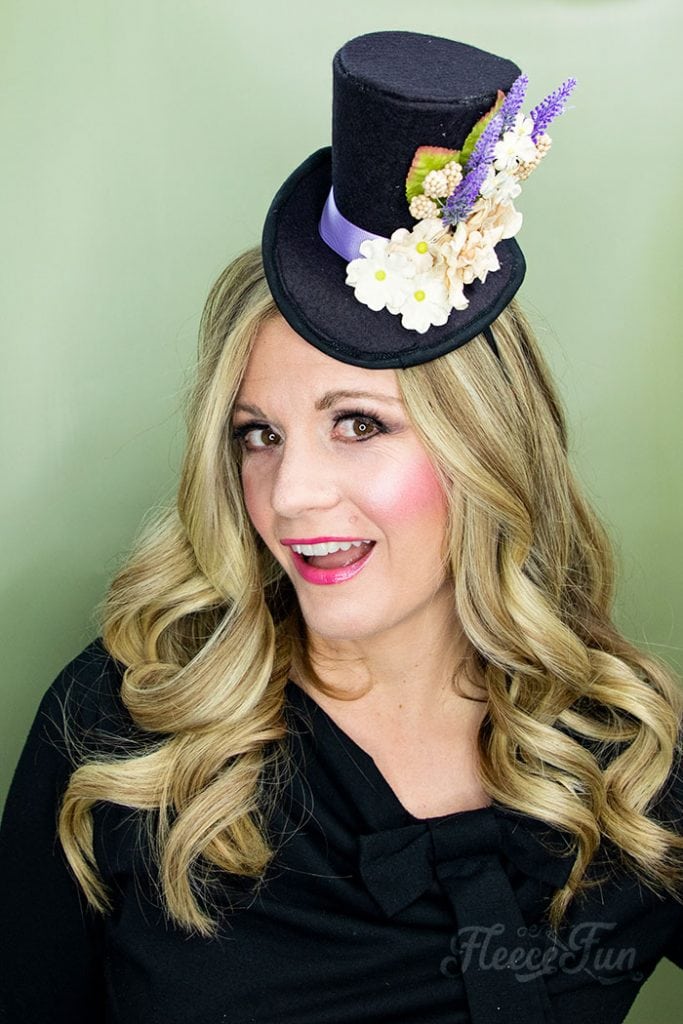
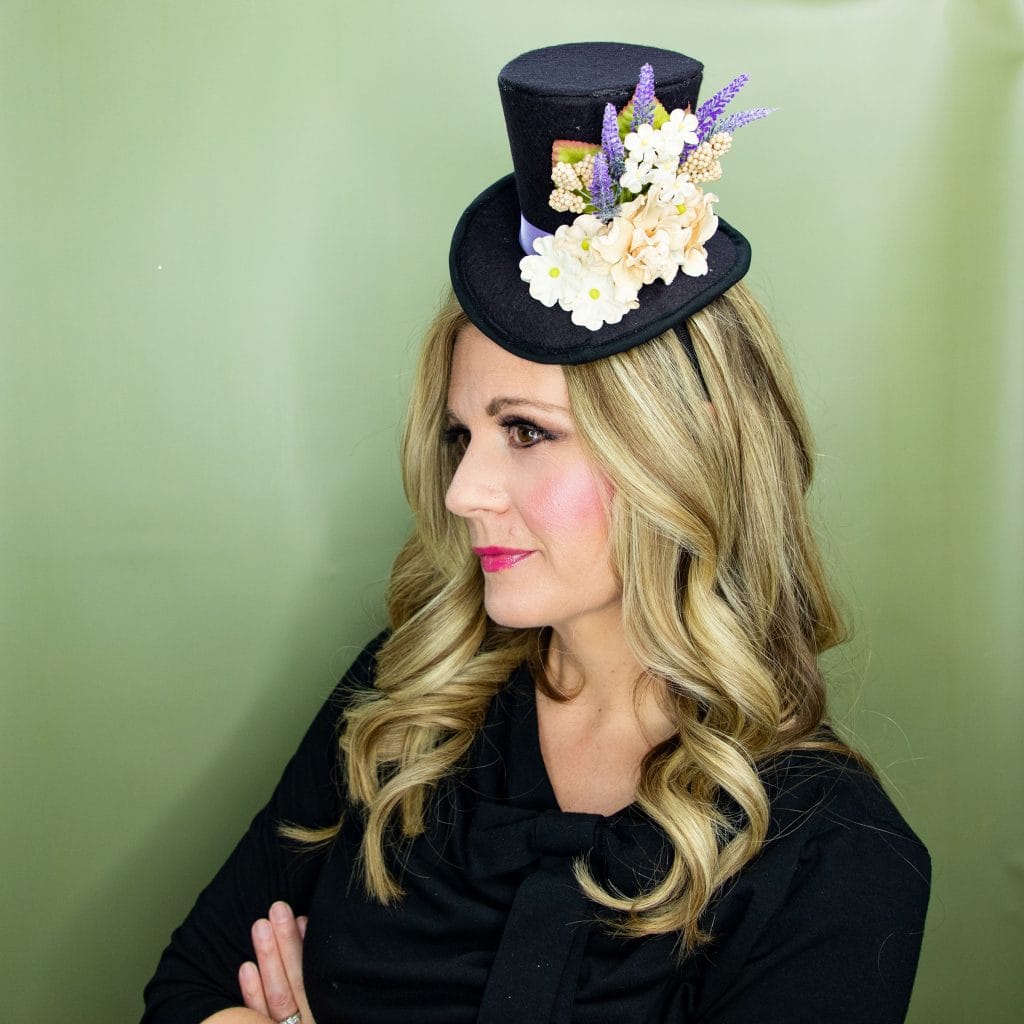
Learn How to Make a Mini Top Hat with this free pattern and template. This fabulous mini hat comes in 3 mini sizes for you to make it in just the size. Perfect for Halloween costumes or a dress up fascinator, this hat for comes to life when you decorate it to suit your style. With a few materials you can make this mini top hat that will be a costume box staple.

This pattern has been updated, I’ve kept the “classic” version below that is a little more simple than this one – but I love the new shape and bendable brim that the new pattern offers.
NOTE
The Large Hat is approx. 5.75 inches high and 8.5 inches at the brim
The Medium hat is approx. 4.5 inches high and 6.5 at the brim
The Small hat is approx.3.5 inches high and 4.5 wide at the the brim.
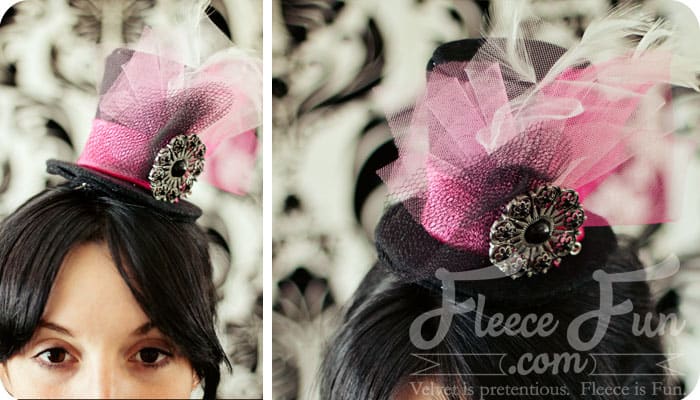
This DIY includes two versions of the hat the “classic” version that has a rounder shape and the newer version that is more elongated and has a moldable brim. For reference I am wearing a medium sizes hat.
Hate The Ads?
This pattern with video, SVG Files and printable instructions is available in the Makers Studio. The Maker’s Studio is an ad free experience, no video ads, no forms, no zip files, just creating.
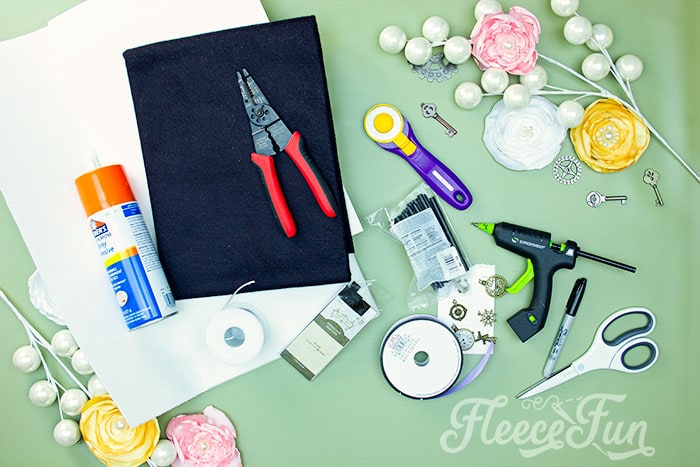
YOU WILL NEED:
Please note that the felt fabric you use with interfacing needs to have wool in it. Don’t use the interfacing with fleece as it can melt under the iron.
- 1/4 yard polar fleece or felt
- Items to decorate you hat (feathers, ribbon, tulle, brooches)
- Headband or Barrette Clips or combs
- Hot glue gun & sticks (I like to use Surebonder’s fabric stiks))
- 10 gauge jewelry wire (this is the one I used)
- 1 non insulated butt connector for 10 gauge (like these)
- 1/3 yard of 1 sided fusible ultra stabilizer (crafts and home décor stabilizer – look in the stabilizer section it’s very stiff and on a bolt only about 20 inches wide)
- 1/3 yard of 2 sided fusible ultra stabilizer
- or poster board or cereal box with spray on adhesive and no stabilizer
- Iron
- Press cloth
- Sharpie pen
- Single fold bias tape or double fold if you’re not sewing.
- Sewing Essentials (scissors, pins, etc.)
- Get the pattern here.
MINI TOP HAT DIY VIDEO TUTORIAL:

How to Make a Mini Top Hat (free pattern or template) Instructions:
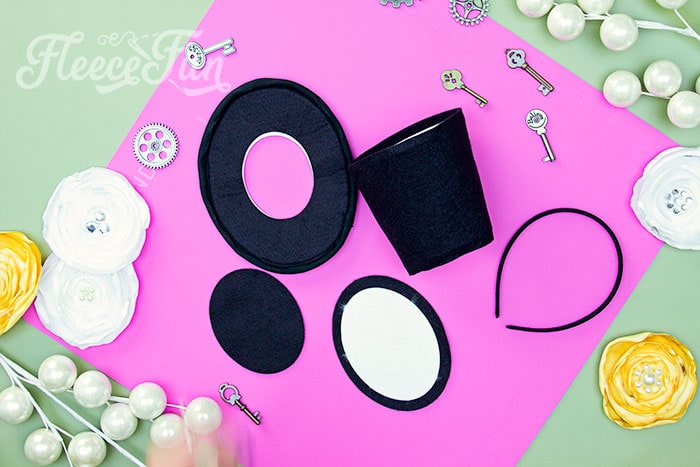
Step 1: Cut Out the Free Mini Top Hat Pattern Pieces
Decide on the size of hat that you’re making and assemble and cut out that pattern. To start we’ll cut out the cloth pieces.
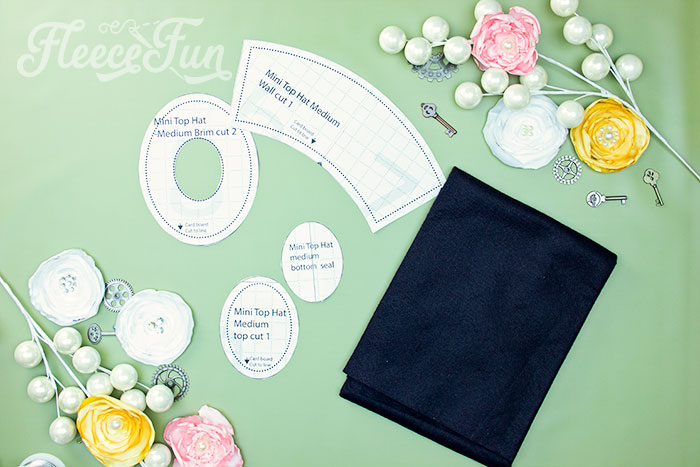
Notice that there are two lines on the pattern. We’ll be cutting to the solid line.
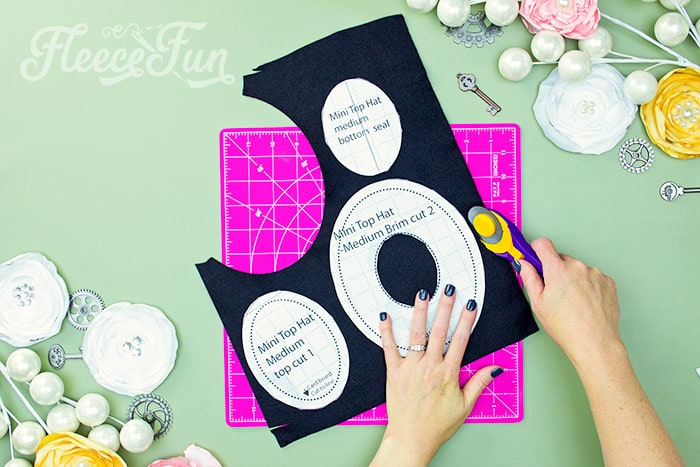
Cut 1 of the bottom seal, and top, and then 2 of the mini top hat brim.
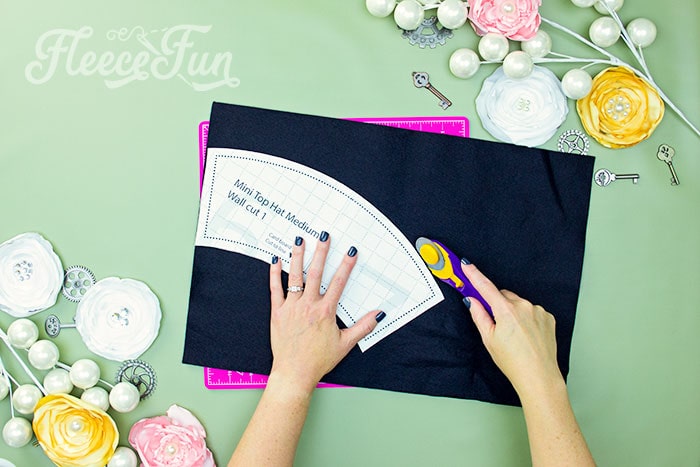
Cut 1 of the Mini top hat wall.
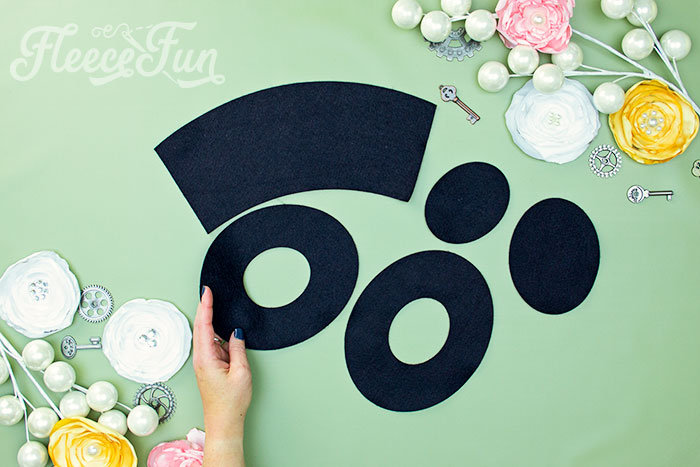
These are all of the fabric pieces you need.
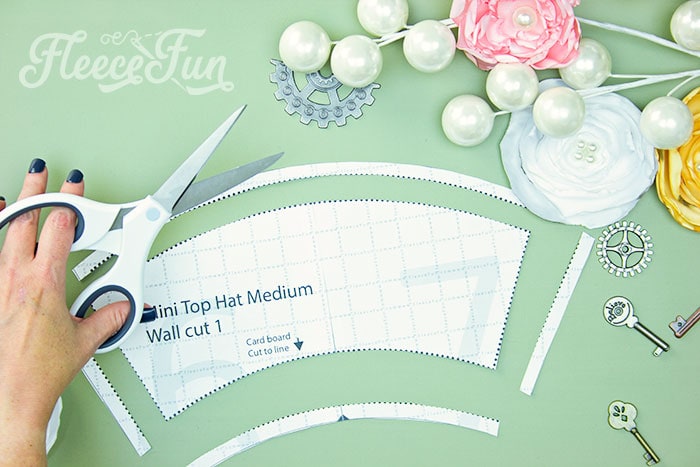
Cut down the pattern to the dotted line.

From the 1 sided stabilizer trace and cut out the wall and hat top. From the 2 sided stabilizer cut out 1 of the brim.

Or you can trace the pieces onto poster board or a cereal box and use this for stabilizer – just be aware that you can’t sew any of the pieces if you use cardboard.
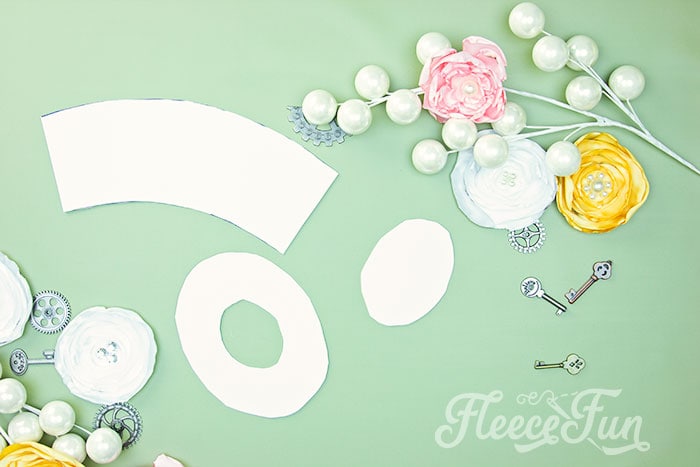
You’ll need 1 wall, 1 brim and 1 top.
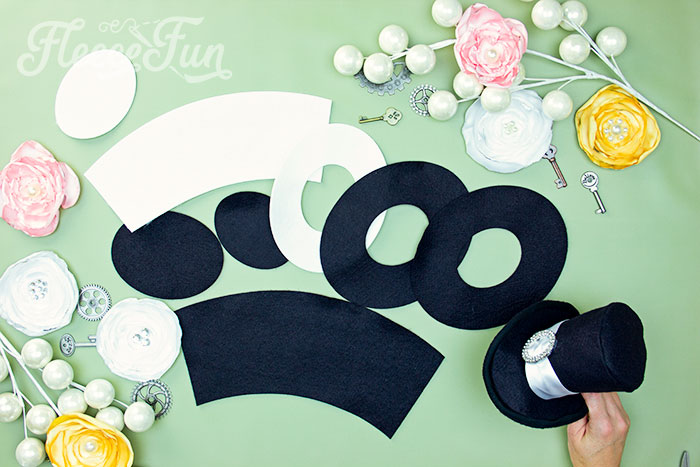
These are all the pieces you need to make a single hat.
Step 2: Prepare the Mini Top Hat Pieces for Assembly
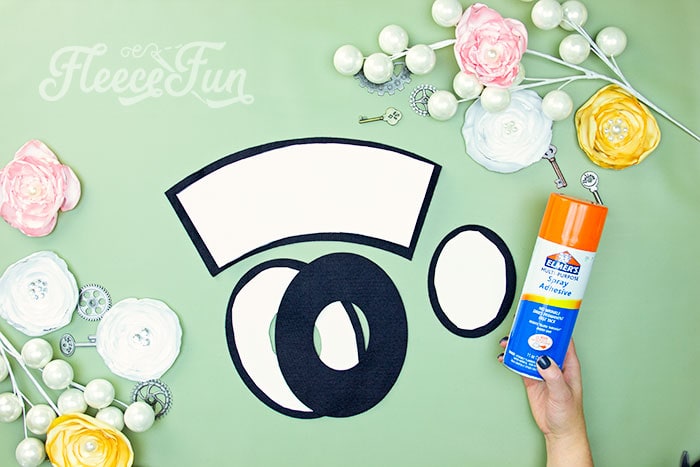
If using the poster board, spray the pieces with adhesive spray (outside in a well ventilated area) and adhere to the pieces. Center them on the fabric as best you can so there is an even line of fabric around them. Sandwich the poster board between the two brim pieces.
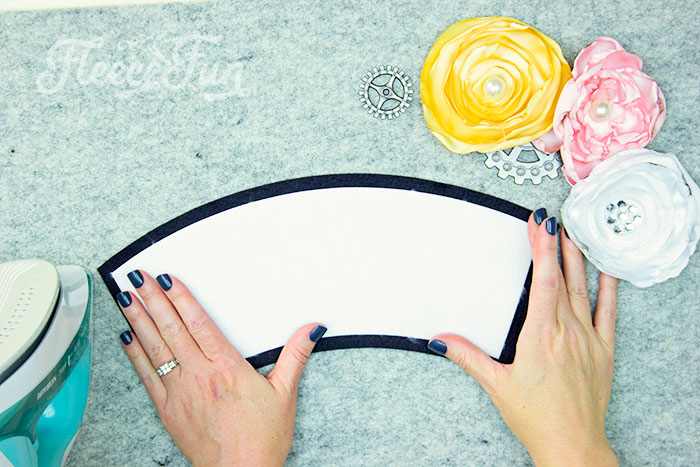
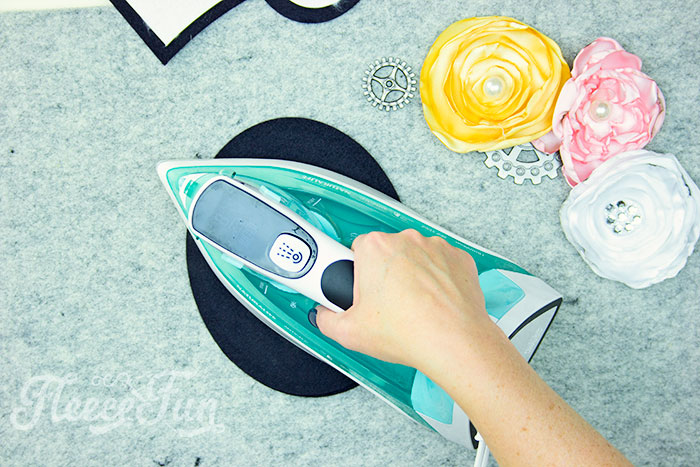
For the stabilizer center it on each of the pieces and iron on, following the instructions on the stabilizer. Make sure the adhesive side ( the bumpy side with the glue is touching the fabric). Do this with the wall.
The mini hat top.
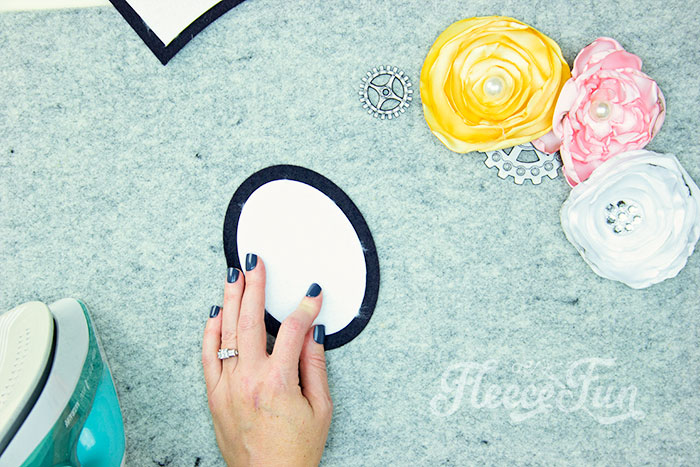
With the brim we’ll use the 2 sided stabilizer (meaning it has glue on both sides). Sandwich it in between the two brim pieces.
Iron it into place.

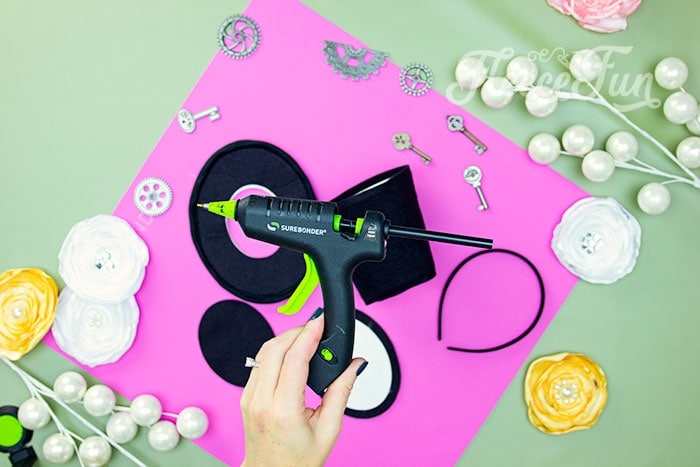
Step 3: Assemble Your DIY Mini Top Hat
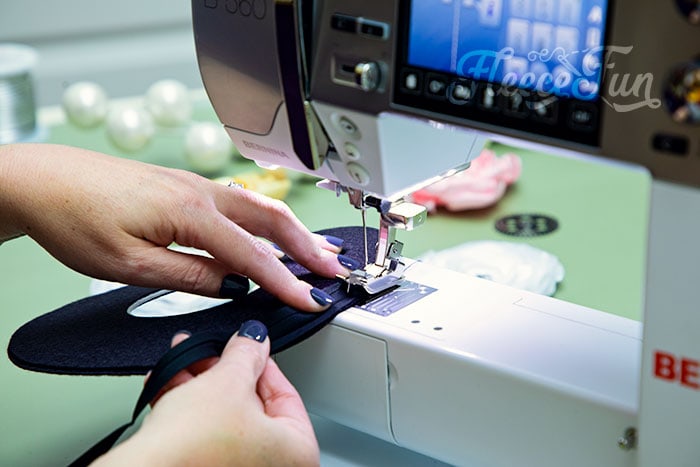
For the sew version: Take the wall and bend in half, right sides touching. Zig sag stich together along the edge of the stabilizer.
If you’re not sewing: Fold the hat the opposite way – so the wrong sides are touching, fold the ends (the flaps of fabric on the ends not touching poster board) in and glue them together to form the back seam of the hat.

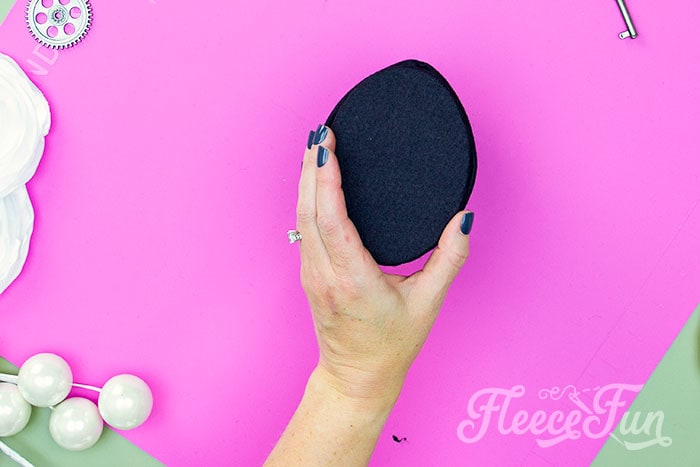
Once sewn flip the hat right side out.
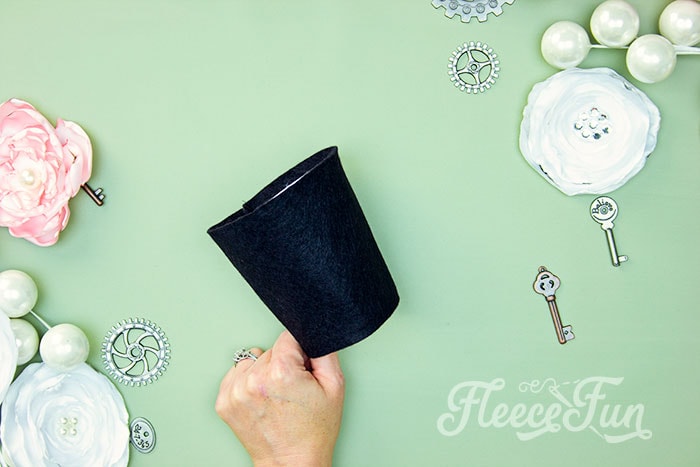
Whether you’ve sewn or glued it this is how the wall should look.
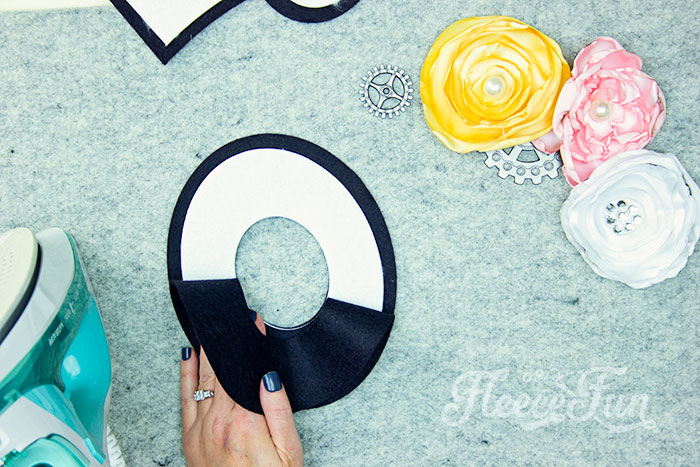
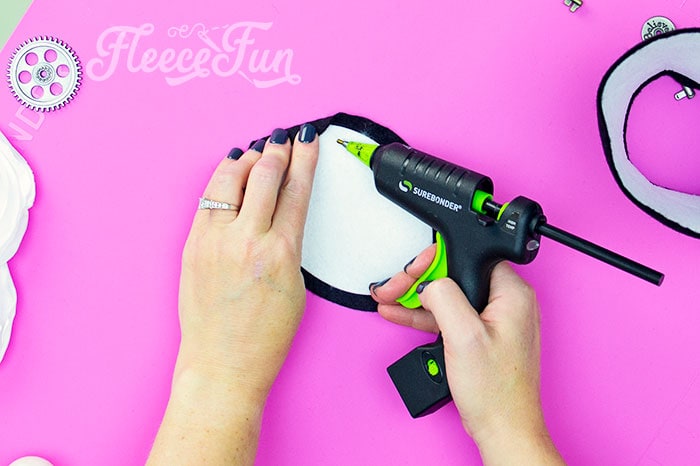
Step 4: Create the Brim for Your Mini Top Hat
If you’re using poster board, simple glue the double fold bias tape to the edge of the brim to finish it. It you use the stabilizer it get’s more interesting.
To give the hat more personality we’re going to make the brim moldable. To do this we need to add the wire.
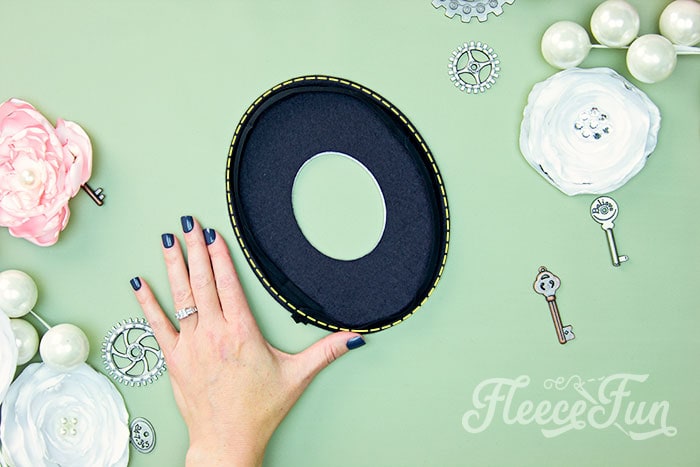
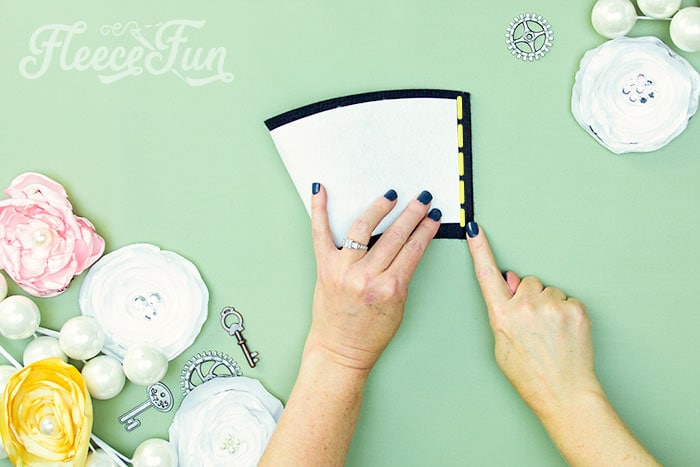
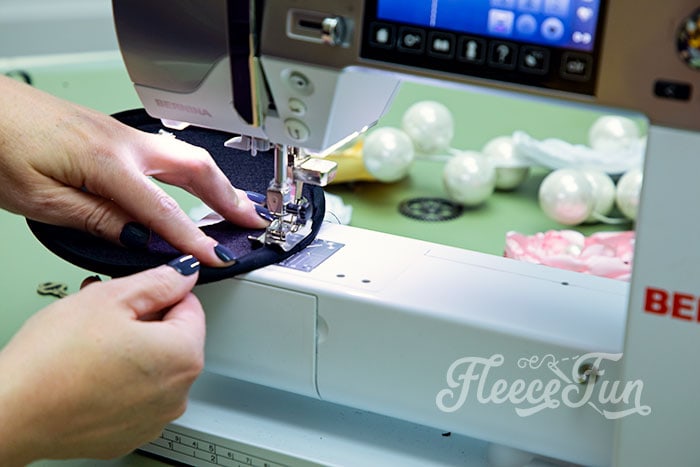
On the what you want to be the bottom of the brim sew on the single fold bias tape, all the way around.
Use you’re edging foot and line up the edge of the unfolded bias tape with the edge of the brim and sew using a straight stitch.

Once you’re done that you need to pull the non sewn edge of the bias tape over so it now sits on the top of the mini top hat brim.

Sew down along the edge leaving a 1 – 2 inch gap for inserting the wire towards the back of the hat.
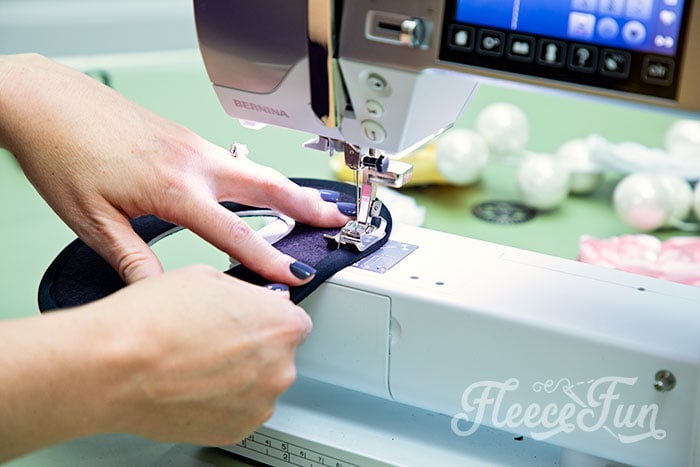
This will make the channel for the wire to thread through.

It also give a nice rim to the hat brim.
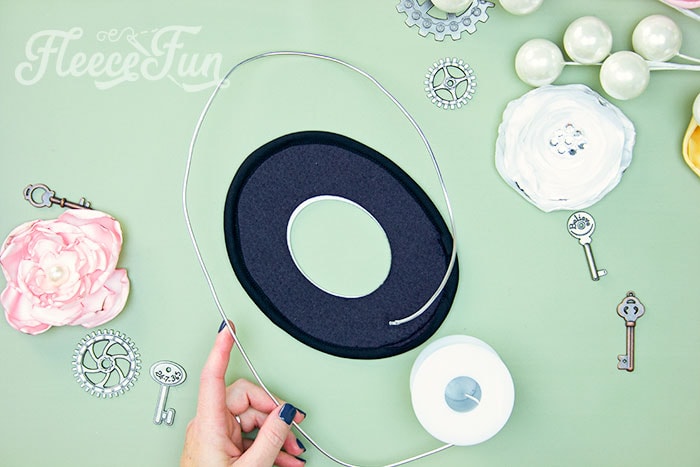
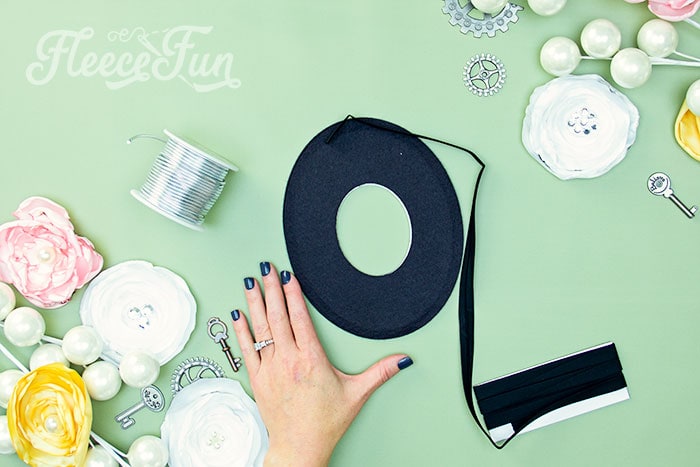
Take the wire and roughly measure around the brim for the length you need and cut.
Quick Tip
It’s better in this case to have it be too long than too short.
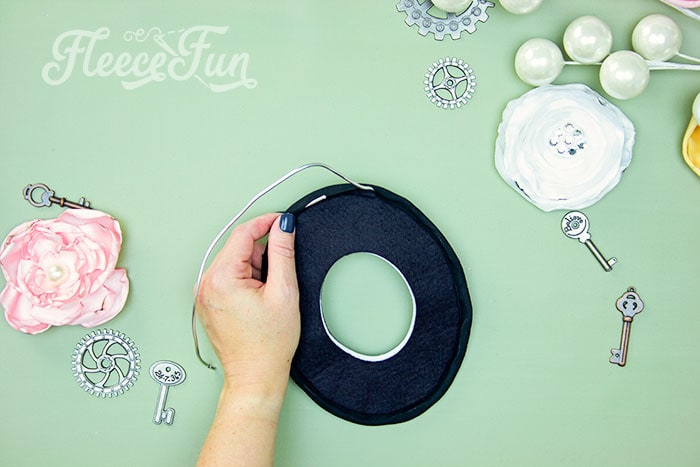
Thread the wire around the brim. Take your time, be gentle. Make sure the head doesn’t get snagged on the fabric and keeps moving. Thread until it reaches the other side.
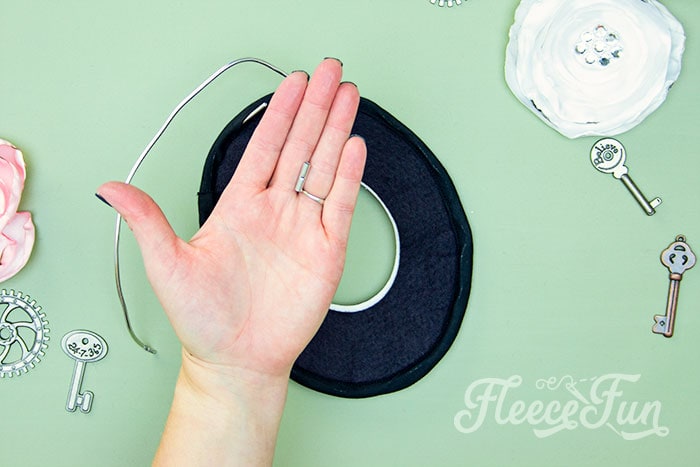
Grab the butt connector.
Add it to each end, trimming down the wire so it will fit.

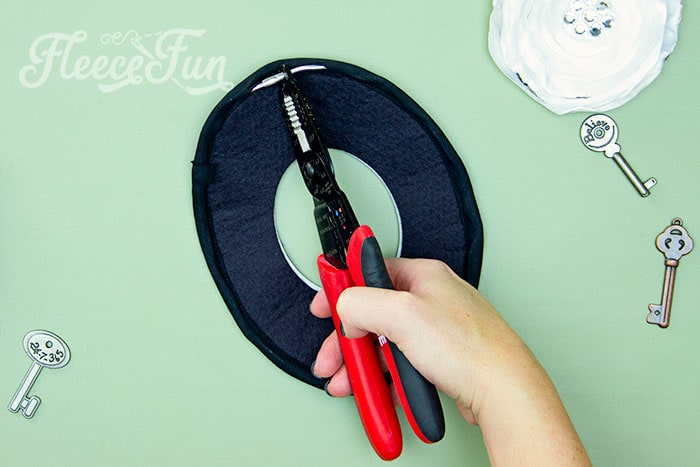
Top stitch the gap shut.
Step 5 – Bring the Mini Top hat together
Now it’s time to bring this fabulous fascinator together.
From here on out it’s all about the glue gun.

Let’ start with the top of the hat. Take the hat wall and the hat top.
Glue the excess fabric around the edge to the stabilizer for the top of the hat.
Do this with the just the top of the wall as well.
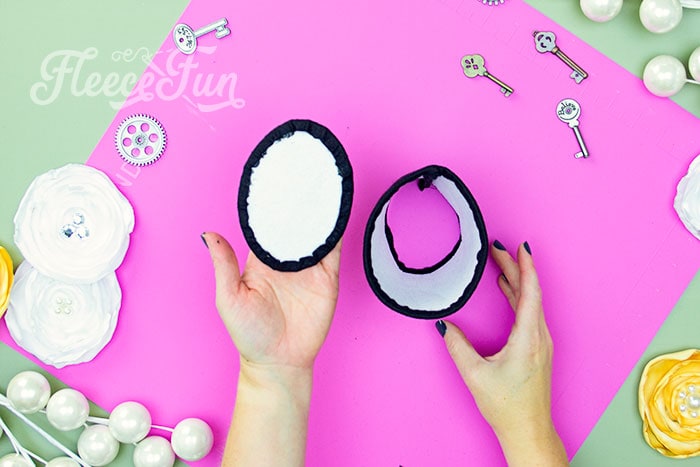
With those pieces prepped glue the top of the hat to the wall.
Have the seam line up with the top of the oval ( so the seam will be in the back). Glue the edges together, take you’re time.
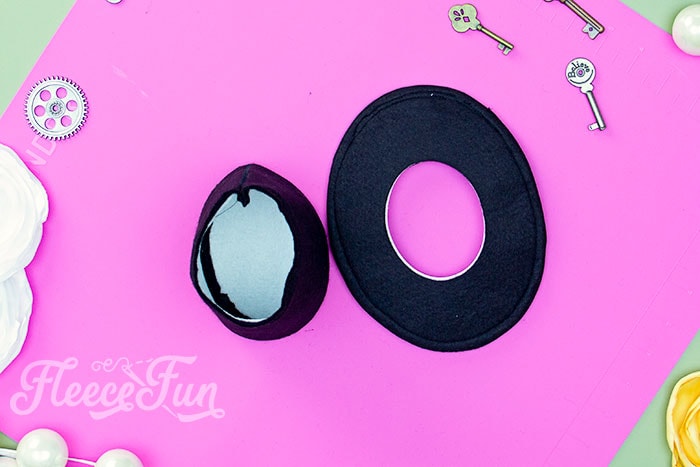
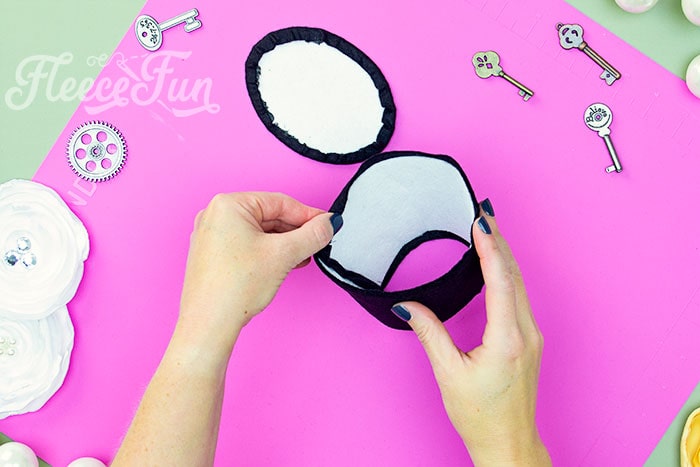
Now it’s time to add the brim. Place the top and wall so they are sitting upside down.

Place the brim on the wall. The bottom of the brim should be facing up at you. The excess fabric (the stuff with out stabilizer) pulls through to the other underside of the brim.
Glue this fabric to the underside of the brim. It will make a little oval around where the wall and brim meet.
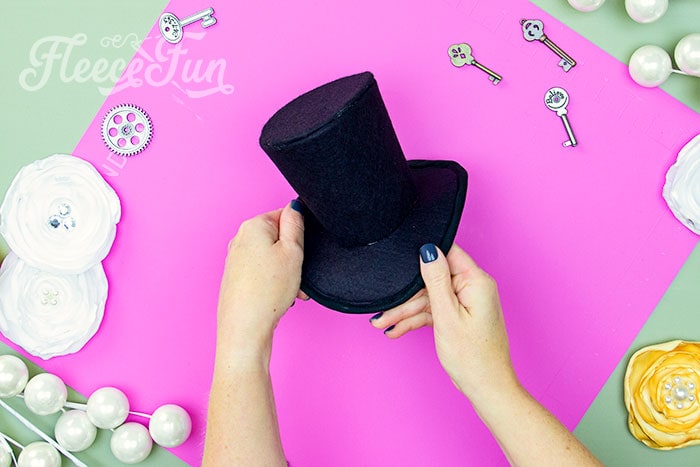
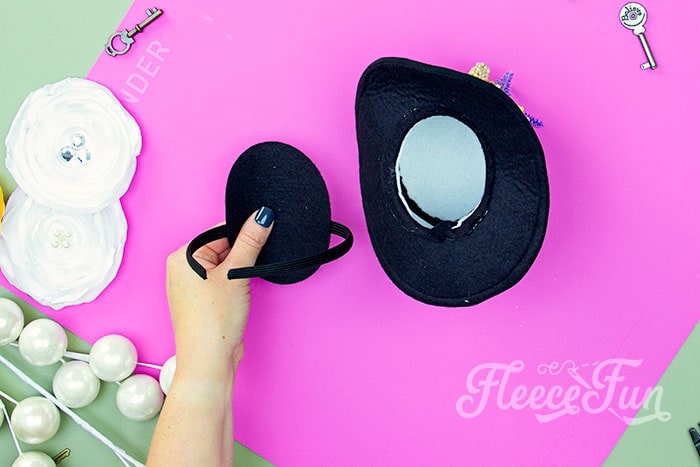
Once the hot glue is set, shape the brim as you desire. I recommend doing this before decorating the hat.
Step 6 – Decorate your Mini Hat and Make it wearable.
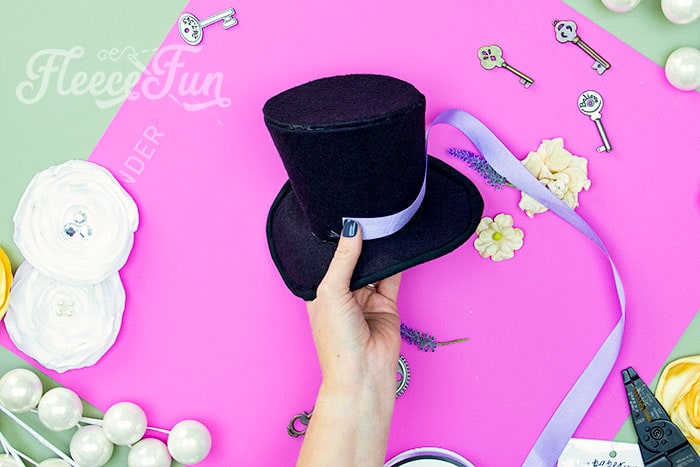
I find it’s easier to decorate the hat before adding the headband or combs. So now it’s the fun part decorate your hat with all the trimmings.
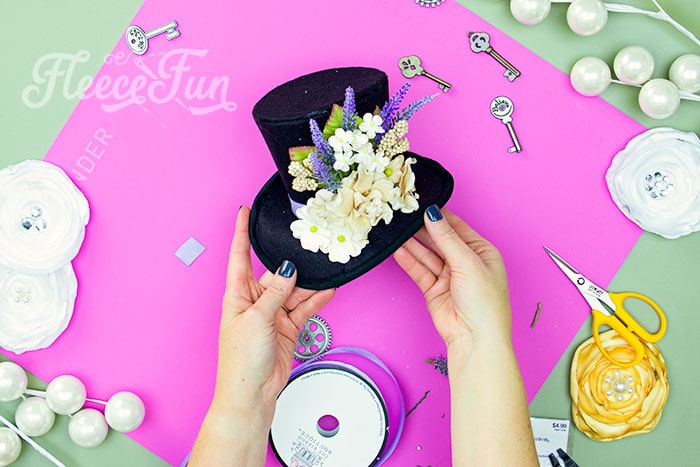
Quick Tip
Keep a lint roller hand to clean off your hat.
Now it’s time to make your hat wearable!
Take the bottom seal piece and glue it to a head band slightly off center.

Then glue to the bottom of the hat. Or..
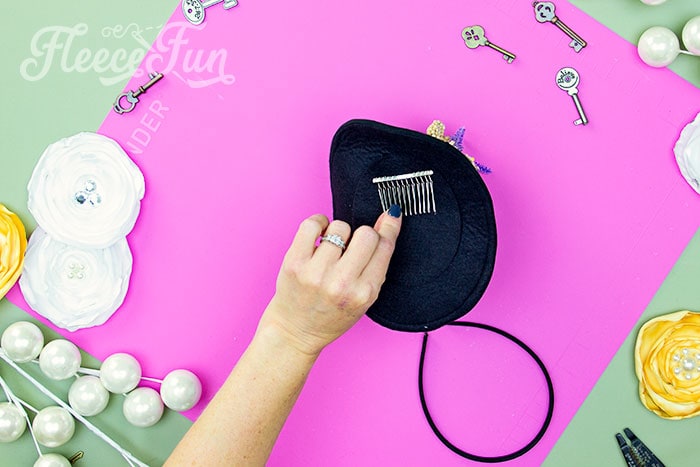
You can glue a comb to the bottom. Or…
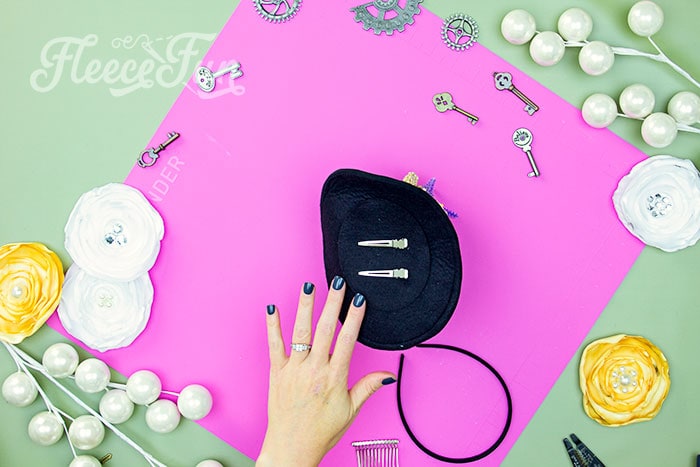
A couple of clips is another option.
That’s it! The Mini Top Hat is finished.
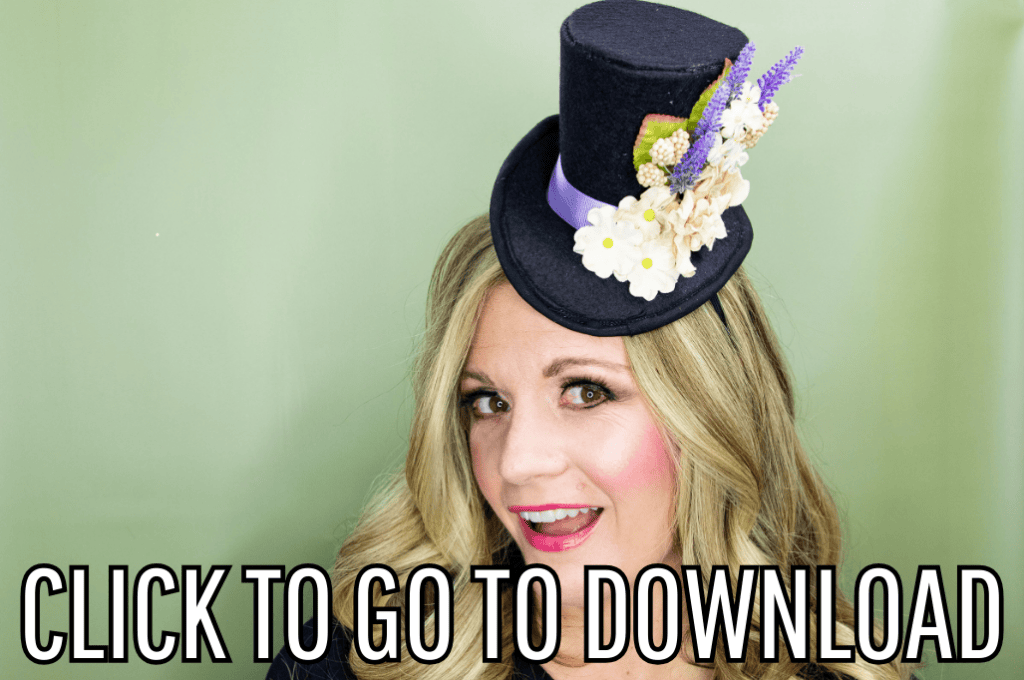
DOWNLOAD THE FREE MINI TOP HAT PATTERN:
I only approve of Adobe reader. By downloading you are agreeing to pattern terms of use. Click the picture below or fill out this form to have it delivered to your inbox.
More Great Costume Patterns:
- No Sew Mini Witch Hat ( SVG and PDF files)
- Hedge Witch Hat
- How to make a witch hat (child and adult free pattern)
- Mini Pirate Hat Tutorial
- See all of Fleece Fun’s Costume Tutorials
More Costume Tutorials you might like!
- Halloween Dress Up Vest
- How to Make a Birthday Crown Free PDF and SVG File
- Aladdin Magic Carpet Costume DIY Free Pattern
- Bonus Craft Tutorial Fall Fairy Costume
- DIY Tiara Free Pattern and SVG File
- Easy Superhero Cape Tutorial

Mini Top Hat Pattern Classic Version Instructions:
This mini top hat free pattern and tutorial uses a template to make this accessory possible. Cute and chic, these mini top hats are all the rage. Whether you’re into Steampunk, Burlesque or classic Victorian this Mini Top Hat is the crowning piece to your costume. Make the perfect mini top hat in the perfect size that you want. Sew and No sew options available.
The Large Hat is approx. 5.75 inches high and 8.5 inches at the brim
The Medium hat is approx. 4.5 inches high and 6.5 at the brim
The Small hat is approx.3.5 inches high and 4.5 wide at the the brim
The Mini Hat is approx. 3 inches high and 4 inches wide at the brim
YOU WILL NEED:
Please note that the felt fabric you use with interfacing needs to have wool in it. Don’t use the interfacing with fleece as it can melt under the iron.
- 1/4 yard polar fleece or felt
- Items to decorate you hat (feathers, ribbon, tulle, brooches)
- Barrette Clips or combs
- Hot glue gun
- thread (for sew option)
- spray on adhesive (for no sew option)
- The .pdf pattern printed on card-stock.
- Sewing Essentials (if sewing)
- Get the pattern here.
Mini Top Hat Pattern Classic Version VIDEO:

No sew version of the mini top hat

No sew will work for all the hats sizes. However, it works best for the small and mini sizes of hat.
1- Cut out the Pattern
You can find instructions on how to assemble the pattern here.
You will need to print the pattern onto card stock as the pattern will become part of the hat . Cut out the and assemble the pattern – be sure to tape the front and the back of the pattern seams (where the paper overlaps) .

Trace the pattern onto the cloth using a marking pen (or even a regular pen – as long as it doesn’t bleed through the fabric. Be sure to trace the brim twice; one with a hole in the center and one without.
Then cut down all the pattern pieces to the dotted line.
2 – Prep all the pieces
You now have four pieces of fabric cut out. set the brim piece that does not have a hole in the center aside.

Spray the back side of the card stock with glue and center on each piece (there should be about a.5 allowance all the way around – except for the hole in the center of the brim. That should just line up with the fabric.
Using a glue gun, fold over the excess fabric and glue down along all the edges of the pieces with the exception of the brim pieces.
note
I did this differently in the example – but trust me it will look better if you do it later – I’ll tell you when.
3 – Assemble the wall

Taking the wall piece, gently fold it around so the two ends barely over lap. Glue ends together, be sure to hold it for a while to secure or use a clothes pin or clip to hold it in place.
4 – Add the top of the hat

Once the wall is secure it’s time to add the top of the hat. Using your glue gun, glue around the the top part of the wall, just barley on the inside place top on glue hold in place to secure for a few seconds.
5 – Add the first piece of the brim.

Place glue on the bottom of the wall of the hat (lining up the bottom circles) and press firmly onto the brim. You may need to hold this for several seconds to ensure it is well glued.
Quick Tip
Place the seam where you will adding all your feathers and tulle – that way it can be covered.
In my example I placed the seam slightly to the right of the of the front. The brim is an oval shape – the sides should be the thinnest part of the oval and the brim should be wider at the front and back of the hat.
For extra support tape a few pieces of tape between the brim and the wall of the hat.
6 – Finish Assembling the Hat

Using your glue gun, place glue on the brim card board and place remaning piece of the brim on it, sealing off the hat. Then Using glue all along the edge of the brim fold over .5 excess of cloth to finish off.
note
Excess is already folded over in the example in the picture, but it will make a nicer edge if you do it this way.
Add a couple of clips or a comb to make it so it can stay in place. You can glue them directly or use a scrap of fleece to glue them on. You could also use a length of elastic thread and make it stay on the head like a party hat.
Now comes the fun part….
7 – Add some personality
This for me is the best part! Add ribbon, tulle, beading, feathers, buttons, brooches, glitter, you name it and make this hat your own. I used tulle, feathers, ribbon and a button in the example. Old jewelry would work well too. Sky is the limit and your creativity reigns – what will your hat look like?

Some other ideas for this hat –
Trace the pattern onto scrapbook paper and make hats from paper for an even cheaper alternative.
Put together hat making “kits” for party guests to make their own mini top hat (great for New years Eve parties, birthday parties, girl’s night.)
Sew Version of the hat (best for medium and large)
1- Cut out the pattern.
If the thought of using a glue gun for everything makes you cringe here is a sew option for you. You will need to print the pattern onto card stock as the pattern will become part of the hat . Cut out the and assemble the pattern – be sure to tape the front and the back of the pattern seams (where the paper overlaps) .

Trace the pattern onto the cloth using a marking pen (or even a regular pen – as long as it doesn’t bleed through the fabric. Be sure to trace the brim twice with a hole in the center.
Then cut down all the card stock pattern pieces to the dotted line.
note
To make the hat extra sturdy you may want to consider gluing the cardstock to the poster board and cutting out the poster board wit the card stock. The card stock with the poster board will make for a much sturdier hat.
2 – Begin to sew

With right sides together pin fold the wall in half and pin ends.
Sew ends together using a .5 seam allowance. trim down seam
3 – Add the Top

With right side facing down (right sides together) pin the top on to the top of the wall ( the wider end). sew together using a .5 seam allowance then trim down the seam.
Set aside.
4 – Sew the brim

With rights sides together sew the outer edge of the brim together using a .5 seam allowance. Trim down the seam after finished to eliminate bumps.
5 – Sew the Brim to the rest of the hat

With right sides together pin ONE side of the brim to the wall of the hat (see picture). Sew together using a .5 seam allowance. Trim down the seam after finished to eliminate bumps.
Quick Tip
Place the seam of the wall where you are planning on adding your decorations. This will allow the seam to be covered. The reason you sew on one side of the brim is to allow you to insert card board into the brim later.
6- Insert the hat form.
Piece by piece insert the hat form starting with the top of the hat. you will need to bend each piece a little when inserting, this is why card stock and poster board works but a harder cardboard would not.

Roll up the wall and insert it into the hat. Line up the seam of the wall with the seam of the hat. Tape the cardstock seam in place and tape the wall to the top.
Flip brim right side out and carefully work in the brim piece (you may need to cut a couple of small slits in the under brim to get this to work.
On brim form is in place tape it to the wall.
Now decorate your hat!
This for me is the best part! Add ribbon, tulle, beading, feathers, buttons, brooches, glitter, you name it and make this hat your own. I used tulle, feathers, ribbon and a button in the example. Old jewelry would work well too. Sky is the limit and your creativity reigns – what will your hat look like? Send me a picture (angel@fleecefun.com) or feel free to post it to the Fleece Fun facebook page!
Hello,
I would really like to create a mini top hat, but I’m having a lot of trouble downloading your pattern?? I already have the pdf creator downloaded to my computer. Would you be able to email it to me?
Thanks!
Lisettte
Hi Lisette!
The files are up and functioning properly.
First try the following and see if it helps:
Clear your internet cache, if that doesn’t work
try a different internet browser.
Double check the settings on your computer’s pdf program for internet file downloads.
Troubleshoot this first so you won’t need to ask for every pattern. =)
I’m having lots of trouble with the download — McAfee tells me the software is harmful.
You need to use Adobe pdf – I don’t recommend any other software. You can find adobe here – http://get.adobe.com/reader/ to download the pattern – click on the pattern envelope.
I am very interest to your works mam,
You are very genius mam
Your reply is not to me
I am waiting for your loving reply mam
loving
shiny
Thank you so much for this!
🙂
You’re welcome Tabitha! =)
These are adorable! Thanks you so much for creating and sharing. You’re very talented!!
Hi Lynn!
Thank you for the compliment!
Hi, I just started this and love the pattern but was wondering once it’s done, what do I attach to it to make it wearable? I didn’t see that in the instructions…did I miss something ? Thank you!
Hi Kim!
A couple of alligator clips or a comb to the bottom will work to keep it secure on the head.
Just wanted to pop in and say thank you for this! This will be the perfect accessory for my Halloween costume this year! Huzzah! 🙂
Hi, Cannot wait to start on this project. Which size hat was made in the tutorial??
Its a fantastic project…you cannot buy one of these for less than £10 in the store 🙂
Hi Kirsty!
The one that I made (in the brown) is the mini size. The one one the model is the small size. I bet your mini hat will turn out cuter than the one in the stores and save you a few Quid in the process!
Best of luck with your project,
Angel
Hi, This is an absolutely fab project. Is it possible to make a mini bowler hat too?
HI Cara!
The bowler is more difficult because of the dome shape of the hat. What you might try is getting a paper bowl, gluing felt to it and fashioning a brim from there.
– Angel
I just made one of the minis in powder blue and pale pink and it is just. so. darn. CUTE!!!!! It was absolutely perfect for the Alice in Wonderland photo shoot I did with my kids! Thank you so much for such a wonderful tutorial as well!
Super excited to try these patterns. I am wanting a professional finish so I am thinking that the sew version would be best. I only wish the video tutorial showed the sew version as well. Is there a link to that?
Hi Erica!
No there isn’t a video – Just the written instructions.
– Angel
Hi Angel,
the patterns and the tutorial are great and I can’t wait to try them out!
I had a little problem, though. As it was impossible to use the measuring tool in Adobe Acrobat or open the PDF in InDesign or Photoshop, it was rather hard to find out the exact sizes of each hat if I didn’t want to print it all out first.
So would it be possible for you to post the approx. height/circumferences here somewhere?
Thank you and keep on doing great stuff!
Hi Anne,
sizes for the hats have been posted on the page.
Thanks,
Angel
I am so excited about these patterns! I am making the pirate hat for all my grandsons and the top hat for my granddaughters! I am going to try both felt and fleece to see which one works best for me….I have both fabrics on hand! You are so incredibly talented and I just wanted to say thank you for sharing with the rest of us!!!
Oh my goodness!!! I have looked and looked for this everywhere. My son is going to have a mad hatter themed birthday next year and I can’t afford to buy the premade hats and I had the hardest time finding a pattern to make them. You just make me sooooo happy!!! I can’t wait to start making them. He will be two, so I was thinking instead of crazy twos, we’d have mad twos. Thanks so much!!!
Just wantecd to say thankyou for the use of your templates as have been able to create a unique and one off mini tophat fascinator to add to my burlesque outfit. I found the templates and instructions easy to use. I have just come back to print off another pattern to make a tophat santa hat. 🙂
These are delightfully adorable! By golly, I think I’ll make for one of our themed events. Thanks so much..gotta run “I’m late for a very important date..” ;0)
Thanks so much for posting this! I love mini top hats, and it will be wonderful to be able to customize them for myself!
Thank you so much for the well detailed instructions, the hat was quite easy to make! I’m having a Mother’s Day Tea Party and made one for myself, a friend celebrating her b-day, and will raffle one for someone to wear at next year’s event. There are so many options out there for decorating them, too!
Super easy pattern to follow, sewed the entire thing, added a veil and sash, and this took less than an hour to complete, totally recommend this pattern to anyone that asks.
Thank you so much for these hats. I have found other tutorials but they don’t give you a pattern, and the are not as through in their directions. So thank you so much.
OMG this is perfect, I’m just getting back into creating and my daughter (turning 18 in a month :'( ) is in a hat phase, only thing I can’t do atm is print off the patterns! going to get a friend to if he can so I can make these for my baby girls and my nieces.
I just love how simple your tutorials are to follow (some of the others leave me scratching my head) So this is a HUGE Thank you for you’re creativity and work. (p.s. I just want you to know that some of the hats I’ll be making will be sold at a craft/charity sale to help raise money for our Community Living organization that helps families with special needs children)
Becky you’re welcome! Thank you for all the nice compliments. Best of luck with your projects!
found this and these hats are just perfect7… made 14 of them for my 5 year old teaparty birthday and they came out absolutely gorgeous.. Thank you so musch for the great directions…
How wonderful LeeAnn – glad your project worked out!
thanks so much for posting this! have always wanted to make mini steampunk hats for comiccon. im using the mini template for matching hats for me and my daughter for D23 next weekend to match our polka dot minnie mouse pinup girl dresses. we have polka dotted ribbon and large daisy flowers to go on these. should look cute!
Awesome – thank yo so much!
Thanks so much for this! I made my daughter a silk version for a mad hatter costume, it turned out so cute!
Hi Jennifer!
So happy it worked out for you! Feel free to post a picture of your work of Fleece Fun’s Facebook page!
– Angel
Thanks for the great website. I have a question about the sewed version. The .5 seam allowance..is that 1/2 inch?
Yes it is!
– Angel
Thank you so much, great tutorial. Can’t wait to try to make one myself.
Hi, I would love to create this mini top hat, but I don’t have card stock. What is a good replacement?
Try printing up the patern on regular paper then glue it to a bendable cardboard like a cereal box. 🙂
– Angel
Thank you for this pattern! I just made the large mini top hat for my 2 1/2 year old’s silly hat day at daycare. It was a big hit! She loves wearing her “silly” hat!
How Fun! So glad your project was a success!
Finished the medium top hat for the White Rabbit in a high school play. Looks awesome. Thank you for the pattern!
Wonderful! You’re welcome!
I want to do these for my daughter’s birthday. With 72″ felt, how many could be made out of the 1/4 yard the pattern calls for?
Hi Tammie,
I’m sorry I honestly don’t know. It depends on what size of hat. I would lay out the size you wanted and measure the space it takes up and calculate it that way.
Thanks,
Angel
Thank you for this pattern and cute top hat tutorial. I was thinking with a small adjustment making it cone shaped, it can be a witches hat for Halloween. Going to try it out. You saved me so much time trying to figure this one out…thank you again!
Just downloaded your Trapper Hat and have been checking out your other tutorials – the extra ear flap for warmth is excellent here in the mountains. The tuts are well explained and easy to understand. The video is a great asset for anyone making the pattern. Several males in my life are getting a Trapper Hat for Xmas, as am I!
This tutorial is so cute and so topical. I see people headed to parties wearing them. Don’t know how I’ve missed your site. Plan to tell everyone. Thanks for taking time to share your knowledge.
Mahalo Angel! your video and all your instructions were so easy to understand and fun. I cant wait to start doing more projects. Will be making this top hat and hopefully post a photo on your fb page. thank you for the free pattern.
I LOVE THE TOP HAT THAT IS ON THE CHRISTMAS TREE. IT JUST REMINDS ME WHEN MY HUSBAND AND I WERE FIRST MARRIED HE WAS IN THE SERVICE AND WE WERE STATIONED IN JAPAN. WE WERE JUST NEWLYWEDS AND DIDN’T HAVE MUCH MONEY SO I DECIDED TO MAKE ALL MY ORNAMENTS AND THE TREE TOPPER. THE TOPPER OF COURSE WAS A TOP HAT. ALTHOUGH MINE WAS MADE FROM CRAFT FELT AND CARDBOARD IT WAS VERY SIMILAR TO THE ONE YOU HAVE DONE HERE. EVERY YEAR AFTER THAT I MADE THE TOPPERS DIFFERENT AND DIFFERENT ORNAMENTS BUT IT WAS VERY SPECIAL TO US. I KNOW LONGER DID THIS AFTER THE KIDS GREW UP AND MOVED ON BUT IT BROUGHT BACK SO MANY MEMORIES FOR ME. THANKS FOR SHARING!
Thanks for this fabulous and accurate pattern! I searched quite a bit and this one is great. I altered a bit and made out of paper in a little larger size. I’m going to use as party favors for my Alice in Wonderland party in June!
Hi! I was looking for a top hat pattern for my Poppy Parker doll and came across your marvellous design. I scaled it down to 47% as her head is quite small.
As I don’t own a glue gun (note to self must get one) I decided to sew my hat….feeling very nervous at this stage!
To cut a long story short it’s turned out amazing, I hope to take a photo when the rest of her outfit arrives…trying for the steampunk look. I’ve knitted a cardigan in angora and customised a Sparkle Girlz dress, just waiting for net stockings and black boots.
Hopefully I can show you the finished result soon. A big thank you for such a cute hat. X
So happy to hear of your success!
I just Love these little top hats.
I will be making these little hats for my Daughter white tree for next year
Thank you so much
Just Love your ideals
These are SO cute (and cool!) I am really into steampunk lately and couldn’t find a free pattern that I could download. Thank you so much!
Thank you for this site, the mini top hat pattern was just what I was looking for! Thank you again
I would love the mini top hat pattern. Thank you so much
I just made 2 lovely medium sized mini top hats. They came out adorable. My friend and I will be the hit of our New Years Eve party. I sewed as much as I could. I didn’t do well with gluing the top of the hat. I only had clear glue sticks and the glue was very noticeable. Since I used interfacing I was able to sew on the top of the hat instead of gluing the top. I really appreciate your free patterns. Thank you so much!
This is a great tutorial! I’m going to make one for my son for Christmas.
I’d love the pattern.
click on the picture that says “click here to go to the free download” you scrolled right past it.
Great tutorial! Thank you for sharing this with the rest of us. I have been inspired!
Great Tutorial
gracias por el tutoria INCREIBLE
This mini top hat tutorial is absolutely adorable! I can’t wait to try out the pattern and customize it for my next event. Thank you for sharing such a detailed guide! ♥
This mini top hat is absolutely adorable! I love the free pattern you provided—it’s so easy to follow. Can’t wait to make one for my next themed party! Thanks for sharing your talent! ❤️
This mini top hat tutorial is absolutely adorable! I love the free pattern and how easy you made the instructions. Can’t wait to try making one for my upcoming costume party! Thank you for sharing!