
Halloween Kid’s Fleece Vest – tummies and tails
This content contains affiliate links or sponsored elements, read our Disclosure Policy.


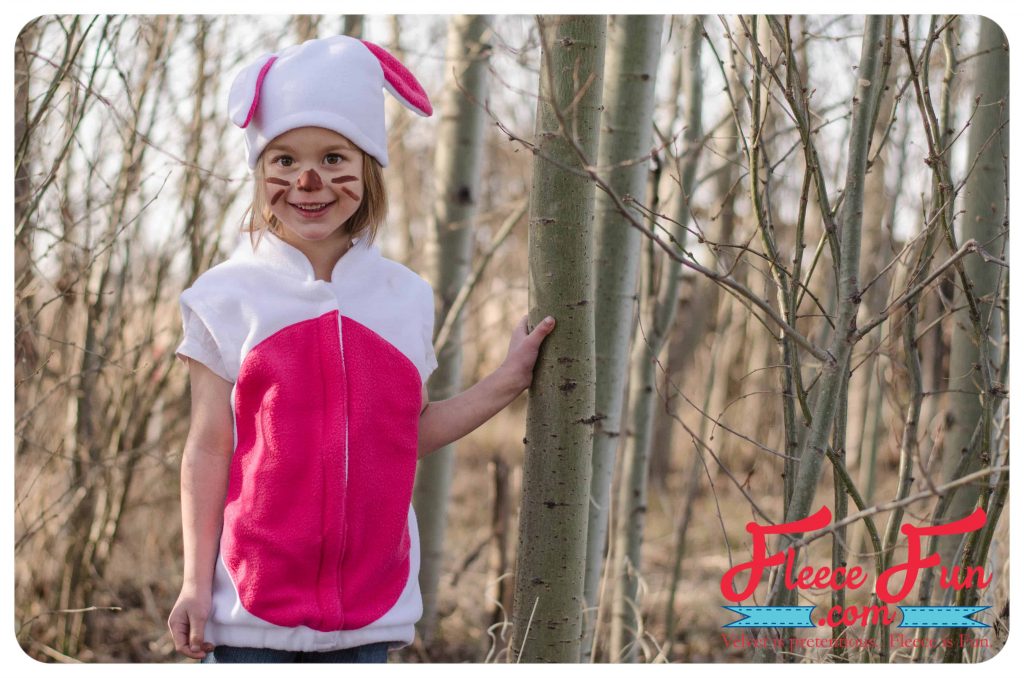
Adding a tummy and tail is a great way to turn the basic Halloween Dress Up Kid’s Fleece Vest pattern into a cute animal costume. This modification is designed to coordinate with the Halloween hat packs 1, 2 and 3. First, you will need the base vest pattern, available HERE.

YOU WILL NEED:
- 1/2 yard of contrast fleece for tummy and tail small amount of fiber fill batting
- Plus materials for the basic vest
- Sewing Essentials (scissors, pins, etc.)
- Sewing Machine
- Get the free pattern here.
Halloween Kid’s Fleece Vest tutorial:
Step 1 – Cutting Out the Fleece Pieces and Starting to Sew

Cut two mirror images of the tummy panel. With wrong side of tummy panel facing right side of front, pin the panel in place 1″ away from the front center edge. Place it so that there is equal amounts of space below and above the tummy piece and that both sides match. Stitch around all the edges with a straight stitch or zigzag. Continue assembling the vest according to the general instructions HERE.
NOTE
The white represents the right side of the fabric and the brown is the wrong side of the fabric. All seam allowances are 1/2″ unless otherwise stated. A walking or even feed foot can be useful for sewing over bulky seams. You will need to assemble the pattern. For instructions on how to assemble the pattern click here.
Step 2 – DIY Fluffy Tail Tutorial for Kids’ Halloween Vests

Cut 1 tail piece. Sew around the outside of the circle with a long basting stitch. Pull the thread tails so that a round shape is formed. Stuff the tail with a handful of fibre batting and tie the thread tails to close up the opening. Hand sew the tail to the back of the vest.
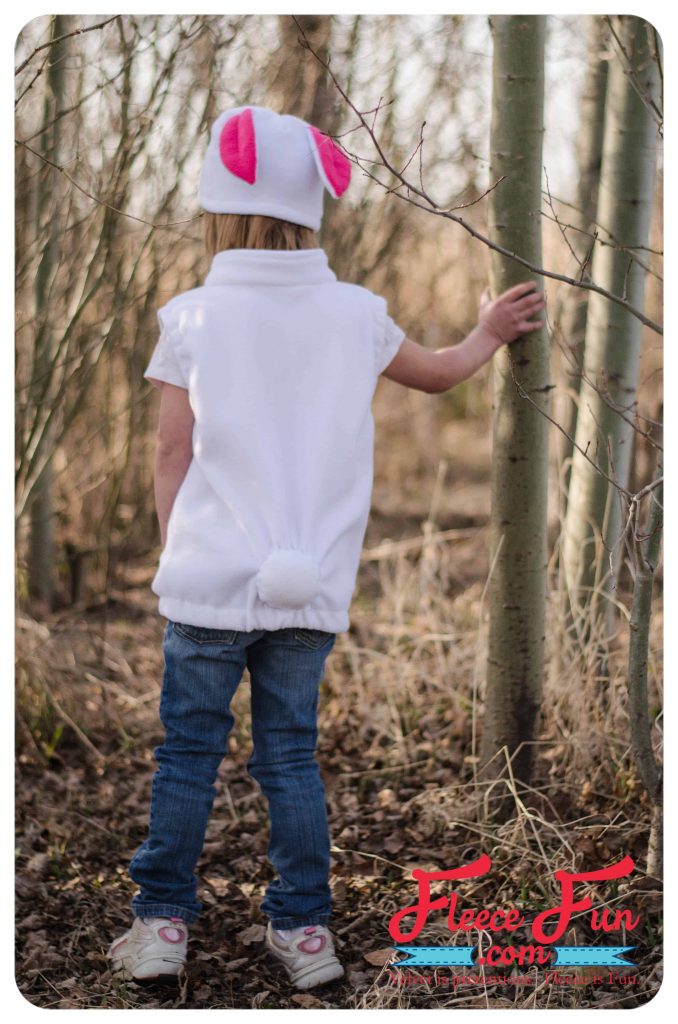
Step 3 – How to Create Short and Long Tails for Halloween Vests


Cut 2 (mirror images) of the tail. Sew the curved edges, right sides together. Turn right sides out and stuff with fibre batting. Tuck in the raw edge and hand sew the tail to the back of the vest. Don’t forget to download the pattern for the coordinating hat here.
Pattern was drafted by GraciousThreads.ca
Download the Free HALLOWEEN KID’S Fleece Vest Pattern Here
You can get a free copy of Adobe reader here. By downloading you are agreeing to pattern terms of use. Click the picture below or fill up the form to download the .pdf !

More Fleece Sewing Projects:
- Bow Ear Warmer Headband
- Washable Duster
- Warm Mittens
- Easy Fleece Blanket
- Quick Sew Hobo
- Child’s Fleece Robe
- Child’s Fleece Pants
More Fleece Projects!
- Halloween Hat Pack
- Monster Mash Fleece Hat
- Fleece Bunny Hat
- Fleece Dog Hat
- Basic Hat (Adult, Child, and Baby)
- Fleece Winter Hat
- Fleece Hat with Ear Flaps
