
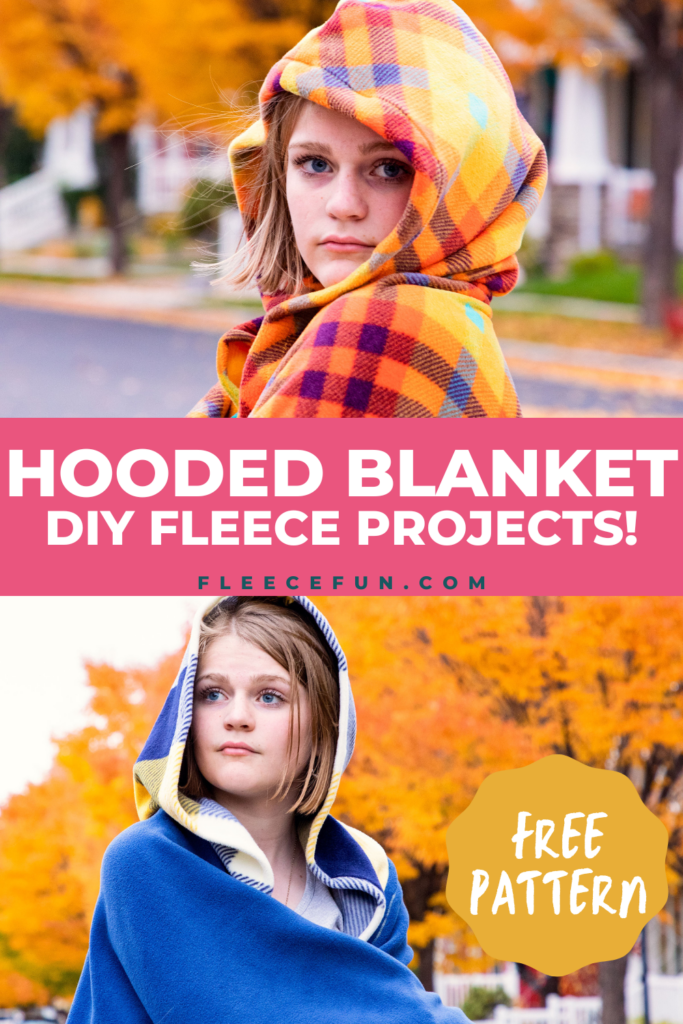
How to Make a Hooded Blanket (Free Pattern Adult & Child)
This content contains affiliate links or sponsored elements, read our Disclosure Policy.


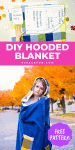


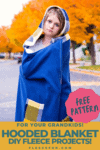

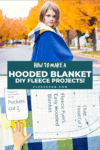
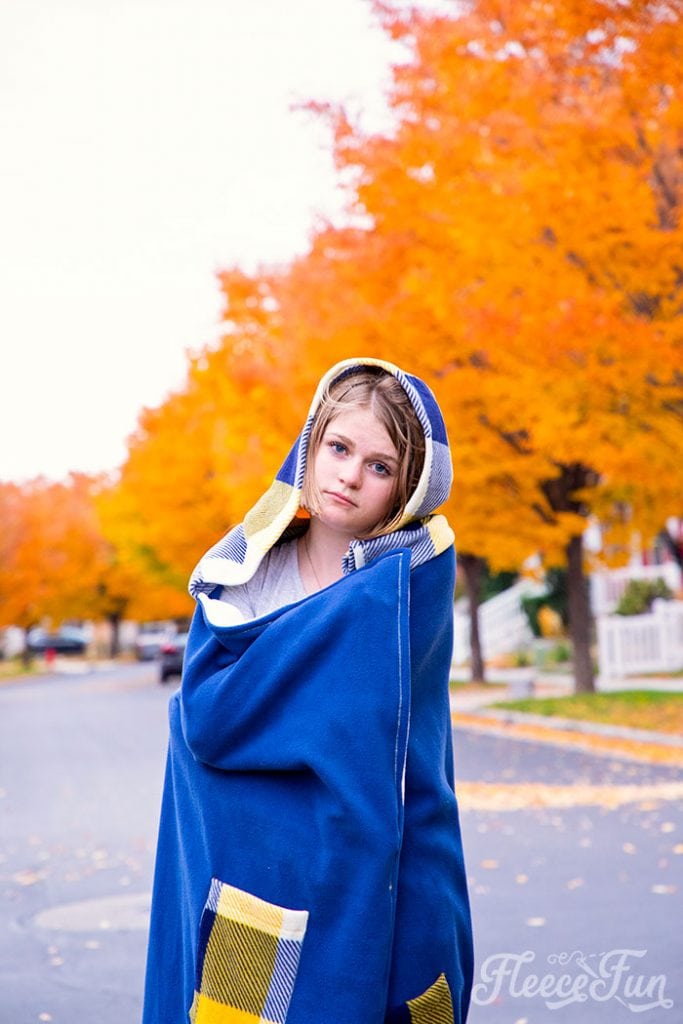
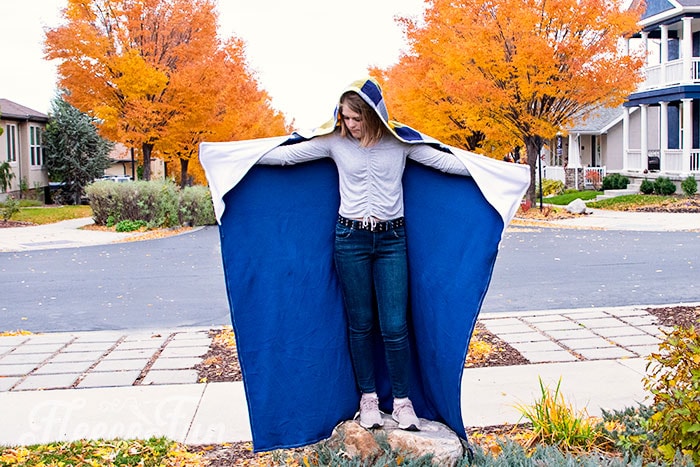
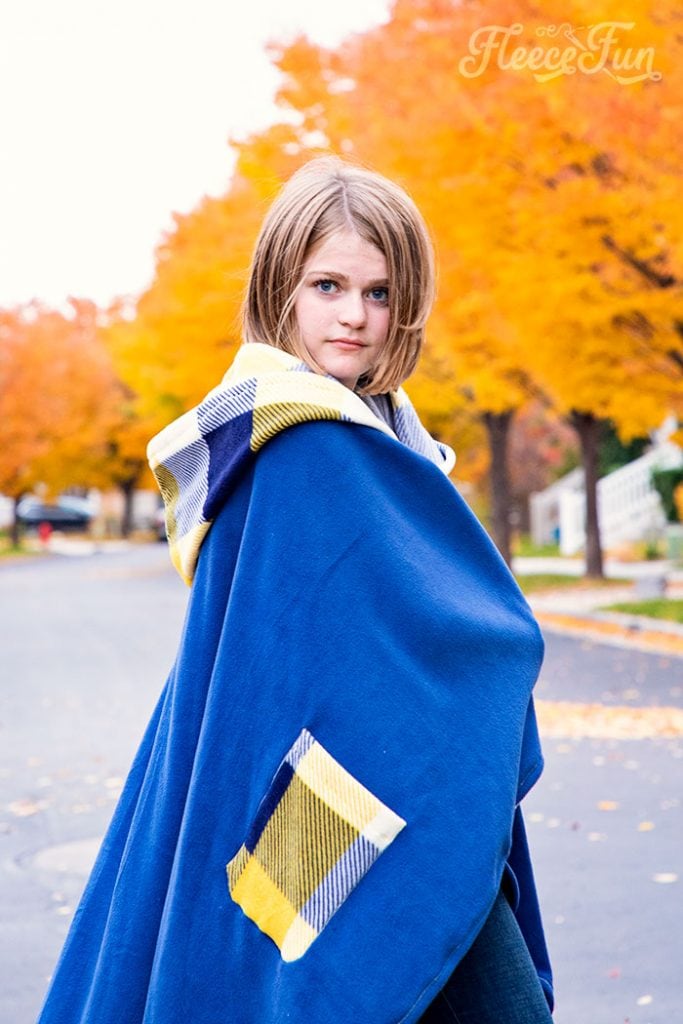
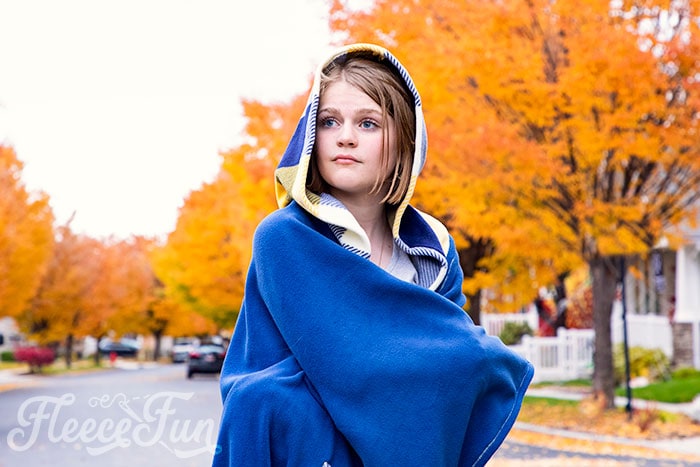
Learn how to make a Hooded Blanket with this free pattern that comes in sizes child and adult. This warm fleece blanket DIY is perfect for cold weather months. With it’s soft hood and warm hand pockets it’s sure to be a favorite. The additional side pockets are perfect for slipping a phone or remote into while you’re curled up in this easy to make blanket.
The best part about this DIY Hooded Blanket Guide is that it’s simple – perfect for a beginning sewing project. One of my favorite things about fleece is that it’s easy to sew on and easy on the wallet!
Hate The Ads?
This pattern with video and printable instructions is available in the Makers Studio. The Maker’s Studio is an ad free experience, no video ads, no forms, no zip files, just creating.

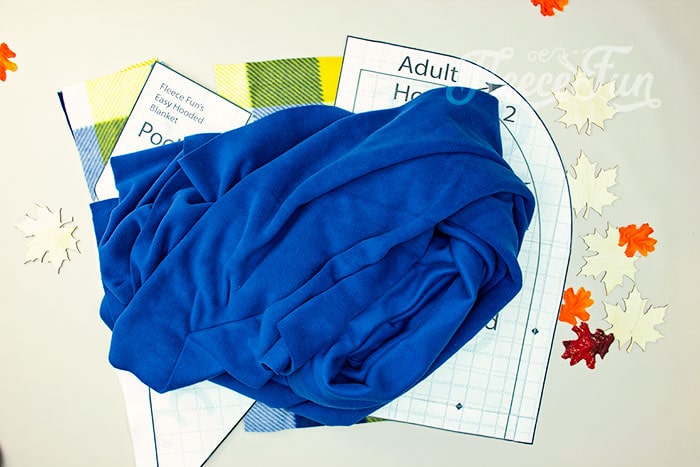
YOU WILL NEED:
*For men you will need and additional 1/2 to yard for their arm span. Also if you desire to to make the blanket longer than 58″, consider using extra wide fleece 85″ to make the blanket bigger.
- 3 yards of fleece (if you want to have the hood/ pocket in a different color it’s 1 yard fleece and 2 yards for the blanket)*
- Rotary Cutter, Ruler and Mat
- Sewing essentials (Sewing machine, pins, thread)
- Get the free PDF pattern.
How to Make a Hooded Blanket (Free Pattern Adult & Child)

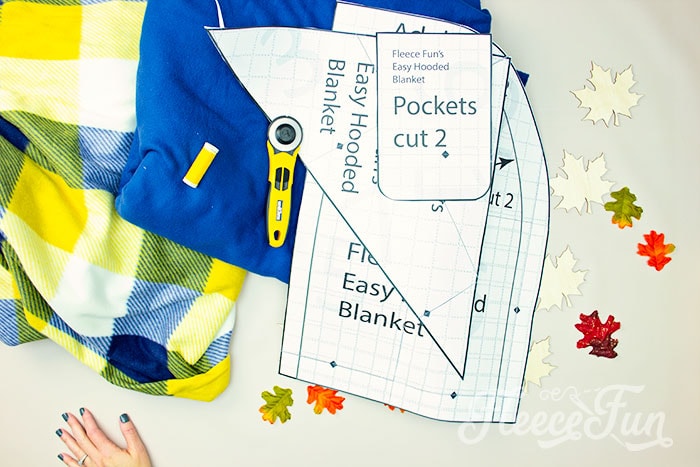
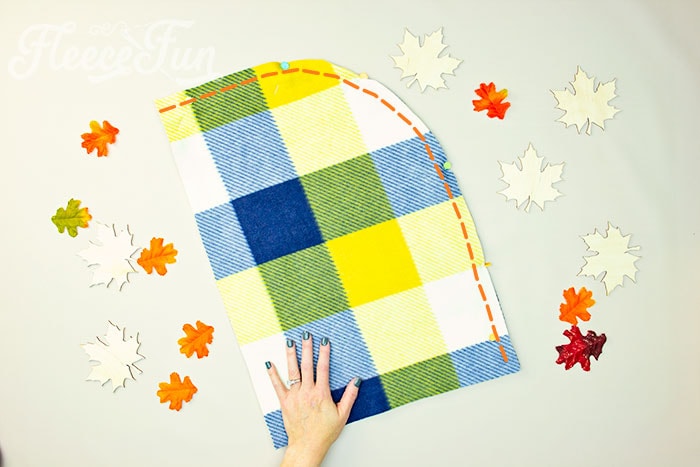
Step 1 – Cut Out the FLEECE Blanket Pattern
Assemble the Free Hooded Blanket Pattern. If you are unfamiliar with digital patterns and hoe to assemble them you can find instructions here.

Decide if you are making a blanket for an adult or child. Cut the pattern to the correct size of hood (all other pattern pieces are the same size).
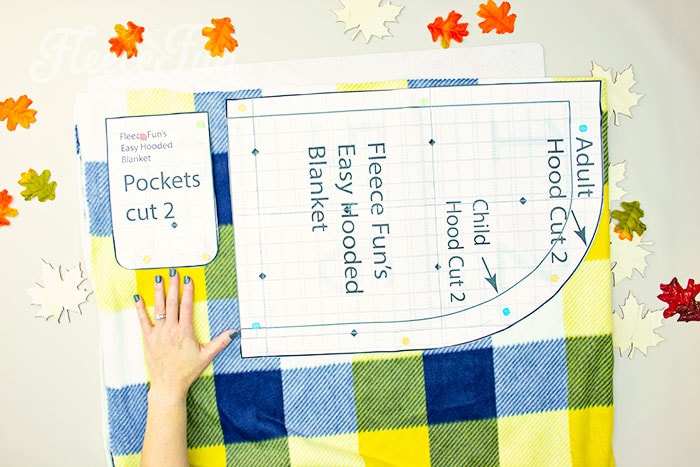
On folded fabric cut out the Hood and outer pockets. You should have two of each.
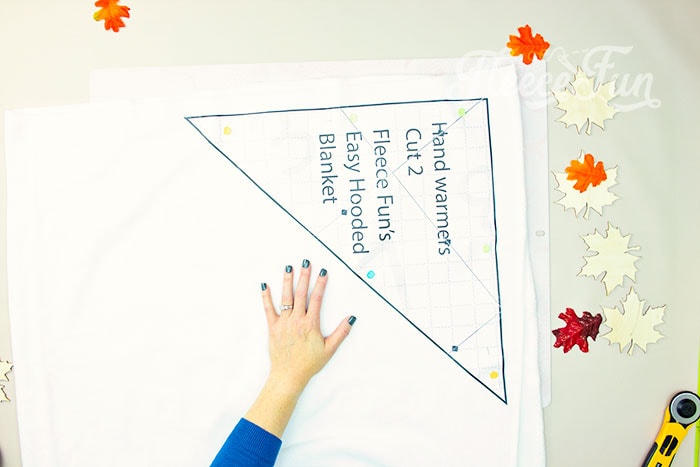
On folded baric cut out 2 of the handwarmers.
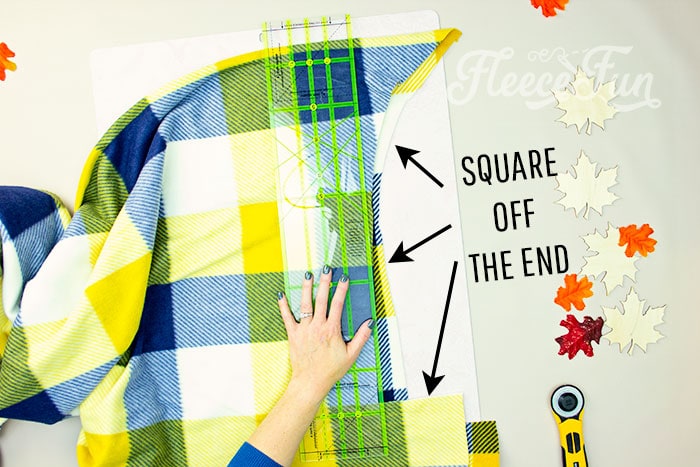
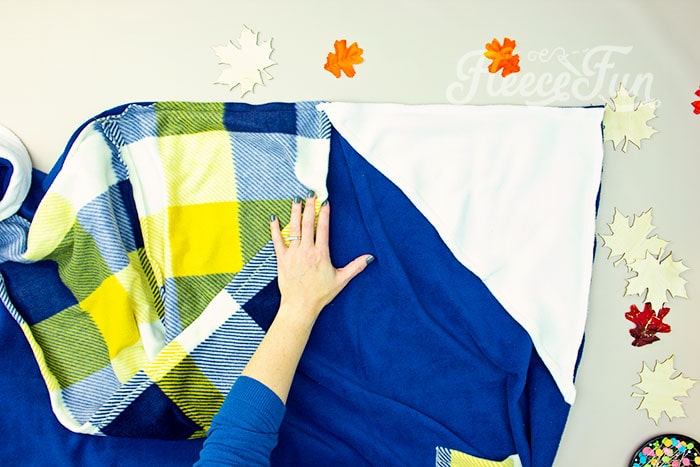
If you want to make a hooded blanket out of just 1 fabric you will need to square of the end ( make it even – straight across) after cutting out the pattern pieces. If you are using 2 fabrics, make sure the ends of the fabric that will be the main body of the blanket are even.
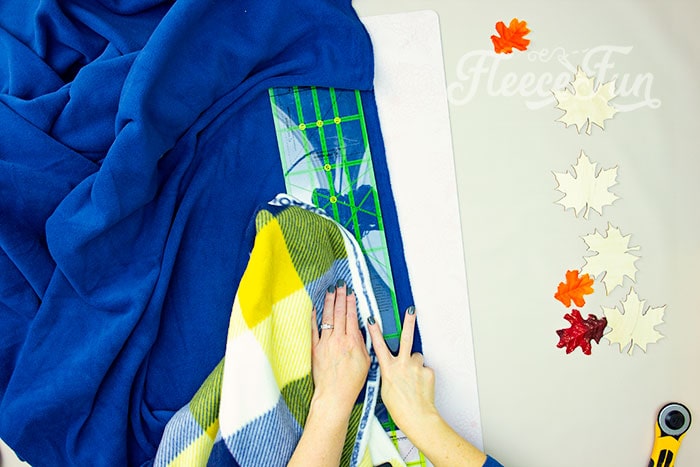
Finally for the fabric that will make up the main body of the hooded blanket cut off the selvages. These are the edges of the blanket that are a different texture, have holes in and sometimes writing/ and the pattern stops.
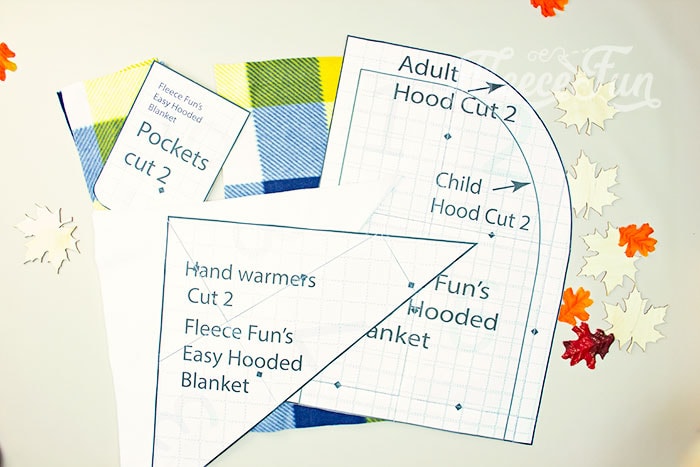
So you should have 2 hood pieces, 2 pockets, 2 handwarmers…
And the body of the blanket ready to go with the selvages cut off and the ends even.
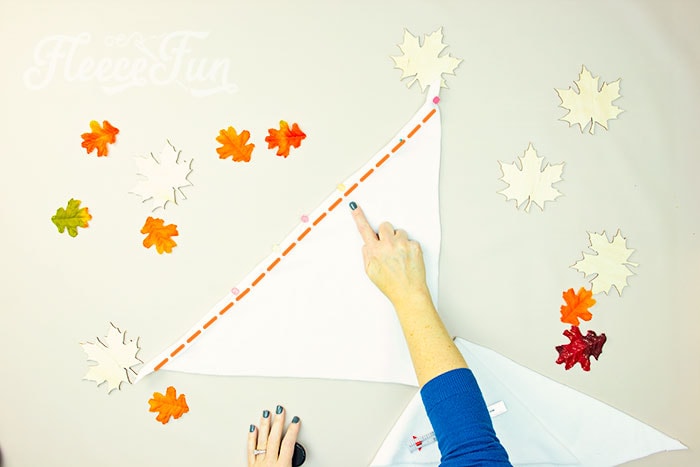
Step 2 – Sew the Hood for Your HOODED Blanket
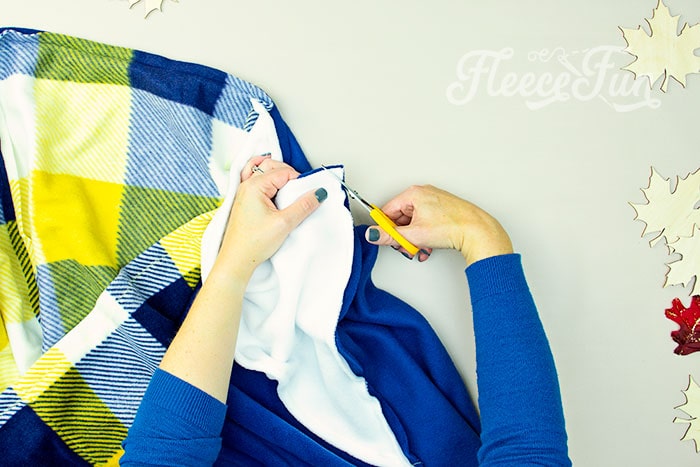
With right sides together, sew the back of the hood using a .5 inch seam allowance.
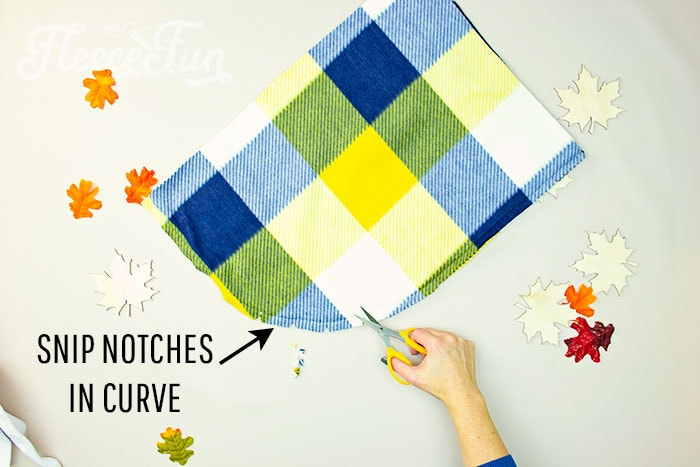
Once sewn, snip tiny notches in the curve to help the hood lay nicely.
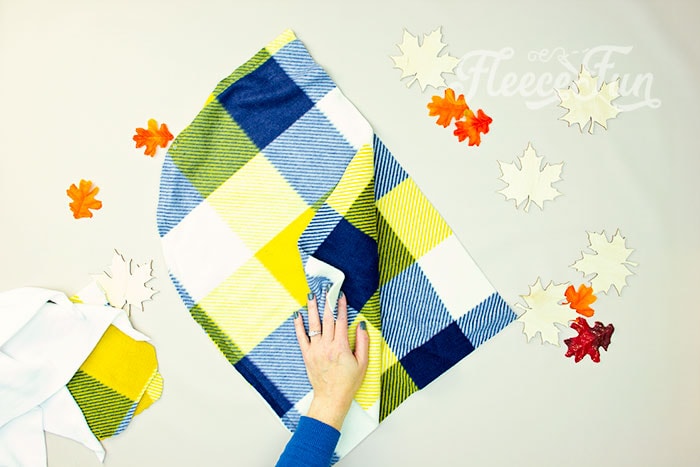
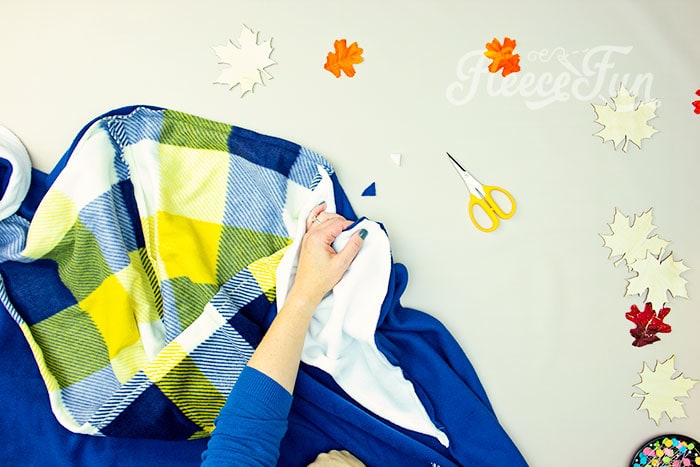
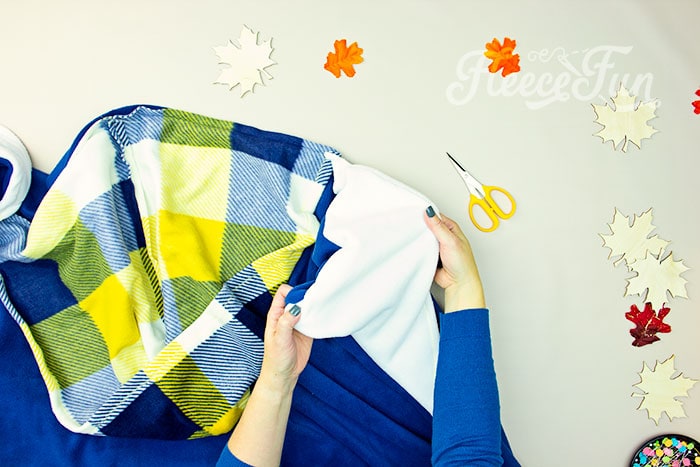
Turn Right side out.
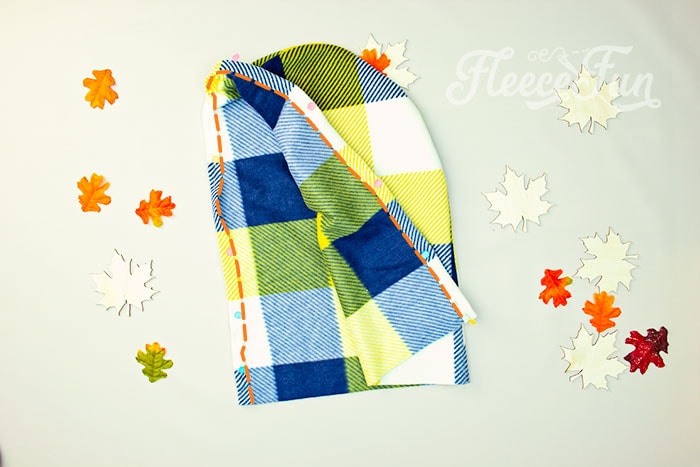
Turn under the front edge of the hood 1″. Sew down along the edge using a zig zag stitch along the edge.
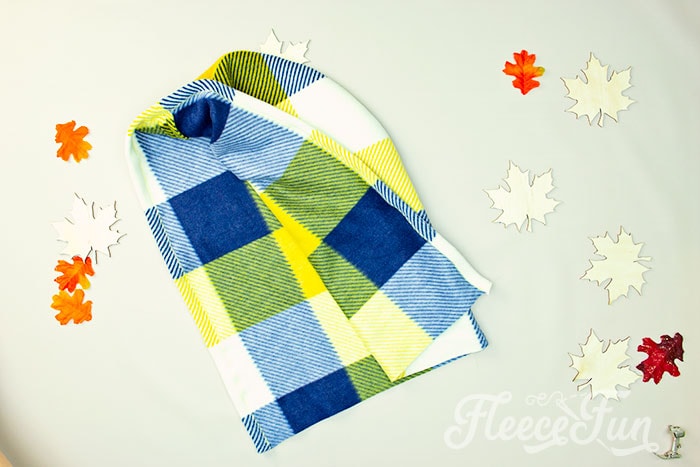
Set the hood aside.
Step 3 – Prepare the Pocket and Handwarmers for the FLEECE Blanket
Take the two pocket pattern pieces. Turn the tops (the end that is NOT rounded) and turn it under 1″ so the it folds to the back of the pocket (wrong sides touching). Sew down along the edge using a zig zag stitch on each pocket.
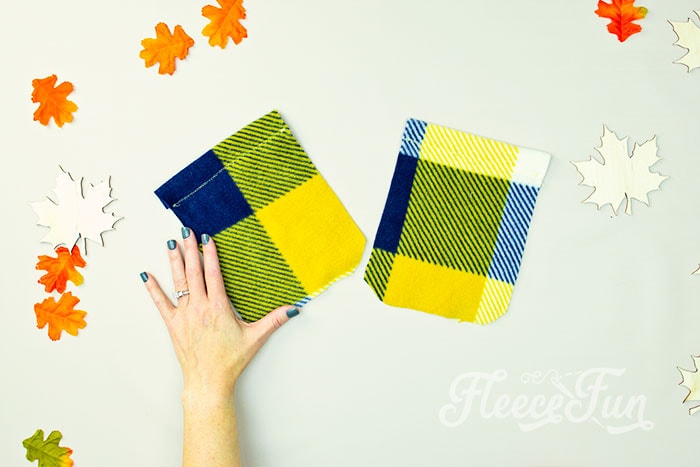
Set the pockets aside.
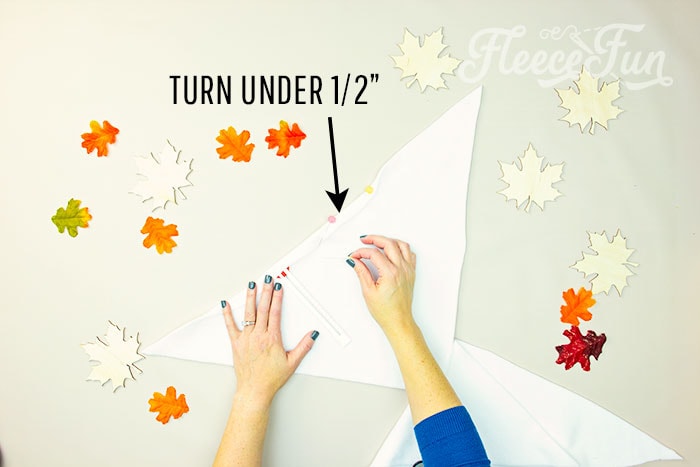
Grab the two handwarmer pieces. Turn the long diagonal edge under .5 inch. It should fold back to the wrong side of the fabric.
Sew down along the edge using a Zig Zag stich on each handwarmer.
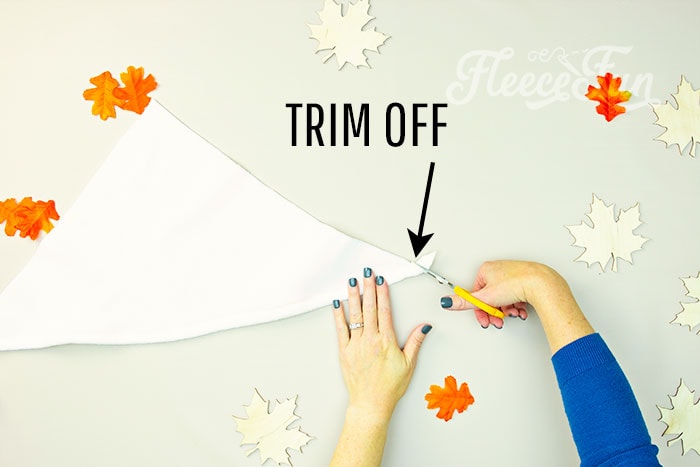
After sewing you’ll notice a little “tail” sticking out from the triangle, snip it off, taking care not to cut through your seam.
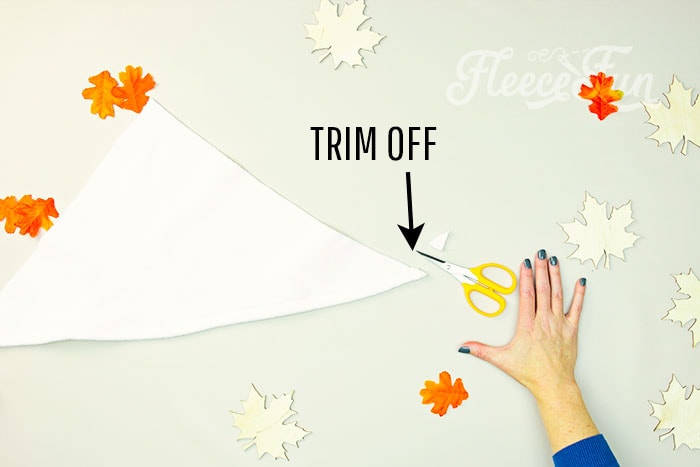
Repeat with the other handwarmer. Set the Handwarmers aside.
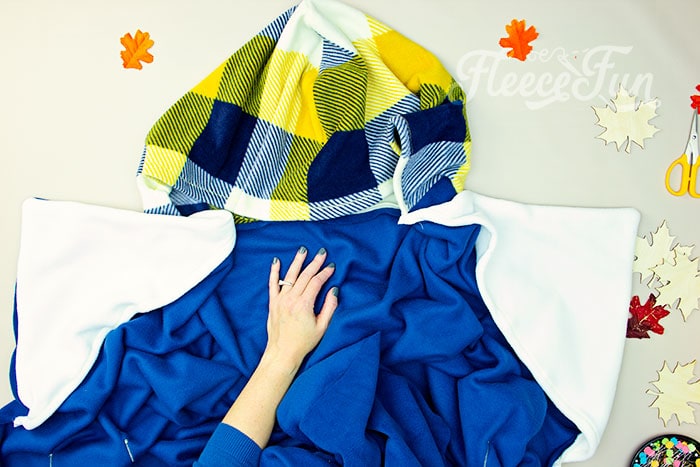
Step 4 – Attach the Hood and Handwarmers
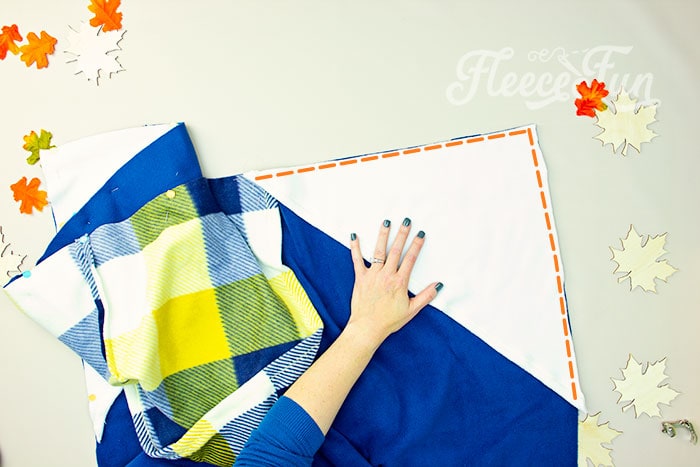
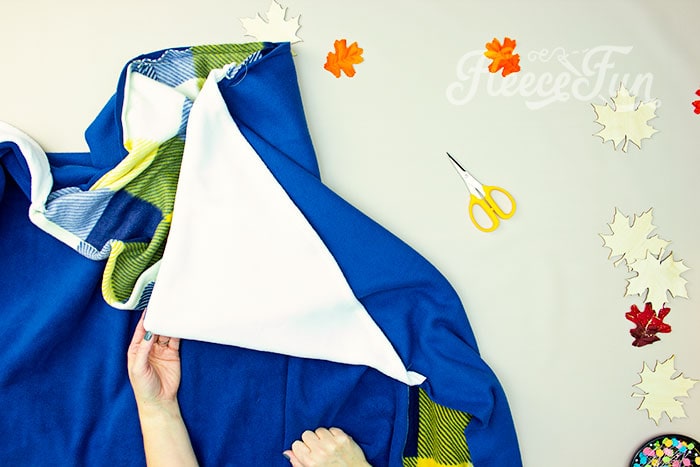
Get the main hooded blanket piece. We want the length of the blanket to be 56″ -58″ the width of the fabric.
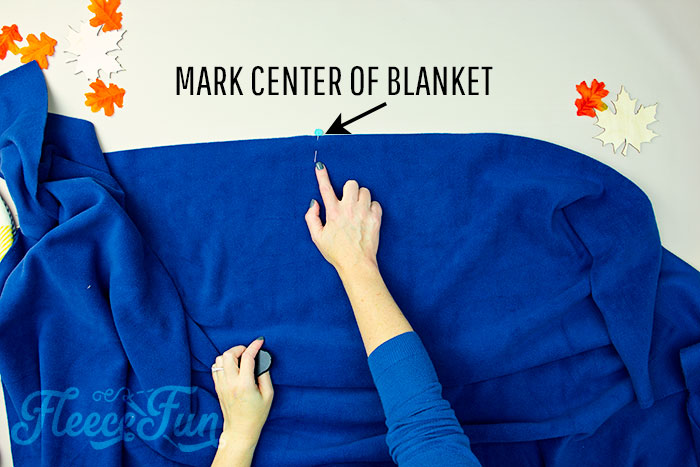
Mark the center on one of the sides that the selvage was cut from. This can easily by done by folding it in half and marking it with a pin. Right side should be facing up at you.
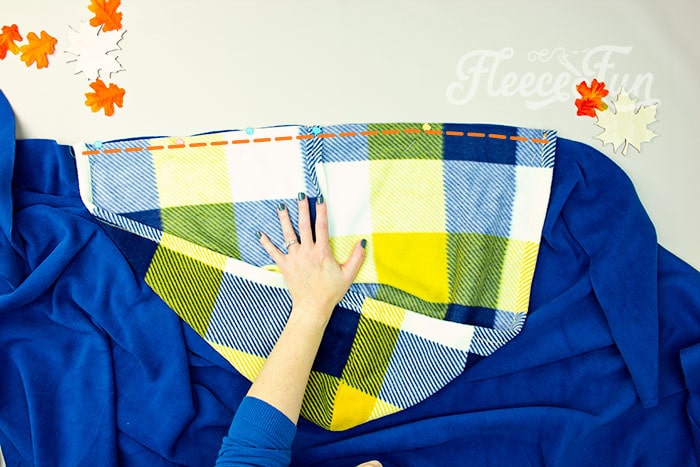
Line up the center seam with the pin/ marking we just made. Pin the hood to the blanket, right sides together. Sew on using a .5 inch seam allowance.
Now it’s time to sew on the hand warmers to each side.

With right sides together pin one handwarmer to the left corner of the blanket. The same side as the hood. Sew into place using a .5 inch seam allowance.
Repeat this process with the right side of the blanket. Sew the other handwarmer into place using a .5 in seam allowance.
NOTE
It’s ok if there is a little overlap with the hand warmer and the hood, just make sure the hood is under the handwarmer.
Now that it’s sewn, let’s make sure that it lays nicely.
Carefully trim some of the excess off of the corner of the handwarmer and blanket to eliminate bulk. Repeat on the other side
Be careful not to trim through the seam.
Turn the handwarmers right side out.
Now it’s time to finish up the blanket.
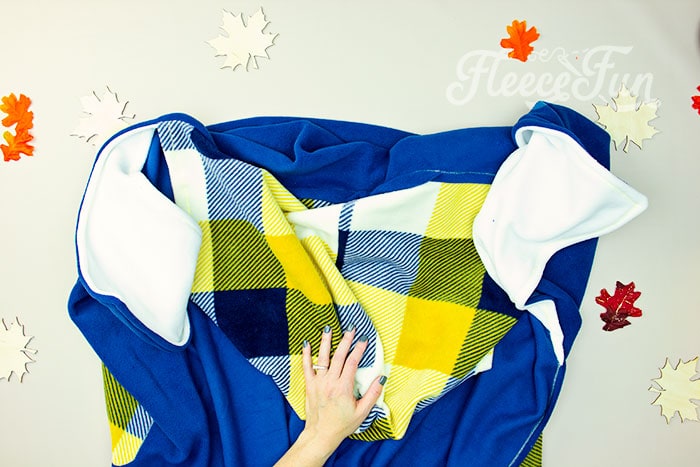
Step 5 – Sew the Pockets and Finish the Hooded Blanket Edges
Time to add the pockets and finish up!
The pockets should be placed about 1/3 of the way down – the tops should be the same direction as the hood and placed six inches from the edge.
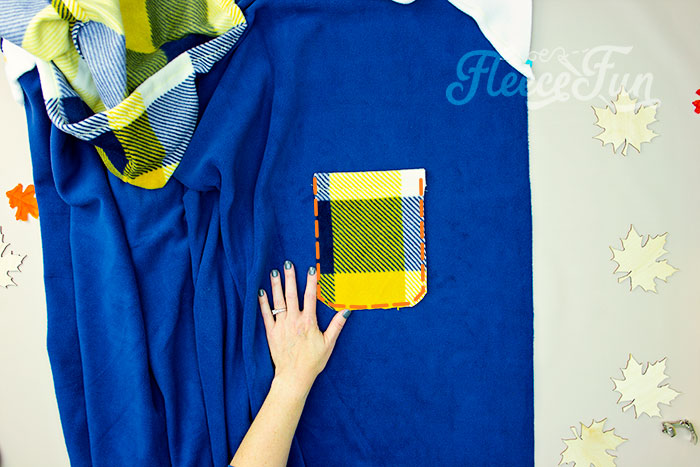
Pin and sew into place using a zig zag stitch along the edge.
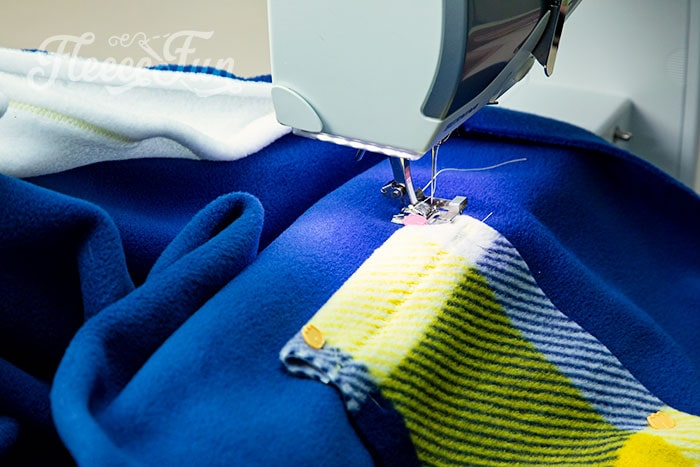
Once the pockets are in place it’s time to finish off the edges of the blanket.
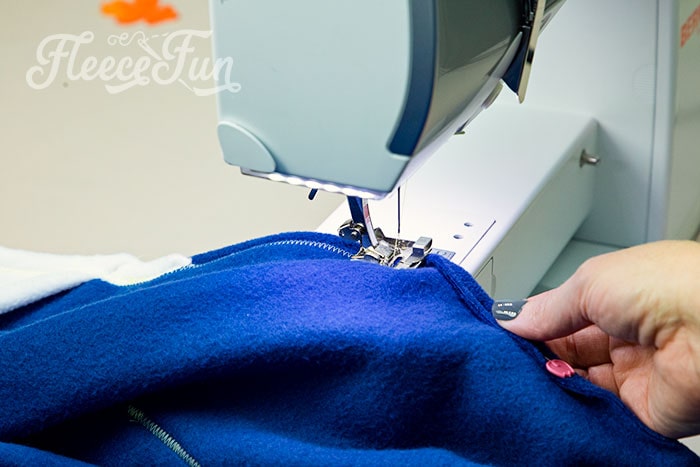
Turn under the edges of the hooded blanket .5″ (wrong sides touching) and sew into place using a zig zag stitch along the edge. If desired you can top stitch the handwarmers and hood as well.
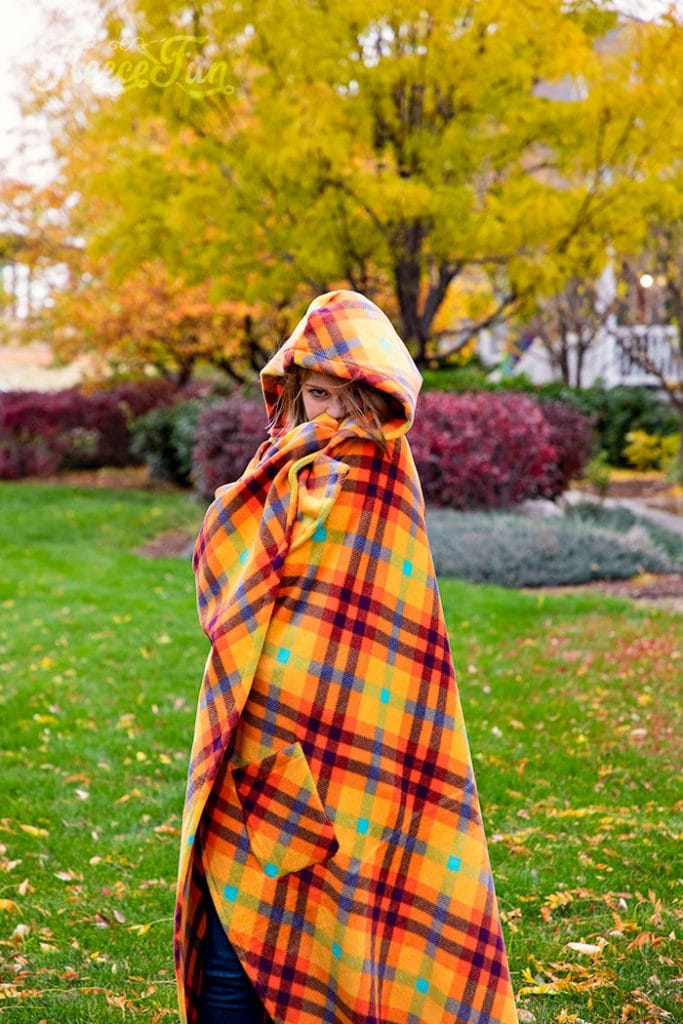
That’s it! You completed the Hooded Blanket Tutorial.
Download the Free Hooded Blanket Pattern Here
You can get a free copy of Adobe reader here. By downloading you are agreeing to pattern terms of use. Click on the image below or fill up the form to get it sent right to you.

MORE FLEECE BLANKET TUTORIALS:
- How to Make a No Sew Tie Quilt
- Traditional Fleece Tie Blanket (with templates and 3 methods!)
- Duvet Cover
- Stitch ‘n flip quilt
- Rag quilt (Easy Beginner’s Guide)
- How to crochet the edge of a Fleece Blanket
- Fleece Blanket with a Satin Binding
- Self Binding Fleece Blanket
- Fleece Ribbon Throw
- How to use the Tie Blanket Ruler!
- You can see all of the blanket tutorials here
Additional Fleece Sewing Projects:
- Bow Ear Warmer Headband
- Fleece Scarf with Pockets
- Red Riding Hood Cape
- Washable Duster
- Warm Mittens
- Quick Sew Hobo
- Child’s Fleece Robe
- Child’s Fleece Pants
Thank you for this pattern my granddaughter says she is always cold at our house this will be perfect for her. Also thank you for the American Girl Doll patterns as a senior the free patterns are great and I will be using them to make clothes for both my granddaughters.
How long would one blanket take to make?
Depends on how fast of a sewist you are. I’d say about 3-4 hours from start to finish if you’re going slow.
Looks easy, thank you!
Love this blanket
I’m going shopping today for fabric to make my 6th and 7th one of these. They’re so simple! Love making them for gifts. I wish someone would make one for me though 😂 This time I’m making them for my (extremely tall) nephews, so I’ll be adding the extra half yard for them.
The one thing I wanted to mention after the last two I made is don’t make the same mistake I did! If you’re going to make it with all one fabric choice, still ask for 2 yards and 1 yard separately. Saves a lot of hassle and extra cutting once you’re home and ready to sew 👍 I bought a straight 3 yards and wish I would have thought ahead, so learn from my mistake!
Also, if you’re making them for kids or people who don’t necessarily appreciate the work that goes into a home made gift, don’t splurge on the spendy fabric. I used the cheaper stuff (on sale) and my kids love them just the same. I did spend more for my oldest daughter’s fabric though since she’s a crafter and appreciates the time and work I put into things 💜
Cant wait to make these for Christmas gifts!
I was just decluttering and found a bunch of blankets I was going to take to the homeless in our city. There’s a massive housing crisis that has families living in tent encampments in a Canadian winter. Now I’m going to grab some extra fabric and add on the extras first. I can even make some smaller ones for the kids.
Thanks for the wonderful idea.