
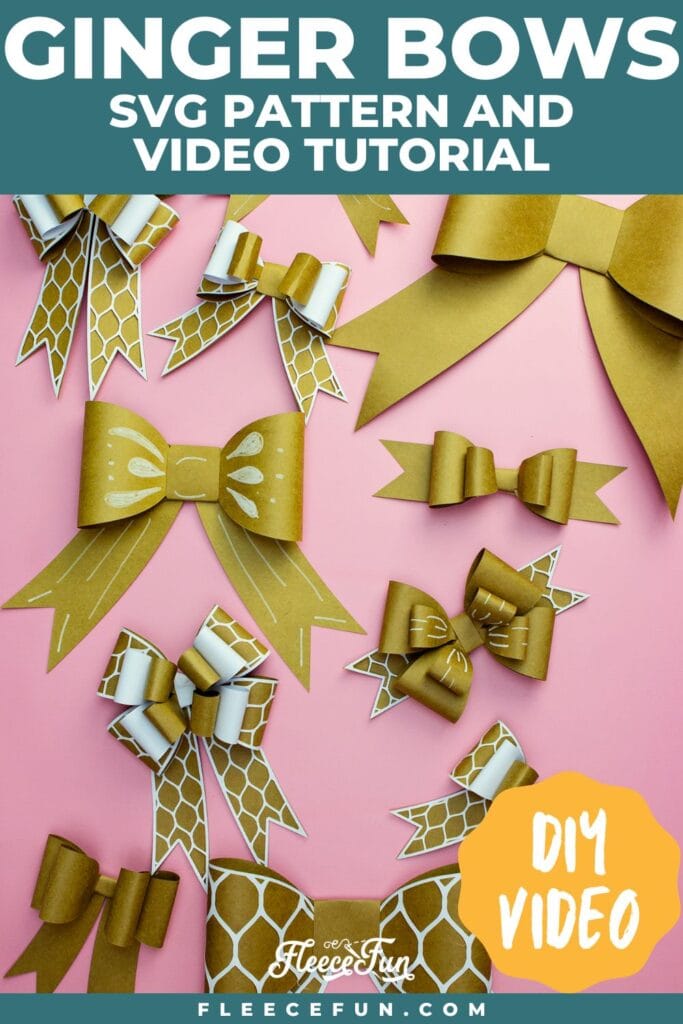
How to Make Paper Bows with Your Cricut
This content contains affiliate links or sponsored elements, read our Disclosure Policy.

Can we just take a minute to appreciate that bows are having a moment right now? I love it so much. There is something about a big, beautiful bow on a gift or tucked into a vignette on a shelf that makes everything feel more intentional, more special, more — I don’t know — delightful. And yet finding a really good bow has always been weirdly hard. Store-bought bows are either flimsy and forgettable or expensive and still not quite right. So naturally, I made my own SVG files for it. These Ginger Bows are designed to cut on your Cricut or Silhouette, go together quickly, and look genuinely chic. And they’re available exclusively inside the Maker’s Studio — that’s where I keep all the good stuff. If you’re already a member, you’ll find the SVG files waiting for you! If you’re not in yet, come join me — I’d love to have you.
The Finished Bows
These bows are something I’m genuinely proud of. They have that full, layered, dimensional look that makes you think someone spent a lot of time on them — but they actually come together so fast once you’ve cut the pieces. You can make them as a single clean layer for a more minimalist look, or stack them into a full multi-layer bow that really makes a statement. The ribbon tails can be mixed and matched with different bow tops, which means every single bow you make can feel unique even when you’re working from the same files.
Hate The Ads?
This pattern with video, SVG Files and printable instructions is available in the Makers Studio. The Maker’s Studio is an ad free experience, no video ads, no forms, no zip files, just creating.
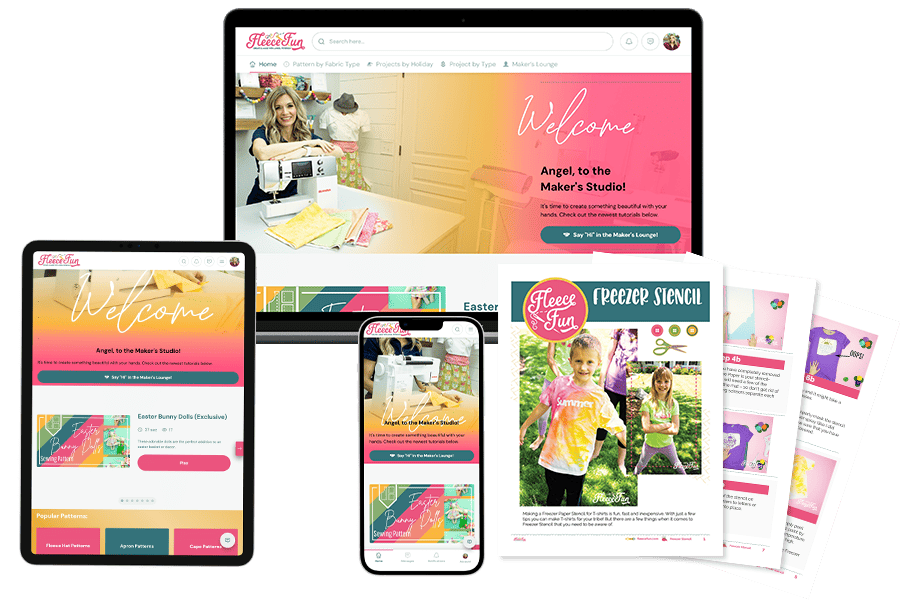
For the price of a single pattern you can have access to 100’s of tutorials!
Click below to learn all about the maker’s studio!
What really sets these apart is the hand-drawn style I call the Ginger Bow. You draw your own designs directly on the paper pieces before assembling — little patterns, doodles, whatever feels right — and the result is something that looks completely one-of-a-kind. A Posca marker works beautifully for this, or a Sharpie if that’s what you have on hand. The point is that these bows get to have personality, which is rare in a paper bow and makes them genuinely special to give or display.
They work beautifully on wrapped gifts, on holiday displays, tucked into a wreath, attached to a gift bag, arranged in a bowl as decor, or tied to just about anything that needs a little happy girliness added to it.
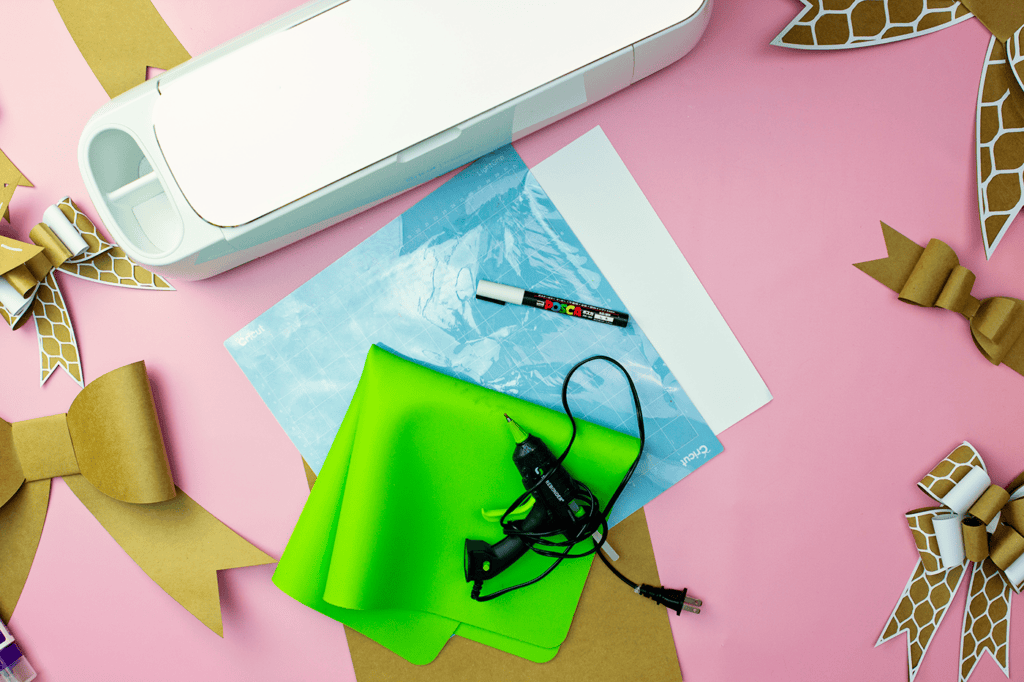
What You’ll Need
- Cricut, Silhouette, or another SVG-compatible cutting machine
- Cardstock or decorative paper in complementary colors — 12×12 or 24×12 sheets depending on your machine
- Light grip mat in the correct size for your machine
- Hot glue gun and glue sticks
- Posca pens or Sharpie markers (for the Ginger Bow style)
- The Ginger Bows SVG files from the Maker’s Studio
A note on paper: the color combinations you choose completely change the personality of the finished bow. Soft neutrals feel elegant and gift-ready for any occasion. Bold, saturated colors feel festive and fun. Mixing a patterned paper with a solid makes the layering really pop. Don’t be afraid to pull out a few options and hold them together before you commit — it’s worth the extra thirty seconds.
How These Bows Come Together
Step 1: Choose Your Style and Cut Your Pieces
Before you load anything onto your cutting mat, you make your first fun decision: what kind of bow do you want? The SVG files include several different styles — single layer bows, multi-layer bows, double bows, regular bows — and you can mix and match the ribbon bottoms with different bow tops depending on the look you’re going for. It’s genuinely like a bow wardrobe.
Single layer bows are quick and clean — great when you want something simple and polished. Multi-layer bows have more dimension and presence, perfect for when you want the bow to be a real focal point. The SVG file guides you through exactly which pieces to cut for each style, so you’re never guessing. Cut everything out, set the pieces in front of you, and enjoy that satisfying moment of seeing the potential laid out before assembly begins.
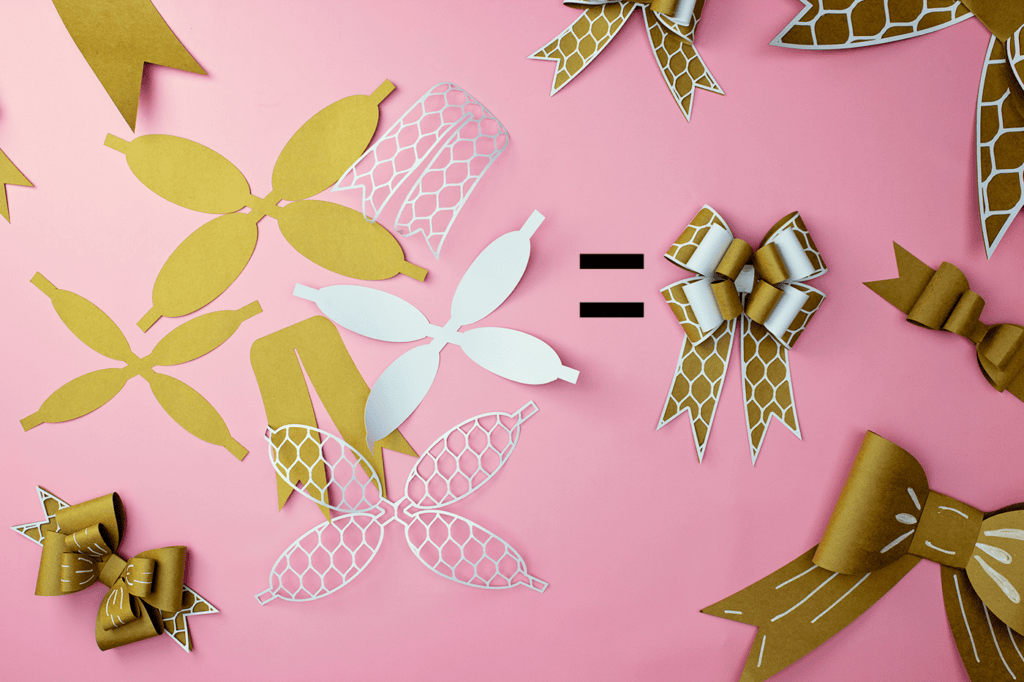
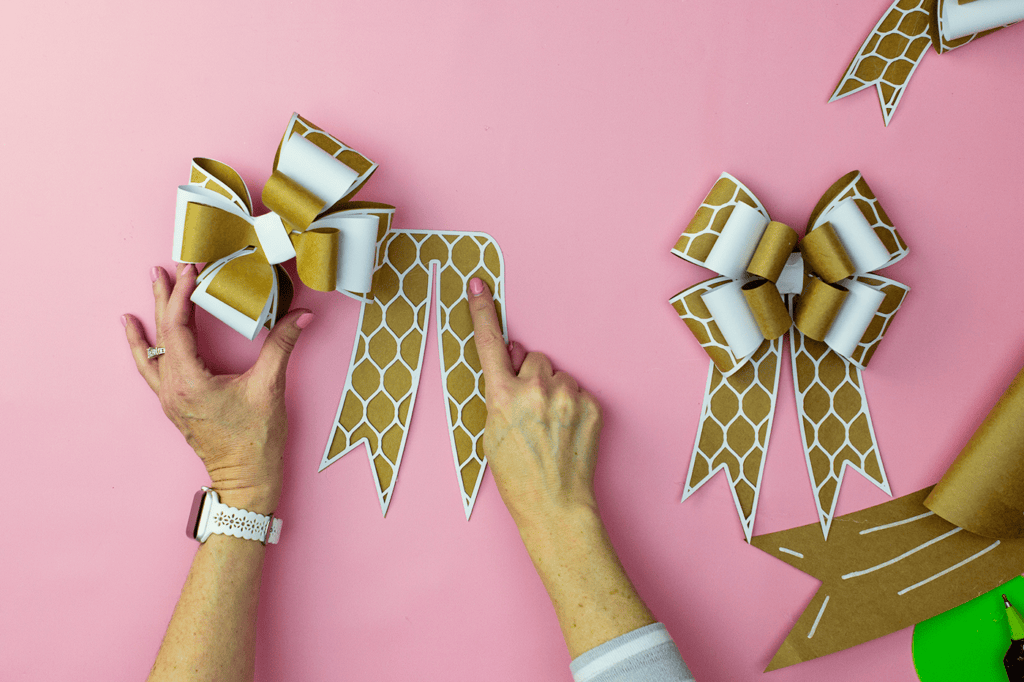
Step 2: Gather and Mix Your Elements
This is the step that makes these bows so fun to work with — everything is designed to mix and match. The ribbon bottom pieces work with multiple different bow tops. You can layer two bow pieces for more dimension or use just one for a cleaner silhouette. There’s also an optional white overlay piece that adds a subtle contrast detail; it’s completely up to you whether you use it or skip it for a simpler look.
I recommend laying out all your cut pieces and playing with the combinations before you glue anything. Try the double bow top with the curved ribbon tail. Try the single bow with the straight tail. Hold the overlay over the bow and see if you like it. This mixing-and-matching phase takes maybe two minutes but it makes a real difference — you end up with a bow that feels designed, not just assembled.
Step 3: Assemble the Layers
This is where the bow comes to life, and it happens faster than you’d expect. You’ll fold the tabs on each bow piece toward the center and glue them in place to create that classic gathered bow shape, then stack and glue the layers on top of each other, working from the bottom layer up. Finally, you’ll wrap the center piece around the middle of the bow — that’s the piece that gives the bow its finished, polished look — and glue it to the back.
The ribbon piece attaches last, and once it’s centered and glued on, you have a complete, beautiful bow. Hot glue is perfect for this project because it holds quickly and firmly, which means you’re not sitting there holding pieces together waiting for them to dry. The whole assembly process for a single bow once you’ve got the hang of it is just a few minutes. Once you’ve made one, you’ll want to make ten.
Step 4: Add the Hand-Drawn Details (Ginger Bow Style)
This is my favorite part of the whole project, and it’s what makes the Ginger Bow style so special. Before you assemble anything, while all the pieces are still completely flat, you draw your own designs right on the paper. Little stars, dots, swirls, florals, stripes — whatever your hand wants to make. The key word here is flat: drawing on the pieces before assembly is so much easier than trying to add details afterward, and the results look so much more intentional.
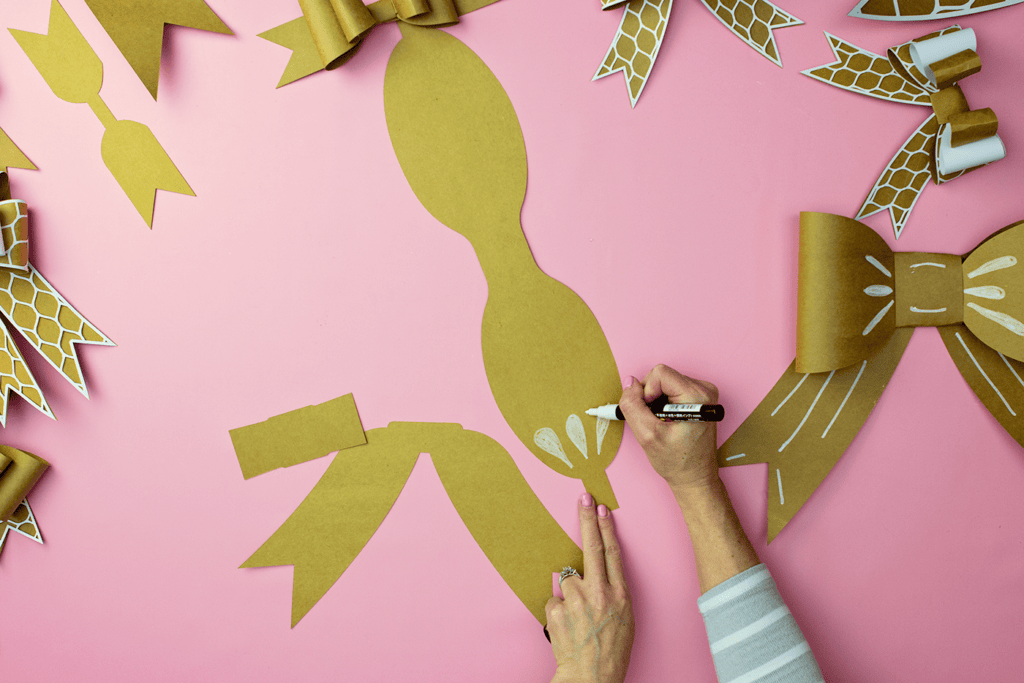
Posca markers are wonderful for this because they’re opaque and come in beautiful colors that show up well on all kinds of paper. A Sharpie works great too, especially on lighter cardstock. There are no rules about what you draw — the whole point is that your bow ends up looking genuinely handmade and unique. Once your designs are done and the ink is dry, you assemble the bow exactly like the standard style. The finished Ginger Bow looks like something you’d find in a boutique, and the fact that you drew it yourself makes it even better to give.
Ideas for Using Your Bows
The obvious use is gift wrapping, and these bows are absolutely perfect for that — but don’t stop there. A cluster of bows in a glass bowl or vase makes a charming seasonal display. A large bow pinned to a wreath adds dimension and color. Bows attached to gift bags instantly elevate something you grabbed at the dollar store. They work on holiday packages, birthday gifts, teacher appreciation presents, hostess gifts, and really any time you want to give something that looks like you really thought about it.
Because the files include so many mix-and-match options, you can cut a whole collection in a single sitting and use them across different occasions. Make a batch in soft pinks and creams for Valentine’s Day, then a batch in fall tones for Thanksgiving, then a set in deep reds and greens for Christmas. The same SVG files, completely different looks.

Ready to Cut Yours?
The Ginger Bows SVG files — all the bow styles, ribbon options, overlay pieces, and everything you need to mix and match — are inside the Maker’s Studio. Come make something pretty with me.
If you’ve been thinking about joining the Studio, this is such a fun project to start with — especially if you’re heading into a gifting season and want something that makes your wrapping look genuinely special. Inside you’ll find the Ginger Bows SVG files plus a whole library of other exclusive designs I’ve created just for members. I’d love to see what combinations you come up with. Come join me.
see More patterns you may enjoy!
- Easy Fleece Robe Pattern
- Quilted Coat Sewing Pattern
- How to Sew Easter Bunny Dolls
- Heart Potholder Sewing Tutorial
- Lantern Village SVG Collection
- Pocket Apron Sewing Pattern
- Family Pajama Pants Pattern
- Child T-Shirt Sewing Pattern
- Kooky Witch Skirt – Halloween Sewing Pattern
- Easy Woven Blouse Pattern for Women