
Quilted Coat Sewing Pattern
This content contains affiliate links or sponsored elements, read our Disclosure Policy.
I have this thing where I fall in love with cozy blankets and then immediately start wondering if I can turn them into something wearable. I know I’m not alone in this — there’s something about the weight and warmth of a good quilt that just begs to be worn, not just slept under. That’s exactly the spirit behind this project. The Spring Quilt Coat has all the coziness of a blanket with the added satisfaction of transforming something you love into something entirely new. And if you have an old quilt or blanket that’s lived a good long life and deserves a second chapter? This is the pattern for it. The Quilted Coat pattern is exclusive to the Maker’s Studio, where I keep all my best sewing projects. If you’re already a member, you know right where to find it! If you’re not in yet, come join me — I’d love to have you.
The Finished Coat
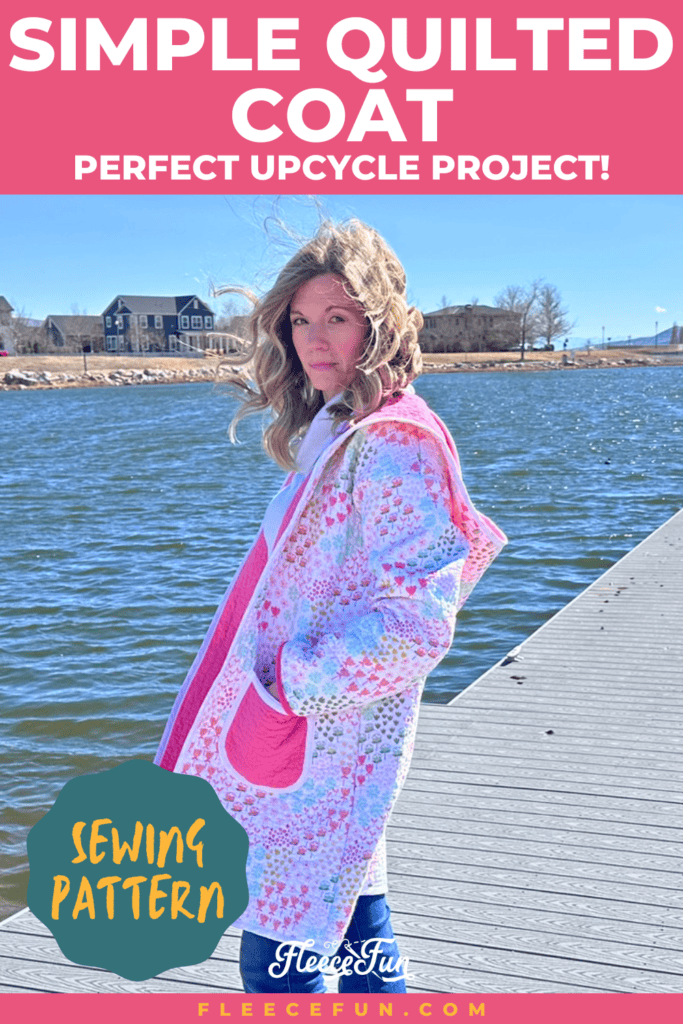
This coat is something special. It’s oversized and cozy — the kind of thing you throw on over pajamas in the morning and then somehow end up wearing for the rest of the day because it’s just that comfortable. But it’s also genuinely stylish. The quilted fabric gives it a texture and depth that plain woven fabric just can’t match, and the open front with a hood makes it feel modern and easy to wear. It’s not a buttoned-up, structured coat. It’s more like your favorite blanket decided to become outerwear, and honestly, that’s exactly what it is.
What I love most is how much personality the fabric choice brings to this coat. A soft pastel quilt becomes something romantic and feminine. A bold geometric print becomes a statement piece. An old family quilt becomes something genuinely emotional — a way to keep wearing something that mattered, even after the original has seen better days. This coat is cozy and wearable for spring, but it’s warm enough to carry you well into fall depending on your fabric weight.
What You’ll Need
- Quilted fabric — either off the bolt or from an old quilt or blanket (this coat requires a good amount of yardage, so plan accordingly)
- Sharp fabric scissors, rotary blade — or electric shears, which are genuinely helpful here since the quilted fabric is thick
- Fabric marking tools — chalk markers or a fabric pen
- Bias binding — plan on about 6 packs, as the binding is used to finish all the seams and edges throughout the coat
- Quilting needle
- Walking foot (optional, but helpful for sewing through thick layers)
- Pins and standard sewing essentials
- The Quilted Coat pattern from the Maker’s Studio
A note on yardage: This coat is cozy and oversized, which is part of what makes it wonderful — but it does require a significant amount of fabric. If you’re working with directional fabric or a patterned quilt, you’ll want extra to make sure everything lines up the way you want it. I strongly recommend laying all your pattern pieces out on the fabric before you cut a single thing, just to confirm everything fits and is oriented the right way. If you’re upcycling a blanket, a double or queen size comforter should give you what you need.

How This Coat Comes Together
Step 1: Cut Your Pieces
Before you do anything else, spend some real time with your fabric and your pattern pieces. The cutting step for this coat is more involved than a typical sewing project because of the fabric thickness, the size of the pieces, and the importance of getting the direction and placement right. You’ll be cutting the back, two fronts, hood pieces, sleeves, and pockets — several large pieces that each need their own careful attention.
If you’re working with an old quilt or patterned fabric, this is where you make decisions about what ends up where on the finished coat. A beautiful border on a quilt might work perfectly along the hem. A central motif might look stunning on the back panel. Take your time here — cutting thoughtfully sets you up for a coat you’ll love.
Step 2: Add the Pockets
The pockets come together early in the process, and they add such a practical, satisfying detail to the finished coat. You’ll finish the edges of each pocket with bias binding, which keeps everything looking clean and intentional, then stitch the pockets to the front panels of the coat. There’s a technique in the pattern for marking the exact pocket placement on the front so both sides are symmetrical — this is one of those steps where precision pays off.

Step 3: Sew the Shoulders
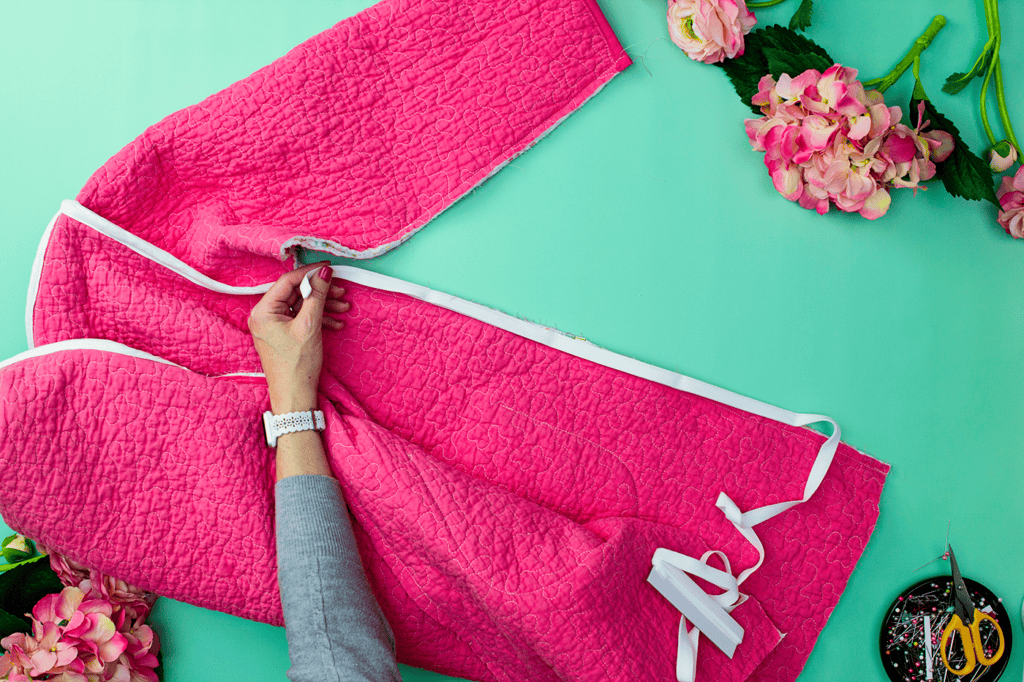
With the pockets done, you’ll join the front coat panels to the back at the shoulders. Sewing through quilted fabric requires a slightly longer stitch than you’d use for lighter materials — this helps the machine move through all those layers smoothly. Every seam in this coat gets finished with bias binding as you go, which is what gives the inside of the coat that clean, polished look. It does add time to the process, but the result is worth it — the finished coat looks beautiful both inside and out.
Step 4: Attach the Sleeves
The sleeves each get their own bias-bound cuffs before they’re set into the armholes, which means by the time you’re attaching them, the sleeve hems are already finished and looking lovely. Setting sleeves is one of those steps that sounds more intimidating than it actually is, especially with a pattern drafted to fit well. You’ll pin carefully, sew, and then finish the armhole seams with another round of binding. The repetition of sewing and binding starts to feel satisfying at this point — you can really see the coat coming together.
Step 5: Sew the Side Seams
This is the step where the coat becomes a coat. You’ll sew the side seams from the sleeve all the way down to the bottom hem in one continuous line, then finish everything with binding. There’s a small snip needed at the underarm curve to help everything lay flat and move comfortably — a little detail that makes a real difference in the final wearability of the coat. Once the side seams are done, you’ll set the main coat body aside and turn your attention to the hood.
Step 6: Make and Attach the Hood
The hood is made separately and then sewn onto the neckline of the coat, which gives you a chance to construct and check it before committing to the final attachment. You’ll sew the curved center hood piece to the two side hood pieces, finish those seams with binding, and then pin the completed hood to the coat neckline before sewing it on. Once it’s attached, the neckline seam gets its own binding treatment to finish it off cleanly. Seeing the hood go on is a genuinely exciting moment — the whole shape of the coat suddenly clicks into place.
Step 7: Finish All the Edges
The final step is finishing every remaining raw edge — the hood opening, the two front edges of the coat, and the bottom hem — all with bias binding. It takes a bit of time to work all the way around such a large garment, but this is also the most meditative part of the whole project. You’re just binding, trimming threads, and watching the coat go from almost-finished to completely polished. When you turn it right side out for the last time and see the finished coat, it’s a genuinely wonderful feeling.
For the price of a single pattern you can have access to 100’s of tutorials!
Click below to learn all about the maker’s studio!
One last thing from the pattern: the pockets in the center of the hood are a fun optional detail — I loved adding them. But the pattern gives you the flexibility to mix, match, and make this coat as classic or as quirky as you want. That’s part of the fun.
Style It Your Way
This coat is endlessly versatile depending on the fabric you choose. A soft, tone-on-tone quilted fabric makes a coat that reads as sophisticated outerwear. A vintage patchwork quilt turned coat becomes a conversation piece and a family heirloom at the same time. I’ve seen this pattern made in everything from classic navy quilted cotton to bold floral prints, and every version has its own personality. It’s the kind of pattern that rewards experimentation — once you’ve made one, you’ll already be planning the next.

Ready to Make Yours?
The full Quilted Coat pattern — with all the pieces, sizing for women’s sizes 2–20, and complete step-by-step instructions — is inside the Maker’s Studio. Come sew with me.
If you’ve been sitting on an old quilt that deserves a second life, or you’ve been eyeing beautiful quilted fabric at the store and wondering what to do with it, this is your sign. The Quilted Coat pattern is inside the Studio along with a whole library of other exclusive designs I’ve made just for members — patterns you won’t find anywhere else on Fleece Fun. I’d love to see what fabric you choose for yours. Come join me.
see More patterns you may enjoy!
- Easy Fleece Robe Pattern
- Paper Bows with Cricut
- How to Sew Easter Bunny Dolls
- Heart Potholder Sewing Tutorial
- Lantern Village SVG Collection
- Pocket Apron Sewing Pattern
- Family Pajama Pants Pattern
- Child T-Shirt Sewing Pattern
- Kooky Witch Skirt – Halloween Sewing Pattern
- Easy Woven Blouse Pattern for Women