
Upcycled Sweater Skirt Tutorial
This content contains affiliate links or sponsored elements, read our Disclosure Policy.


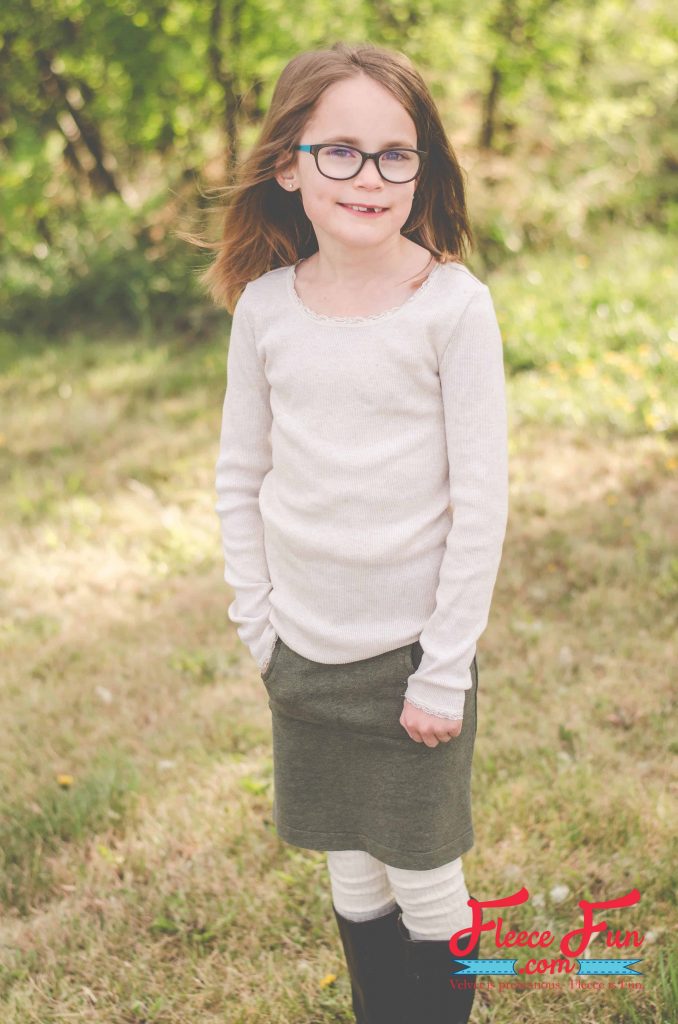
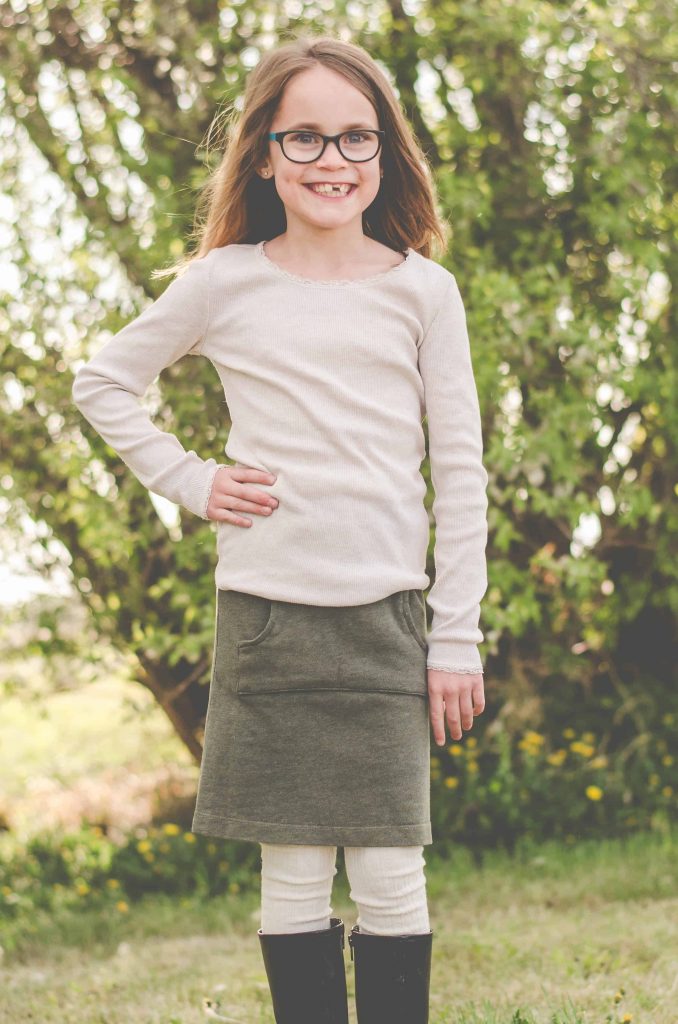
This cute upcycled sweater skirt tutorial is perfect for fall and your pocket book! Make this cute back to school skirt with ease.
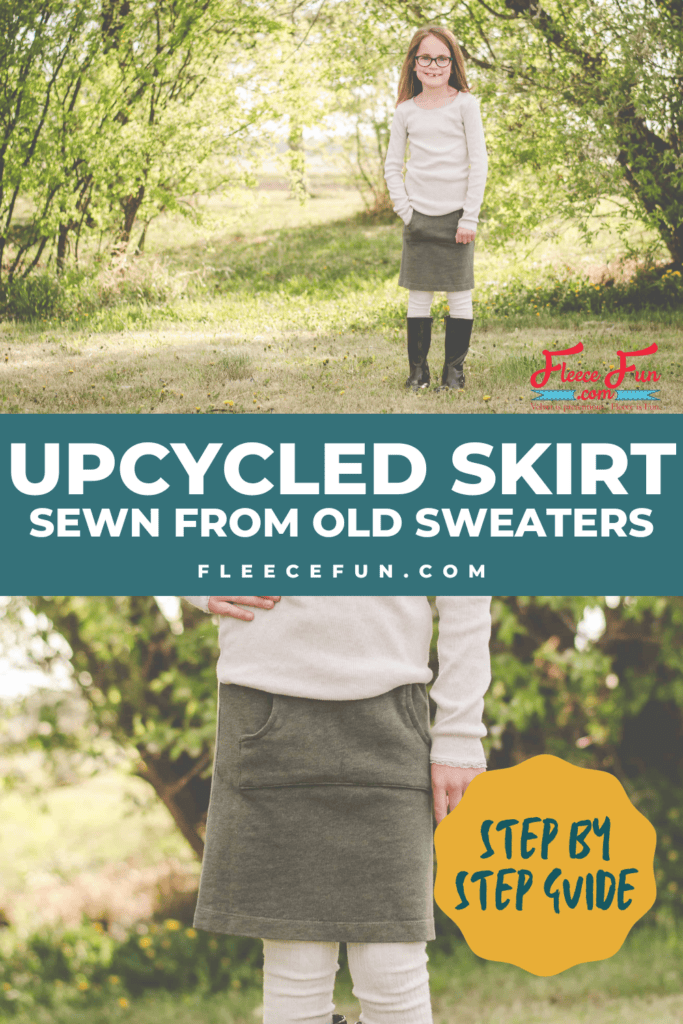
While the biggest reason I sew is to be creative and come up with one of a kind, well fitting clothes, it also can from time to time save me money. This upcycled sweater skirt is a perfect example. It is sewn from an old sweater and can be completed in about an hour.
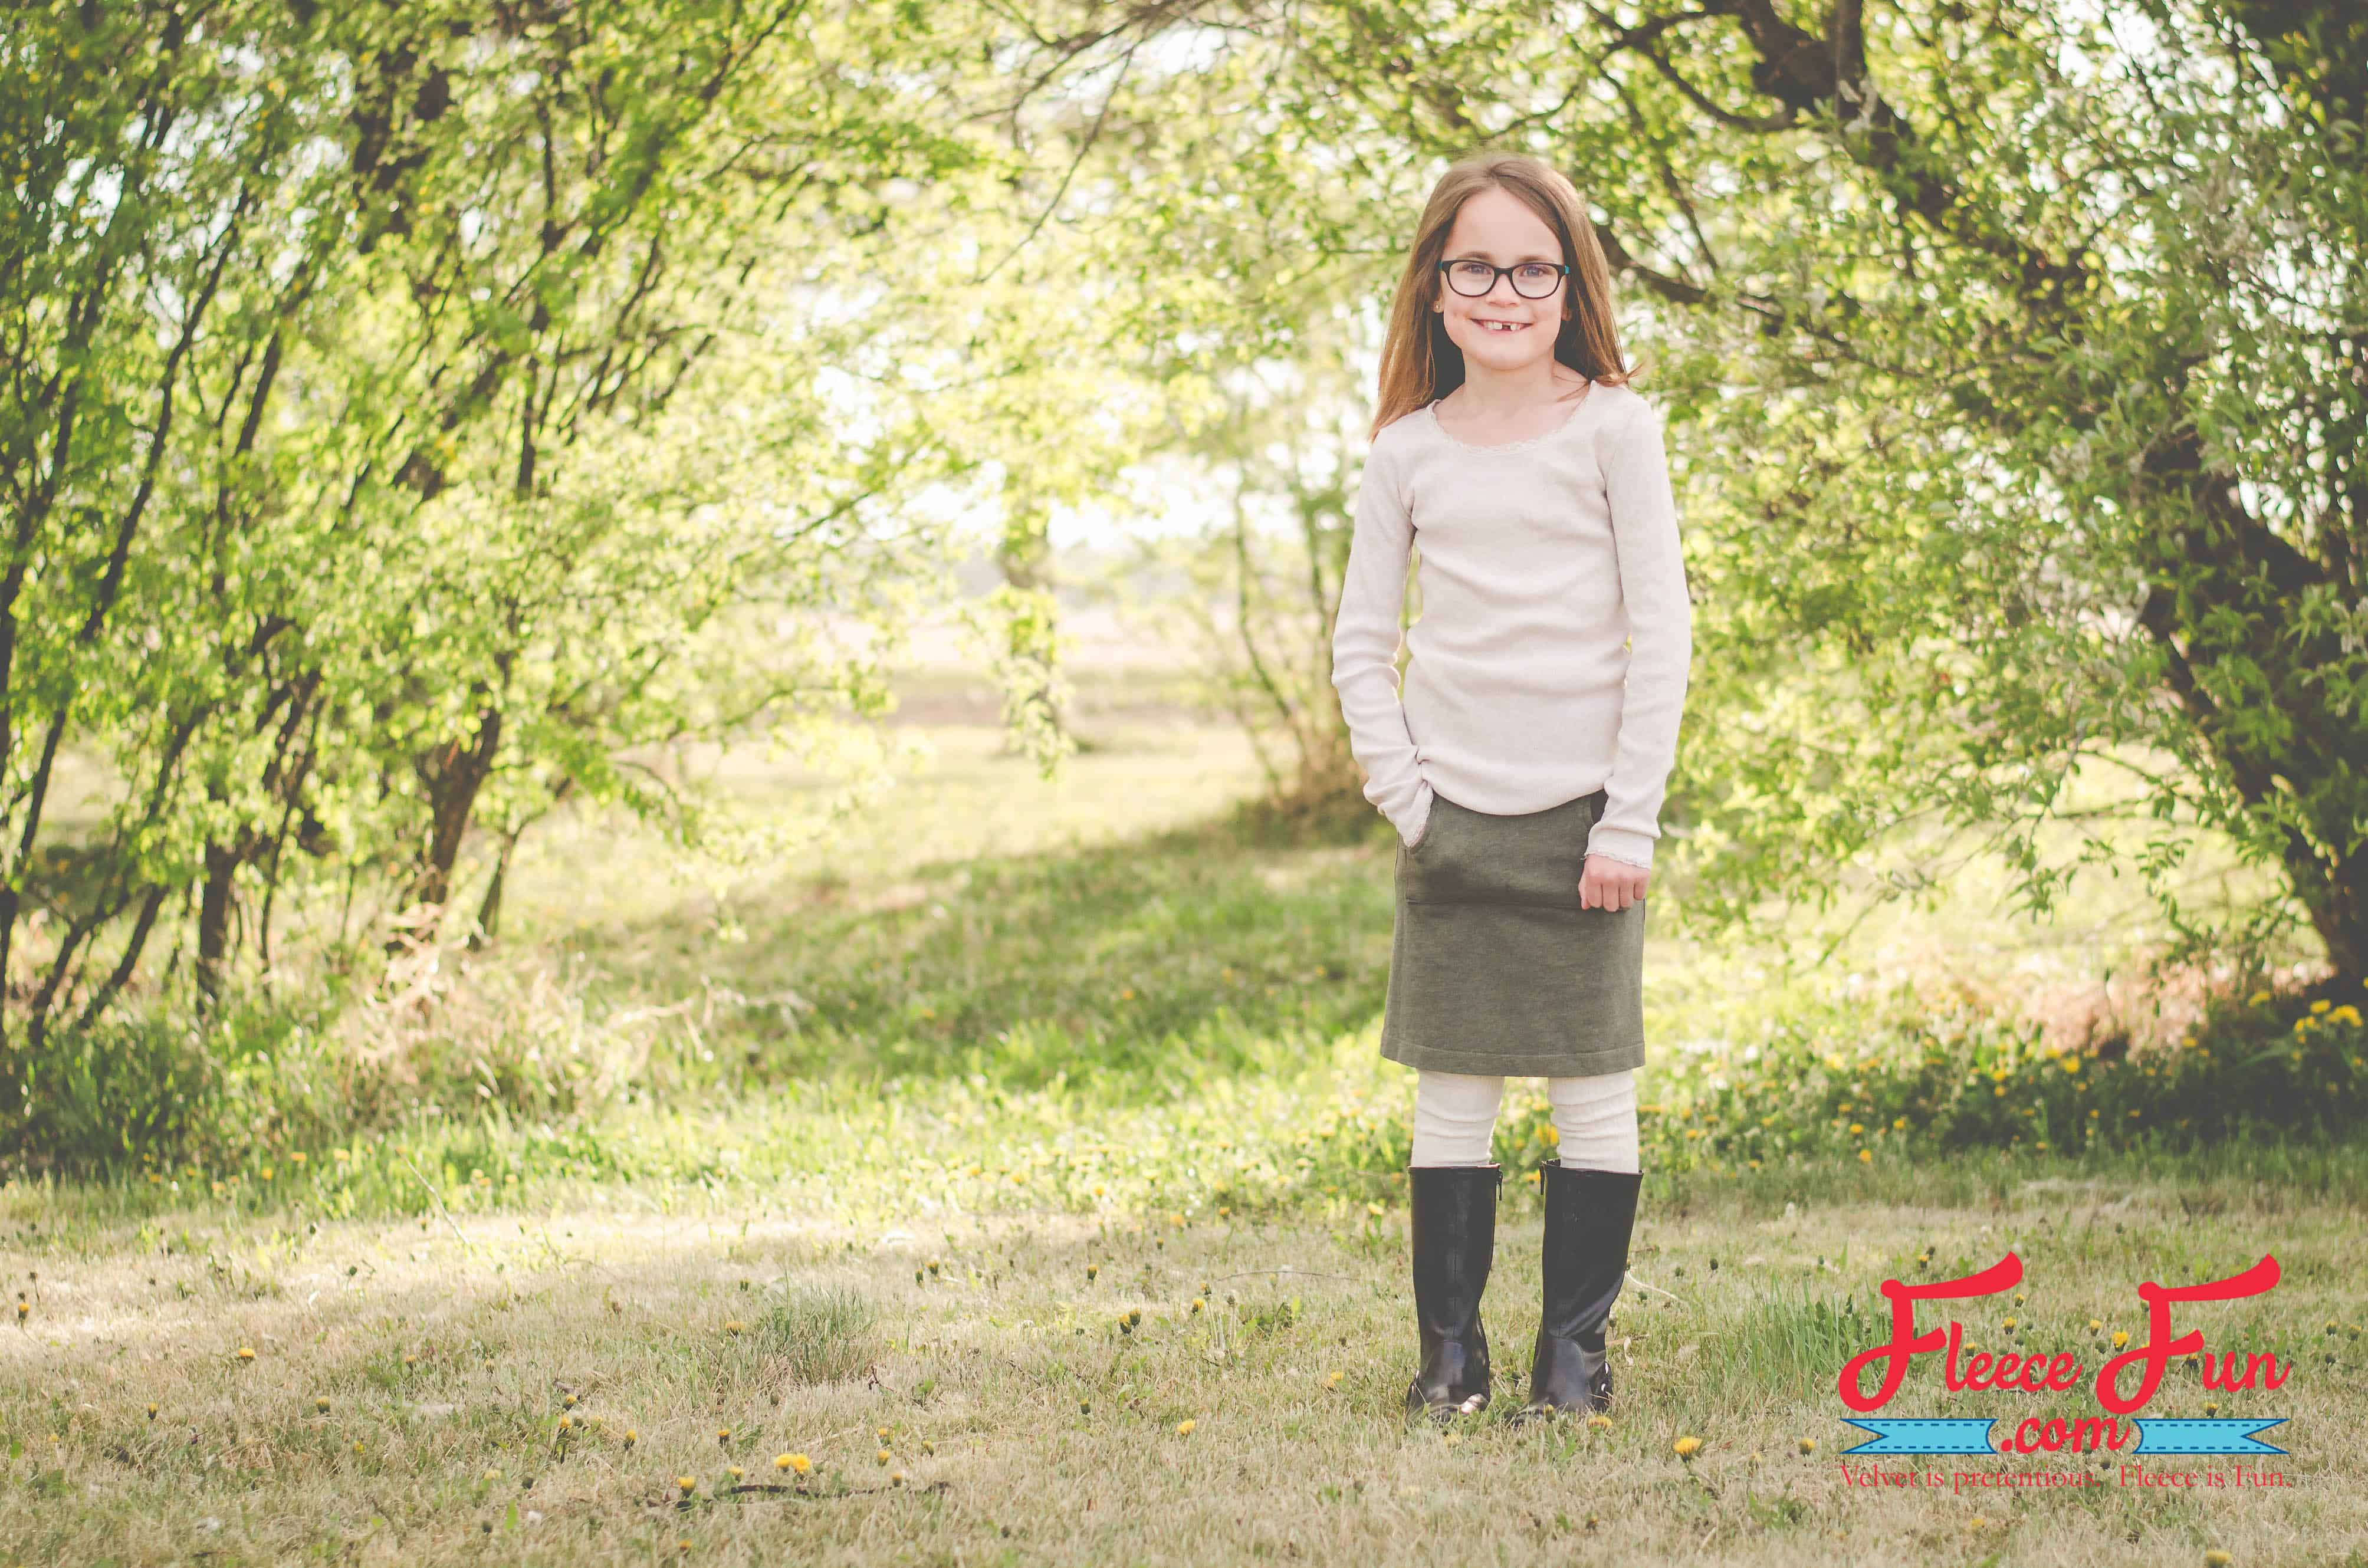
I used one of my husband’s old fitted wool/poly blend sweaters for this project. It had lost some of its shape and there was a small hole under the arm. Instead of tossing it out, I created a comfortable and trendy skirt for my daughter for fall.
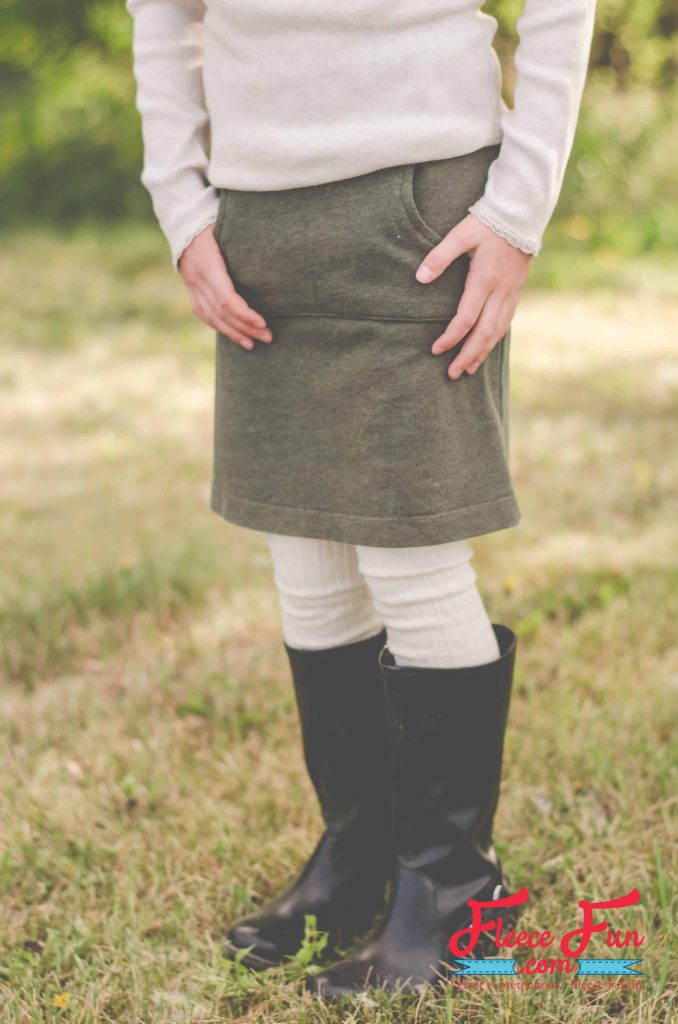
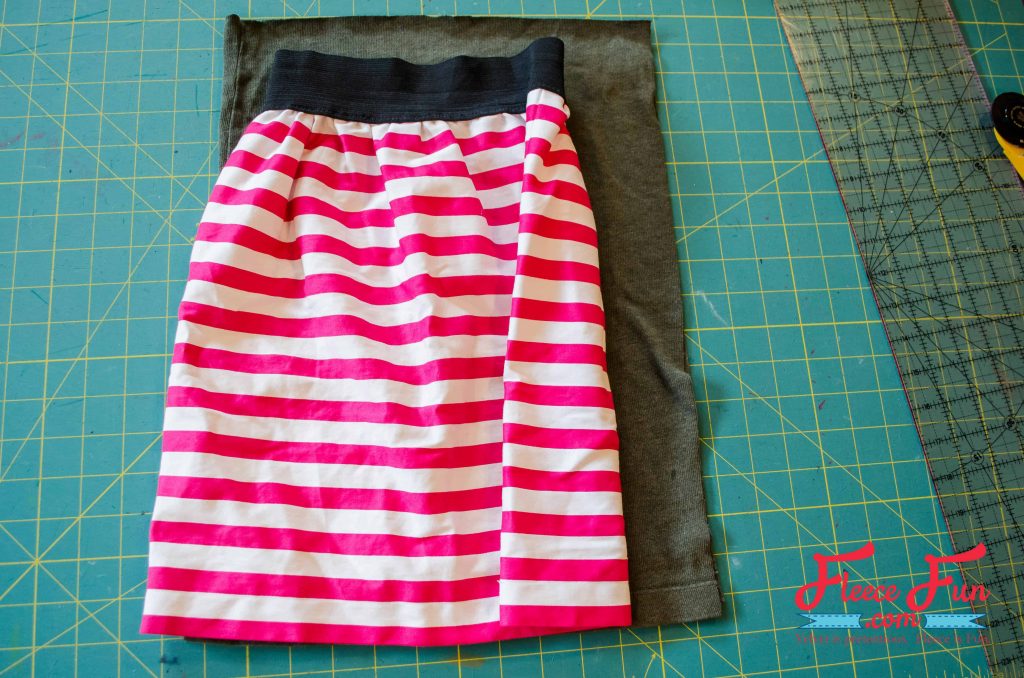
It works perfectly styled up with some thick cable tights and boots, and my daughter loves the front kangaroo style pocket.
YOU WILL NEED:
When choosing a sweater- choose one that doesn’t ravel apart when cut (tighter weave). The width of the sweater has to be wider than the hips of your model, plus 1″.
- Old sweater
- 3/4″ non roll elastic
- Sewing Essentials (pins, scissors, etc.)
- Get the Free Pattern here.
Upcycled Sweater step-by-step guide:
Step 1 – Cut Out Sweater Pieces
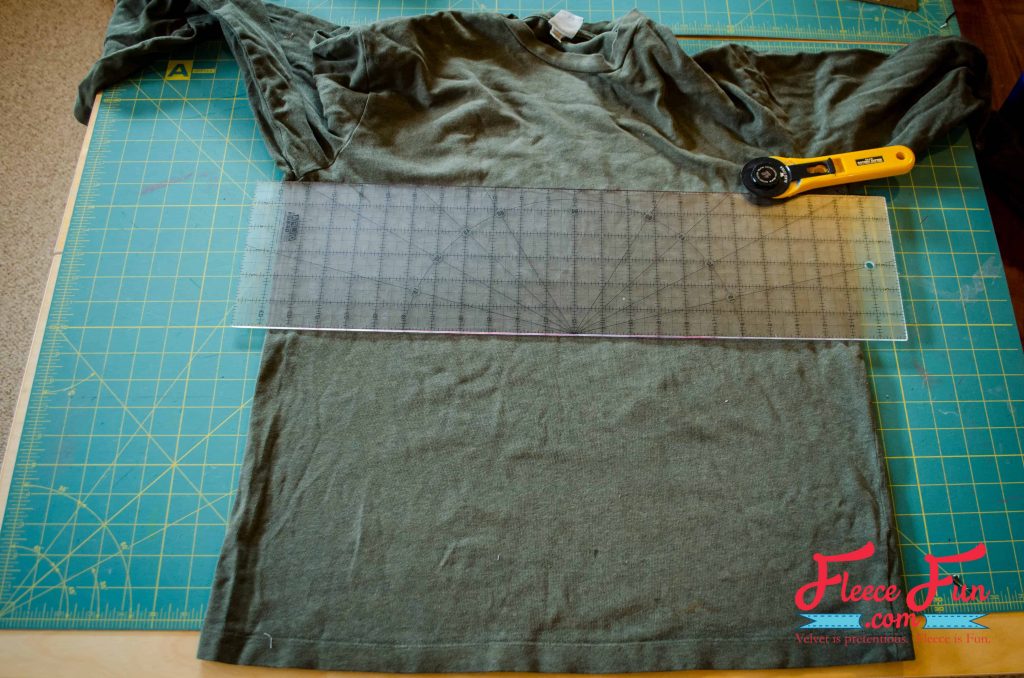
Cut the sweater right below the arms. Put the rest of the sweater aside for the pocket.
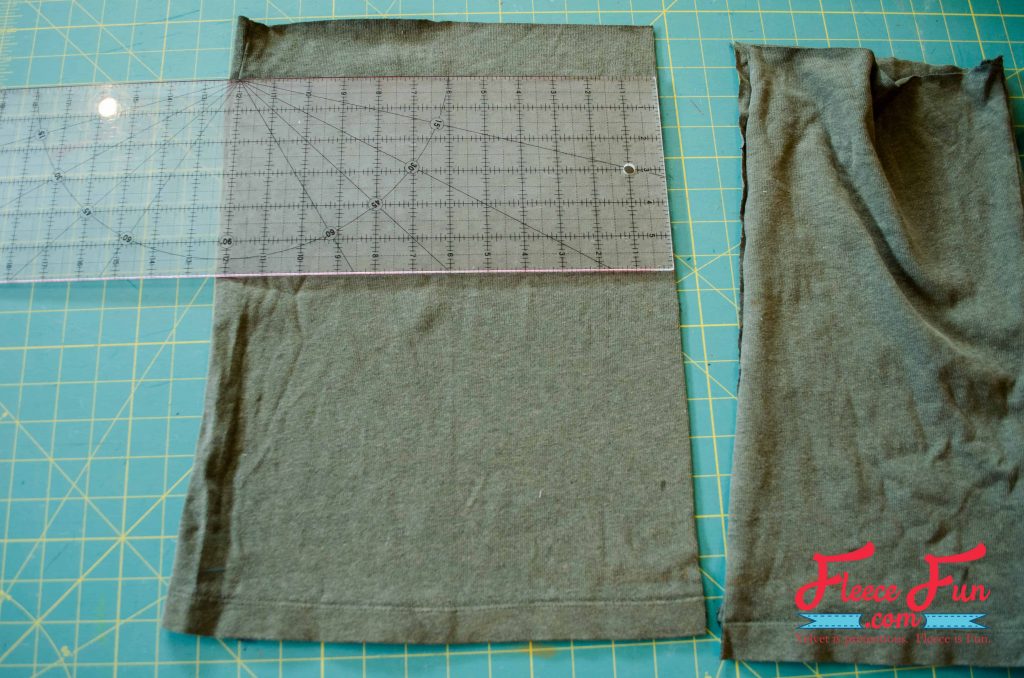
Keeping one side seam intact, cut the sweater half the width of your model’s hips, plus 1/2″ for seam allowance. My daughter’s hips measure 24″, so I cut the sweater 12.5″ wide.
To determine the height, measure the desired length plus 1″. My daughter wasn’t home, so I just compared it to a skirt I knew fit her well (free pattern for that one here!). Trim from the top of the sweater to leave the original hem intact. You now have your main skirt body cut out.
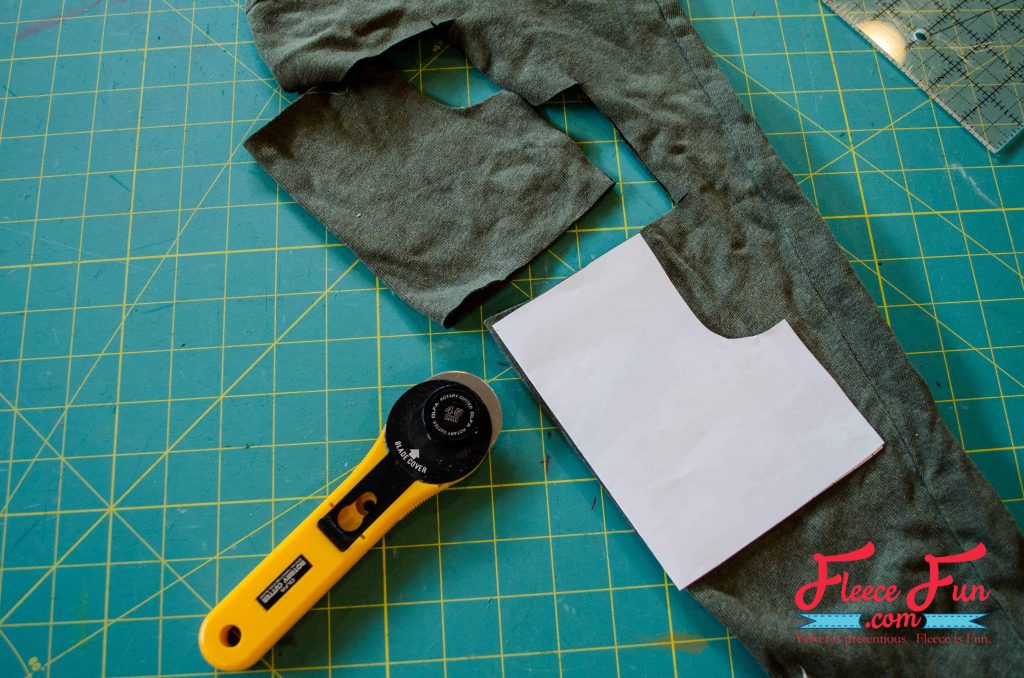
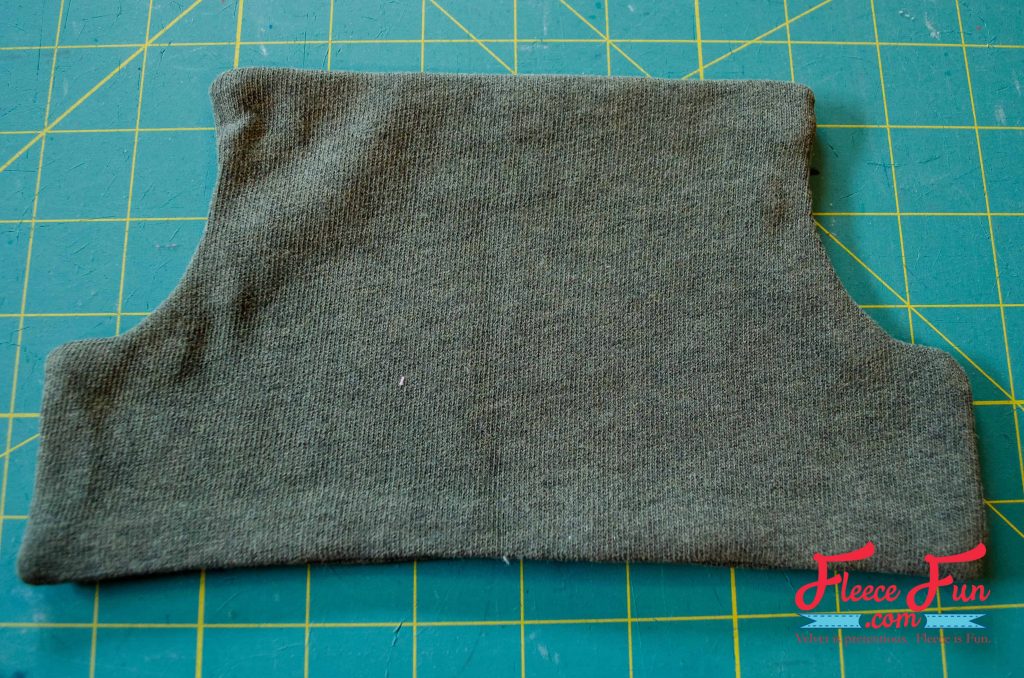
Cut out two pocket pieces on the fold from one of the sleeves. If your sweater is really thick, you can cut one, or both, of the pocket pieces from a thinner knit fabric to reduce bulk.
Step 2 – Sew the Skirt Pocket

With right sides together, sew the two pocket pieces together with a 1/2″ seam allowance, leaving a 2″ gap for turning along the bottom edge.
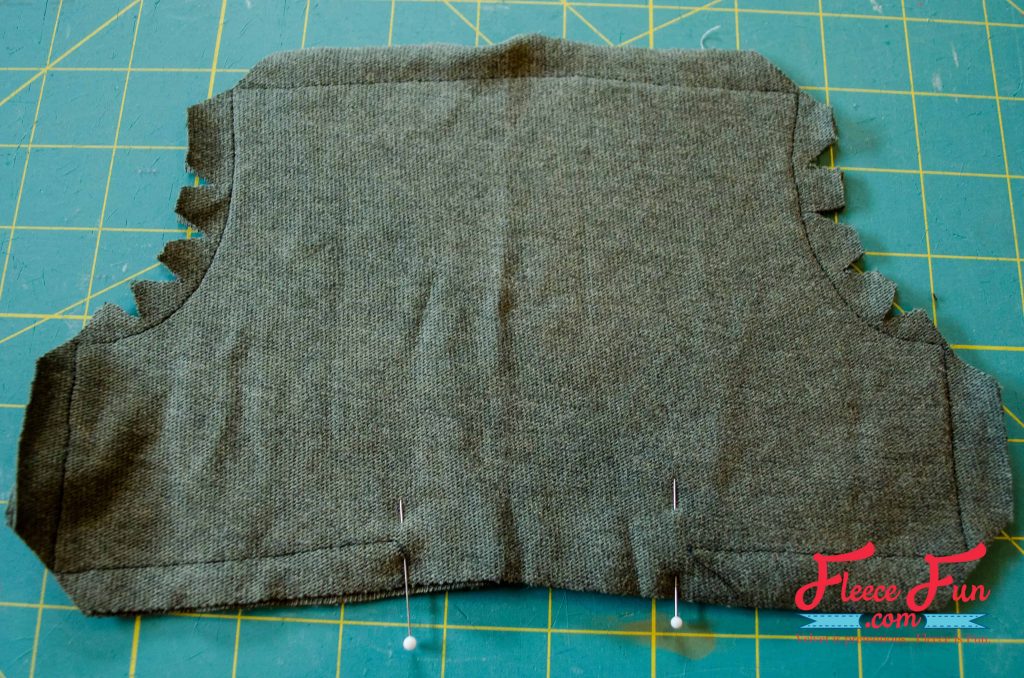
Clip the corners and notch the curved sections.
Turn pocket right side out and give it a good press.
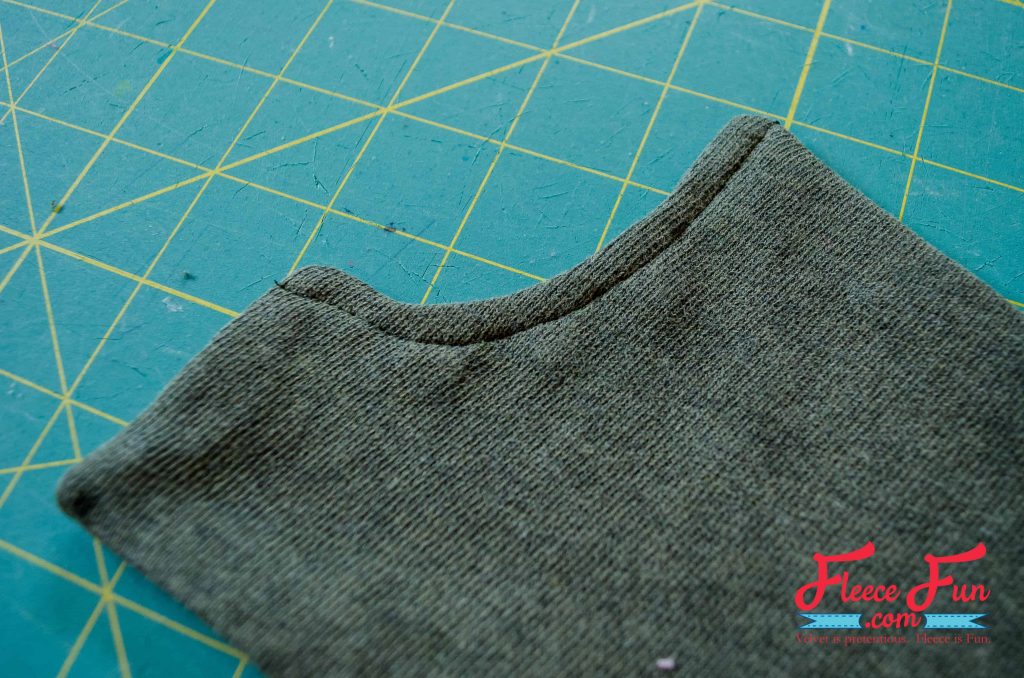
Optional: topstitch 1/4″ from the edge of the curved edge.
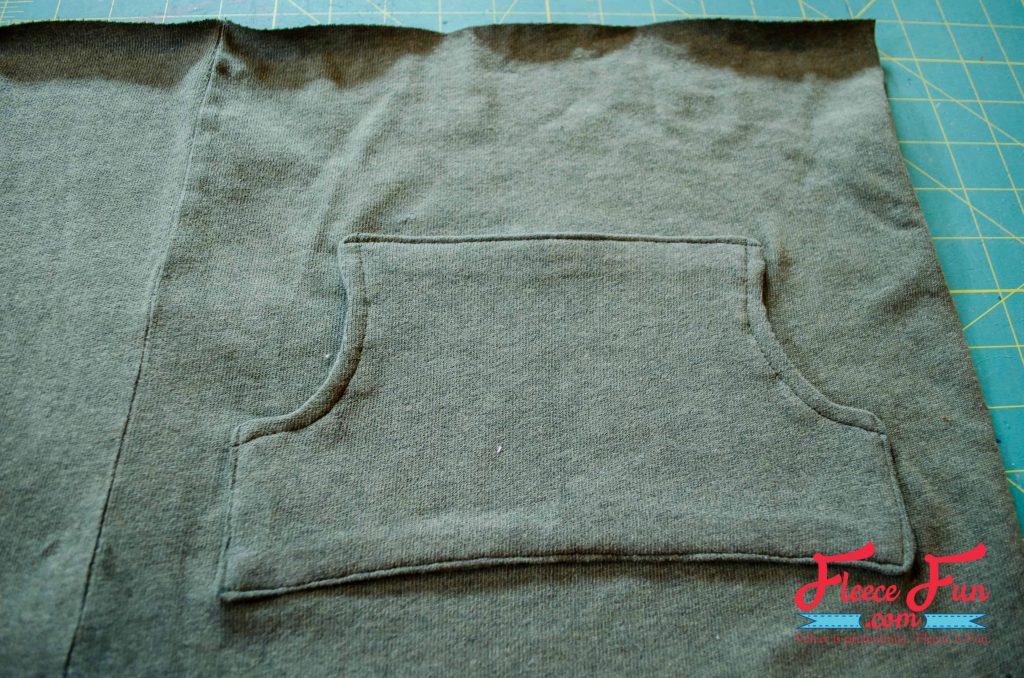
Step 3 – Attach the Pocket to the Skirt
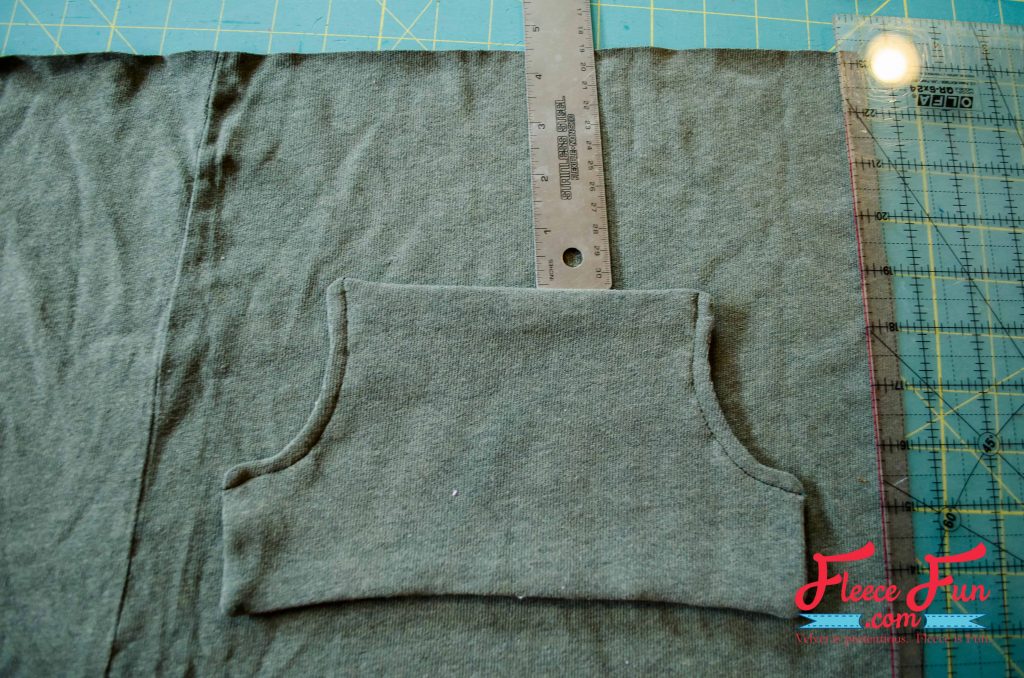
Open up the skirt body so that the right side faces you. Center pocket approximately 4.5″ from the top edge. Remember that 1/2″ on the raw side of the skirt will be used up as seam allowance, so subtract that part (covered by the clear ruler) when centering the pocket.
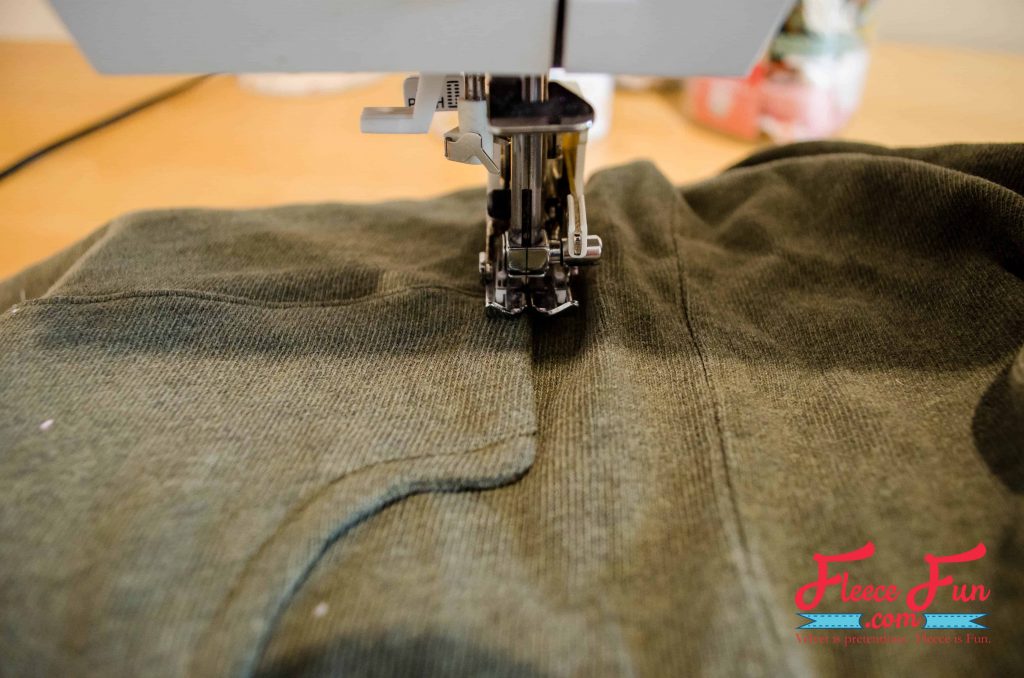
Topstitch pocket in place along all the straight edges.
Step 4 – Complete the Sweater Skirt
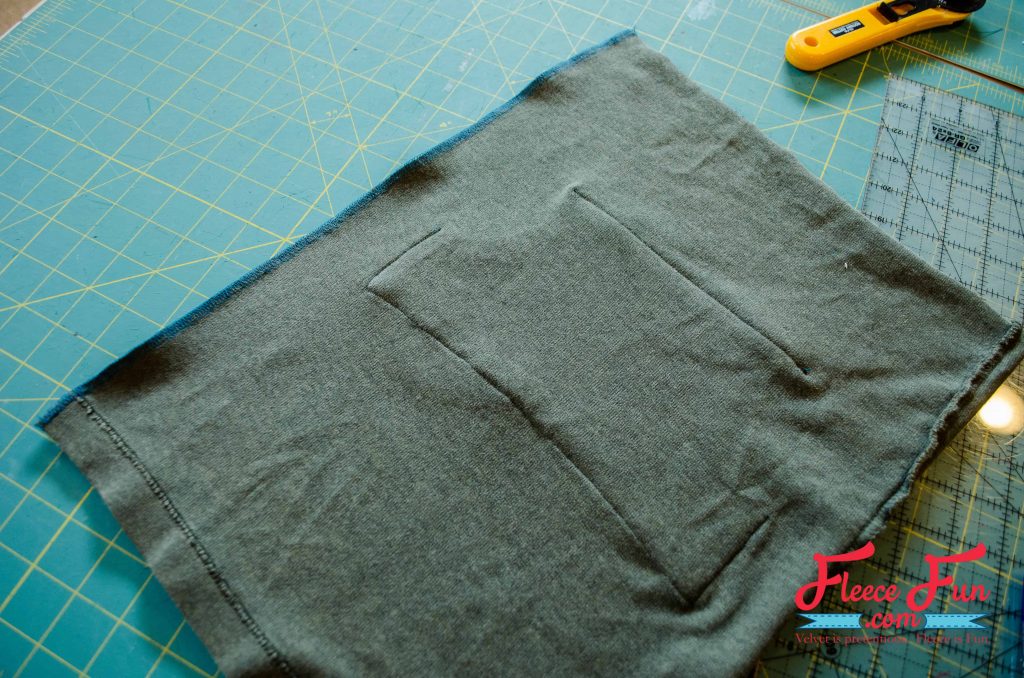
With right sides together, sew (or serge) the other side seam with a 1/2″ seam allowance.
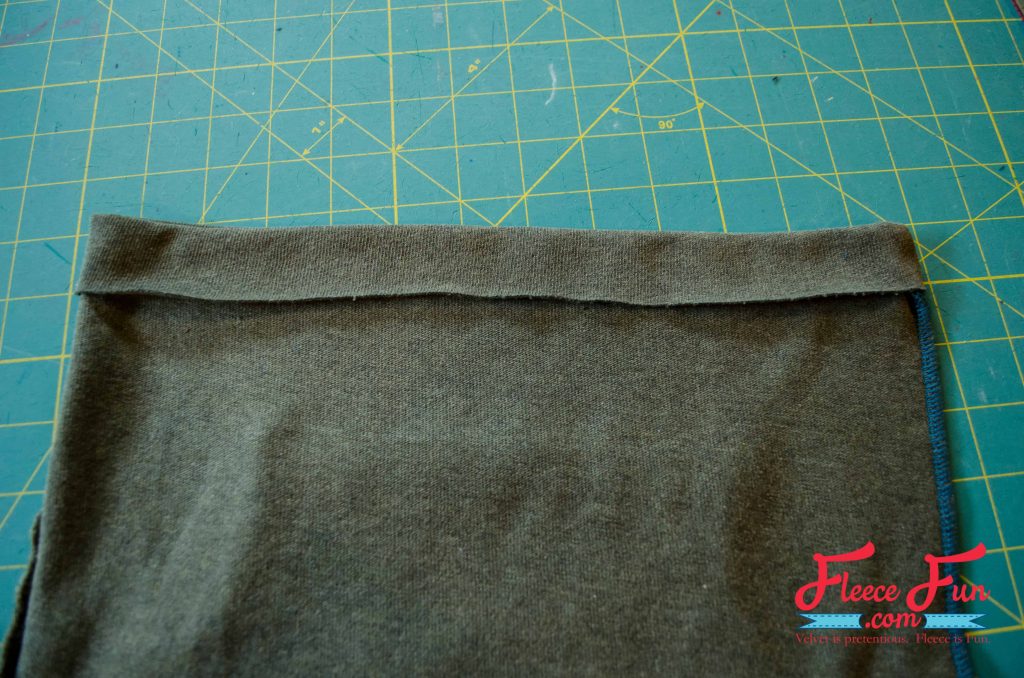
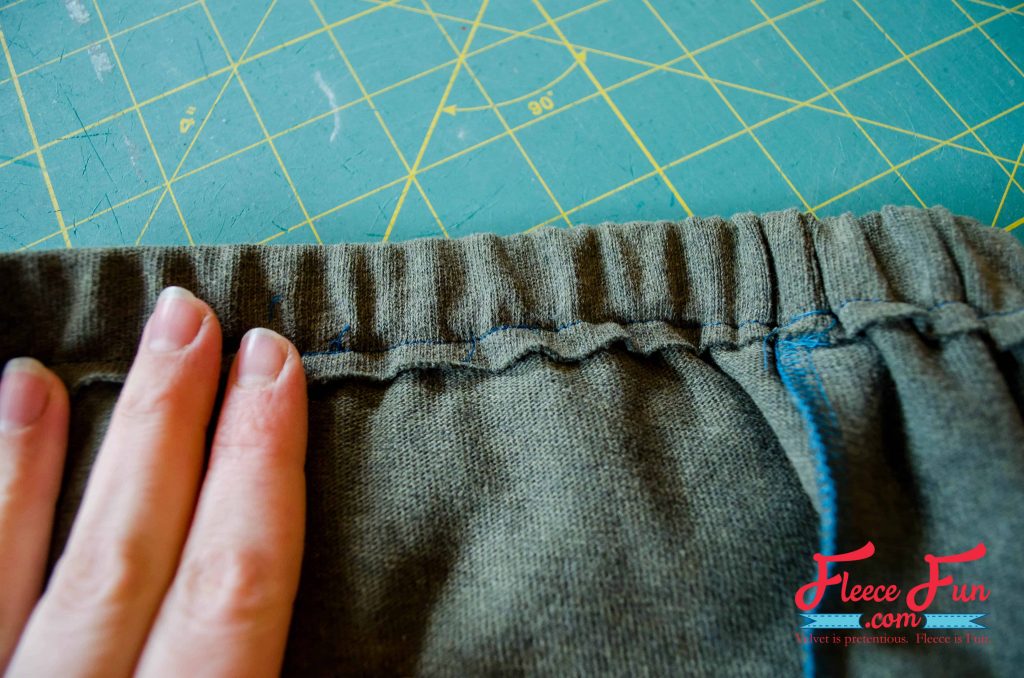
Fold over 1″ of the top edge to the wrong side and press to form an elastic casing. If you sweater frays, finish the raw edge with a serger or zigzag stitch.
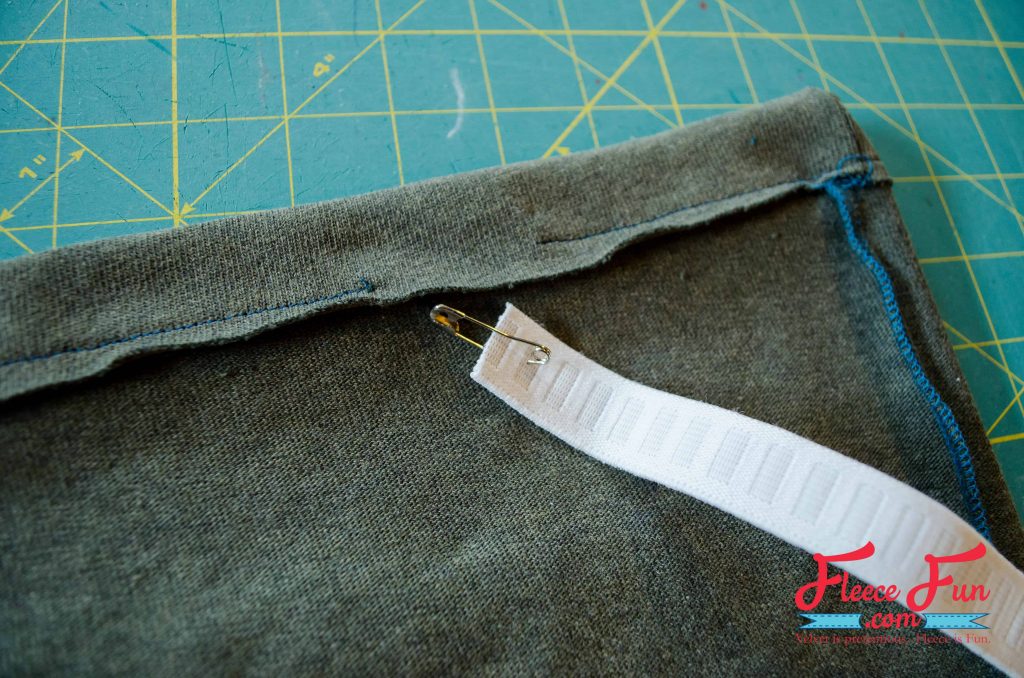
Stitch elastic casing 1/4″ from the raw edge. Keep a 2″ opening. Cut a piece of elastic the length of the waist of your model minus 1″. Insert the elastic into the casing with a safety pin.
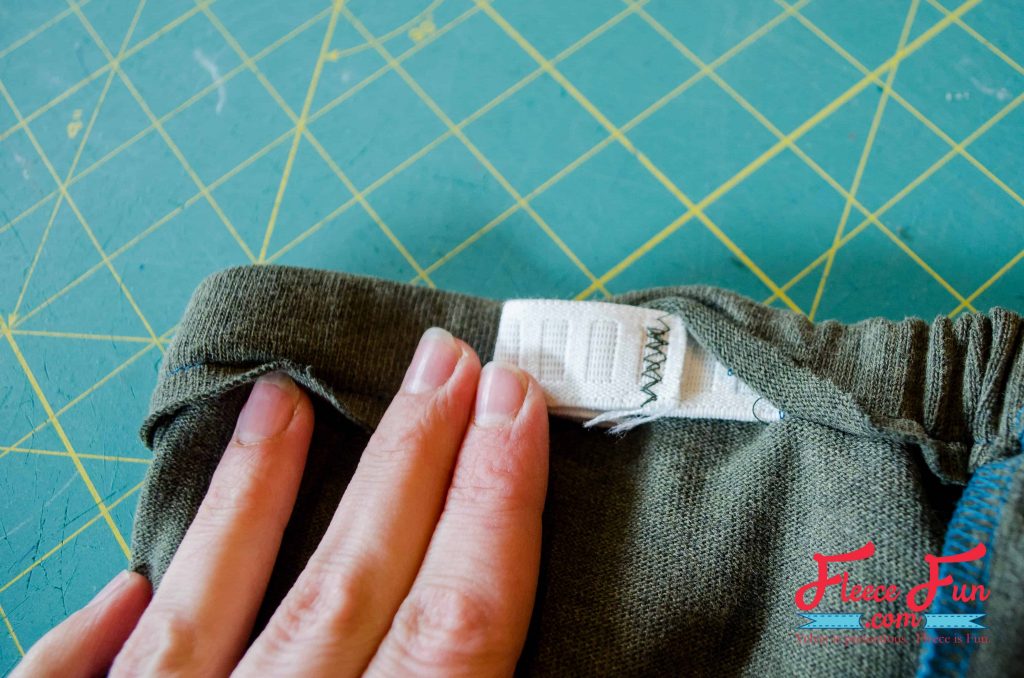
Overlap the two ends of the elastic by 1/2″ and zigzag together.
Sew casing opening shut, matching up with previous stitching lines.
Give it a good press and you are done!
Download the free upcycled skirt Pattern Below:
You can get a free copy of Adobe reader here. By downloading you are agreeing to pattern terms of use. Click the picture below to download the .pdf !


More Free Girls Patterns:
- The Simple Pencil Skirt
- The Circle Skirt (no math needed!)
- Midi Yoga Skirt (comfy and easy!)
- The Fleece Ruffle Skirt
- The Pleated Skirt
- The Fun and Frilly Skirt
- Apron for Teens and Tweens
- Child Apron Tutorial!
- How to Make a Flower Fascinator