Button Front Skirt for an 18 Inch Doll Tutorial (free pattern)
This content contains affiliate links or sponsored elements, read our Disclosure Policy.


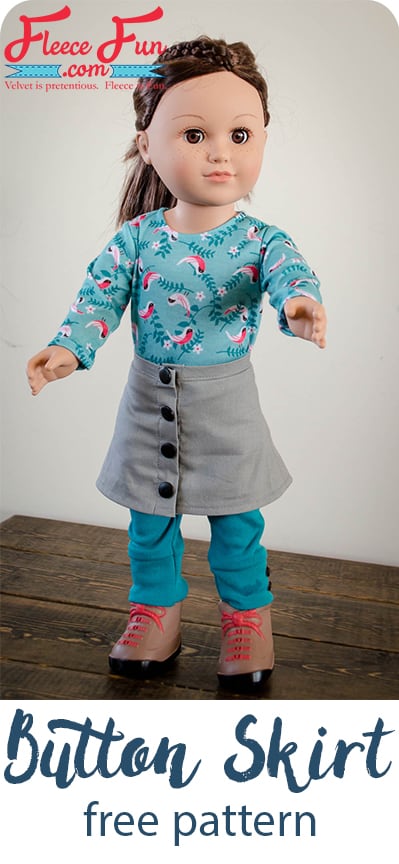
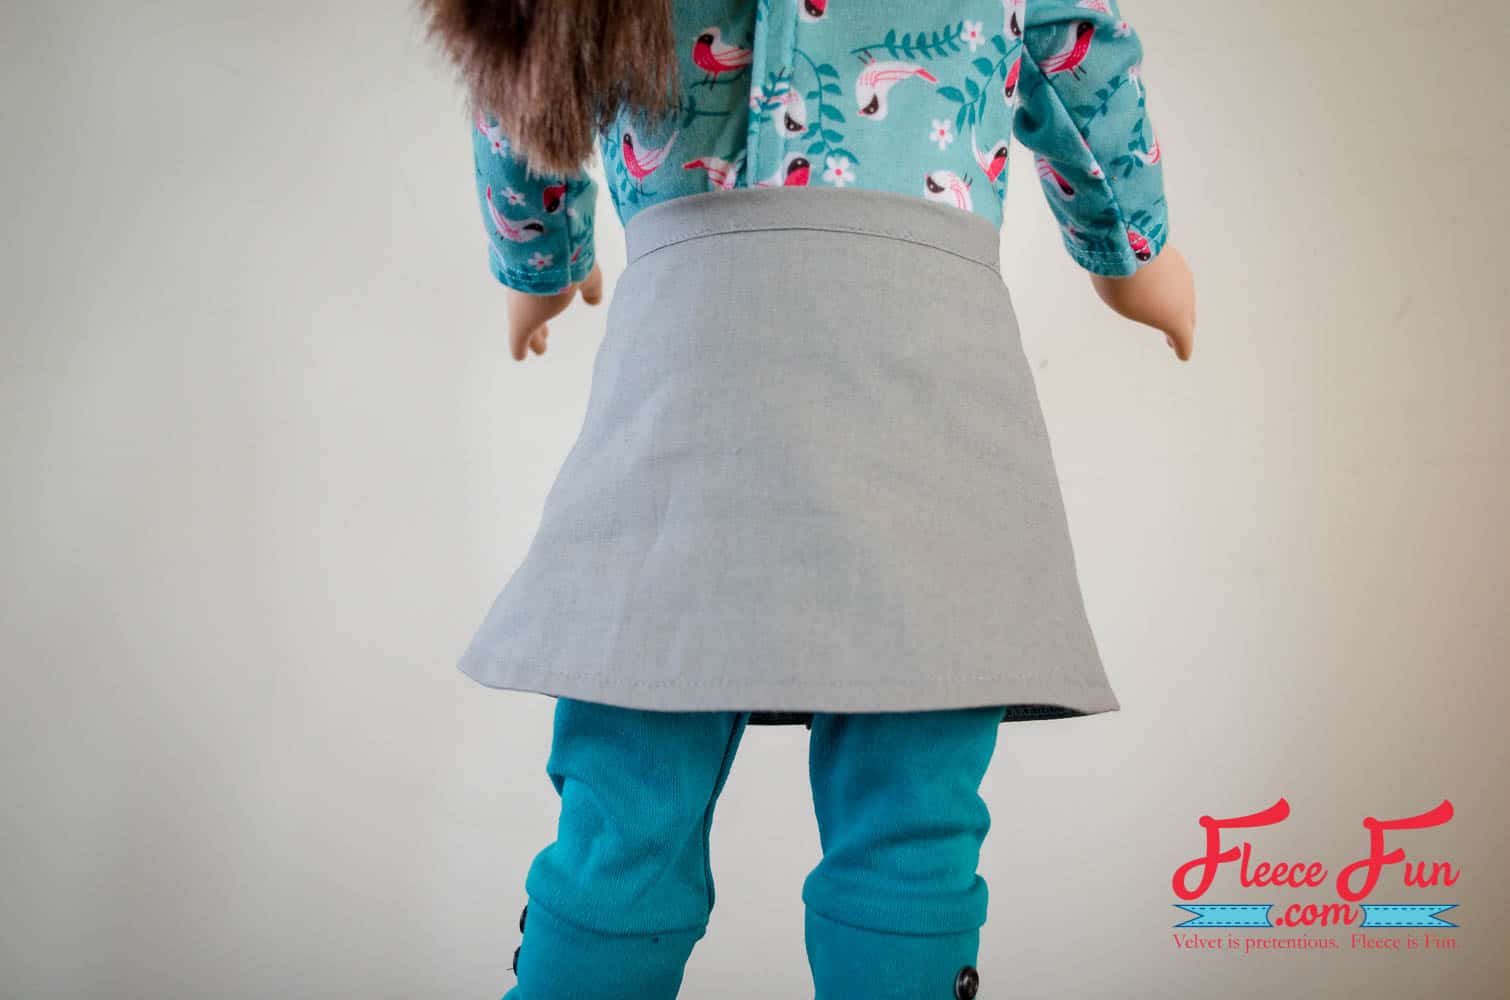
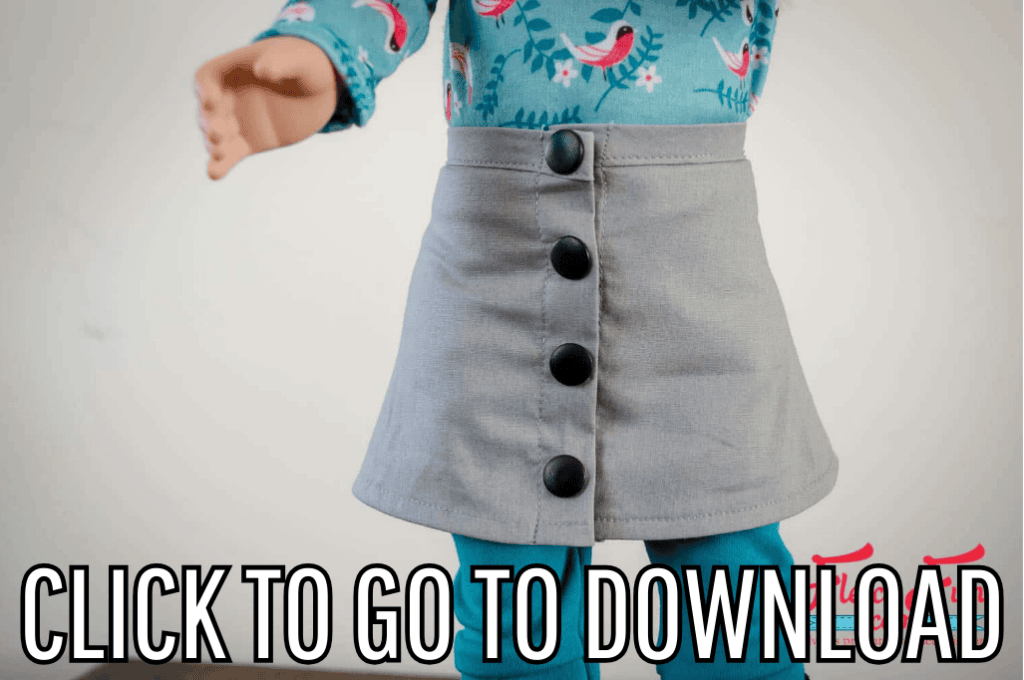
This button front skirt for an 18 inch doll tutorial is perfect for easy (and fashionable) dressing of dolly. Skirts that button up the front are one of the biggest trends for fall, and now your 18″ doll can have one too! This a-line skirt ends at the knee and includes a bias tape waistband and a front placket.

I chose to use snaps on my version of the Button Front Skirt so that little fingers can dress and undress their doll on their own, but you can easily swap them out for buttons and buttonholes.
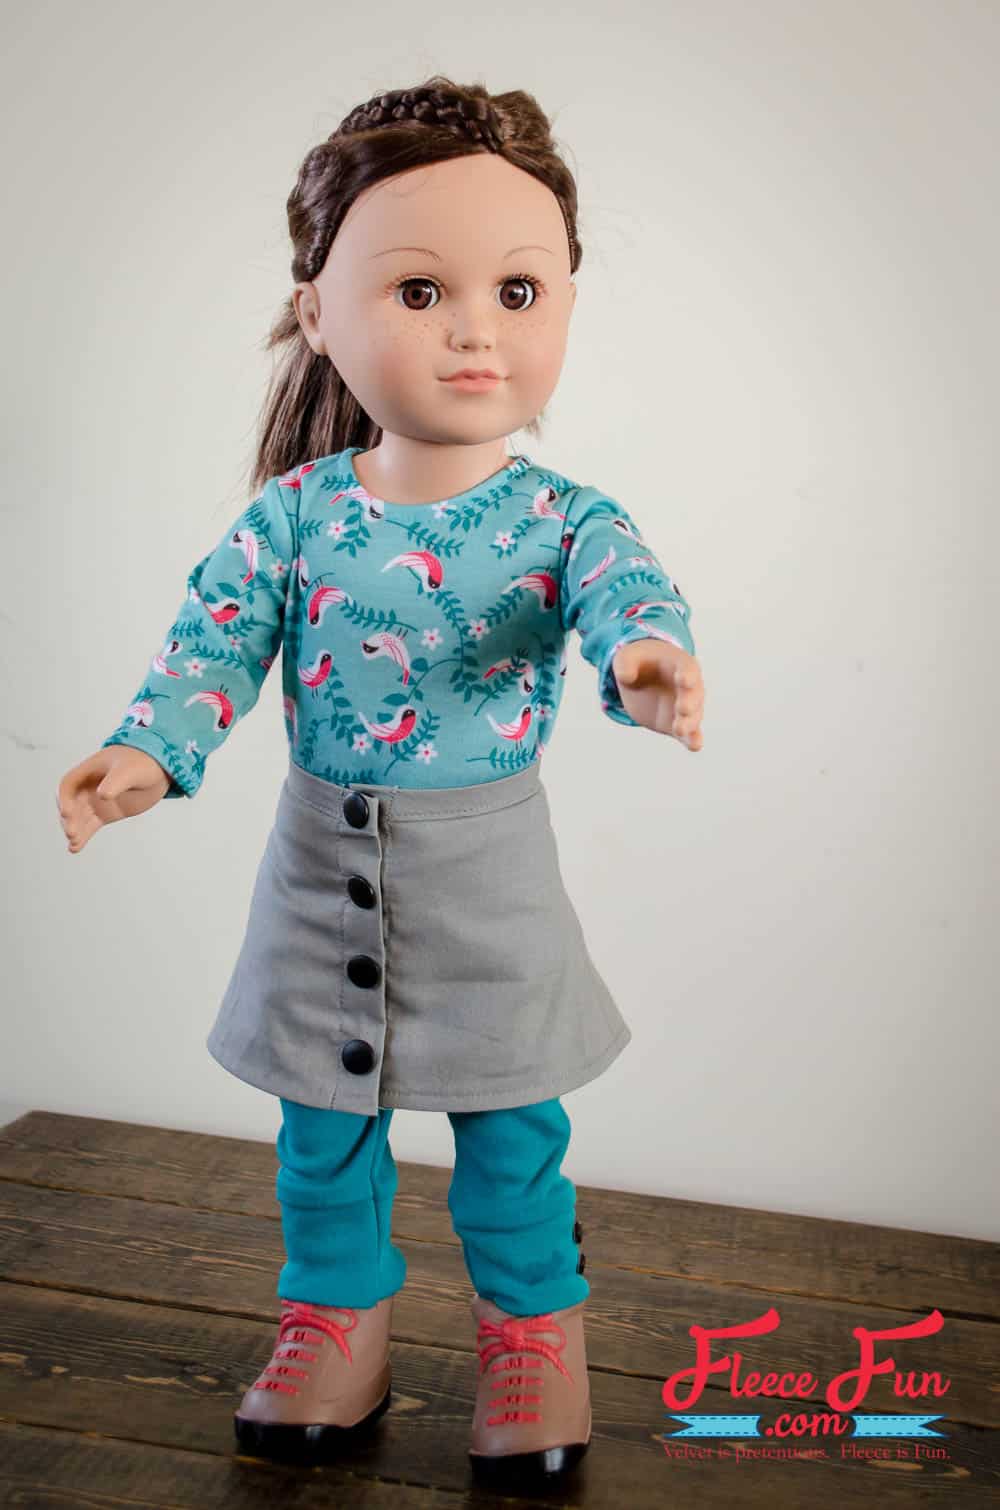
The fabric I used is a light grey quilting cotton, but any light to medium weight woven fabric will work. I paired the skirt with a store bought tee and a pair of cuffed leggings; you can find a free pattern for those here.
This doll skirt is a simplified version of one of my most popular patterns, the Maple Skirt. You can purchase the girls’ and women’s version in my shop.
YOU WILL NEED:
- fat quarter light to medium weight woven fabric
- scrap light weight fusible interfacing
- 1/4 yard 1/2″ bias binding (packaged or make your own)
- 4 snaps
- Sewing Essentials pins, thread, needles etc.
- Get the free sewing pattern here.
Button Front Skirt for an 18 inch Doll Tutorial
Step 1 – Begin the Skirt
You will need to assemble the free pattern. For instructions on how to assemble the sewing pattern click here.
Seam allowance is 3/8″.
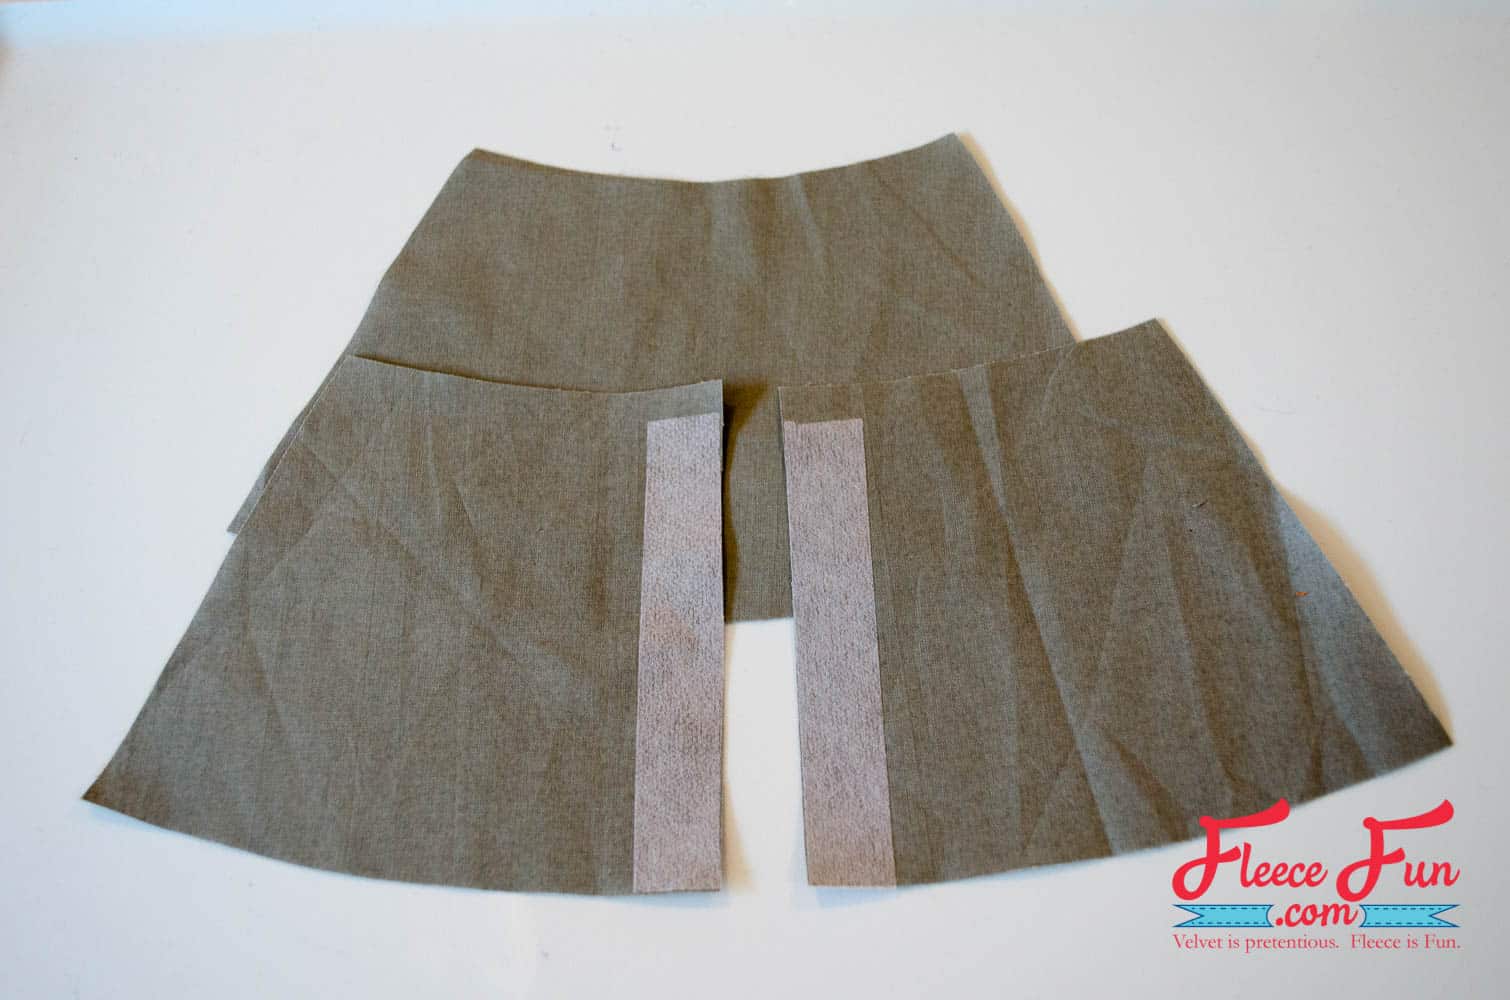
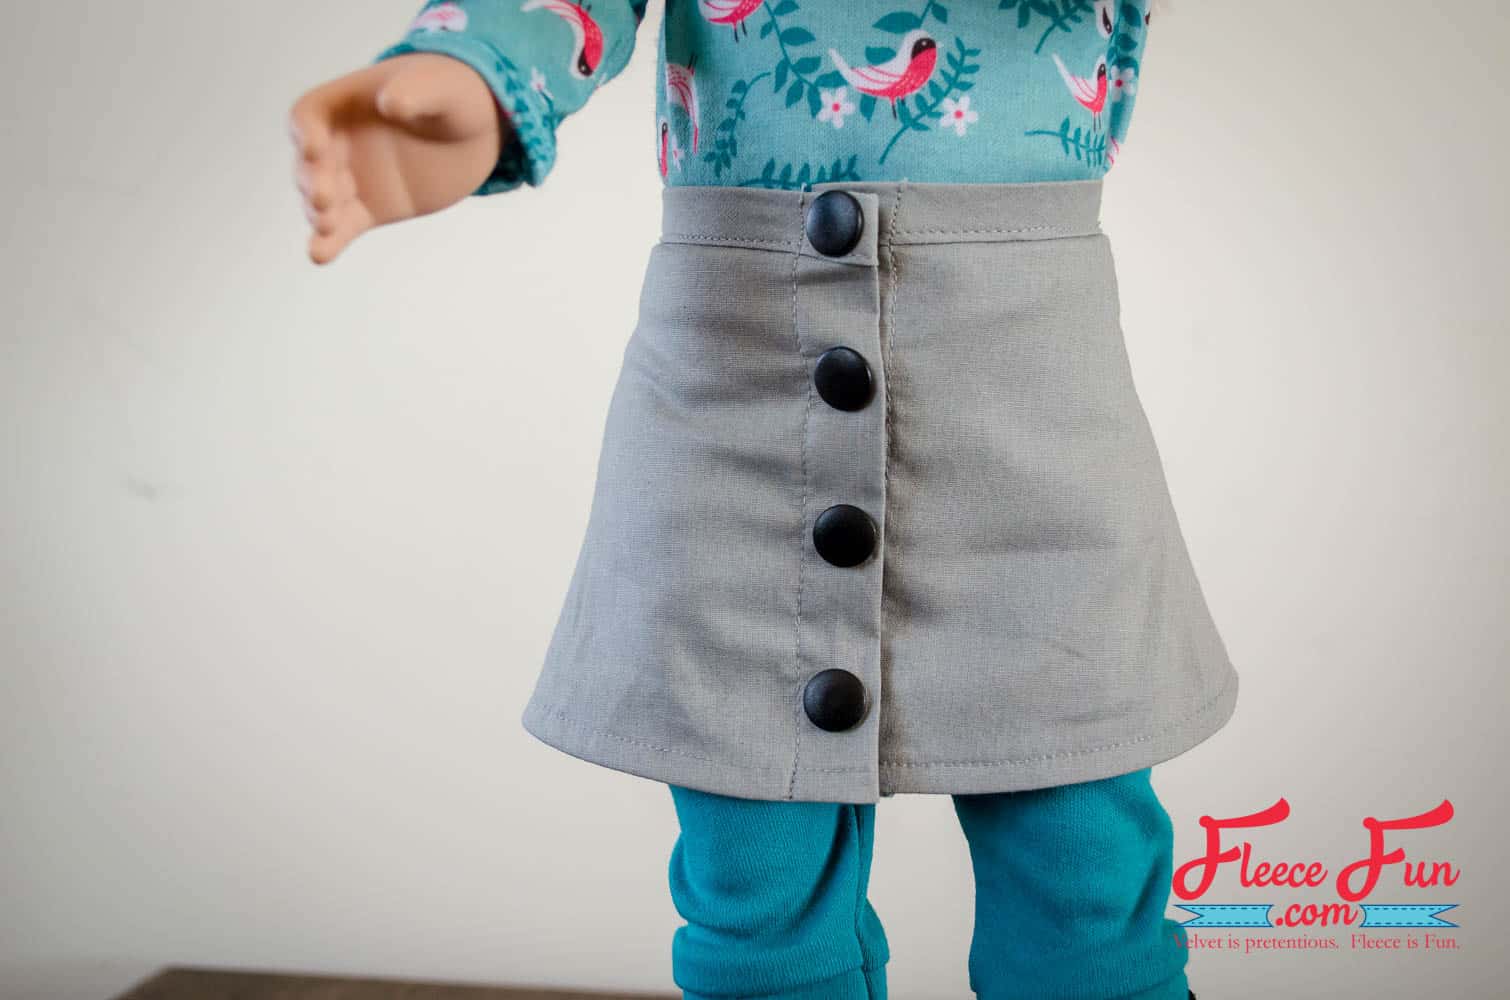
Cut 3/4″ strips of interfacing. Fuse to the WRONG side of the center fronts, beginning 1/2″ below the waistline. (It is marked in grey on the front pattern piece). This reinforces the snaps.
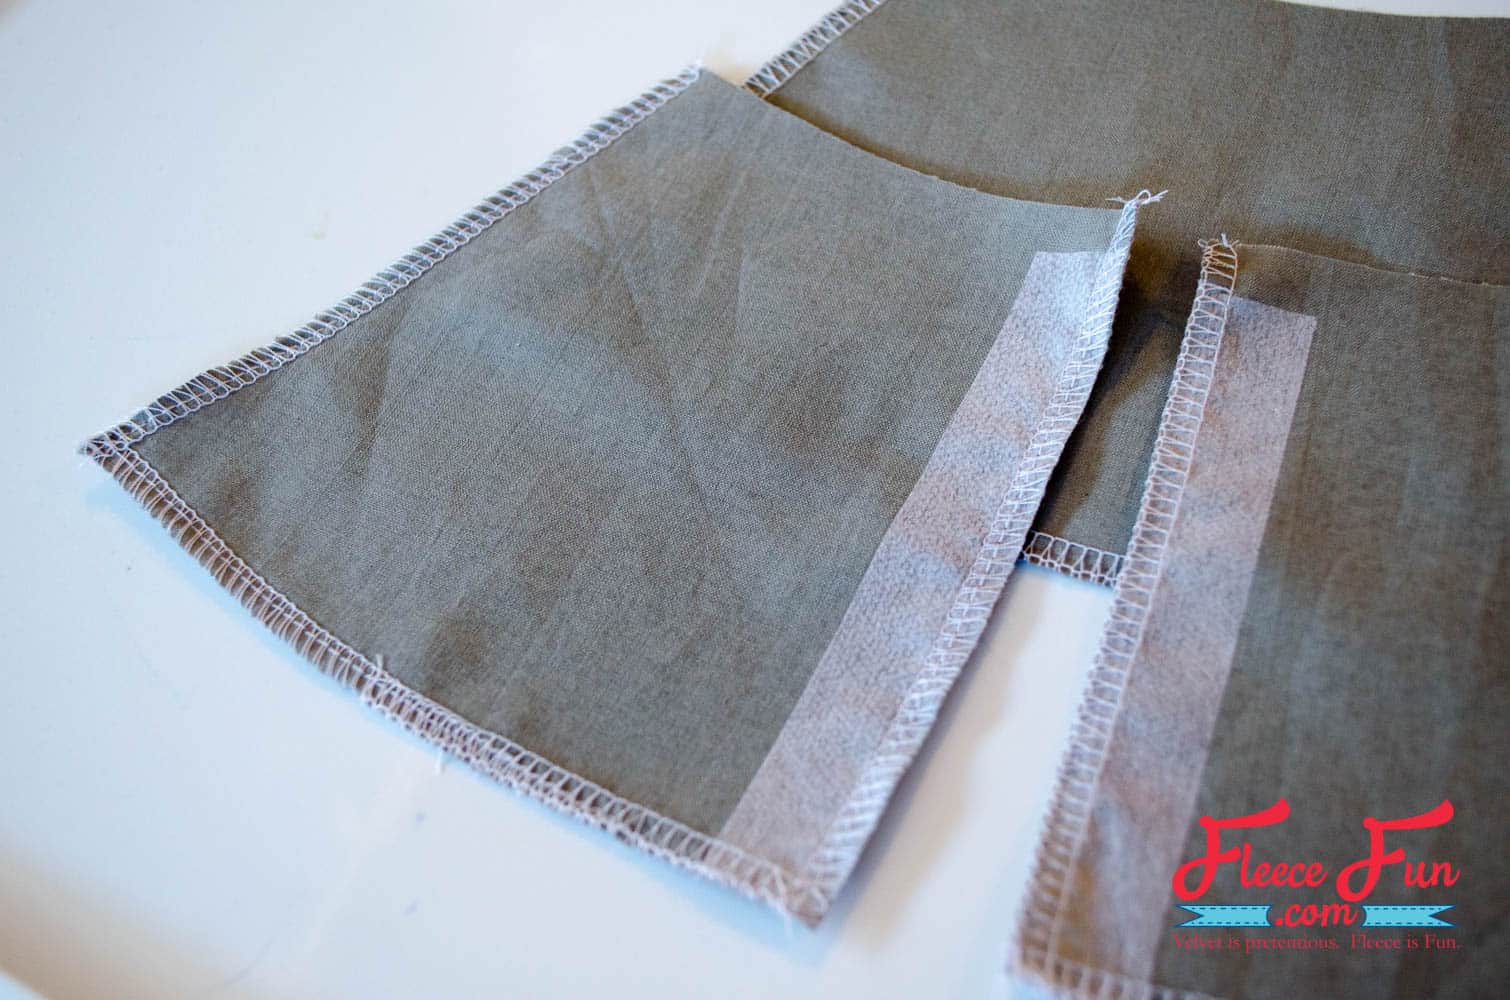
Finish bottom and side edges of fronts and back with a zigzag stitch or a serger.
Step 2 – Sew the Sides of the button skirt
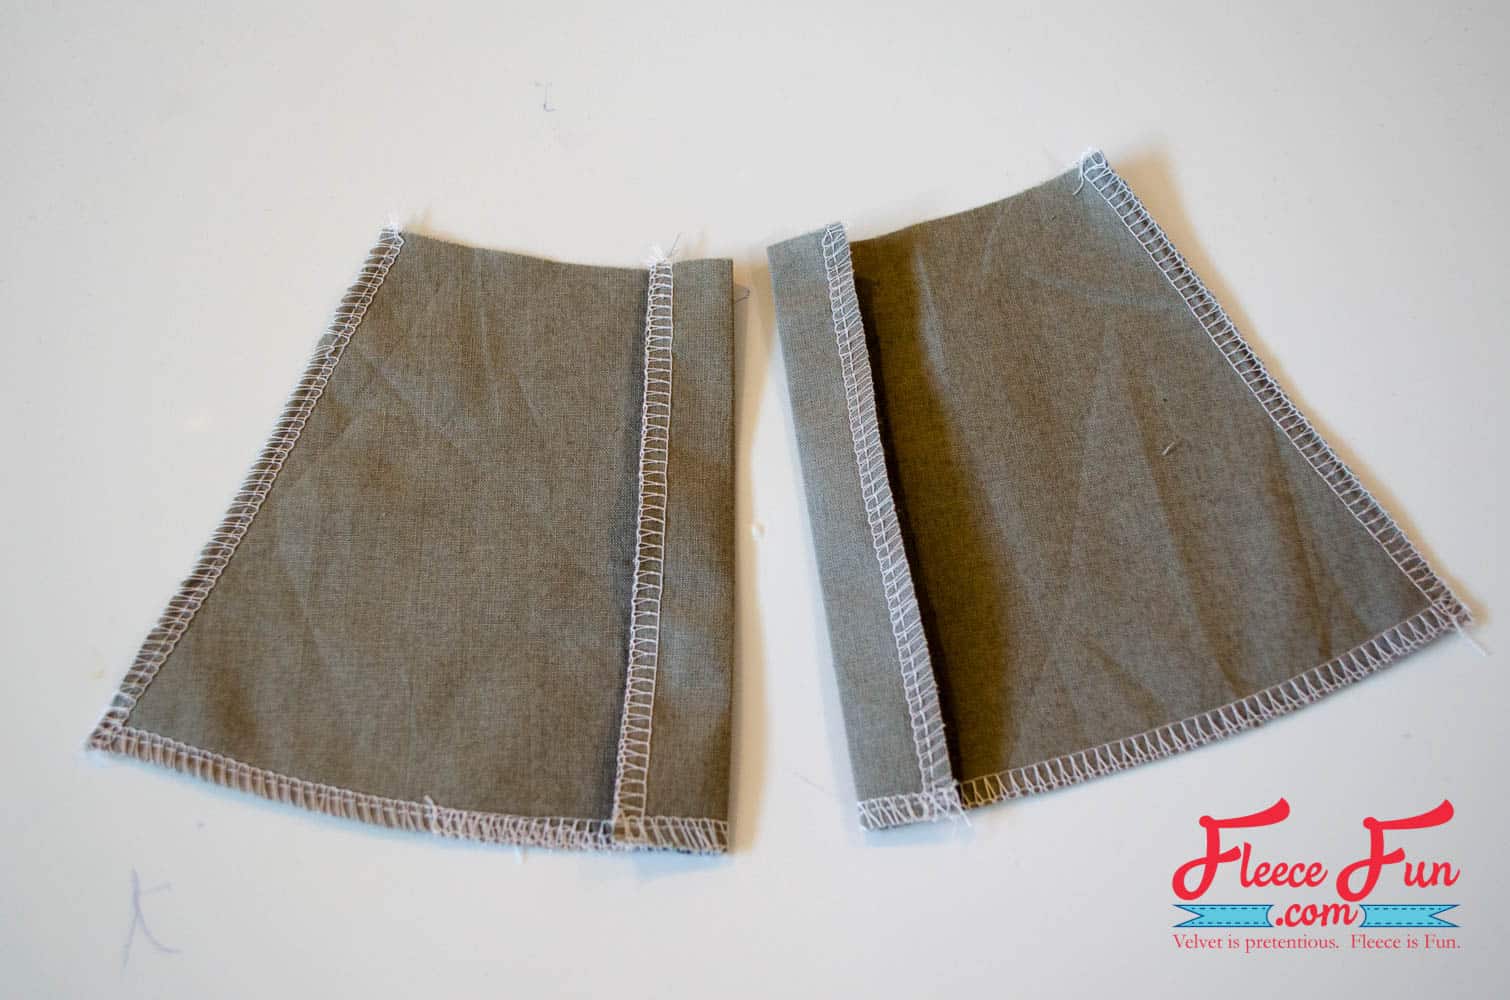
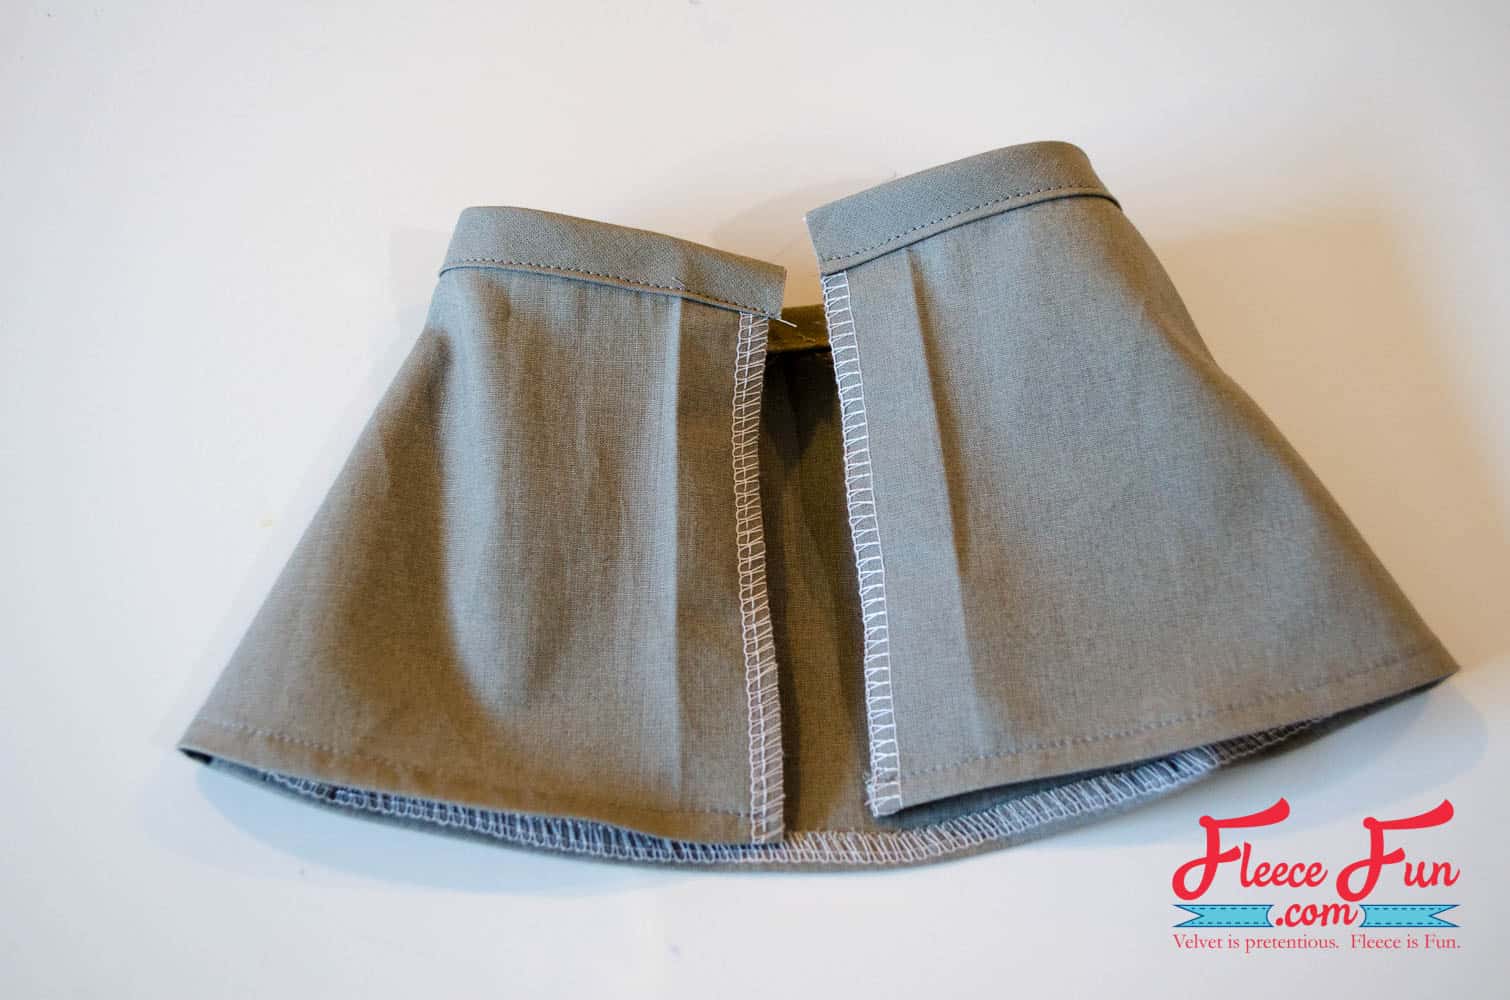
Press center fronts to the wrong side by 3/4″ as marked on the pattern piece with a dashed line. This will be the front placket of the Button Front Skirt.

Pin and stitch skirt fronts to back at side seams, right sides together. Press seams open.
Step 3 – Make the Top
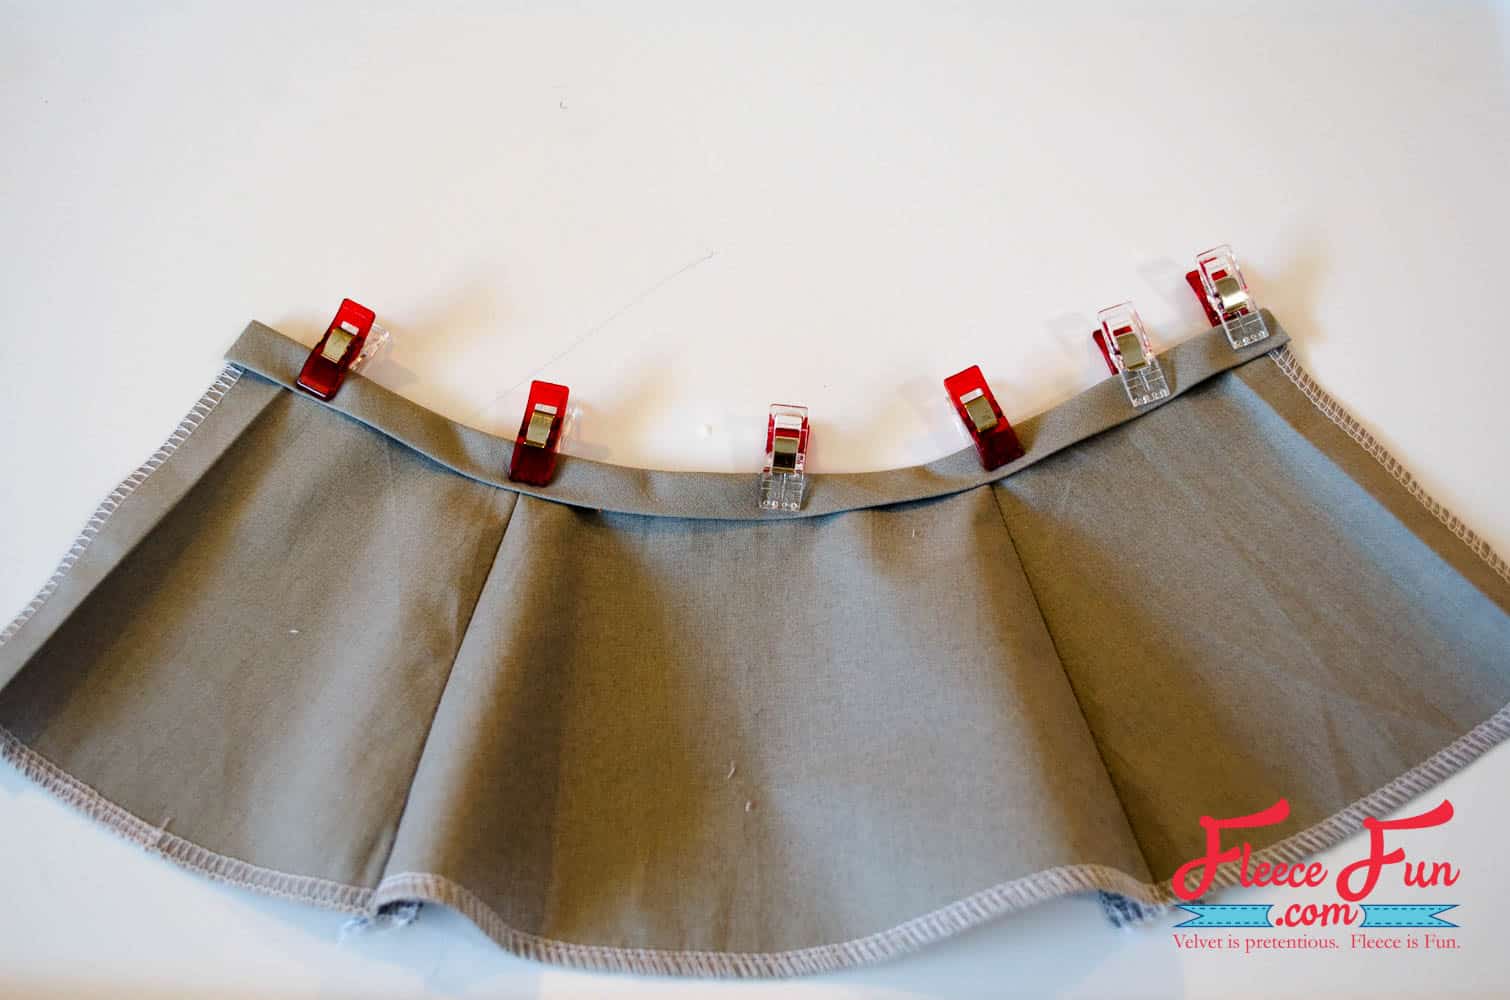
Sandwich bias binding over the waist of the skirt. Stitch in place.
Fold up bottom hem of the skirt 1/4″ to the wrong side. Topstitch.
Step 4 – Make the Placket
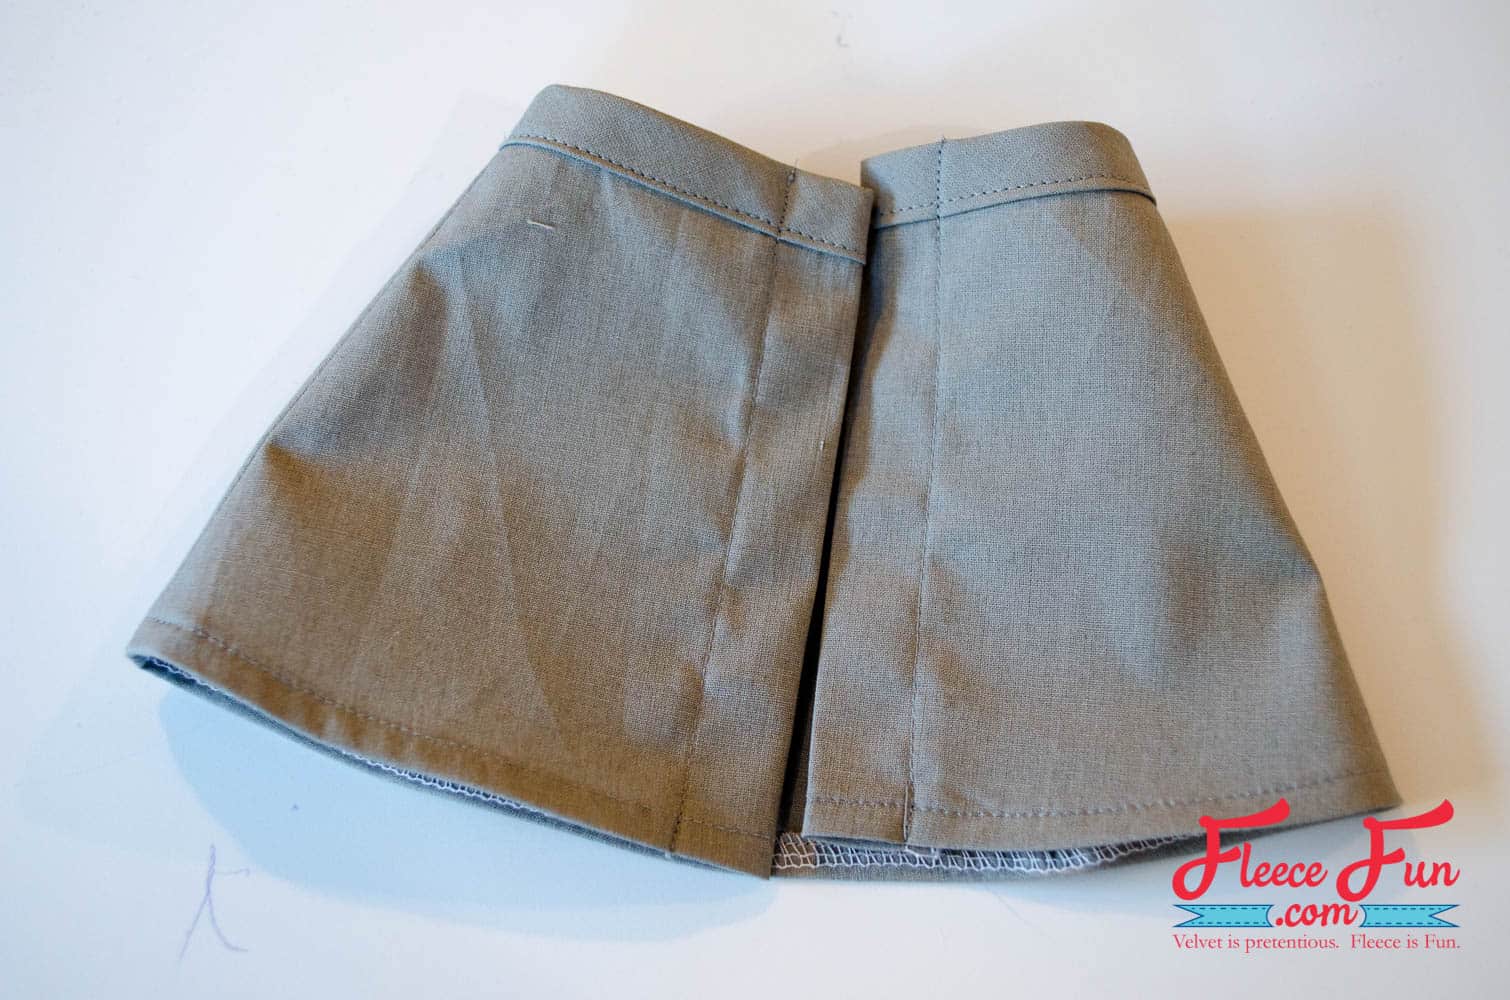
Fold center front placket to the wrong side (it was previously pressed in step 3). Topstitch along the raw edge.

Apply snaps on center front. You’ve now completed the Button Front Skirt for 18 inch dolls!
Get the Free Button Front Skirt Sewing Pattern Below:
You can get a free copy of Adobe reader here. By downloading you are agreeing to pattern terms of use. Click the picture below and fill out the form to download the free pattern.
More FREE American Girl Doll Patterns:
- Doll Mermaid Costume
- Doll Peplum Coat
- Doll Fur Vest
- Doll Knit Joggers
- Cute Chambray Party Dress
- Pocket Tee for Dolly
- Fleece Ribbon Hat
- Leather Fringe Purse
- 18″ Doll Sleeping Bag Tutorial
- Long Coat for 18″ Doll Pattern
- Cuffed Leggings for Dolly
- Doll Cardigan
- Tiered Ruffle Skirt
- Doll Robe
- Doll Sleeping Bag Pack
- Doll Basic Fleece Pants
- Doll Boutique Pants
- Doll Button Tunic
- You can see all of the Free American Girl Doll Patterns here