
How to Make a Rag Quilt (EASY Beginner’s Guide)
This content contains affiliate links or sponsored elements, read our Disclosure Policy.
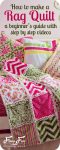


Learning how to make a rag quilt is easy! Rag quilts are a wonderful for a first time quilting project. They’re simple to make! Are you itching to try your hand at rag quilting but not quite sure where to start? Whether you’re a seasoned quilter or a complete novice, with its cozy texture and rustic charm, rag quilting is an incredibly rewarding hobby.
But don’t let the thought of frayed edges and unconventional techniques scare you off! In this post, we’ll break down the basics of rag quilting so that even beginners can confidently create beautiful blankets. From choosing fabrics to finishing touches, we’ve got all the tips and tricks you need to get started on your own stunning rag quilt project!
Rag quilting is a type of quilting that uses ragged, or frayed, fabric instead of traditional piecing techniques. The end result is a quilt that has a unique, shabby-chic look. Because it doesn’t require piecing and is made with individual blocks or strips putting together an entire quilt is possible for a novice quilter.
Hate The Ads?
This pattern with video and printable instructions is available in the Makers Studio. The Maker’s Studio is an ad free experience, no video ads, no forms, no zip files, just creating.

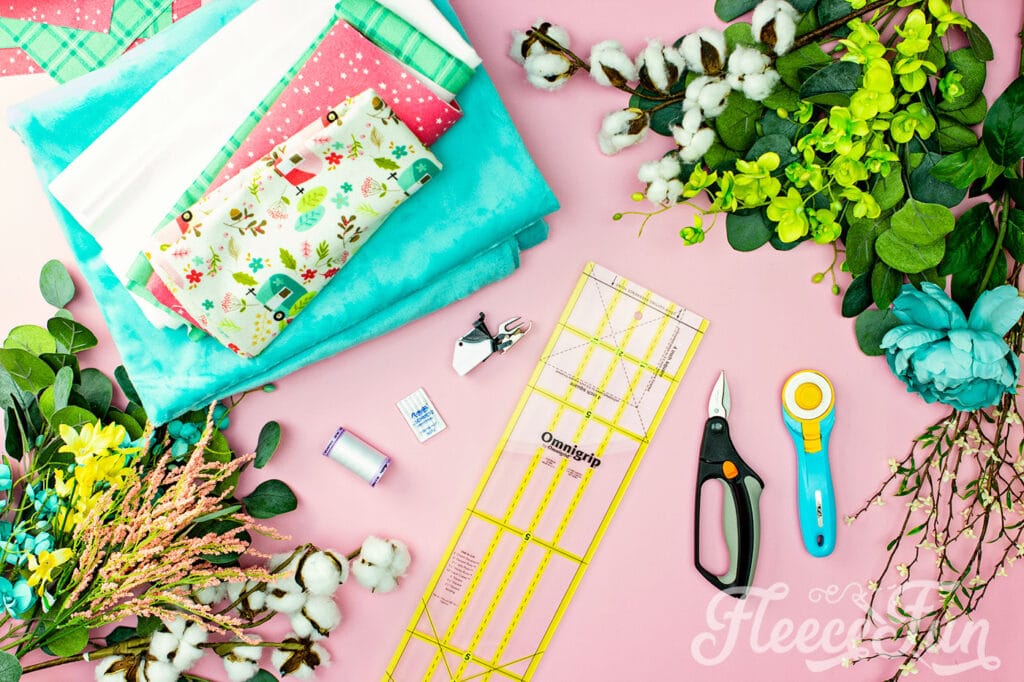
YOU WILL NEED:
Please note that you can make different combinations of fabric and batting. You can make the blanket without minky and just use flannel which is more traditional.
- Flannel (this fabric frays the best/ softest) (See free guide at the end of the post for yardages)
- Minky (optional for backing – See free guide at the end of the post for yardages)
- Batting (adds weight and warmth I prefer a thin one for rag quilts)
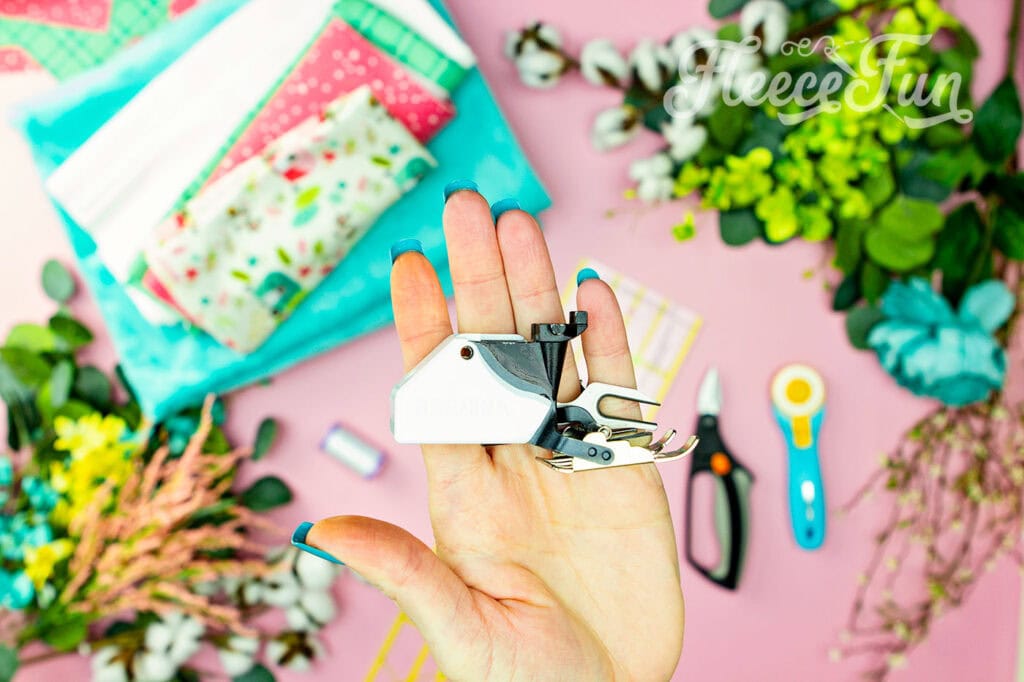
- Ragging Shears (Optional, but highly recommended)
- Rotary cutter, ruler and mat (available here)
- Thread
- Walking Foot (necessary for heavier blankets with minky)
- Sewing Essentials (scissors, pins, etc.)
Fleece Fun has over 60 FREE patterns – and many come with a video tutorial. See the Master list here.
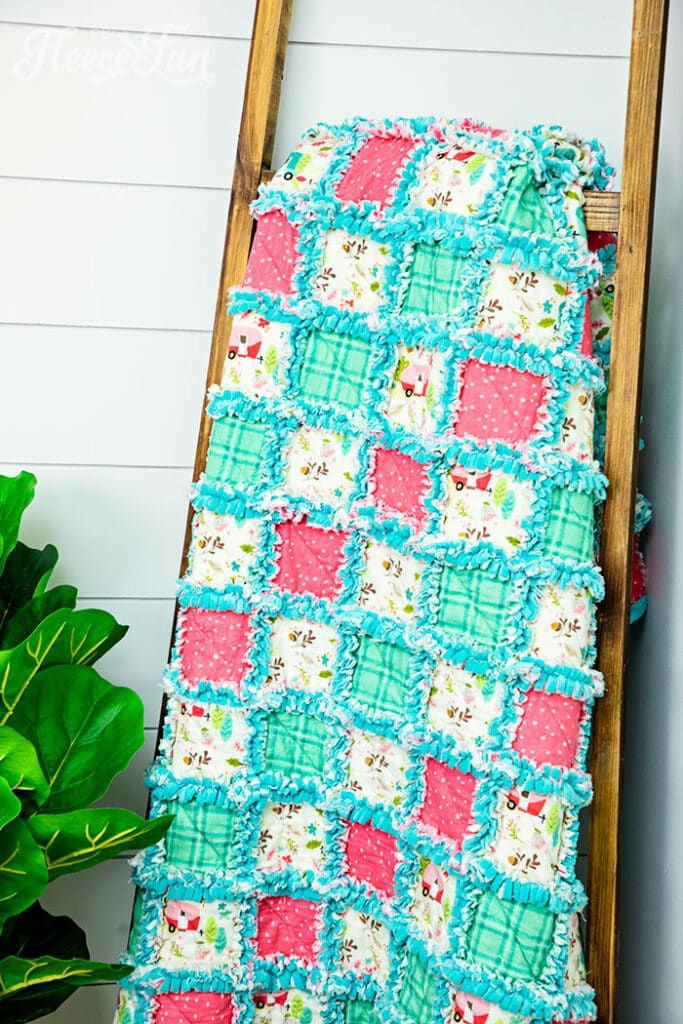
How to make a rag quilt (easy beginner’s guide)
Basic Overview Video Tutorial Here, More Detailed Videos Below:

Step 1 – Design your quilt
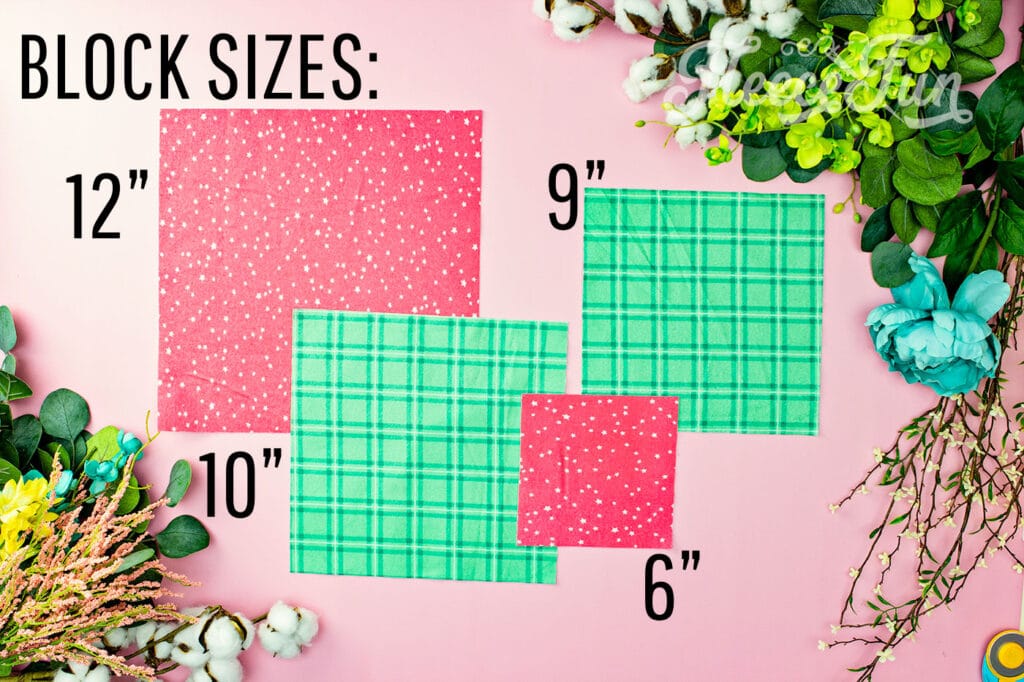
Before you even begin cutting out fabric ( Or even buy fabric!), you need to decide on what block size you want your quilt to use. The traditional blocks sizes are 12, 10, 9, and 6 inch. Each size has it’s advantages and disadvantages.
The larger the block the less fabric the less ragging there is, the smaller the block, more ragging. While more ragging gives it a beautiful shabby chic look it also eats a lot more fabric. So two quilts that are the same size but one has a larger block and one has smaller. The quilt with the smaller blocks will require more fabric.
You need to decide on the size of the ragging. I like 3/4 of an inch (~2cm) but if you want less you can make it 1/2 and inch.
Using my handy guide (available at the form below) design your quilt and calculate the how much fabric you will need.
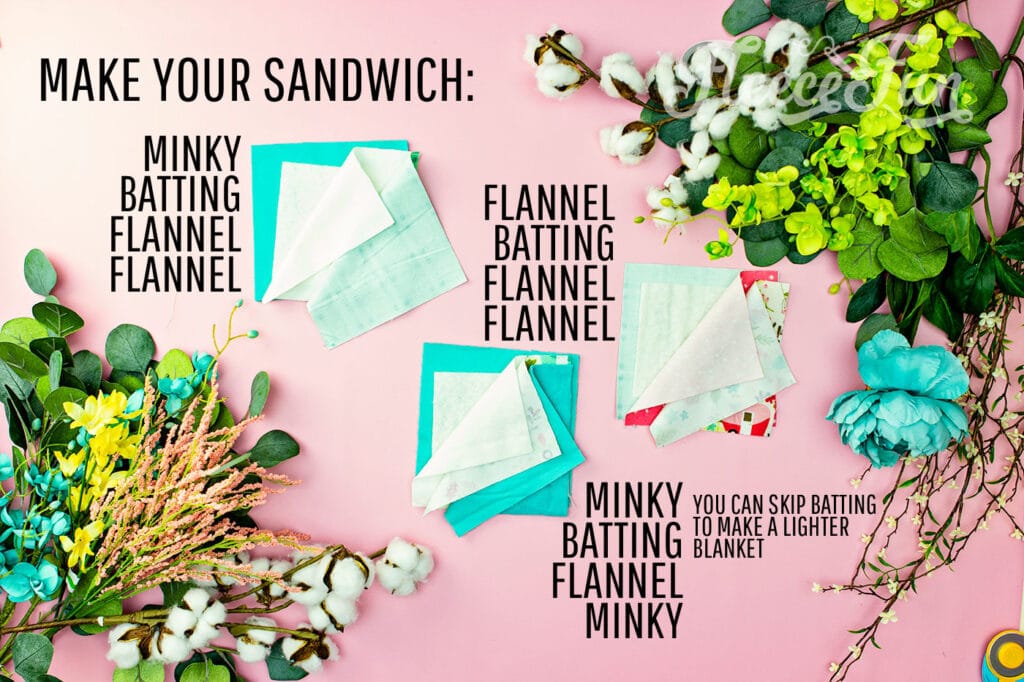
There are different combinations you can use to make the rag quilt warmer/ softer/heavier. If this is your absolute first time I recommend the flannel batting flannel, flannel combination as this is the easiest and lightest to sew.
Just so you know…
I like to add a layer of flannel to the block as it makes the ragging look more full. You can make a block slimmer/ lighter by not having this layer, just bear in mind that the ragging won’t be as full as the example quilts.
If you choose to use minky you REALLY want a walking foot. It will make the process much less frustrating. If you plan on sewing with minky a lot a walking foot is worthy investment. It’s also handy for machine quilting too!
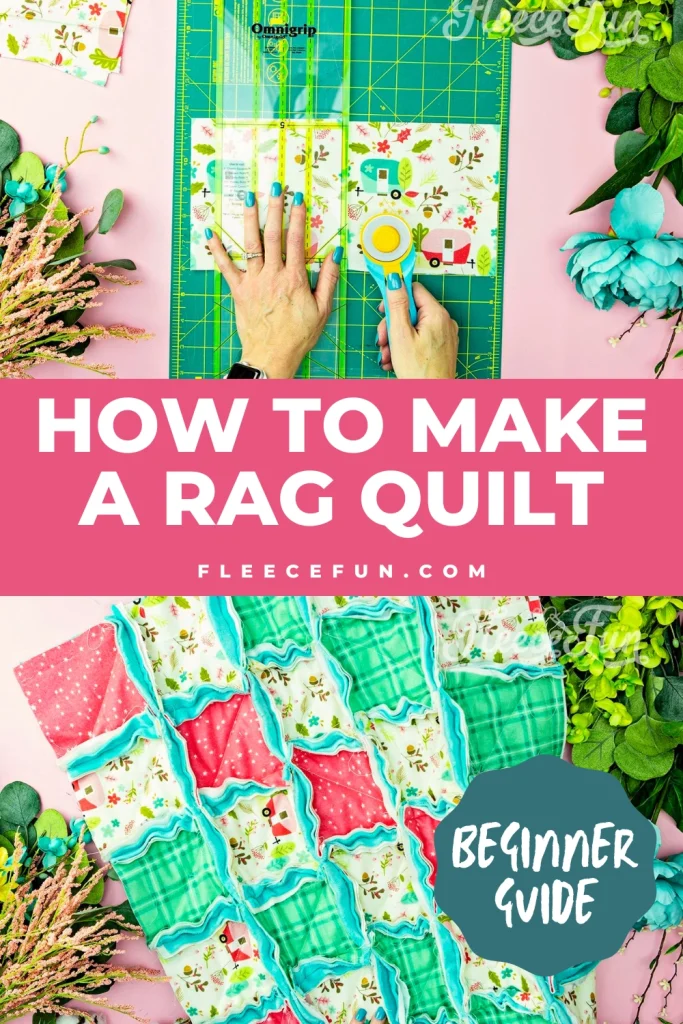
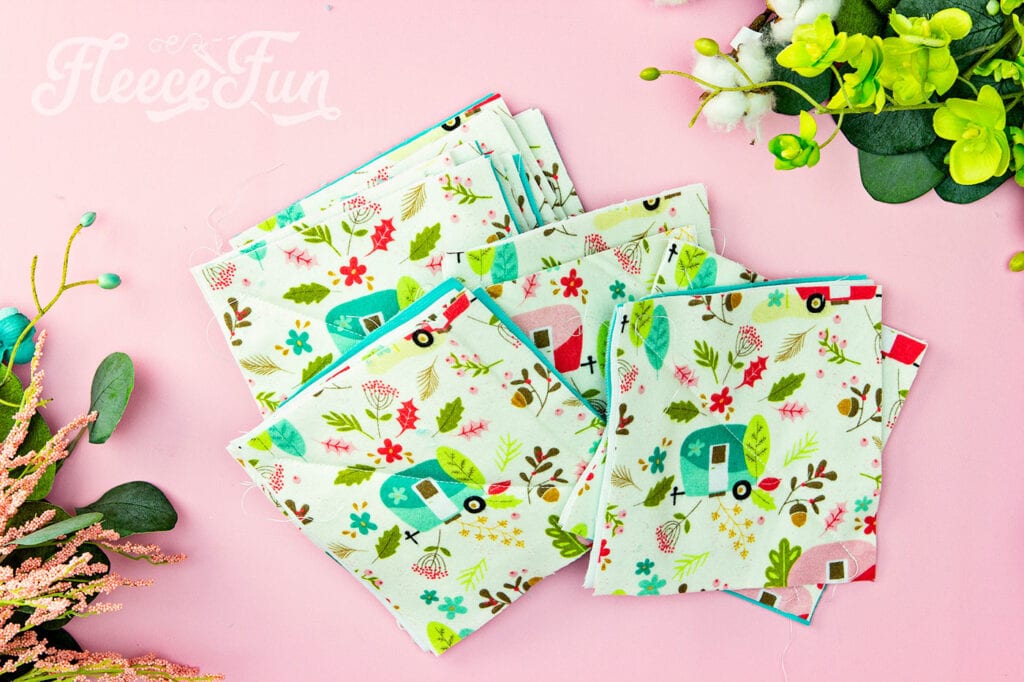
Step 2 – Cut the Squares to the rag quilt
No need to wash the fabric – you can just get going! Let’s cut out the squares to the rag quilt.
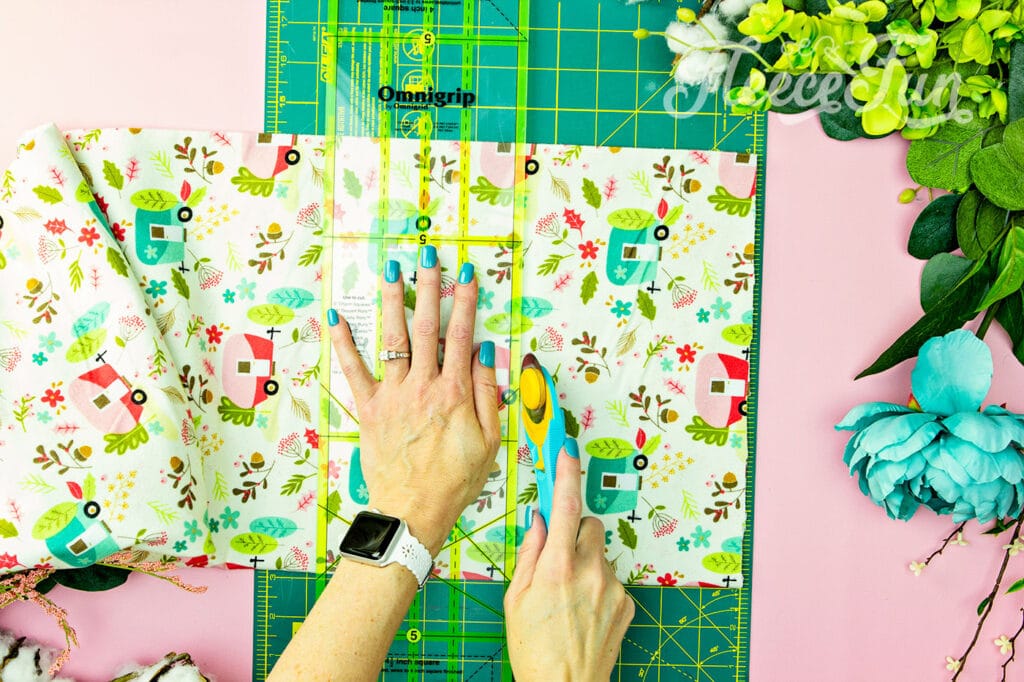
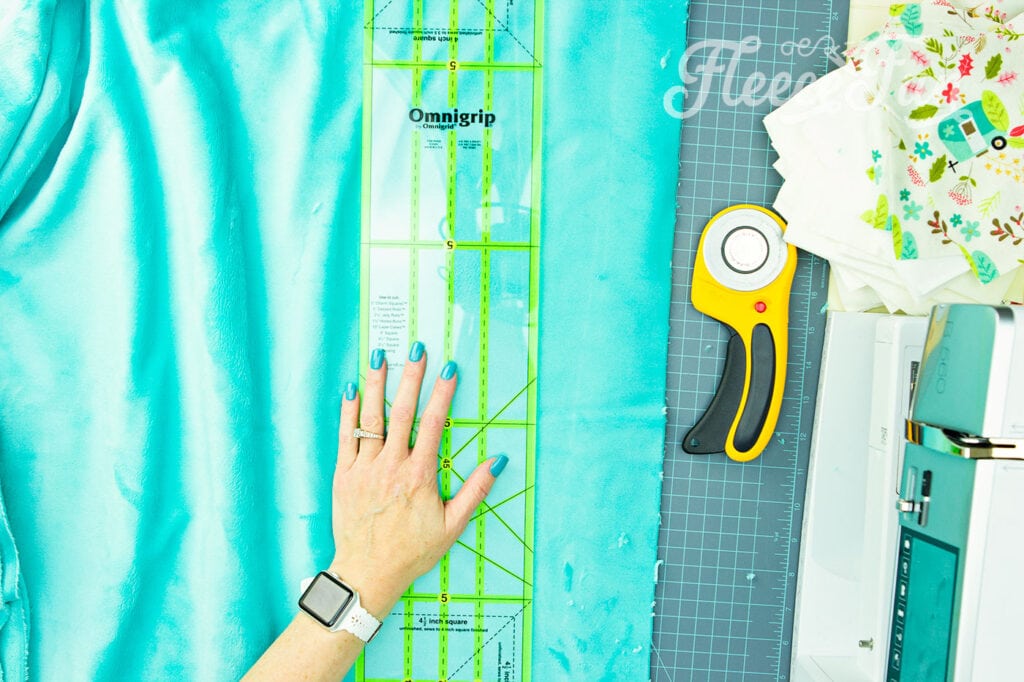
Start by cutting a strip the size of your chosen block across the width of the fabric the fabric.
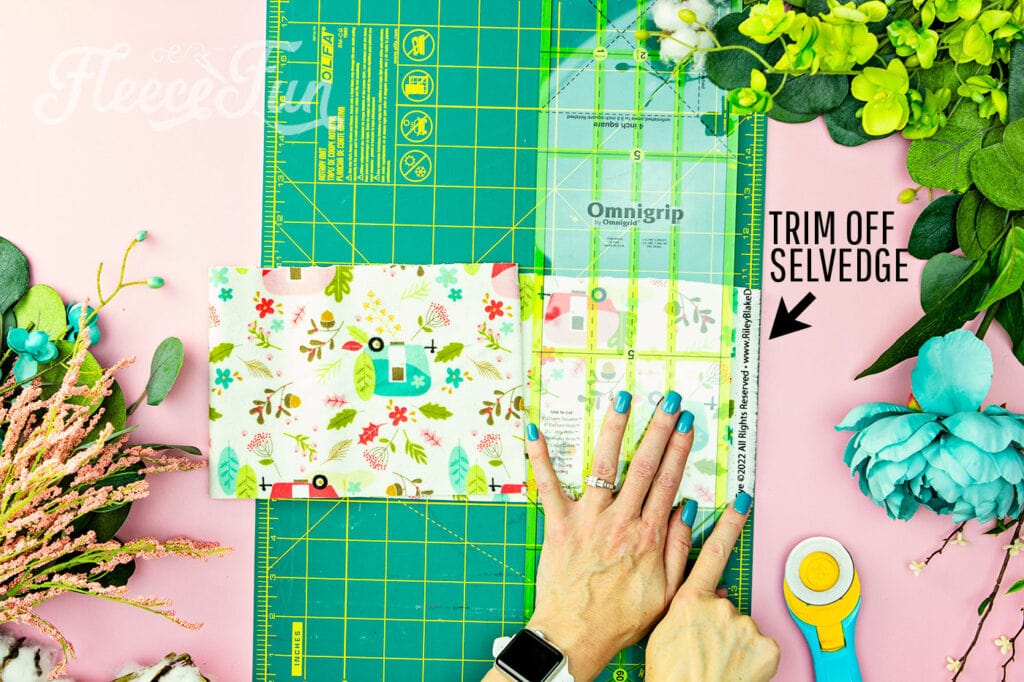
Turn the strip – make sure you trim off the selvedge (or it won’t fray!)
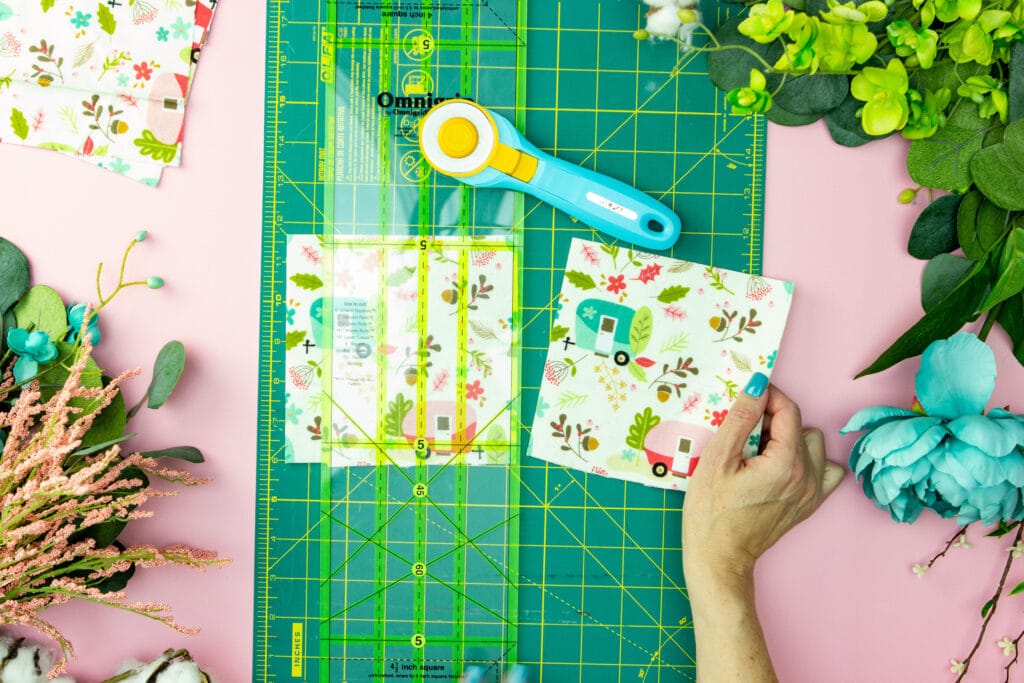
Cut the strip int the block size you need. Continue until you have cut all the blocks you need.
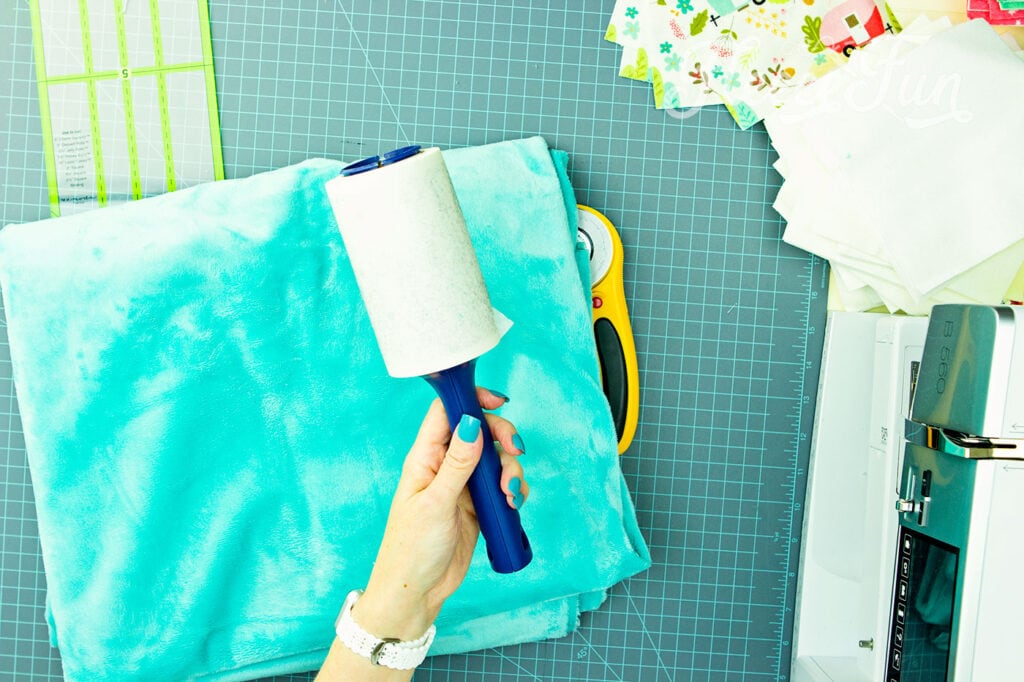
When cutting minky I recommend having a lint roller near by. A mini vacuum and an apron can also help you keep your sanity. The little fuzzies from the minky get everywhere.
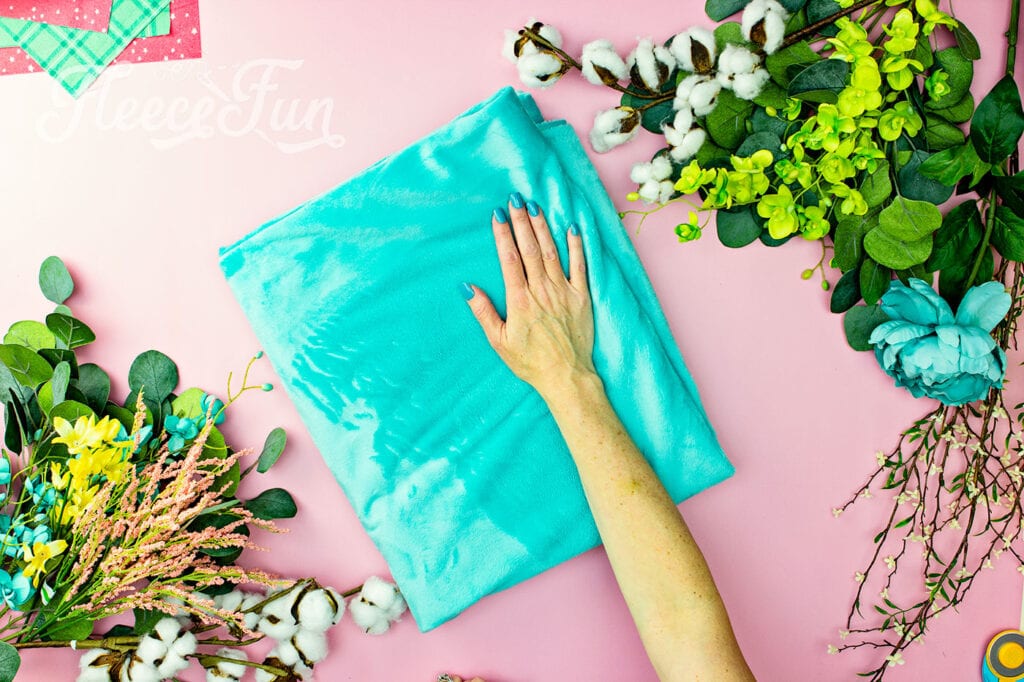
Cut the mink squares in a similar fashion as above – they are the same size as the flannel squares.

Finally cut the batting squares. The length of the ragging will determine the size of the batting in the center. So for example I have a 6 inch square I would subtract the ragging ( or seam allowance of .75 x 2 so the interior batting square would by 4.5 inches in size.
Step 3 – prep the Quilt Blocks for sewing
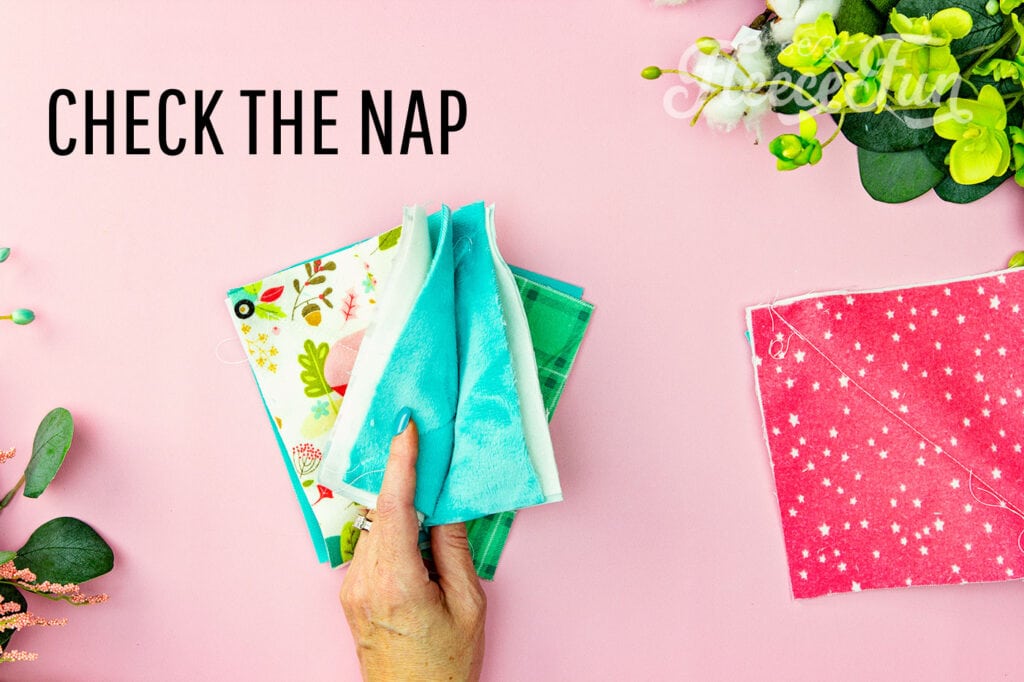
Before we get started we need to quickly talk about minky fabric and nap.
Minky has a nap to it – meaning when you push it in certain directions it feels like pushing against or up and the color changes slightly. Ideally when making a minky quilt the nap all goes in the same direction.
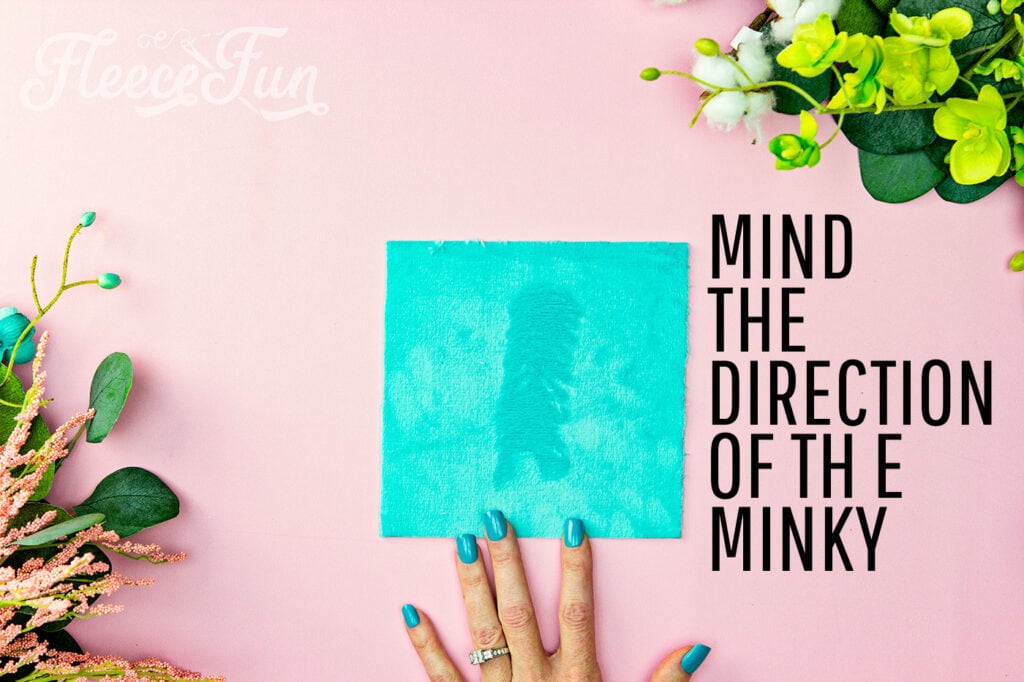
So when you begin to build your block (if you’re using minky in it) It’s a good idea to chekc the nap and have it all going in the same direction. Now if you mess up, it’s really not the end of the world, this is a nice to have but not must have.
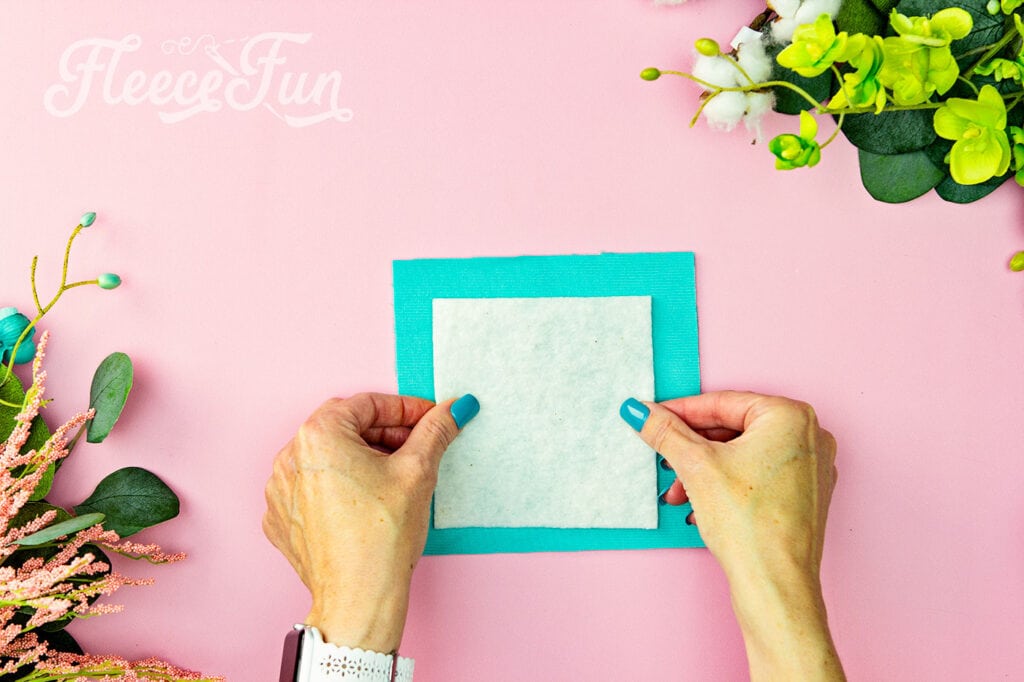
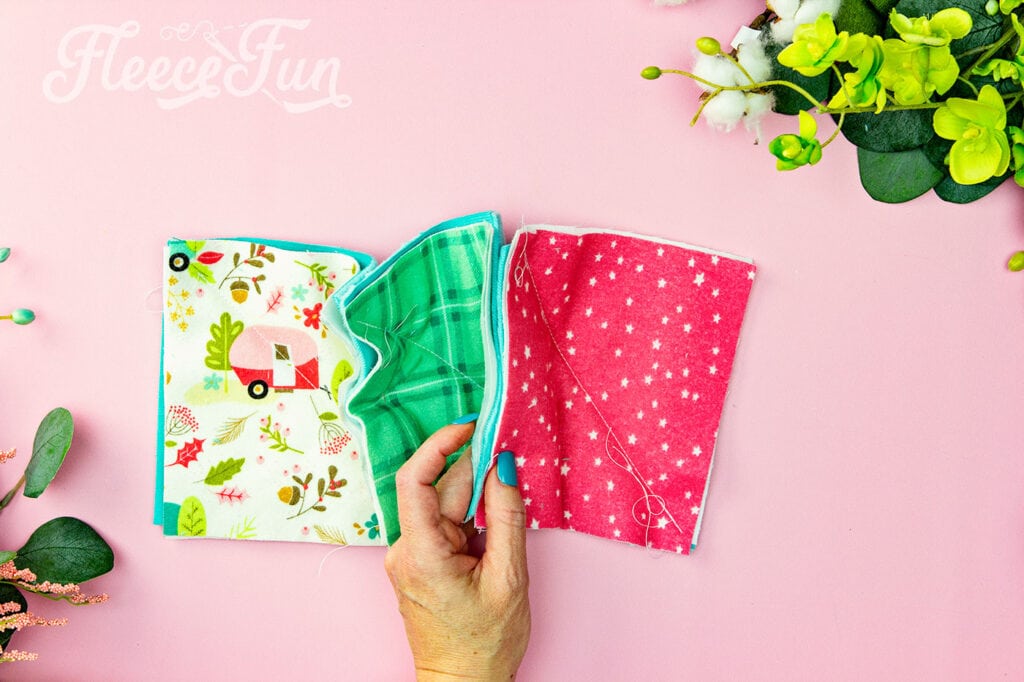
With the minky or bottom of the block the right side should be face down on the work surface. The wrong side facing up at you. Next place the batting in the center of the block.

Next add a layer of the plain flannel so make the ragging thicker on the quilt. It doesn’t matter which direction this filler section faces.
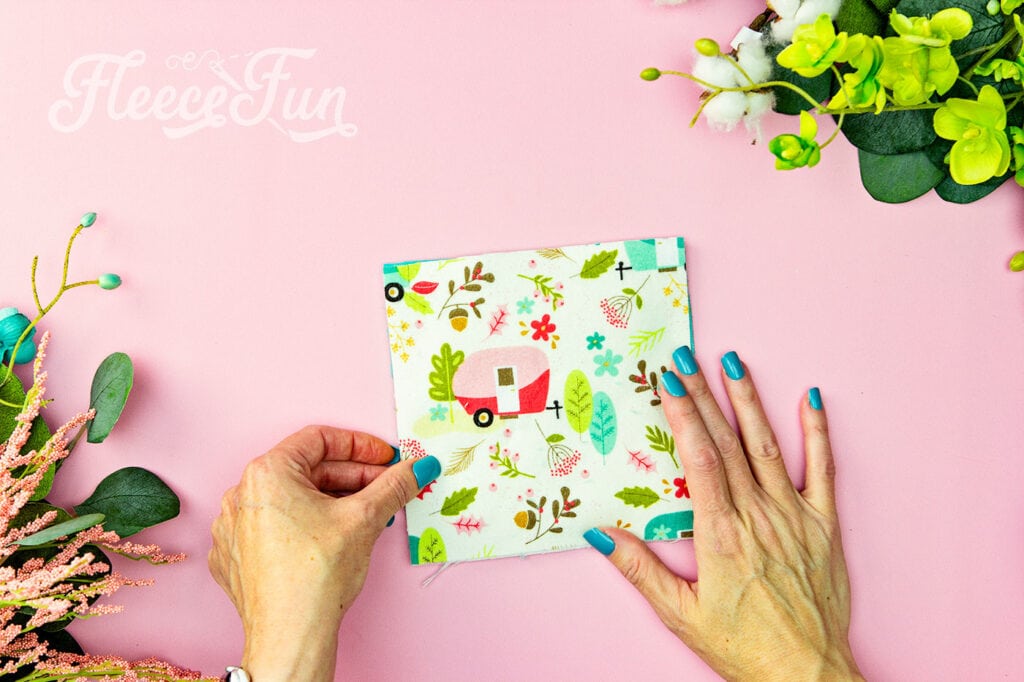
Finally place the top of the block on your quilt sandwich with the fabric facing right side out.

Pin or safety pin your block into place. Repeat this process with all of your blocks.
Just so you know…
Tip on how to make a rag quilt: For easy and quick assembly make the block the same color on the back. For blocks that have minky on the top and bottom: double check the nap of the minky to make sure it’s going the same way on both sides of the block.
Step 4 – Sew the Quilt Blocks
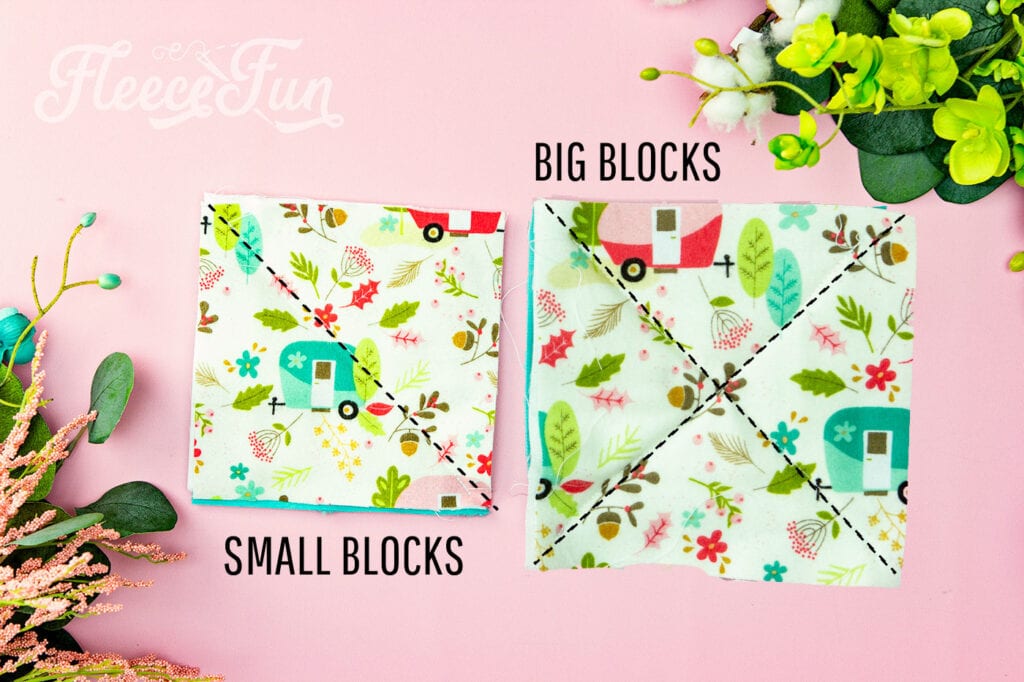
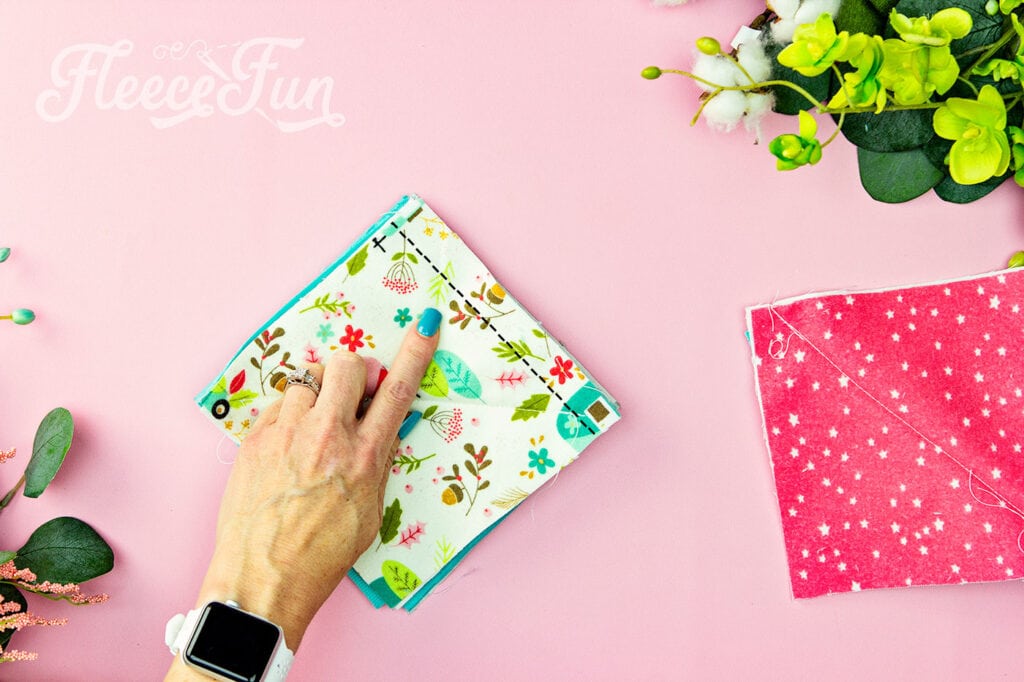
Blocks bigger than 6 inches need to be sewn together using an “x” from corner to corner. You can draw and x on each block using a ruler and a washable pen to help keep you lines straight.
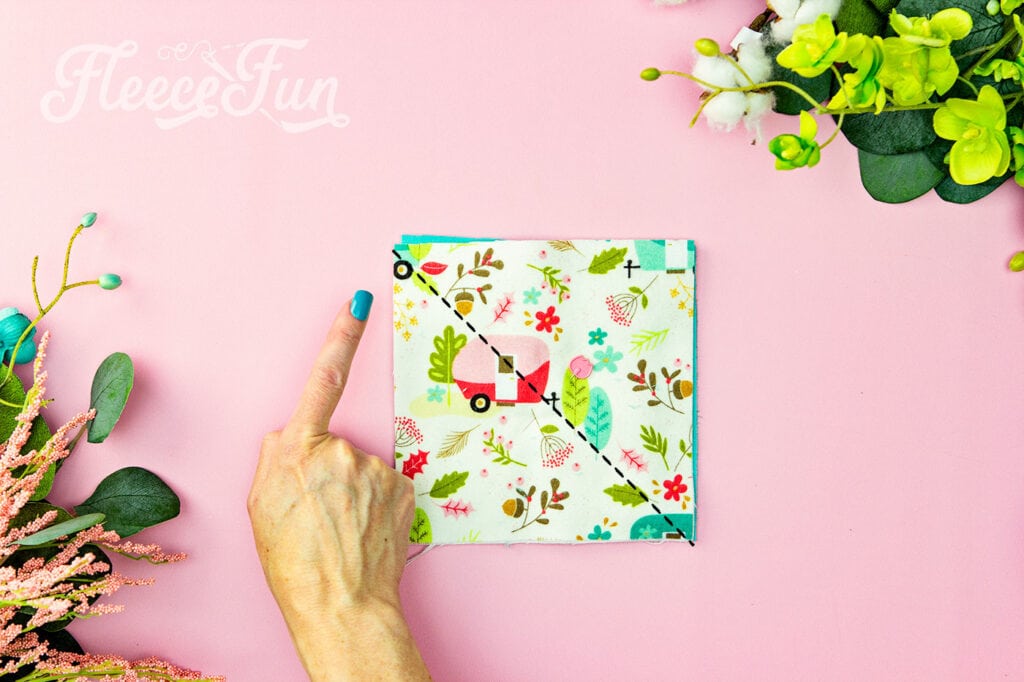
If sewing blocks that are 6 inches you only need to sew one diagonal line across the block to finish it.
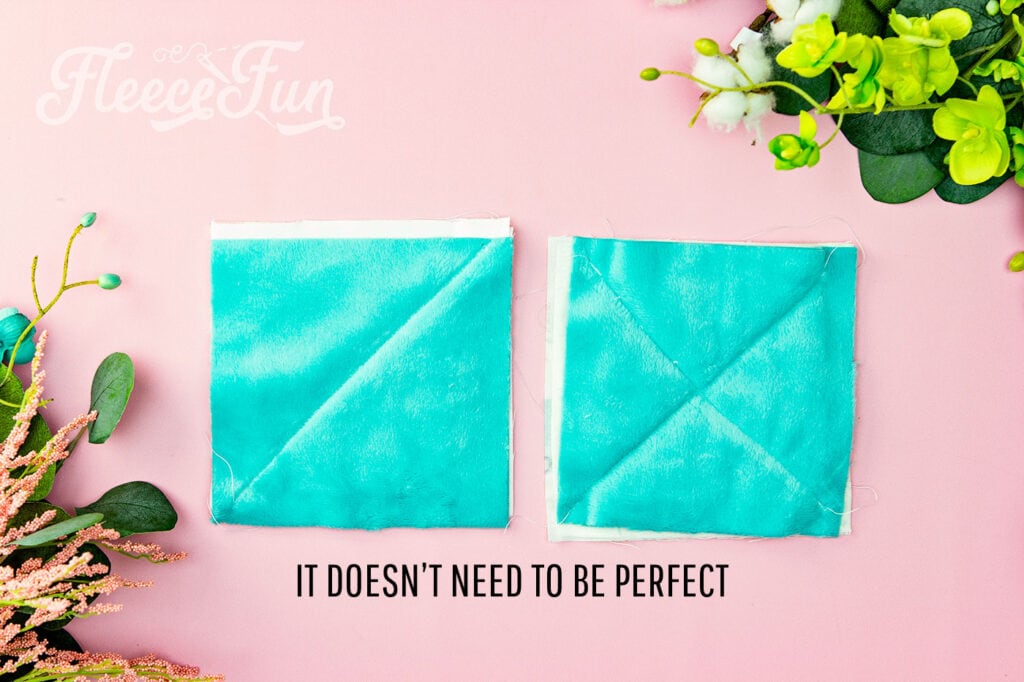
Unlike most quilting rag quilts have a lot a wiggle room. if you sew it and it’s not perfectly squared up through all the layers – it’s fine! If it’s really off ( like by and inch or if the batting isn’t centered, then there’s a problem and you’ll need to unpick the block and sew it again.
When sewing all the blocks together you can use an old quilter’s trick – chain sewing. Basically you don’t worry about locking the stitch.
You just continue to sew through the bocks feeding on right after the other. When finished simply snip the thread between them apart. No need to start and stop on each block.
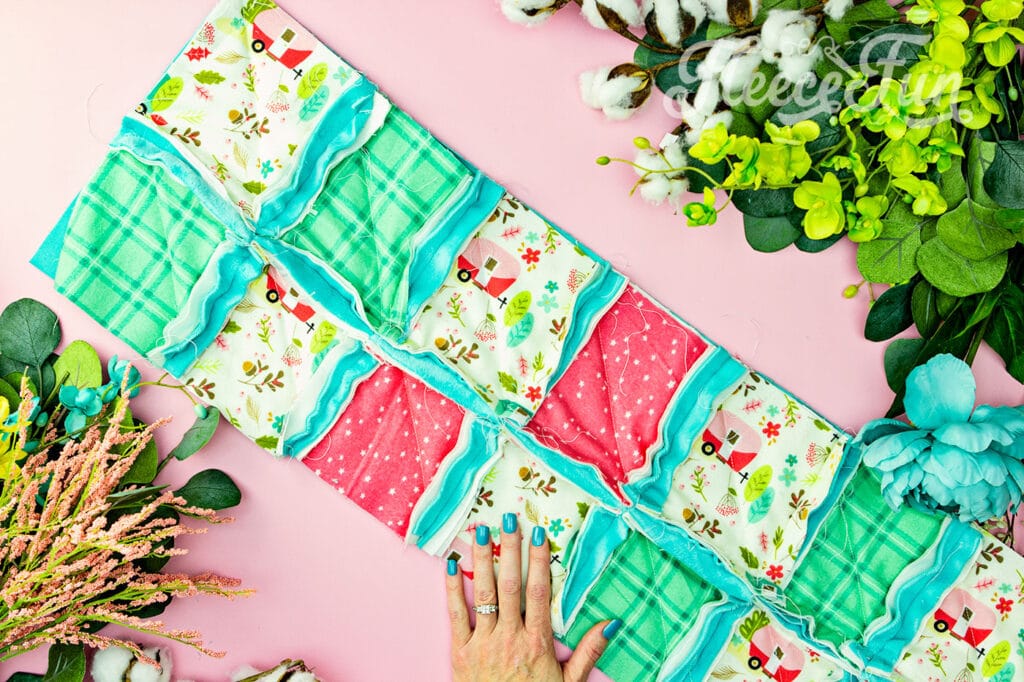
Step 5 – Sew the Quilt Blocks into Rows

Now it’s time to bring this rag quilt together. We’ll start with rows and build the blanket from there. Layout your blocks in the order that you want your row to go.
If using minky, double check that the nap is the right direction and that the diagonal stitch is the right direction too.
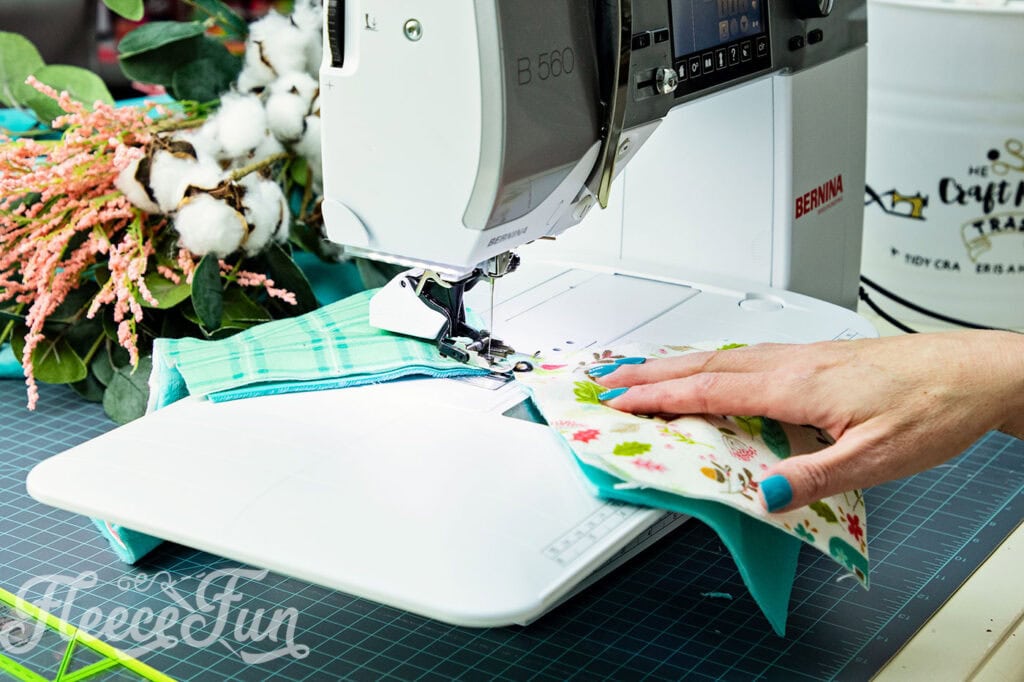
With the bottoms of the block touching sew along the right side using a 3/4 inch seam allowance.

Since a 3/4 seam allowance isn’t a common one I sew like to mark it with some washi tape to make it easier to see while sewing the quilt blocks.
Add the blocks in the desired pattern you want. When sewing the blocks together lock the seams.
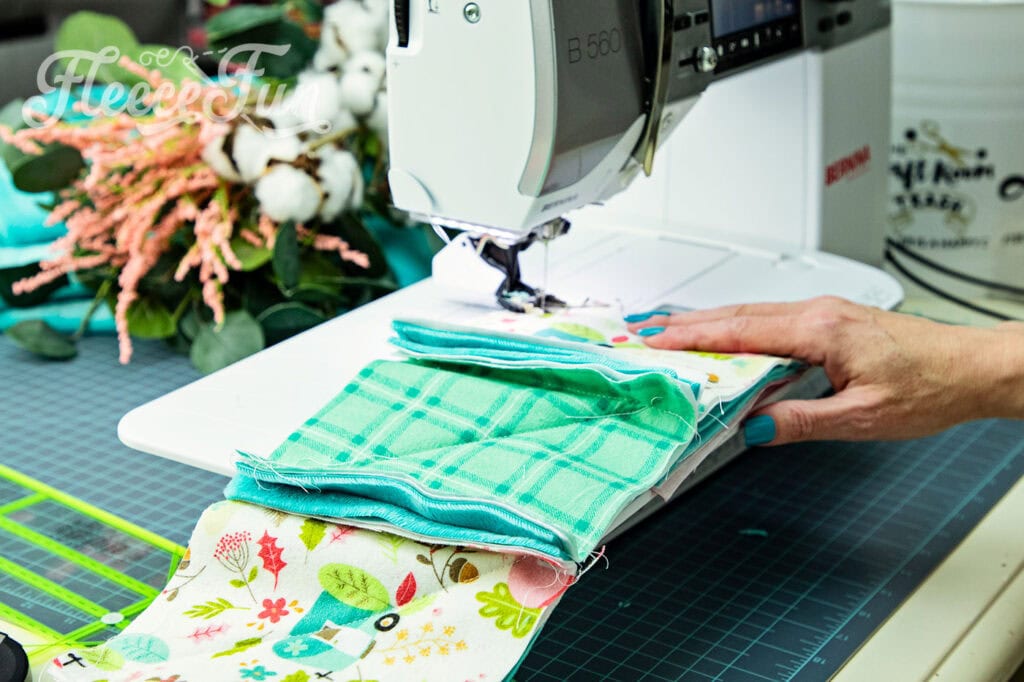
Continue to add blocks to the row on the right side until you’ve added all the blocks in a row (for this blanket I used 9 blocks in a row).
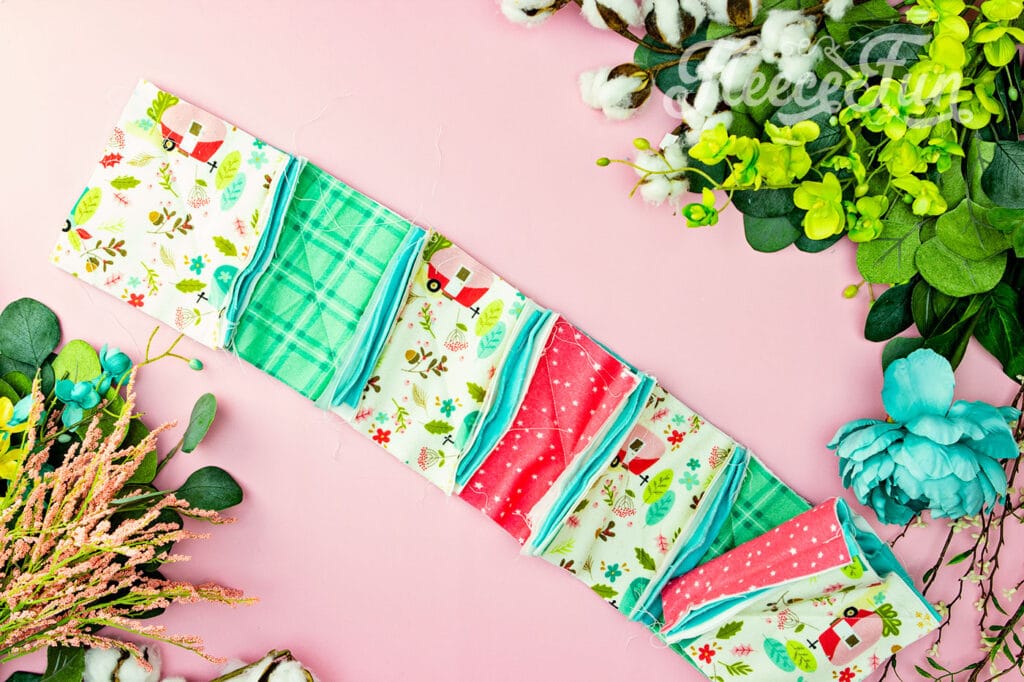
Continue making all the rows for your cozy blanket.
Sew each row of the blocks together. For a rag quilt I prefer a ¾ inch seam allowance. Double check the nap to make sure that it’s all going in the same direction on the rag blanket.
Step 6 – Sew the Rows Together
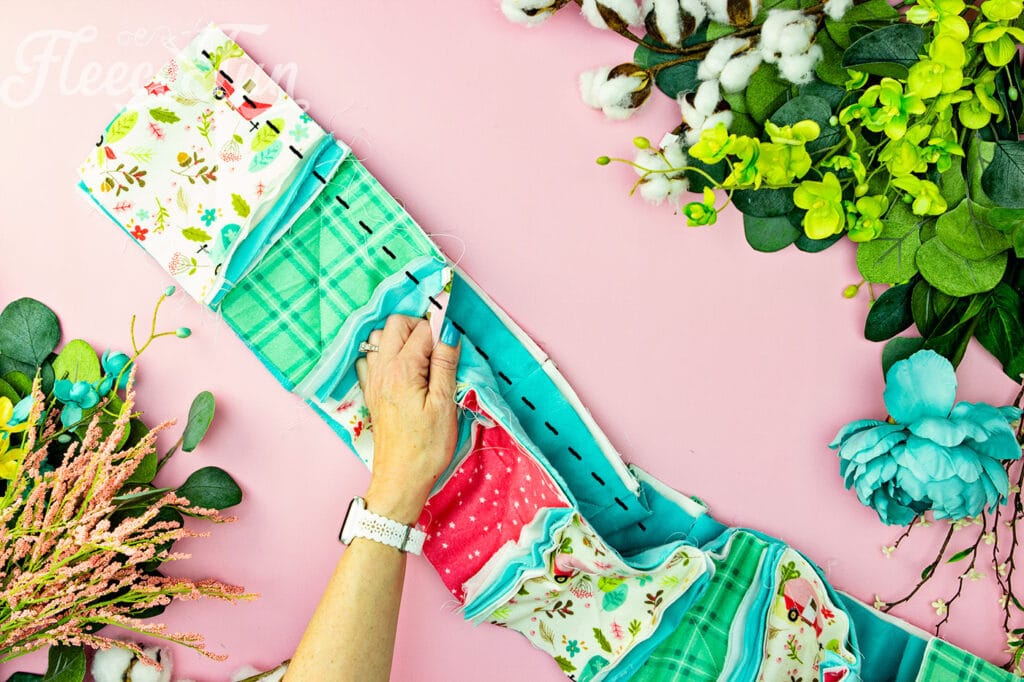
Let’s build this blanket! Take two of your rows, with the bottoms of the rows touching, Sew together using a .75 inch seam allowance. BUT>>> since we’re learning quilting I need to teach you an important trick to lining up blocks are the corner.
You nest the seams. This is a way of making the blocks line up beautifully.

To nest the seams fold the seam of the top block over ( so it’s easier to sew over). Then you fold the bottom seam allowance over so it’s going the opposite direction.
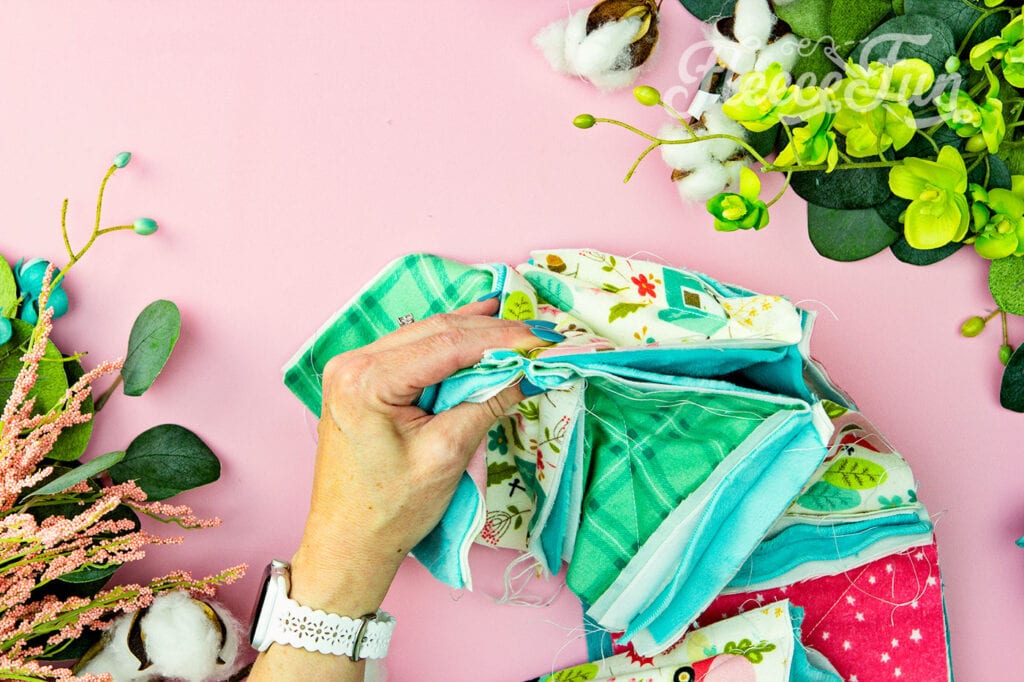
This makes it easy to line it up right at the seams of each block.
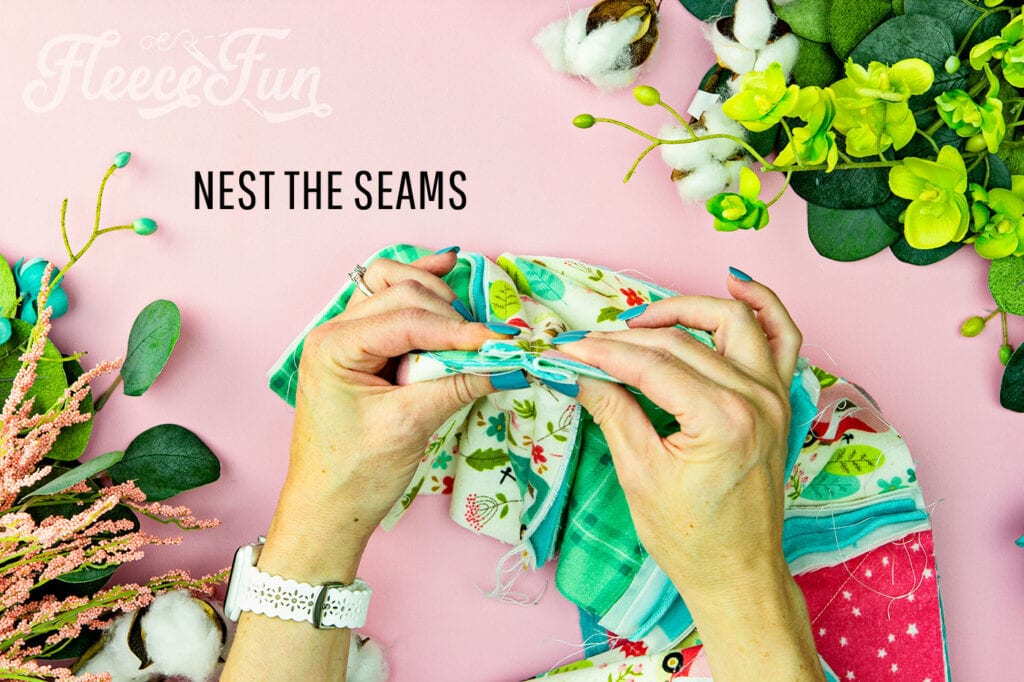
I recommend pinning it at the seam all along the row.
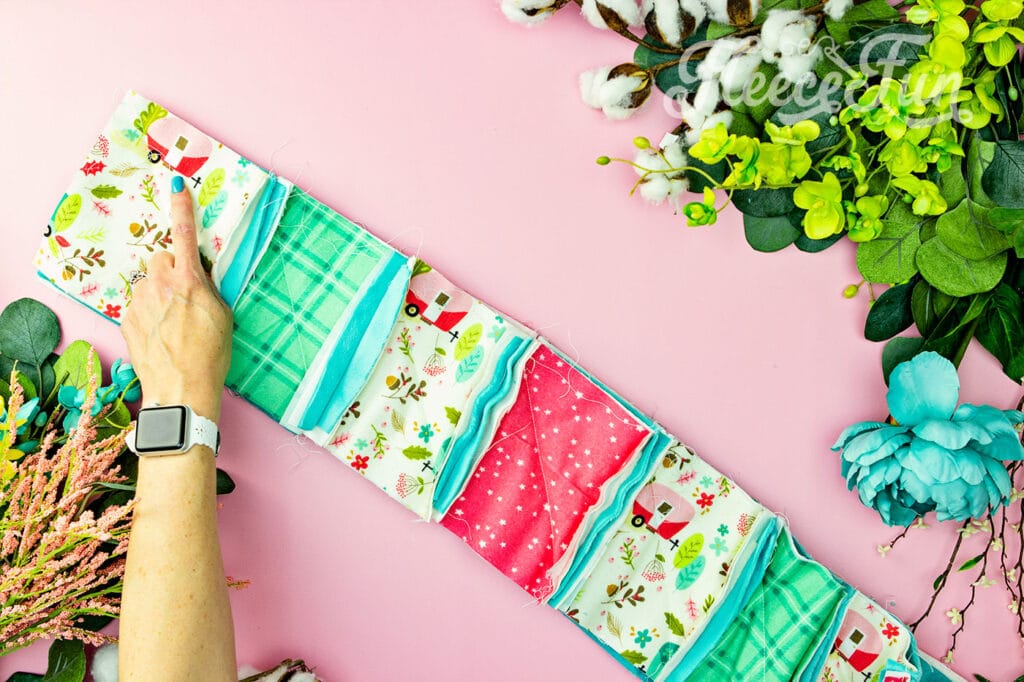
Continue to add rows to the blanket as shown above, nesting the seams.
At this point, be mindful that as you add rows you add weight to the quilt.
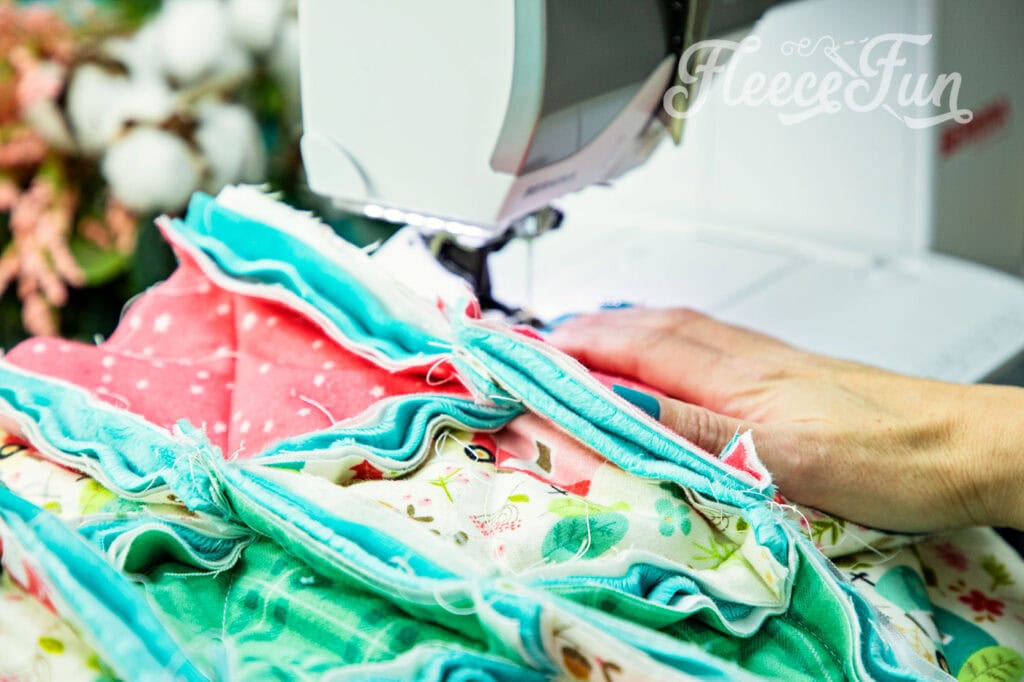
Don’t let it pull on the needle while feeding it through the sewing machine.
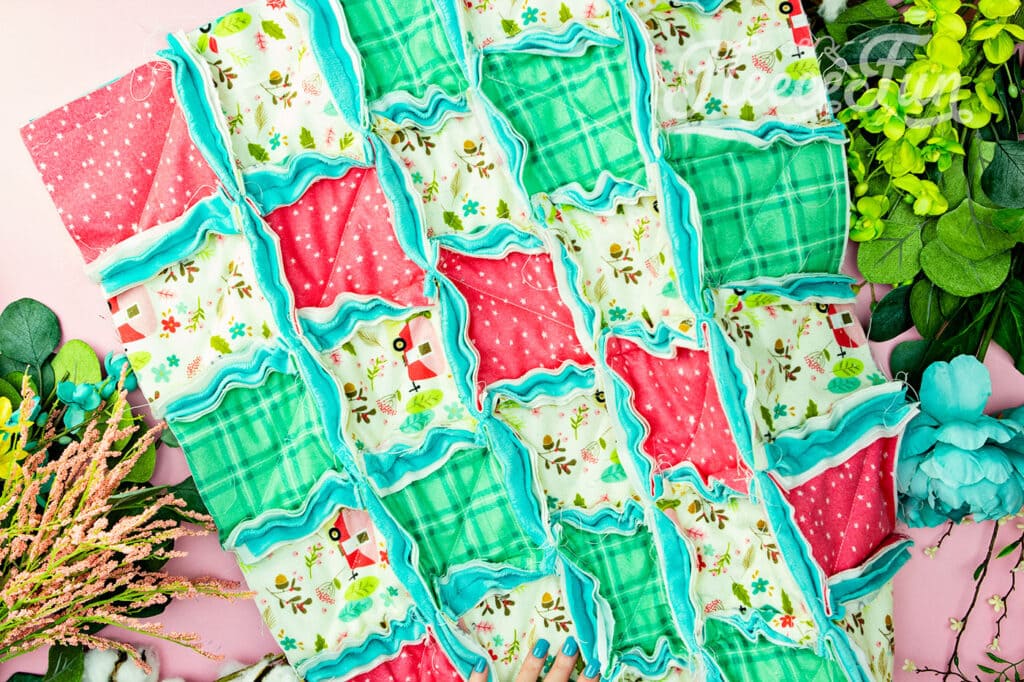
Hey it’s turned into a blanket!
Step 7 – Finishing the Outer edges to a Rag Quilt
There are a couple of ways to finish the edges to the rag quilt the easiest way is to sew a straight stitch all around the edge of the blanket 3/4 an inch from the edge and rag it like the rest of the quilt (more of that in a moment).
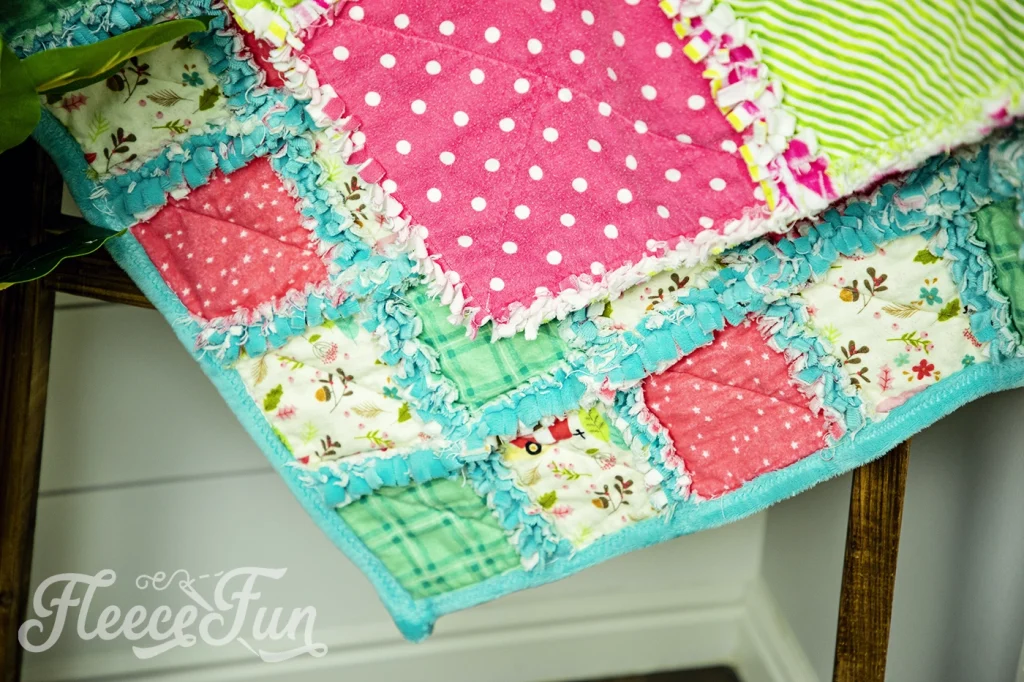
The more advanced way is to bind it with minky using this method here.
Both will work it’s just up to you and your skill level. I chose to bind this blanket this time so I could show the two options.
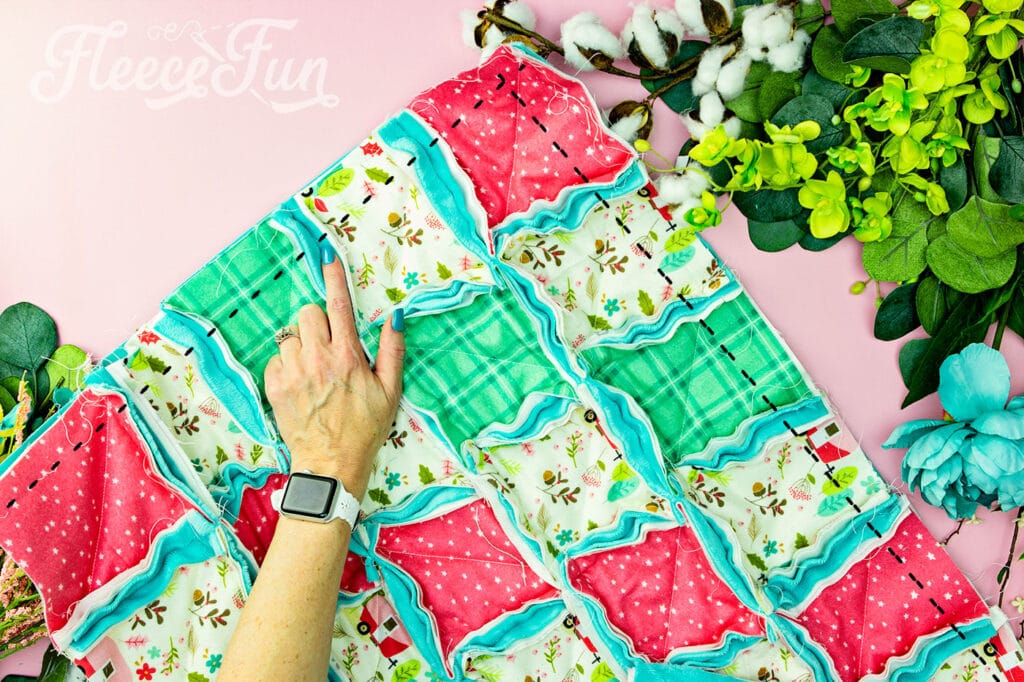
Step 8 – Snip the Seams to the Rag quilt
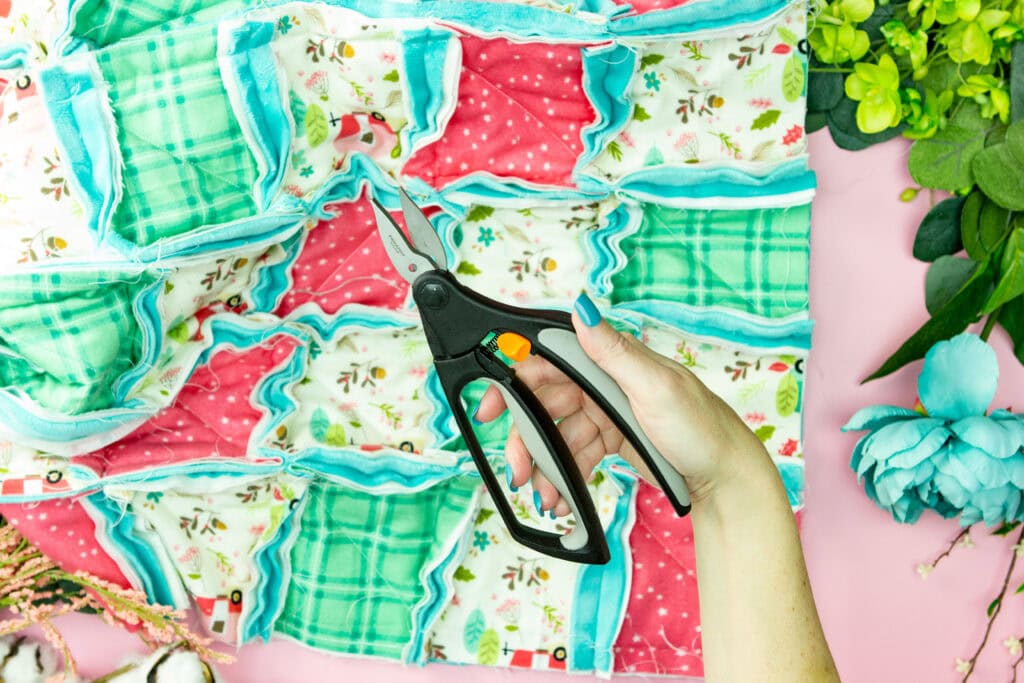
Now its time to cut up all your hard work. Using scissors or ragging shears snip the seam allowance about a quarter inch to a half inch apart.
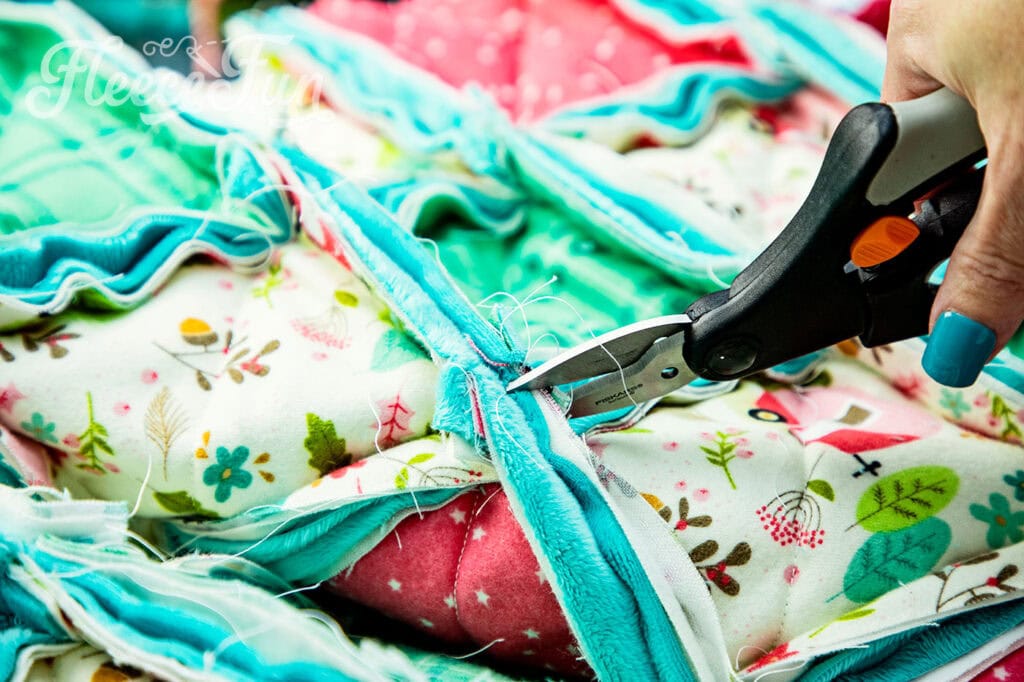
Try your best to keep it even, but it doesn’t have to be exact. Depending on your size of blanket this could take some time.
Turn on a good movie or podcast and try to find some Zen in the repetitive action. Be mindful not to snip through your seams, and while you’re sitting there with scissors snip off any stray threads you come across.
Just so you know…
Because this blanket requires soooooo much snipping, I strongly recommend scissors that are spring loaded. It will save you from a lot of grief. This is the pair I use and personally recommend.
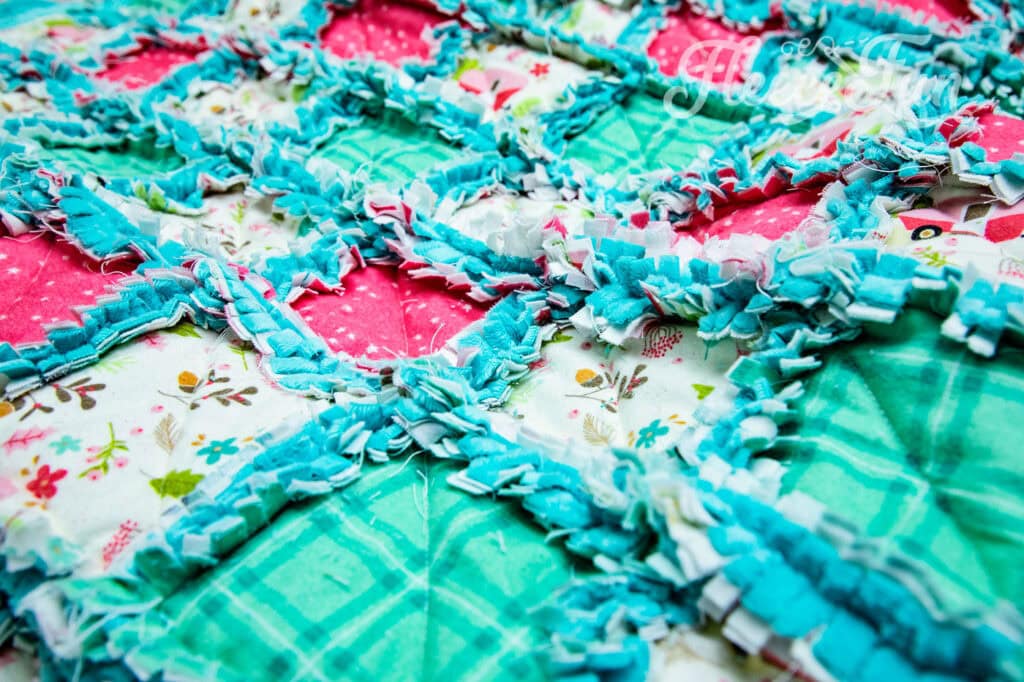
Step 9 – Wash the Rag Quilt
Wash your cuddle quilt to complete the ragging process. Throw in some old towels to help with the agitation. Do not use liquid fabric softener as that will gum up the ragged edges and the minky fibers.
It may take a few washes to fully get the rag look. Enjoy your ragged quilt!
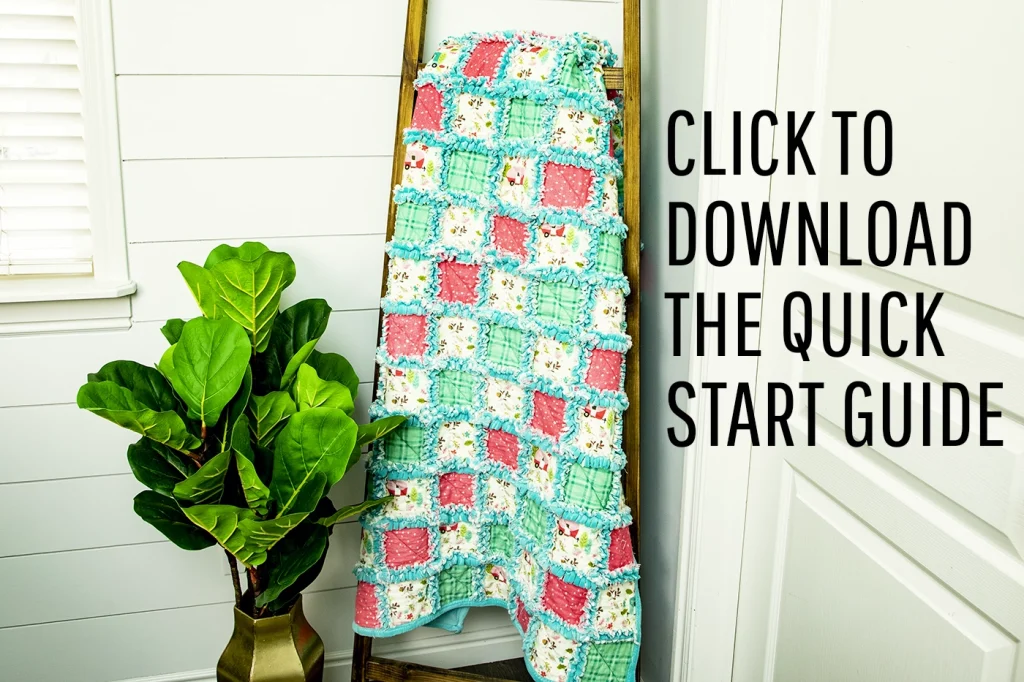
GET THE FREE Start Guide BELOW:
I only approve of Adobe reader. By downloading you are agreeing to pattern terms of use. Fill out the form here to have it delivered to your inbox or get to it by clicking the picture.
Other Beginner Quilting Tutorials for you to enjoy:
- Quilt As you Go, Stitch N Flip Quilt
- How to Sew a Quilt the Easy Way
- Easy Pinwheel Quilt Block
- Summer Table Topper Quilt Tutorial
- Quilted Christmas Table Topper Tutorial
More Fleece Blanket Tutorials:
- Hooded Fleece Blanket DIY (Child and Adult)
- No Sew Blanket Tutorial (with flannel!)
- How to Make a No Sew Tie Quilt
- How to make a no sew fleece tie blanket
- Duvet Cover
- Stitch ‘n flip quilt
- How to crochet the edge of a Fleece Blanket
- Fleece Blanket with a Satin Binding
- Self Binding Fleece Blanket
- Fleece Ribbon Throw
- How to use the Tie Blanket Ruler!
- You can see all of the blanket tutorials here
You May Also Like:
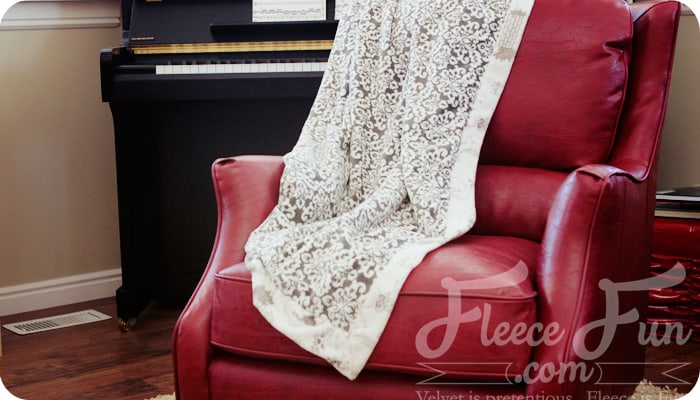
The self binding fleece blanket. Warm and easy to make! Get the video tutorial here.
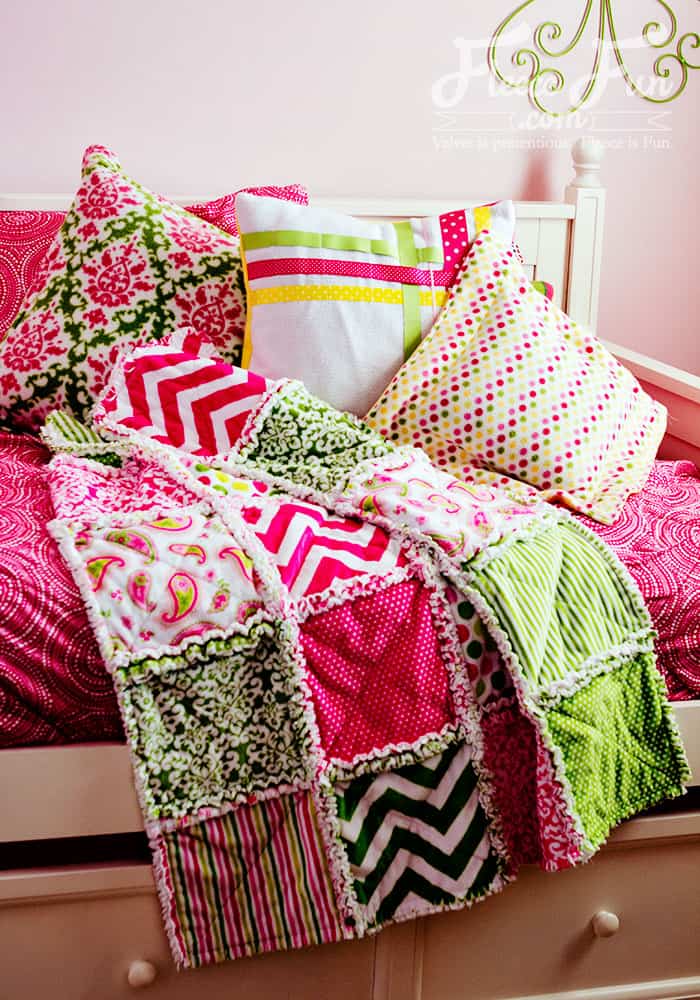
Have some leftover flannel? This adorable Rag baby bib on Creations by Cara would be perfect to use it up!
You can find a quick start guide to rag quilts here.
Flannel is what is traditionally used as it frays nicely giving the fussy edge to it. Flannel can often be combined with fleece, minky or jersey knit to add more warmth and texture, but these materials do not fray.
This depends on how you want your rag quilt to look and feel. In quilting the traditional block sizes are 3″, 6″, 9″, 12″ and 15″. The smaller the block, the more blocks you will need to complete your rag quilt and the more “fuzzy edges” you’ll have. In this tutorial the block end up being 8.5″ ( taking away the 3/4 seam allowance from 10″). The truth is you can make the blocks any size you want under 12″. Anything larger than 12″ and the rag quilt doesn’t look as nice.
Wash as recommended for flannel. Be sure to toss in a few old towels with the quilt to help with balance and agitation. Do not use liquid fabric softener as this will cut up the ragging and make it less fluffy. Dry as normal, again with old towels to help agitation of the frayed seams.
A baby quilt is typically 30″ by 40″. Traditionally smaller squares are used for a baby rag quilt so 4″ work well. If you use a half inch seam allowance, You would want 140, 4″ squares to make a baby size rag quilt.
If you make larger squares your will need less fabric than if you make smaller squares as the smaller squares requires more seam allowances/ frayed edges. Also depending on how much fabric you choose to sandwich between each layer. 6 Yards of colorful fabric (exterior) and 3 yards of interior/ plain fabric should cover your needs for a traditional throw is 50″ by 65″.
Thank you for a great quilt will be making this for my grand kids who are moving to Alaska. And where can I buy this fabric at?
You can find it online at several stores. Like Missouri Quilt Company, fabric.com, etc.
what are cuddle cakes and where do you get them i just purchased three yards of fleece in 4 different colours/patterns. what size blocks should i make and can i use fleece for the front and the back?
I have watched at least 2 dozen videos on rag quilting and not ONE has ever explained the process as well as you have. I appreciate you and have learned a lot from the tutorial. Thank you again. Fan here!.
Love the rag-quilt tutorial! I want to try this for my grandson!!
is cuddle cloth & fleece the same thing?
Cuddle cloth is more like minky. Fleece and cuddle cloth are like cousins – as they are both synthetic and have similar stretch and knit properties. You can make this blanket out of fleece if you desire.
This has helped me a lot thank you so much….
I can find the “girly girl” kits on Amazon but not the kit with the paisley pattern. Did they quit making the paisley kit?
Hmmm, looking at Shannon’s website the kit has the paisley pattern in it. So I’m not sure why the kit you found doesn’t have it. 🙁 I’m sorry I know that doesn’t help. My recommendation would be to ask the seller to confirm whats in the kit. If it is Shannon’s kit, the paisley should be in there according to the description on their website.
Thanks for the tutorial!
I got a sewing maschine some weeks ago and dream of making a quilt! I will certainly come back to your tutorial!
Take care
Anne
http://crochetbetweentwoworlds.blogspot.de
I have a question, I would love to make one of these Rag Quilts, I have been collecting Material with owls on it, for a very long time now, but none of them are Flannel its the novelty print material from joann;s will making a rag quilt out of this Material work?
thank you Norma
Regular cotton doesn’t fray as nicely to the soft edges that people expect from a rag quilt. I can work and rag – but it won’t be as soft as the flannel and it won’t rag as nicely. So it’s reaally a matter of taste and what you want.
I just got done making my first quilt and ill tell u its a lot of work! But these rag quilts are so cute and they seem easier and a little quicker. I bet ill make one for my niece!
What if I do not want the flannel to be in the “ragged” edges? Do I just cut the flannel 1″ smaller?
I suppose you could – but doesn’t that defeat the point of a “rag” quilt?
I want to try this for my daughter who is due in 2 weeks(Dec 10th). Is this fabric your using stretch in any way? We bought some fabric to make her crib and we got the dotted minky. We decided to go with a pack and play instead of a crib and have all this fabric left over, I’m afraid that the cotton and minky won’t go well together and I’ll just make a huge mess of it. Just curious if this is stretch fabric
Sorry if this is a stupid question, but I don’t sew a lot. How do you line up the fleece with the flannel so perfectly??
You make sure your cuts are acurate and then pin it into place.
I am speaking of the inside part of the squares (the flannel/fleece insert).
I have made several flannel rag quilts but, trying something new with cotton. Please tell me it will work!? I realize I won’t get the
same finish but, the material was so darn cute I couldn’t resist! Suppose I could have made a regular quilted one but, not that confident yet! Also- can u use cotton & flannel together in a rag?
Thanks…LOVE your tuts!
You can use them together – but the cotton won’t fray as nicely as the flannel. If that doesn’t bother you – it should work.
CAN YOU USE MINKY ON ONE SIDE OF THE FABRIC?
Yes – that will work.
I purchased 100% cotton fabric and flannel to make a rag quilt for my king sized bed. Do you think it will work okay? I am planning on filling the squares with cotton batting not going all the way to the edges. 10″ squares and 8 1/2 inch batting.
That sounds like it will work great!
You do beautiful work, but I don’t understand why you would put any kind of fabric softener on this because the fabric is already soft. Everything I’ve read of fabric softener is that it remains in the fabric and gums it up and I didn’ t like that next to my children’s skin. Then someone, who ran a cloth diaper service, told me they use vinegar in the rinse cycle to remove all the junk that builds up on the fabric. I have not used anything else since.
Hi Suzanne! I say in the video to not use fabric softener. 🙂
Thanks for a wonderful tutorial. Can’t wait to try it?
Someone else mentioned this same thing, but I do not add any sort of sheets or softener to our laundry and haven’t for years, due to skin irritation issues. I merely use vinegar in my final rinse in my washer, helps to remove static and that’s the purpose of softener originally.
Another option is to make fabric squares and soak in a mix of half vinegar, half water with several drops of fave essential oil, add one of these fabric sheets to the dryer, these are the fabric dryer sheets I use and they don’t impede the absorption properties of towels and help reduce static cling from the dryer.
Hi’ya.
Great tutorial! I’m completely new to rag quilts and I love your sewing machine. Mine is vintage and looking for a more modern one. Can you tell me which one you use? Thanks.
Allison
HI Allison,
I use a Bernina Manual machine. It’s been my machine for over 20 years now. 🙂
Hi Angel,
Thanks! I’m desperate for a new reliable machine.. been using my moms vintage Singer. Which model.. there are sooo many. Thanks.
Allison
Allison I know this is answering 8 years later but I also use a Bernina. I got my fist one in 1975 and that’s my main machine. I also have a Bernina machine that has an embroidery modular with it. But if you take that off it’s just a newer Mondale fancy machine with more stitch options! Still I use my 1975 model! I also have 2 Bernina sergers. One simple one and one that also does the hemmed seams. I’ve stuck with Bernina because they last! I grew up with my mom buying cheap machines every other year! When she passed away she had about 6 machines and most didn’t work well! I gave all them away!
Angel I’ve sewed for over 56 years learning in jr high years in Home/Ec. I’ve made my own patterns, sewed formals, wedding dresses, quilts, Barbie clothes, made Teddy bears, you name it I’ve sewed it. But I’ve never made a rag quilt! Great tutorial!! Thank you! You make it easier with your descriptions! Can’t wait to try it! Loads of my mom’s material to sort through!! 😃
Just watched your tutorial… I am so going to try and make this… I bought a simple sewing machine 2 days ago… never sewed in my life!!! Well I started by making a minky blanket with the simple inside sewing. I cant wait to try this rag quilt!!! going to purchase my material tomorrow… Thank you again!!!
I want to make one of the quilts the tutorial was super easy to follow…Here is my question…I am using T-shirts for the outside and wonder if using standard on the inside would turn out an ok product? I have lots of fleece on hand but all my flannel is patterned and I hate to use that. Trying to use up stuff on hand but don’t want to do all the work then it not work out. I did a few squares like this but am concerned about after washing? And should I wash the flannel before use?
If the T shirt fabric is already shrunch I would wash the flannel.
Hi! Please reply!! Did you use a quilting machine or a regular sewing machine for this project? Love it!
Hi Hannah,
I use a regular machine. This project will not work on a feather wight machine – so please be sure to use a machine that is sturdy.
Hi Angel, I found this on Pinterest and can’t wait to get started on this for my girls. I was thinking is it possible to do this with another fabric besides minky and cuddly and make it more quilt-like? I’m a complete newbie at this and love it.
Thank you
Hi Nadia,
You can make just out of flannel for beautiful results. Good luck!
You can just flannel for the whole thing.
If I were looking to get the cuddle somewhere else, would I simply look for cuddle cloth?
this would be my first quilt. just purchased 3metres of fleece in 4 different colours, what size squares should i cut. and what are cuddle cakes?
Hi Linda!
Cuddle cakes come in pack of 20 that are 10 by 10 inch squares. Which is about 25.4cm. We’ll round down to 25cm to make it easier. So Cut 25 by 25 cm – you will need to determine the size of blanket you want to make from there. Good luck!
Rag quilts are so easy to make and come out so cute! The cutting part is a huge pain, even with a pair of really sharp snipping scissors. I accidentally sliced through one of my squares in several places while cutting the seams, and I don’t have any more fabric to replace that square! What do you advise to do?
Hi Stephanie!
I’m so sorry – that’s really frustrating. Hmmm… Re sew the seam again across the places you snipped – perhaps even do it twice. Then hand stitch the cut that is past the seam allowance shut so it won’t fray more. That’s my best guess/ advice in that situation.
– Angel
Great help, still need help, I’m working my first and I didn’t wash any of it. Do I need to take it apart or will it be ok? I’m washing all of the next one, do I have to iron it?
Ok don’t panic. 🙂 It will be fine, ti will just be a little wrinkled looking ….NO biggie! congrats on your quilt! Ironing is not needed for this quilting technique.
So do you or do you not wash the flannel first before cutting the squares?
Hi Kathy,
I only “preshink” the flannel if I am combining it with a material that doesn’t shrink (like minkee or fleece). If you are only using flannel washing is not necessary. 🙂
Just wanted to ask, I think I know the answer but just wanted to make sure. Do the ragged edges show up on both sides of the quilt? I didn’t watch all the videos since I am on limited data here. Do you have a pd i can print out with directions?
We live in a rural area and the internet is slow and no high speed or cable, only satellite 🙁
The ragged edges only show up on one side of the quilt. I am sorry there is no pdf available for this pattern.
Hi! I just cut all the pieces for my first rag quilt for my upcoming grandson. My first question was thread color since I have 4 colors and a 5th for the back. Does it matter if I use white? (Light blue, blue plaid, yellow, navy, and a slightly different shade of blue for the back) I have been told medium grey to beige? For sewing together I think white will be okay. When I fan the seams is that nesting the seams, this term sort of confused me. Thanks for your response.
Grey beige or blue will work. Fan the seams? Can you give me an example?
Thank you for the tutorial, I’ve made rag quilts before and this is the best technique I’ve found.
Could I use the cuddle cake kit for the front and a solid minky fabric for the back?
Yes that would work – you would just need to cut the squares yourself. 🙂
Thank you for sharing! My mom give me all the tool needed to make one. I just need to buy material!
I saw this tutorial a year ago last August and it was the first quilt I had ever sewn. The only thing I had sewn before that was a pair of pj pants. Almost a year has gone by and I have won a 1st place award for one of my rag quilts and I have gifted so many. Thank you so much for this tutorial it has inspired me to love quilting and I just taught my daughter how to quilt and yesterday she made her first rag quilt for her bed. Thank you again!!
Thanks for sharing your story!
Thanks,i made a rag quilt and i love it,so warm and cozy!
Relatively new to quilt making and I was just wondering do I do a small back stitch at the start and end of the big cross in each square and each seam. Love the tutorial and video.
HI Dorothy! what I did was a single long row of stitching diagonally across the blanket. So I back stitch where I started at the edge of the blanket and locked the seam at the other end. The truth is because I machine stitched the binding I technically didn’t need to lock the seam, but it made me feel more secure. 🙂
This tutorial is STILL the best tutorial for making rag minky quilts.