
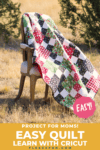
How to Sew a Quilt (the Easy Way) with Cricut and Riley Blake
This content contains affiliate links or sponsored elements, read our Disclosure Policy.
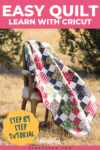
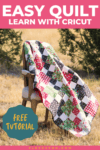

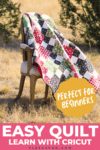
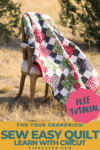
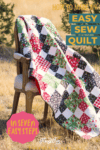
Quilting basics: Learn how to sew a quilt the easy way using these step by step instructions with tips and tricks. Learn some basic quilting techniques that you can apply as a beginner to make the sewing process easier.
This post has been sponsored by Cricut, compensation has been given but the opinions are my own. This is part three of my quilting series using my Cricut Maker and Riley Blake’s “Comfort and Joy” fabric kit. I’m making the “Sew Many Squares” pattern from Cricut’s Design Space. In the Previous two posts I showed you how I selected the pattern, prepped the fabric for cutting, cut the fabric in preparation for sewing. Today I’m finally getting to the sewing and finishing up the quilt.

I have to be honest, quilting is not a quick process. It’s a lot of sewing and it makes you utilize a lot of skills and tricks along the way. In this quilting tutorial I’ve included some of the tricks and tips you can use to speed up the process and make things a little easier. But I have to tell you I LOVE the end result of this quilt.
YOU WILL NEED:
- Cricut Maker with a Rotary blade
- One Riley Blake Fabric Kit
- Quilt batting
- Fabric for the Quilt Backing (see pattern for correct amount)
- Cricut’s Rotary Cutter Ruler and Mat (to make prepping the fabric fast and easy)
- 12 by 24 Fabric Mat (at least two to make it easier)
- Brayer (not necessary but a nice way to make sure the fabric is secure on the mat)
- Quarter inch sewing foot ( not necessary but makes things easier)
- Iron
- Sewing Essentials
- Access to Cricut’s Design Space
- Printed up PDF of the Desired Quilt Pattern
- 505 Spray
How to Sew a Quilt For Beginners Video:

How to Sew a Quilt For Beginners:
Step 1 – Organize Your Riley Blake Fabric for Quilting
Before we start putting blocks together it’s important to get all the fabric organized and into piles so it’s easy to grab the fabric you need.
Be sure to reference the instructions and the card in your fabric kit to make sure you keep everything straight.
Step 2 – Chain Sewing: Building Your Quilt Blocks
One of the reasons why I chose this pattern is that when you break it down the blocks are very simple. It’s just a four square mixed with larger blocks to make a cool pattern.
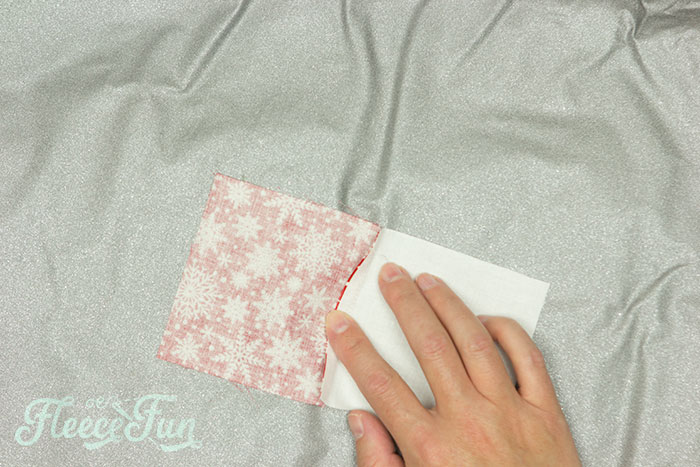
I’m staring with the first block which is fabric 1 with fabric 3. Basically I need to sew all the white squares to a red square. Since the fabric non directional I don’t need to worry about which direction the fabric is facing. I place a white square on top of a red square.
To make this top come together quickly I used a method called chain sewing.
Basically rather than locking the beginning and end of each seam to each grouping I run all of them through, one after another.
I then snip them apart. I don’t need to worry about the seams being locked because of how the quilt top is sewn together.
Step 3 – Press and nest the quilt block
You can’t skip ironing in quilting. it’s a MUST.
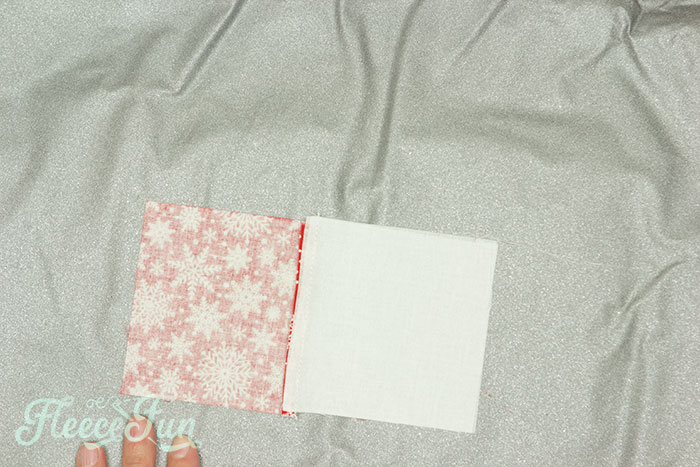
Press the seam to the dark (fabric #3) on all the grouping you just sewed.
Now take two of your grouping and place them together as shown in the diagram in the quilt pdf instructions.
Be sure the seams are nested. Nested means that the two seams that you line up, the seams are in opposite directions so the bulk is evenly distributed on both sides of the seam. This also makes is so the center can line up in the block.
Sew the block together.
Repeat until you have 25 of each of the blocks (see “Sew Many Squares” PDF for instructions).
Be sure to press the seams as instructed.
Step 4 – Sew the rows together and make the Quilt Top
Following the instructions, form the rows. Take care that the 4 Square you made is turned correctly. The white block should always be in the top left and bottom right.
Continue to build the rows and sew the top together as instructed.
Step 5 – Make your Quilt Sandwhich
Now that the quilt top is sewn It’s time to build the “quilt sandwich”. I will tell you that I backed my quilt with minky, which I love. But Minky is NOT beginner friendly. If you plan o quilting it yourself and If you don’t have any experience with Minky now is not the time to try. Stick to a cotton back.
Fold you back in half and mark the halfway line. This will make it easier to put the batting on.
Unfold the back and tape it down with masking tape.
Using 505 spray baste down the batting to the back of the quilt. I like to start from the middle and work my way out, doing a a row of about a foot at a time.
Baste down the quilt top using the same method, Trim away any excess batting, but be sure to keep about 3 to four inches of batting and backing around your quilt top. Since I am using minky and it can shift I also added a few safety pins to tack it down.
You can take your quilt to a professional long arm quilter and have them sew the “quilt sandwich” for you or you can do it yourself. I opted to do it myself with my walking foot.
Step 6 – Quilt the sandwich together
At this point there are a million possibilities to quilt. You can hand quilt. You can long arm.
I opted to do a simple pattern using my walking foot.
Follow the line of the squares to make a simple diamond design.
I sewed three lines together to make it a little more interesting and make some more squares in the pattern.
I love how the pattern looks on the minky back.
Step 7 – Bind the Quilt together
Using the fabric provided in the Riley Blake kit, I bound the quilt. If you’re unfamiliar with binding Riley Black has a great YouTube tutorial to walk you through it:
One tip that I will share with you.
To keep my freshly pressed binding nice, I wrapped it around a bottle ( like a spool) so it would stay perfect until I was ready to use it.
That’s it. While a quilt can be a lot of work, when it’s finished it’s wonderful. I know that I’m going to love pulling this quilt out every holiday season. It was really fun to follow a pattern and have all the coordinating fabric chosen for me. I might just have to try a more complicated pattern next time!
That’s how to sew a quilt the easy way!
Other Beginner Quilting Tutorials for you to enjoy:
- How to Make a rag Quilt for Beginners
- Quilt As you Go, Stitch N Flip Quilt
- Easy Pinwheel Quilt Block
- Summer Table Topper Quilt Tutorial
- Quilted Christmas Table Topper Tutorial
Creative Sewing & Cricut Projects You’ll Love!
- DIY Placemats for the Holidays
- Acorn Template (Free JPEG & PDF)
- DIY Custom Sewing Labels
- Felt Valentine Envelope DIY (No Sew)
- DIY Matching Game
- DIY Birthday Crown (Free PDF & SVG)
- Freezer Paper Stencil for T-Shirts Tutorial
- Tips for Working with Iron-On Mesh
- DIY Tiara (Free Pattern & SVG)
- How to Make a Knight Helmet (Free Template)
More Cricut Projects!
- Cricut Maker for Beginners: Easy Party Decor
- Your Top 3 Cricut Maker Questions Answered
- DIY Pineapple Decor
- Cute Craft Room Trash Can DIY
- See all of FleeceFun’s Cricut Tutorials!
This is a sponsored conversation written by me on behalf of Cricut. The opinions and text are all mine.
really turned out very cute and yes will be great for Christmas…it will be hard to put away after the holidays…
Love this! Couldn’t have picked better fabric for this pattern. I want to try one now!
I love this pattern and style. I am very new with quilting so i am practicing.