
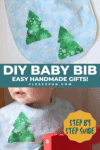
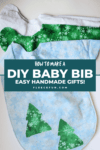
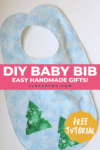
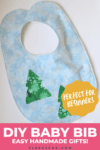
Baby bib tutorial, a handmade gift idea
This content contains affiliate links or sponsored elements, read our Disclosure Policy.


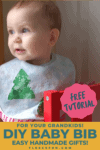
Hi! Ula here from Lulu & Celeste. I blog mainly about my sewing projects for my two girls and share tutorials for things I’ve made them! I love making bibs! The baby bib in this tutorial is so practical and you can make them fun using cute fabric or play around and do some fun embellishing.

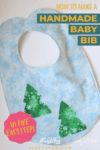
Reverse applique work has been on my to-try list for awhile, so I decided to do it out for this bib. For this one I made tree shapes but any shape you liked would work.

YOU WILL NEED:
- 1 Fat quarter for bib front (Fabric A)
- 1 Fat quarter for underlayer (Fabric B)
- 1 Fat quarter of towelling or flannel for backing (Fabric C) (For this bib I used two layers of flannel)
- 2″ piece of Velcro, or other brand of hook and loop tape
- Thread, scissors, iron, ironing board, etc
- Pencil or washable fabric marking pen
- The pattern (or trace around your favourite bib, don’t forget to add a seam allowance!) (Make sure to download before printing and that it is set to print at actual size).
- If using the bib pattern provided, it includes 1/4″ seam allowance.
Baby Bib tutorial Handmade Gift How To:
Step 1 – Cut out the fabric

Fold fabric lengthwise and trace bib onto all three fabrics. Cut out.
Step 2 – trace a Christmas tree pattern

Trace tree shape onto top layer of fabric (A) in any arrangement you prefer. Be sure to leave a space of at least 1/2″ from the edge of the fabric so it doesn’t get sewn into the seam allowance, Pin fabrics A and B together, both right sides facing up (so wrong side of fabric A is touching right side of fabric B).
Step 3 – cut out the tree shape and sew
Sew right on top of the shape(s) you drew in Step 2 of this baby bib tutorial. Then, being careful to snip only through the top layer, cut out the shape on the inside of the stitching. (see pic above)
Step 4 – Sewing and Turning the Fabric Layers

Pin Fabric C to Fabric A right sides together and sew leaving a 2″ opening for turning. Clip slits along the curved edges, or use pinking shears (make sure you don’t snip the stitches!), then turn right sides out and press. Make sure fabric at the opening is turned under.
Step 5 – finishing the handmade baby bib tutorial
Topstitch all around the bib. Sew the Velcro on.

You’re done! Now, find an adorable baby to give your bib to!
More Baby Bibs and Burp Cloths Patterns:
- Bib with Pocket Tutorial
- Muslin Baby Bib Pattern and Tutorial
- Towel Bibs for Babies – Bandana Style Ultimate DIY
- Free Baby Burp Cloth Pattern
- Easy Baby Burp Cloth Tutorial
- How to Make a Pacifier Clip