
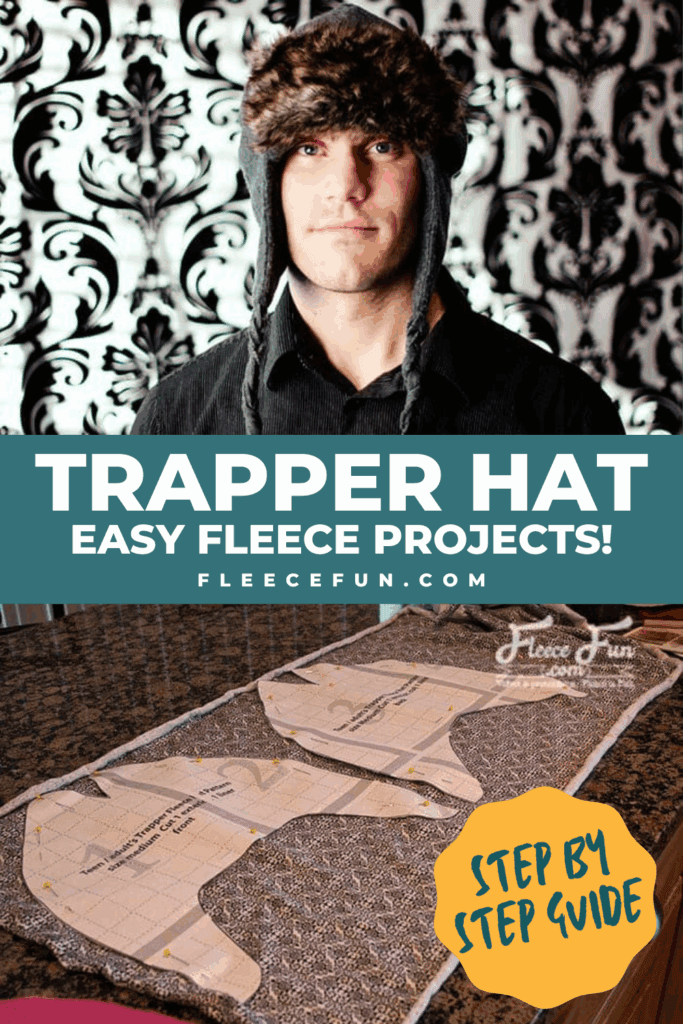
Fleece Trapper Hat Pattern and Tutorial (Free)
This content contains affiliate links or sponsored elements, read our Disclosure Policy.


This free fleece trapper hat pattern has a secret! You can make a warm trapper hat that hides a set of earphones. Listen to your favorite mp3 player while keeping warm. Pattern can also be made without earphone inserts.
Hate The Ads?
This pattern with video and printable instructions is available in the Makers Studio. The Maker’s Studio is an ad free experience, no video ads, no forms, no zip files, just creating.

YOU WILL NEED:
- 1/2 yard fleece (for exterior and lining) or
- 1/2 yard jersey knit for lining
- 1/8 faux fur (optional)
- rotary cutter and mat
- over the ear headphones (optional)
- Sewing Essentials (pins, scissors, etc.)
- Sewing Machine
- Get the free pattern here.
Fleece Trapper Hat Pattern video tutorial:

Fleece Trapper Hat Pattern Tutorial
step 1 – Cut out pattern
Print up the free pattern (you can get assembly instructions here).
Decide if you are making a fleece trapper hat with fur trim or not.
For the fleece trapper hat pattern tutorial you will need cut out:
1 of the exterior front, 1 of the exterior back
Then, 1 lining front, 1 lining back
and 1 front piece of fur (optional).
1 front piece of fleece (optional)
6 to 12 strips of fleece about 6 inches in length (optional)
Quick Tip
To cut out the fur trace an outline on the the back side of the cloth – it will be easier to cut out than pining the pattern piece and trimming. Also be sure to shake it out outside to get rid of stray fur.
If you are making headphone inserts you will need to trace a box around one of the headphones you are using to insert – be sure to leave room for a .23 seam allowance.
Quick Tip
You could upcycle an old sweater for this Fleece Trapper Hat exterior. For the lining you could make it from fleece or jersey knit.
step 2 – Begin to make the fleece hat
With right sides together sew the fur piece to the fleece piece, using a .5 inch seam allowance leaving the bottom open for turning.
Trim corners. Turn right side out
Line up bottom with the hat (see picture) baste into place along the bottom and tack into place in three to four spots along the top.
step 3 – Sew the exterior together
With right sides together sew the front of the exterior to the back of the exterior.
note
The front and the back of the hat are not symmetrical
Using a .5 inch seam allowance sew the side seams together leaving the v open.

Then turning the hat sew the v shut. (pinch the v together (right sides of the front together, right sides of the back together pin sew together in one continuous seam.
step 4 – Make the braided tassels (optional)
If you aren’t making the tassels for the Fleece Trapper Hat, skip this step.
Gather the strips into two groups.
Sew a straight stitch across the top of each bunch.
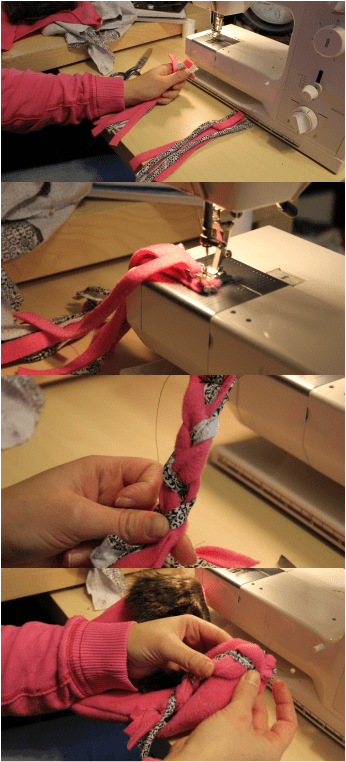
Then braid the strips.
Sew across the bottom to secure and cut ends so they are even.
Then sew to the ends of the exterior of the Trapper Hat – be sure to pin them up out of the way when you add the lining.
step 5 – Make the lining
With right sides together sew the front of the exterior to the back of the exterior.
note
The front and the back of the hat are not symmetrical
Using a .5 inch seam allowance sew the side seams together leaving the v open.
Then turning the hat sew the v shut. (pinch the v together) right sides of the front together, right sides of the back together pin sew together in one continuous seam.
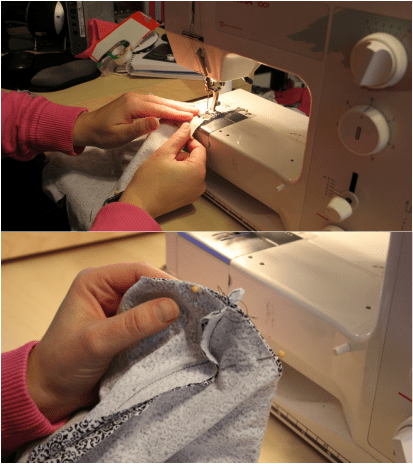
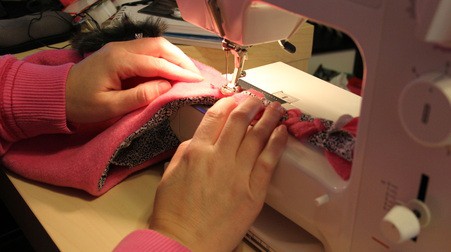
step 6 – Add the earphone pockets (optional)
Pin the pocket over the side seam just below eye level. Sew pocket on using a .25 seam allowance, sewing along three sides leaving the top open.
Repeat on the other side.
Once you’ve sewn the pocket make sure that the earphone can fit into the pocket on each side of the fleece hat. Remove ear phones and set them aside.
step 7 – Bring it all together
Take the lining and stuff it inside the exterior, so right sides are touching. Line up the seams and the bottoms. Pin the bottoms of the lining and the exterior together.
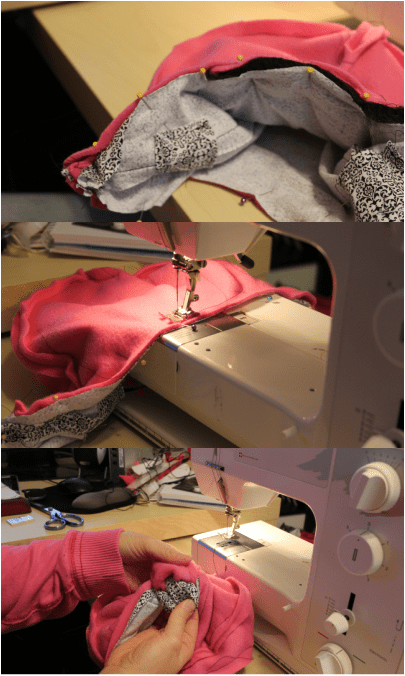
Sew all the way around the bottom using a .5 inch seam allowance, leaving a 3 inch gap for turning in the back.
step 8 – Finishing up the Fleece Trapper Hat
Turn right side out using the opening at the top (work with a it a little as it is a squeeze). Once turned right side out, stuff the lining of the hat into place.
Top stitch all the way around the hat .25 away from the edge – leaving the gap open if you plan on inserting headphones.
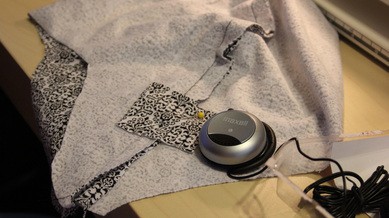
step 9 – Insert the headphones

Through the opening in the back of the Fleece Trapper Hat, insert the headphones into the pockets and let the wire hang out the back. Just be sure to remove before washing.
step 10 – Finishing the fur for the trapper hat

This is a picky thing but it makes the fur cuff look really nice. Take a pin and pull the fur that gets caught in the seam out. – if make the side seams practically invisible and looks professionally finished.
You’ve completed the Fleece Trapper Hat!
Download the free Fleece Trapper Hat pattern here, tutorial below.
You can get a free copy of Adobe reader here. By downloading you are agreeing to pattern terms of use. Click the picture below and fill up the form to download the .pdf !

More Fleece Hat Projects:
- Basic Fleece Hat (Adult, Child, and Baby)
- Fleece Winter Hat
- Fleece Hat with Ear Flaps
- Simple Fleece Slouchy Beanie
- Basic Hat with Ribbon
- Basic Hat with Top Knot
- Baby Hat with Chin Strap
More Fleece Projects!
- Ladybug Hat
- Children’s Boutique Style Pants
- Fast Fleece Tie
- Monkey Hat
- Fleece Owl Hat
- Child’s Fleece Robe
- Child’s Fleece Pants
- All Warm Fleece Hat Sewing Patterns!
ohhh, You are beyond fabulous! I would love this in toddler and children sizes for my grandsons age 1.5 and 4.5. Any chance that children’s patterns are coming soon? pretty please 🙂
Hi Sue –
that’s on the horizon – stay posted!
Agreed! However, I think if you just shrink the pattern to fit the regular kid hat it would work 🙂 trying it tonight!
I would love to make a few of these, but I have a Mac and can’t download the pattern. Is there anywhere else to get it? Or could you email it to me?
Okay, nevermind. I was clicking on the totally wrong thing. I got it figured out. Thanks for sharing such a great pattern!
Hi – Brilliant pattern but I’m missing something here. In step 2 you say to tack the top of the fur in place in 2 -3 spots. But when does this top part actually get sewn “properly” in? I don’t see it in the steps. Thanks if you can help! Paula
Thanks for these patterns! Is there an inch measurement for the adult caps? The ones I need to make are for 20 inch head size. I don’t know if this is Adult Large or Adult Medium.
Thanks for your help!
Adult
Small 20 inches or 50.8 cm
Medium 22 inches or 55.88 cm
Large 24 inches or 60.96cm
I absolutely love this pattern. I made in our school colors. I think my grand children and great grand children are going to love them. Thank you so much. 12/17/13
At the end you made a comment saying to sew around the outside of hat when all done. What would the seam allowance be? And is this how the hole is closed (that was used to turn it right side out?) or do you hand stick it closed? Thank you-
I used a quarter inch seam allowance and that should be enough to close the gap.
thank you so much. hope to manage after your kind explaations,dear Angel
Can our quilt club use your pattern to make trapper hats for homeless vets?
Absolutely – if you’re sewing for charity you are welcome to make multiple copies.
Hello Angel. Just want to say thank you for making this pattern so easy to access, understand and use. I’ve just made one entirely in black fur with ears for my daughter to wear in her school Christmas play (she’s one of the Three Bears) and will be making two more for her fellow bears. From research to finishing my daughter’s took about 90 minutes! Fantastic. Thank you so much.
Susanne
PS: I live in Scotland so we will be celebrating St Andrew’s day this weekend coming which will coincide with your Thanksgiving. I hope you and your family have a great time.
How wonderful! So happy you had success with your projects. 🙂
I realize that this is an older post, but when I click on the pattern for the child SMALL, it gives me the child LARGE. Is there a way to get the child SMALL pattern? Thank you so much!
Hi Becky,
I just checked it on desktop and it’s correct. Maybe try a different browser?
I absolutely love this fleece trapper hat pattern! The design is both cute and practical, and the step-by-step tutorial makes it easy to follow. I can’t wait to make one for myself and my kids this winter. Thanks for sharing such a wonderful free resource! ❤️
I absolutely love this fleece trapper hat pattern! The tutorial is clear and easy to follow, and I can’t wait to make one for myself and my kids. Thank you for sharing such a fun and cozy project!
I absolutely love this fleece trapper hat pattern! The step-by-step tutorial is easy to follow, and the design is super cute and cozy. Can’t wait to try it out for the colder months ahead. Thank you for sharing such a fantastic project! ♥
I absolutely love this fleece trapper hat pattern! The tutorial is so easy to follow, and the step-by-step photos really help. I can’t wait to make a few for my family and friends. Thank you for sharing this creative project!
I absolutely love this fleece trapper hat pattern! The tutorial is so easy to follow, and I can’t wait to make one for myself and everyone in my family. Thank you for sharing such a fun and practical project! 💖
I absolutely love this Fleece Trapper Hat Pattern! The step-by-step tutorial is so easy to follow, and the design is both stylish and warm. I can’t wait to make a few for gifts this holiday season. Thank you for sharing this free pattern!