
Self Binding Blanket Tutorial – How to make a self binding fleece blanket
This content contains affiliate links or sponsored elements, read our Disclosure Policy.
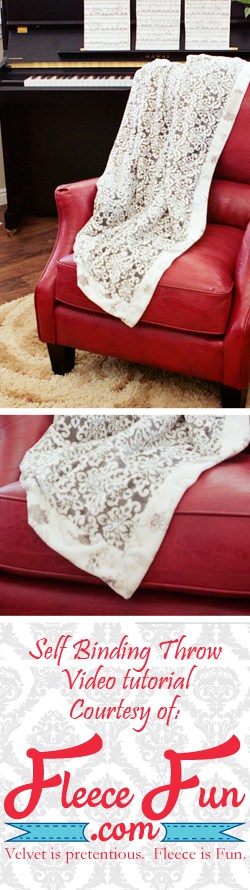
This self-binding blanket is fast and easy to make! Its double thickness is warm and comfortable. Use complementary fabrics to give the blanket a nice look. You can use cuddle fabric or fleece to sew this blanket.
The video tutorial makes it easy, fast, and fun to make. Written instructions are also included, making it simple to review the steps.
Hate The Ads?
This pattern with video and printable instructions is available in the Makers Studio. The Maker’s Studio is an ad free experience, no video ads, no forms, no zip files, just creating.

YOU WILL NEED:
- 2 yards fabric 1
- 2 1/3 yards fabric 2
- Rotary Cutter and mat
- A marking pen
- Sewing Essentials (pins, scissors, etc.)
Self-binding Blanket Video Tutorial

Self-binding Blanket Tutorial
Step 1 – Cut the material
Cut off the salvages of the fabric (approximately 1 inch on each side, for a total of 2 inches from both Fabric 1 and Fabric 2). Cut Fabric 1 so it measures 72 inches by 48 inches, and Fabric 2 so it measures 82 inches by 58 inches.
Step 2 – Layout the blanket

Place Fabric 2 (the larger piece of fabric) right side up on the floor. Fold it in half and place a pin in the center to mark it. Repeat with all four sides.
Then place Fabric 1 right side down (so the right sides are touching). Next, fold it in half and pin at the center, just like you did with Fabric 2, on all four sides.
Line up the center pins on Fabric 1 and 2, and pin them together from the center out on all four sides – be sure to use plenty of pins for the best results with your self-binding blanket.
Note
You will have excess on the corners – that’s on purpose!
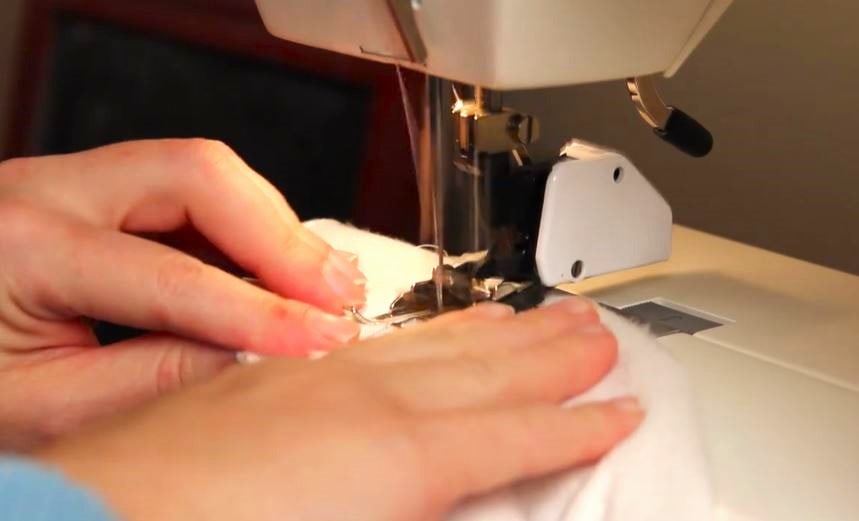
Step 3 – Sew the first seam
Using a straight stitch with a ½-inch seam allowance, sew from the center outward on each of the four sides. Be sure to end your seam ½ inch away from the edge of the fabric for your self-binding blanket.
NoTe
I sewed from the center out on each side because of the stretch in the fabric, trying to make it as even as possible. Be sure to leave a 4-inch turning gap on one of the sides.
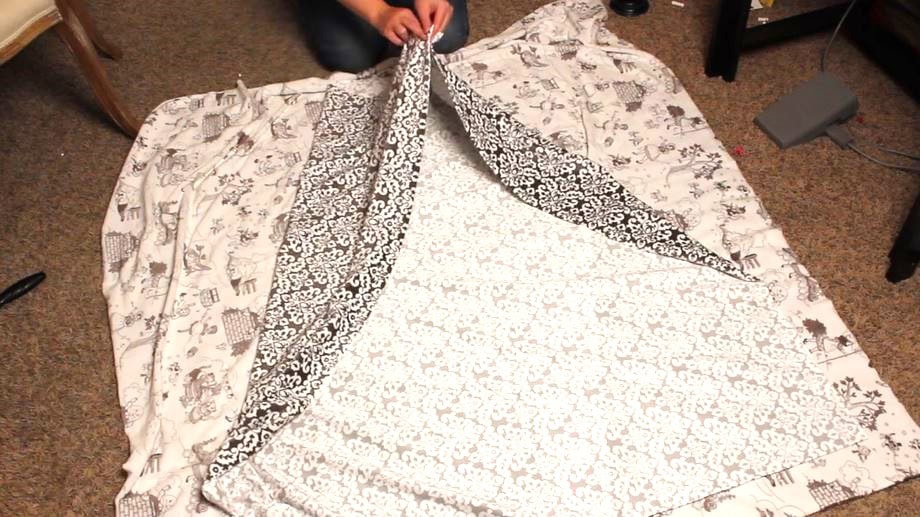
Step 4 – Turn is right side out
Now it’s time to make the mitered corners. I’m sure you’ve noticed the excess fabric on each corner of your blanket. We’re going to use this to make mitered corners, using an old trick.
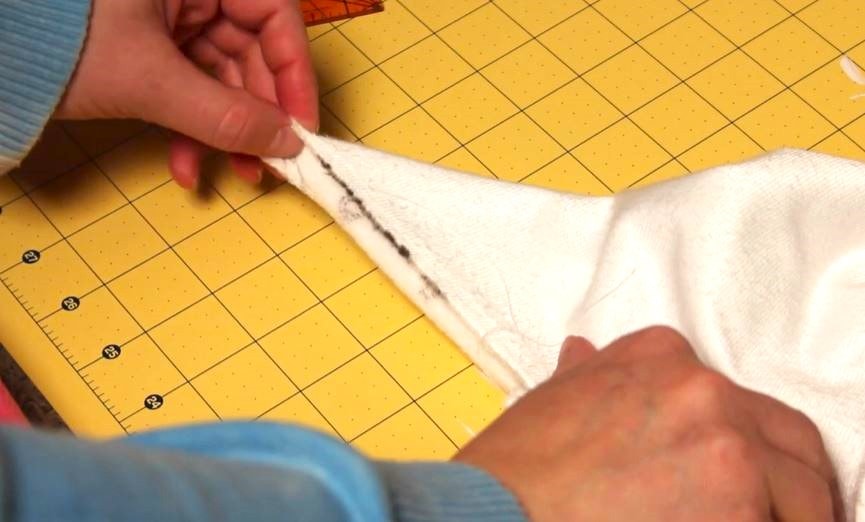
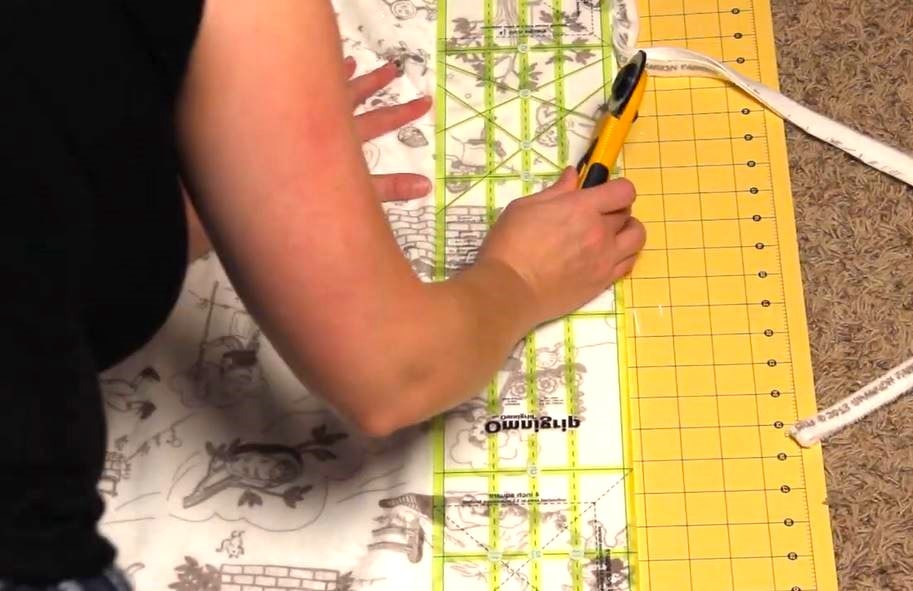
Fold the blanket at one of the corners so the seams touch and the edges of the excess fabric (Fabric 2) line up.
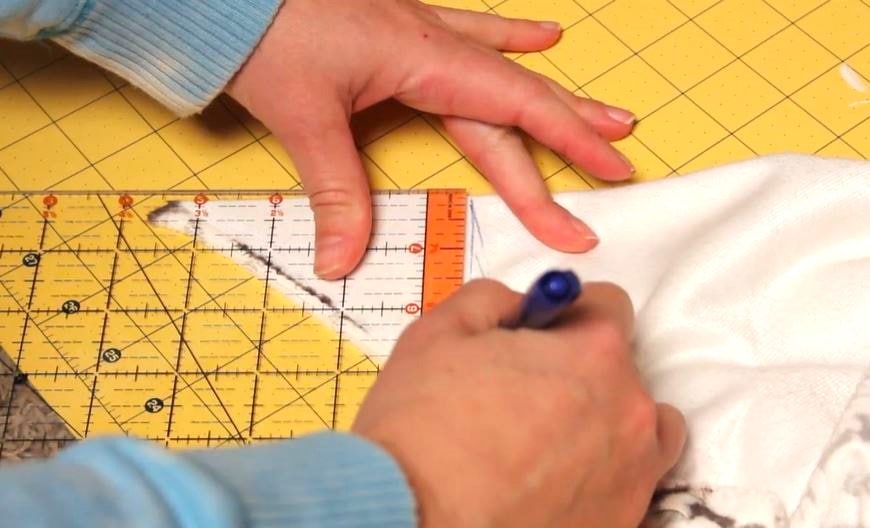
Then take your ruler and marking pen, and line up your ruler so it meets the edge at a 45-degree angle. Draw a line with your pen.
This is where you’ll sew a seam (don’t cut just yet—sew it first! You might even want to flip it right-side-out and check it to be sure.)
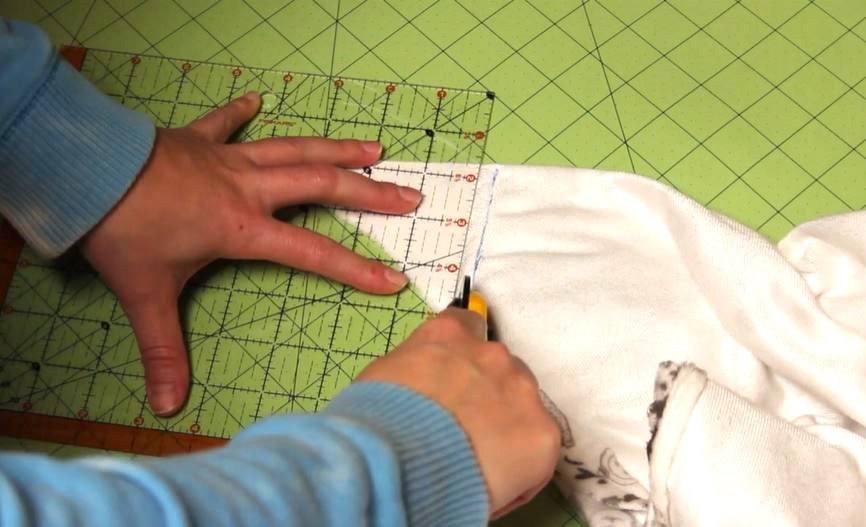
Once you’re happy with the seam, cut off the excess fabric. Repeat this for the other three corners.
Step 5 – Finish up the self-binding blanket
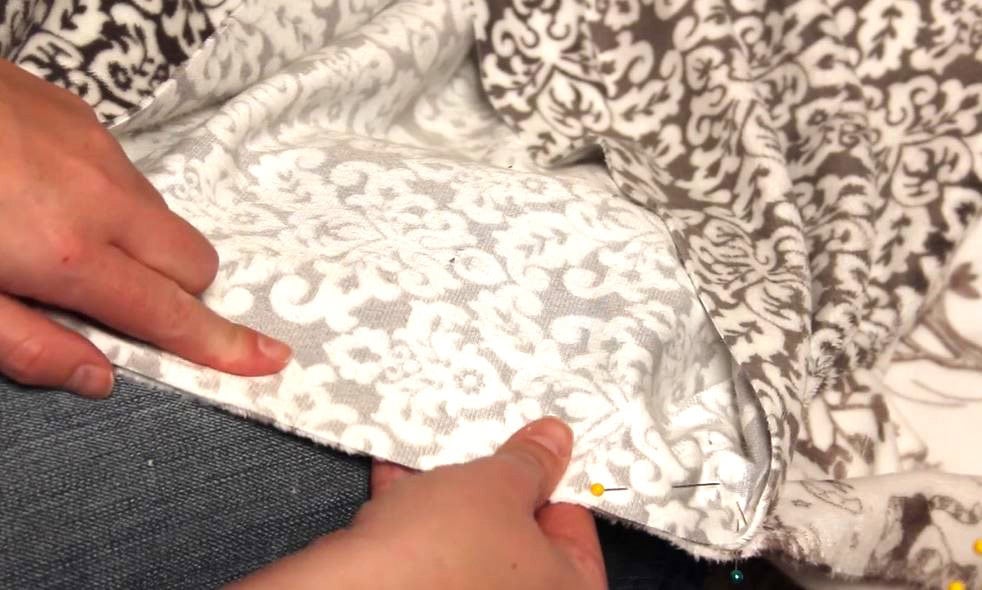
Now it’s time to finish up the blanket. Flip it right side out, taking care to get all the corners fully turned.
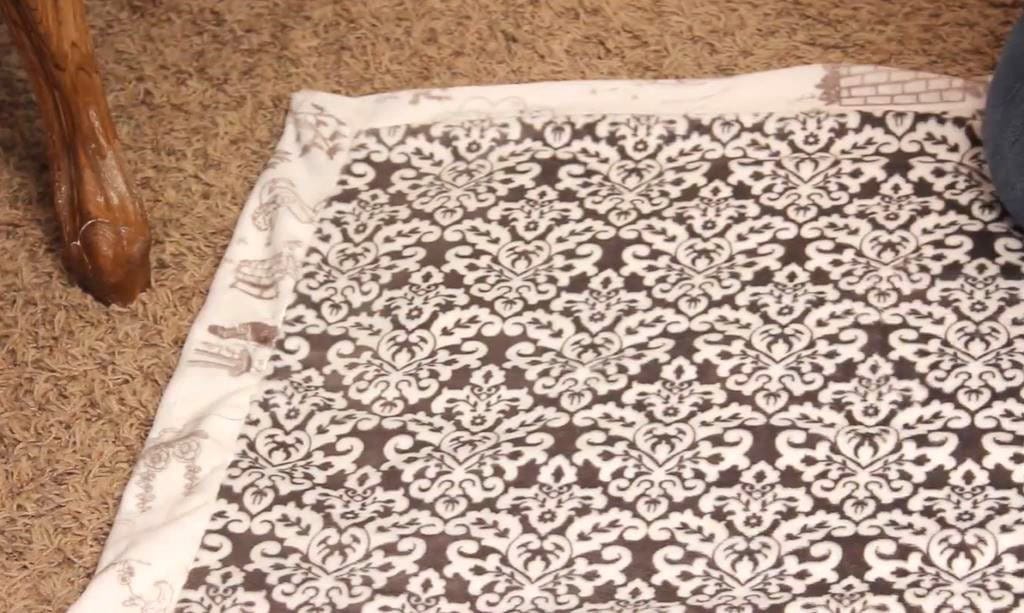
Then lay the blanket flat – taking care that it is lying perfectly flat and the borders are straight (the border should be approximately 2.5 inches wide).
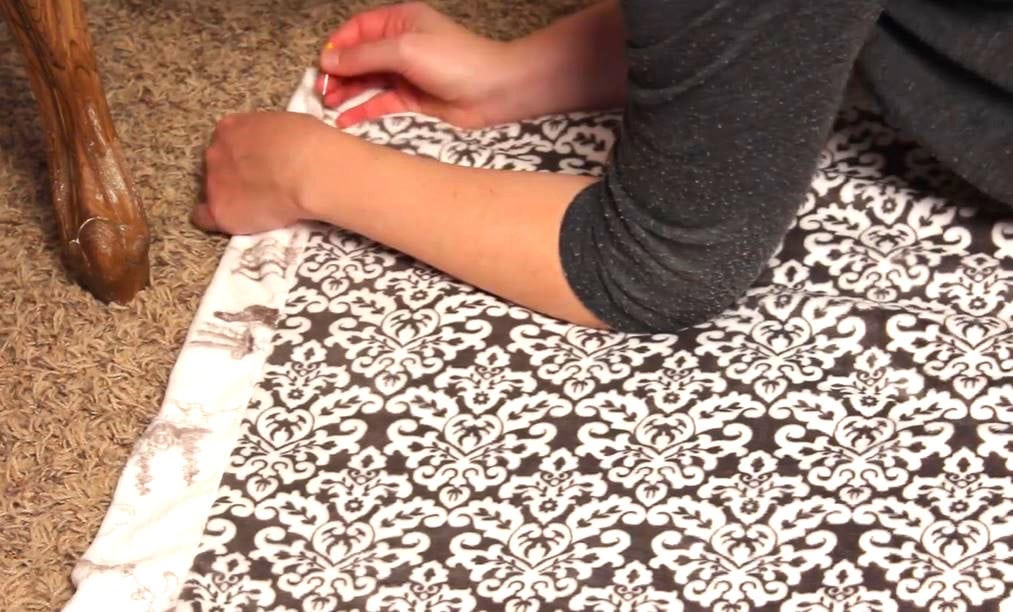
Pin the closed turning gap, and pin down the fabric between the border and Fabric 1.
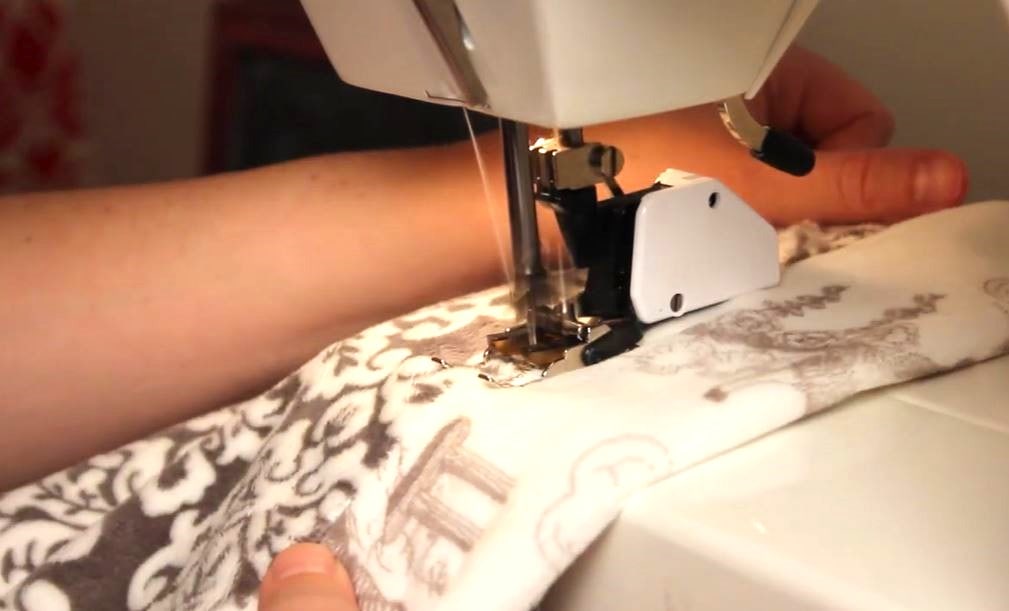
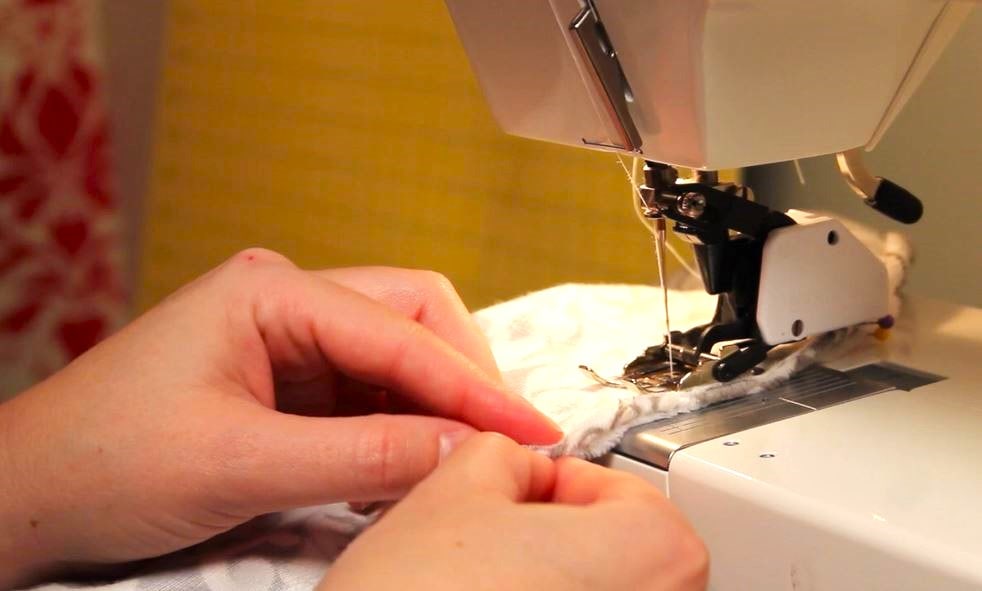
To secure the blanket and sew the gap shut, use a serpentine stitch (or any decorative stitch you prefer) all along the seam between Fabric 1 and Fabric 2.
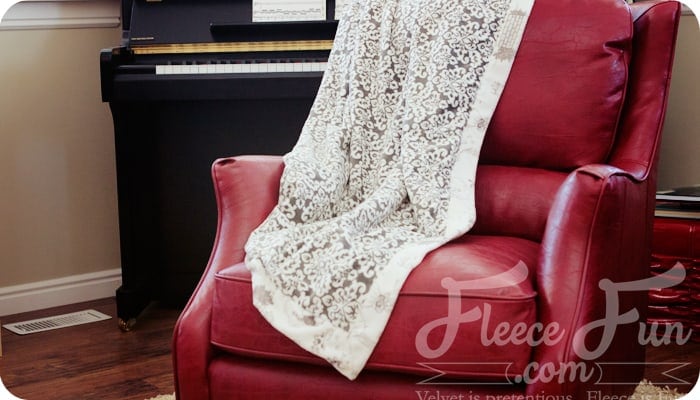
Trim any loose threads, and your self-binding blanket is finished!
Love self-binding blanket? See More Fleece Blanket Tutorials
- Hooded Fleece Blanket DIY (Child and Adult)
- No Sew Blanket Tutorial (with flannel!)
- How to Make a No Sew Tie Quilt
- How to Make a No Sew Fleece Tie Blanket (better method with templates!)
- Duvet Cover
- Stitch ‘n flip quilt
- Rag quilt (Easy Beginner’s Guide)
- How to crochet the edge of a Fleece Blanket
- Fleece Blanket with a Satin Binding
- Fleece Ribbon Throw
- How to use the Tie Blanket Ruler!
- You can see all of the blanket tutorials here
Additional Fleece Sewing Projects:
- Bow Ear Warmer Headband
- Fleece Scarf with Pockets
- Red Riding Hood Cape
- Washable Duster
- Warm Mittens
- Easy Fleece Blanket
- Quick Sew Hobo
- Child’s Fleece Robe
- Child’s Fleece Pants
Thanks…love the cuddle fabrics! Will be making these for gifts!!
Beautiful! Your tutorials make me feel like this is something I can actually do, despite my longstanding disagreements with my sewing machine… We shall overcome!
Beautiful! I am new to sewing and you make this look so easy. Thanks so much for posting!!! Janet
So excited to make this blanket! My question is that do I need to wash and dry the fleece before sewing? Thank you!
No, you don’t need to was fleece before sewing on it. 😉
I can’t find a way to print your patterns. I have watched the printing tutorial and there are no download buttons. Am I missing something?
On this tutorial there is no pattern to download – it’s only instructions.
Enjoy the tutorials and patterns.. looking forward to using this site often
I’ve made several fleece blankets I far this season, and this looks like a really fun and easy pattern! No more satin binding needed. I love it.
Love it! Can’t wait to try it out! Thank you for the wonderful video