
Easy Fleece Hat With Ribbon Tutorial
This content contains affiliate links or sponsored elements, read our Disclosure Policy.


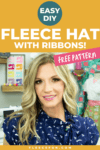


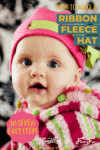
This free fleece hat pattern is cute and relatively easy to make! This Easy Fleece Hat With Ribbon Tutorial is adorable on little girls! This fleece project has easy sew options if you have a button-hole phobia.

While this tutorial is great for learning how to make several button holes, if you’re just looking for how to make a fleece hat I have this easy to follow tutorial.
YOU WILL NEED:
While all of these hats looks different the items needed to make them are the same. Please note that these patterns are designed for fleece. They WILL NOT work with woven fabrics that don’t have stretch (like cotton).
- 1/3 yard polar fleece (you could actually make several from this)
- Thread
- 1 yard 7/8 ribbon
- 1/8 yard (or less really a scrap) of fusible interfacing
- Sewing Essentials (scissors, pins, etc.)
- Lighter or match (to finish ribbon ends)
- Get the free pattern here.
Quick Tip
Make multiple ribbons so you can switch them out to go with different outfits. Combine the hat with a satin flower hair clip for extra drama
Easy Fleece Hat with Ribbon video Tutorial

Ribbon-Decorated Fleece Hat Step-by-Step Guide
Step 1 – Preparing to Sew Your Fleece Hat with Ribbon
Assemble the pattern. Instructions for this can be found here.

On folded cloth pin pattern and cut out. (Note pattern looks different because it has been modified since the picture was taken – this pattern makes an unflattering cone.) If you do not want a 1 inch brim, trim the bottom of the pattern shorter.
Step 2 – Marking the Ribbon Placement on the Fleece Hat

You will notice that on the free sewing pattern there are dark vertical lines. These are where the slits/ button holes will go. Mark the top and bottom with a fabric pencil or pen on the right side of the fabric.
Step 3 – Apply Interfacing for a Professional Finish
Cut 10, 1 inch rectangles of fusible interfacing. On the wrong side of the fabric place these where your marks are on the other side (you can eyeball this or flip the pattern over and mark the wrong side of the fabric too.

Just note that the markings aren’t evenly spaced so you need to make sure that you flip the pattern over or your markings won’t match up. You want to use the interfacing because fleece stretches out easily. Also be careful and follow the interface instructions because fleece will melt and take the shape of the iron if you aren’t careful.
STEP 4 – Sew the Button Holes – DO NOT PANIC THERE IS ANOTHER WAY =)

Sew button holes where you marked on each of the pieces – do not open the holes until later.
Alternate 1 – instead of making button holes make rectangles with a narrow zigzag stitch using the marking as a guide for how long they should be – again do not open the holes until later.
Alternate 2 – do nothing you can open the holes at a later step.
Step 5 – Pinning and Sewing the Fleece Hat Together

Pin right sides together. Using a 1/2 inch seam allowance sew each side of the hat (the long curved side to the point before it dips into a V. Be sure to leave the bottom (the brim) open.)
Step 6 – Completing the Top of the Fleece Hat

Now that you’ve sewn the sides of the hat it’s time to close the top. Fold the hat in half so the seams you just sewed are touching. Pin the “v” on each side closed. Sew one seam along the top of the hat closing the v on both sides. (This will make a rounded top.)
Step 7 – Final Touches: Finish Your Fleece Hat with Ribbon

Turn the brim edge under 1 inch (or more/less if you like) pin and sew a zig-zag stitch over the edge of the fabric. Snip any loose threads and turn right side out.
Now you can open the button holes/zig zag boxes.
If you want to keep it really simple, (Alternate 3) just snip the holes open.

Using a lighter or match melt the ends of the ribbon so it doesn’t fray (be careful), and thread the ribbon through the hat. Tie into a bow and Tada! Your Basic Fleece Hat With Ribbon Tutorial is finished.
Download the Free Fleece Hat Pattern Here
You can get a free copy of Adobe reader here. By downloading you are agreeing to pattern terms of use. Click the picture below or fill up the form to download the .pdf !
More Fleece Hat Projects:
- Basic Fleece Hat (Adult, Child, and Baby)
- Fleece Winter Hat
- Fleece Hat with Ear Flaps
- Simple Fleece Slouchy Beanie
- Trapper Hat
- Basic Hat with Top Knot
- Baby Hat with Chin Strap
More Fleece Projects!
- Basic Hat with Horns
- Basic Hat with Bear Ears
- Fleece Unicorn Hat
- Fleece Frog Hat
- Washable Duster
- Warm Mittens
- How to Make a No Sew Fleece Tie Blanket
- Fun Facts about Fleece
- All Warm Fleece Hat Sewing Patterns!

Hi Angel
i love love your website – i have a small question – can i make this adorable fleece hat form other elastic fabric?
(i have a friend that recently gave birth and it’s kind of hot to wear a fleece hat now… we’re in Israel)
Thanks Moran
Hi Moran!
Jersey knit (t-shirt) fabric works great with this pattern and it will give you the breathe-ability you need in a hot climate.=)
Thanks so much for sharing this fabulous pattern – I have made 3 this past week – it has become my go-to last minute gift idea, and everyone who has received them loves them. I think I will be making at least 2 or 3 more in the coming weeks!
I have uploaded photos of them on my blog.
Made this on Saturday, and your instructions were crystal clear… I only wish that you could have made my buttonholes for me. 🙁 Zigzagging worked just fine, in spite of my buttonhole disability. Darling hat! Have you made it with a lettuce-edged hem?
I haven’t, but I bet it would be adorable – great idea!
If you look at the bottom of this page: http://creativemisc.blogspot.com/2013/01/making-simple-things-more-difficult.html, I redid the hem of the hat I made, to get the ruffled look. It worked pretty well! 🙂
Hi! Love the pattern!
Another easy way to finish off the ends of the ribbon is clear nail polish! Just apply to the cut ends and allow to dry. Looks good and doesn’t take much time!
Great share! Thanks for the tip. =)
Thanks for this darling pattern! I am teaching the 7 year old daughter of a friend to sew. She is amazing! This is a perfect project for learning about buttonholes (which she is dying to try!!!) I like to have something that she has made for her to take home – not just a technique on a piece of cloth. This is so fast and easy that she will be able to make one for herself and her little sister!
Thank you very much indeed!
Thanks so much for the pattern. I want to make this for my almost 2 year old granddaughter and for myself! I just need some more clarification about the sizing. I looked (or maybe overlooked) for the head circumference ratio to size indicator. What size head is for a small child vs large child and the different sizes of the adult size? Thanks for your help! I can’t wait to make a few a these.
Love these hats – I’m going to make them for the grandchildren! Thanks!
thank you for sharing these patterns,can’t wait to make the infant size hat,will post after i sew !!!!
Thanks for the patterns! I was able to save the teen/adult size as a pdf file but the child and baby sizes indicated the files were corrupted and wouldn’t open with adobe reader. My default browser is Firefox and I also tried Internet Explorer with the same result. Fortunately, they printed just fine!
Hi Cherie,
Glad you got it to work./ I have checked both files and they appear to be working fine.
– Angel
Hello,
I found you’re blog when I was looking for a basic pattern to complete my blog post with. Is it ok for me to send my readers to http://www.fleecefun.com to get an original pattern to use when sewing my tutorial (not based on yours-don’t worry)???
Haven’t posted it yet- I will await your reply.
LOVE this blog by the way
Moo 🙂
BTW I have also recommended my viewers to look at some of your great hat tutorials
Hi Moo
my terms of use are outlined here – http://www.fleecefun.com/terms-of-pattern-use.html which includes instructions on use in tutorials.
Thanks for sharing! I am making these to donate to the maternity ward of my local hospital, so I am really happy to have a reliable pattern to work from! Your sharing has made it possible for needy infants to have some basic items! Thanks again and happy holidays!
Hi Jessica,
thanks for taking the time to sew for charity! That’s wonderful!
– Angel
Is there a printable version of the instructions? Am I missing something? thanks!
Hi,
There is no printable version of the instruction – just what is on the website. You are welcome to copy and paste the instructions into a word file for personal reference.
– Angel
Baby hats and toddler hats are always very welcome to give to clients at your local pregnancy centers. If you want to make someone’s day, we like to have hats available to moms and toddlers who come see us all through the winter. The little children love picking out a hat. You can find your local center at http://www.optionline.org Thanks!
I subscribed a long time ago but am being asked to do so again. I haven’t received any newsletters from you in quite a while so not sure what is up with that. Not sure what to do as I cannot look at some of the things I want to see as there is a box in the way. Any suggestions?
Subscribers who don’t open there newsletters for several months are unsubscribed. Just resubscribe. 🙂