
How to Unpick a Seam for Beginners
This content contains affiliate links or sponsored elements, read our Disclosure Policy.

It doesn’t matter how long you’ve been sewing. You will have to unpick a stitch. Unpicking can either save your project or destroy it. So it’s important to properly unpick the seam to save the fabric.
Learn how to unpick a seam the right way. Proper unpicking will save you time and money in the long run so patience is key.
Hate The Ads?
This pattern with video and step by step tutorial is available in the Makers Studio. The Maker’s Studio is an ad free experience, no video ads, no forms, no zip files, just creating.

How to Unpick a Seam Video Tutorial:

How to Unpick a Seam:
step 1 – Make sure your Seam Ripper is Sharp
One mistake that sewists make when unpicking is that they don’t regularly replace their seam ripper. A sharp seam ripper is essential to have success unpicking a seam.
step 2 – Take your time
This is important – take your time. Taking your time is crucial to preserving your project. (Messing up can be a bit annoying, I know.)

Think of it as a break. Turn on some good music. Stay calm, frustration is useless. Focus on correcting the problem. If you need to just walk away for a moment before you need to unpick.
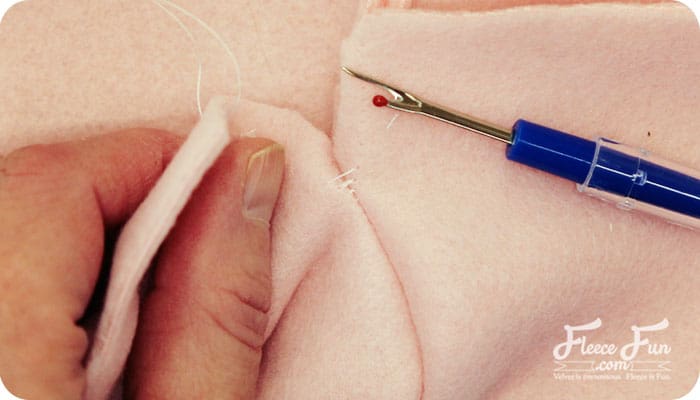
step 3 – begin to unpick where the seam isn’t locked
Start unpicking where the seam isn’t locked. If both ends of the seam are locked start at one end by unpicking the lock stitch and work your way to the other end.

To begin unpicking start by unpicking a few stitches on one side of the seam. Just every few stitches take the seam ripper and lift up under one of the loops and break it with the seam ripper. Take care not to puncture the cloth, this is especially important with finer cloth like satin, taffeta or silk.
step 4 – Once properly unpicked, begin to gently pull the seam apart
Next, take each side of the seam and gently pull to have the stitches loosen. Take care not to tear or put too much strain on the cloth. Unpick the seam more if there is little or no give.
step 5 – If you meet resistance use the Seam Ripper some more
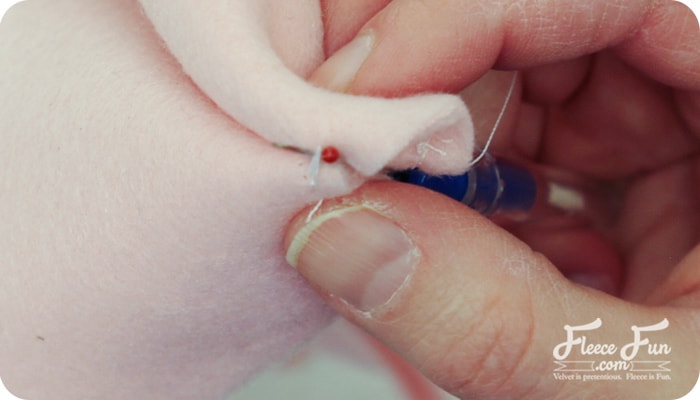
Next, as you come to a stitch that won’t give, use the seam ripper to cut it. Continue until you’re finished with the seam.
Be sure to check out all of my “Sewing for Beginners” series on this page. I have tips from machine sewing to basics on cloth. Everything you need to get started.

love this unpick a seam tutorial? More How to Sew Lessons:
- How to get started sewing with a sewing machine
- How to Make a Button Hole
- What are the parts to a Sewing Machine?
- What is a Straight Stitch and How to Sew it
- What is a Basting Stitch?
- How to read a Sewing Pattern
- How to Make a Rolled Hem or a Baby Hem
- What to Look for a in a Good Sewing Machine
- What are the must have sewing tools?
- Traditional Sewing Pattern VS Digital
- How to Choose a Sewing Machine
- 5 Easy Ways to Save Money on Crafts and Fabric
- 7 Tips for Pregnant Bloggers
- You can see all the How to Sew Lessons Here
Yes, we all have to unpick seams and we all hate it! thanks for sharing the tips.
I really look forward to your e mails. Thank you so much for taking the time to send them. Sometimes they just remind me of good habits that I have forgotten and other times I learn something new.
verry usefull. Thank you for letting us know that mistakes are made by beginners and by pro’s.