18 Inch doll fleece hat free pattern tutorial
This content contains affiliate links or sponsored elements, read our Disclosure Policy.


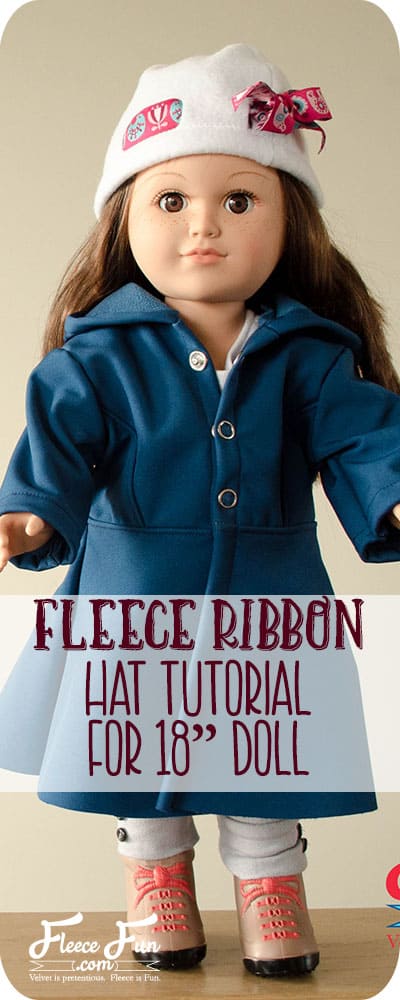
This 18 inch doll fleece hat free pattern is cute and relatively easy to make! This doll fleece hat is adorable on! You can also make a matching hat for little girls you can get that pattern here. This fleece project is easy to sew.
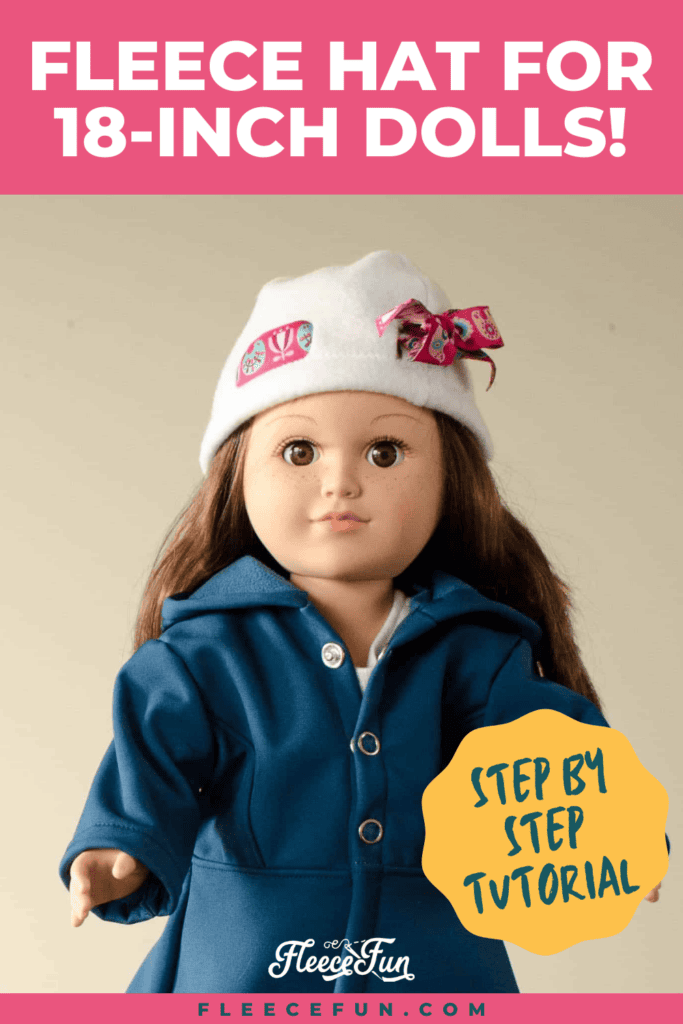
Today I’m sharing and 18 inch size of my popular ribbon hat tutorial. I confess that this pattern has been asked about for a year now ever since it appeared on Jess’s doll wearing her soft shell coat. This cute doll hat is easy to make (it would even be a great first sewing project.
Quick Tip
Make multiple ribbons so you can switch them out to go with different outfits.
YOU WILL NEED:
- A printed out version of the Free Fleece fun doll fleece hat pattern PDF.
- 1/4 yard polar fleece (you could actually make several from this)
- Thread
- 1 yard 1/2 ribbon
- 1/8 yard (or less really a scrap) of fusible interfacing
- Sewing Essentials (scissors, pins, etc.)
- Lighter or match (to finish ribbon ends)
- Get the free pattern here.

18 inch doll fleece hat free pattern tutorial
step 1 – Getting started

Assemble the pattern. Instructions for this can be found here.
On folded cloth pin pattern and cut out.
note
The pattern looks different because it has been modified since the picture was taken – this pattern makes an unflattering cone.
step 2 – Mark where the Ribbon will go on the 18 inch doll hat

You will notice that on the pattern there are dark vertical lines. These are where the slits/ button holes will go. Mark the top and bottom with a fabric pencil or pen on the right side of the fabric.
step 3 – Snip Holes

Snip holes where you marked on each of the pieces.
Step 4 – Pin the Fabric and Start Sewing the doll Hat

Pin right sides together. Using a .25 inch seam allowance sew each side of the hat (the long curved side to the point before it dips into a V. Be sure to leave the bottom (the brim) open.)
step 5 – Finish sewing the top of the hat

Now that you’ve sewn the sides of the hat it’s time to close the top. Fold the hat in half so the seams you just sewed are touching. Pin the “v” on each side closed. Sew one seam along the top of the hat closing the v on both sides. (This will make a rounded top.)
step 6 – Finish the 18 inch doll Hat

Turn the brim edge under .25 inch (or more/less if you like) pin and sew a zig-zag stitch over the edge of the fabric. Snip any loose threads and turn right side out.
Using a lighter or match melt the ends of the ribbon so it doesn’t fray (be careful), and thread the ribbon through the hat.

Tie into a bow and Tada! Your hat is finished.
Get the Free 18 inch doll hat Sewing Pattern Below:
You can get a free copy of Adobe reader here. By downloading you are agreeing to pattern terms of use. Click the picture below and fill out the form to download the .pdf !

More FREE American Girl Doll Patterns:
- Doll Mermaid Costume
- Doll Peplum Coat
- Doll Fur Vest
- Doll Knit Joggers
- Cute Chambray Party Dress
- Pocket Tee for Dolly
- Leather Fringe Purse
- Button Front Skirt for Dolly
- 18″ Doll Sleeping Bag Tutorial
- Long Coat for 18″ Doll Pattern
- Cuffed Leggings for Dolly
- Doll Cardigan
- Tiered Ruffle Skirt
- Doll Robe
- Doll Sleeping Bag Pack
- Doll Basic Fleece Pants
- Doll Boutique Pants
- Doll Button Tunic
- You can see all of the Free American Girl Doll Patterns here