
Fleece Hat With Horns (Viking hat) How To
This content contains affiliate links or sponsored elements, read our Disclosure Policy.
Are you ready to channel your inner Viking and conquer the chilly weather in style? Look no further! We have just the thing to unleash your fierce side while keeping you warm and cozy – an adorable fleece hat pattern that is as cute as it is functional. Whether you’re a fan of Nordic history or simply love unique accessories, this DIY project will have everyone asking where they can get their own Viking-inspired headgear. So grab your sewing kit and let’s dive into this fun and adventurous journey of crafting a hat fit for a modern-day shieldmaiden or warrior!

In recent years, there has been a resurgence of interest in Viking culture and fashion. Many people are drawn to the rugged yet stylish look of Viking garments. This has led to an increase in demand for Viking-inspired clothing items, including hats.
If you’re someone who loves all things Viking or simply looking for a cozy and unique hat pattern, then you’re in luck! The Viking Fleece Hat Pattern is here to unleash your inner warrior while keeping you warm during those chilly days.
What is the Viking Fleece Hat Pattern Or Horned hat pattern?
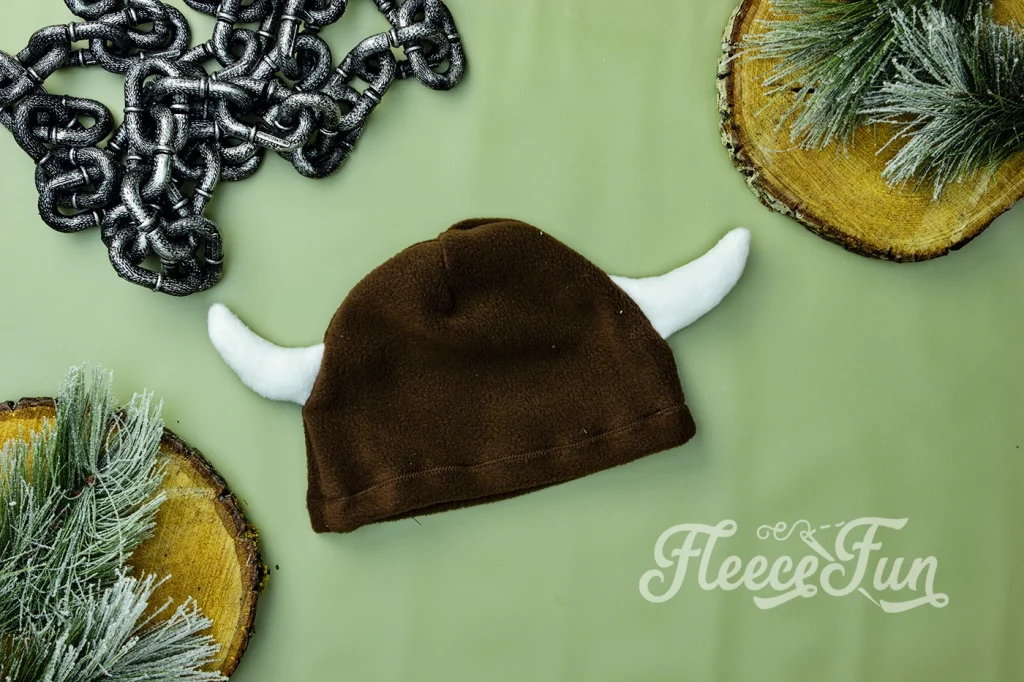
This pattern is designed to replicate the traditional headgear worn by Vikings but with a modern touch. It features a warm fleece material that makes it perfect for cold weather. The hat also includes two protruding “horns” on either side, giving it that classic Viking look.
Why choose this pattern?
Not only does this hat make a great addition to any winter wardrobe, but it also allows you to express your love for Vikings in a fun and fashionable way. Plus, since it’s made from fleece fabric it’s washable, warm and comfortable to wear.

I obviously take my job very seriously…..ahem.
YOU WILL NEED:
Please make sure that you’re using fleece. As this pattern is designed for fleece. This pattern WILL NOT work for cotton or other woven fabrics that do not have a stretch to them.
- A printed out version of the free pattern (available at the end of the post)

- Contrasting fleece fabric, 1/3 yard for main color, scraps for contrasting inner ear (you could actually make several from this)
- Batting or stuffing or fleece scraps to stuff the horns.
- Sewing Essentials (thread, scissors, pins, etc.)
how to make a horned or viking fleece hat
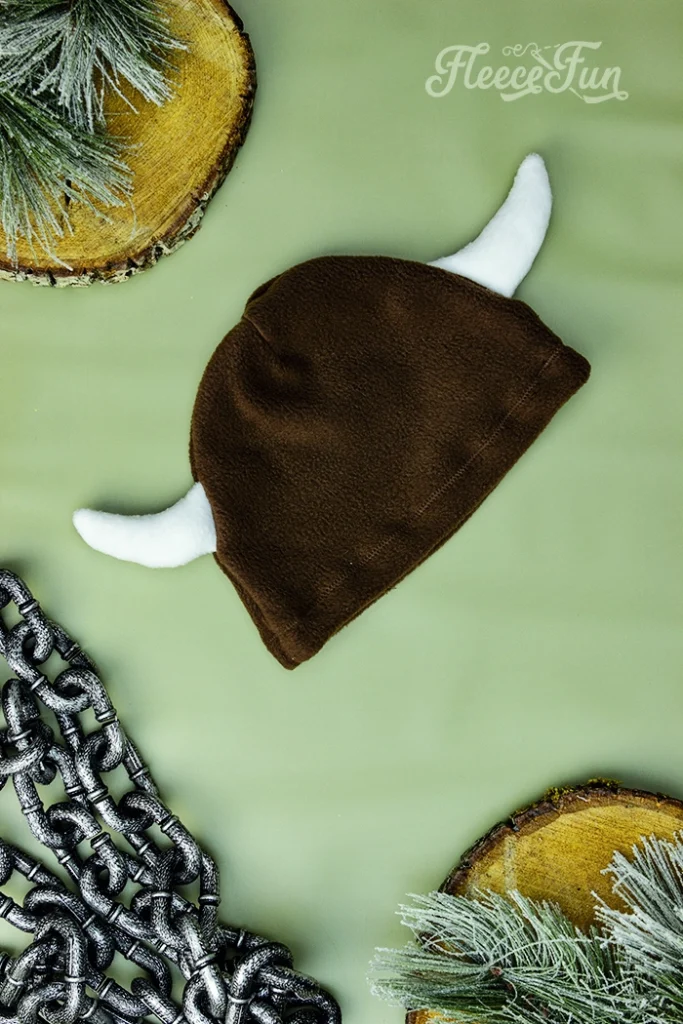
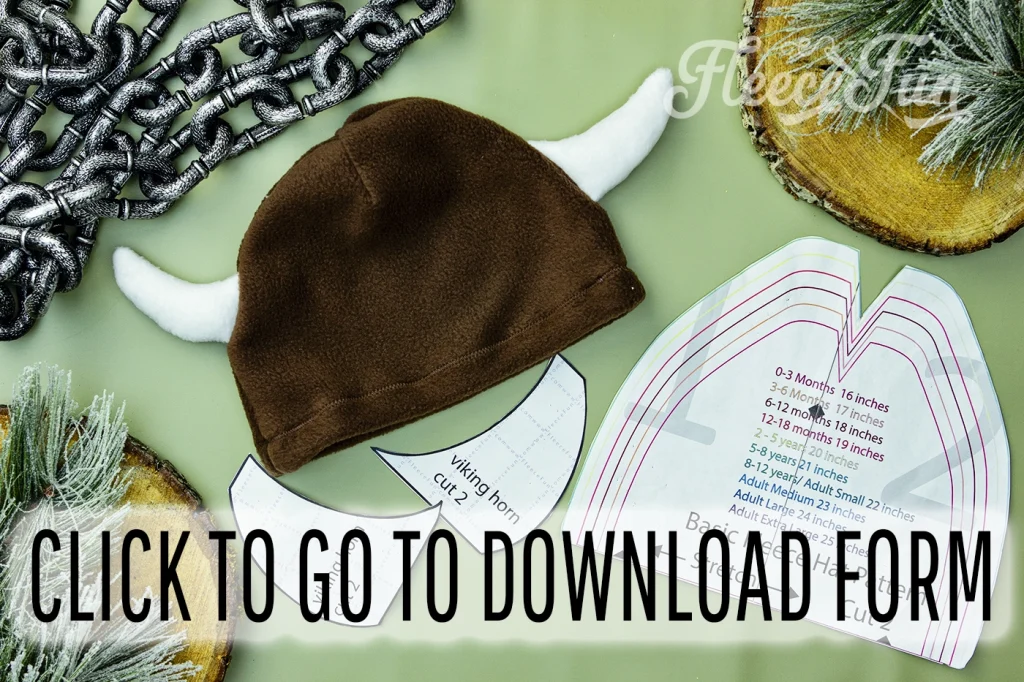
Step 1 – Cut out the Pattern Pieces
You will need to assemble the pattern. For instructions on how to assemble the sewing pattern click here.
This warm fleece hat requires two of the basic hat pattern (in the size you desire, it comes in sizes baby to adult).
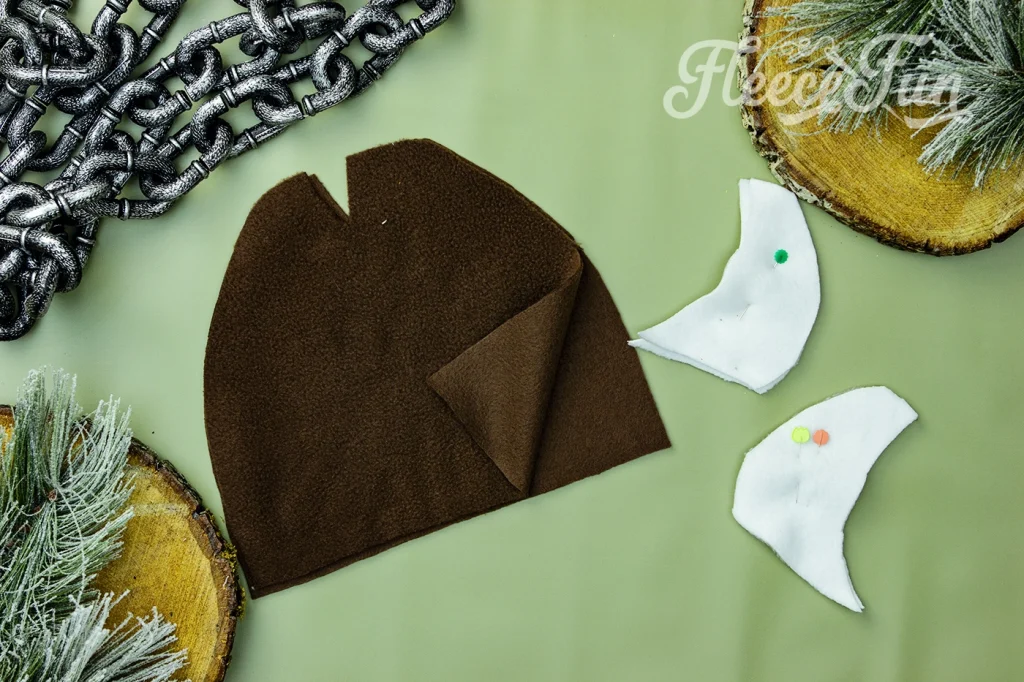
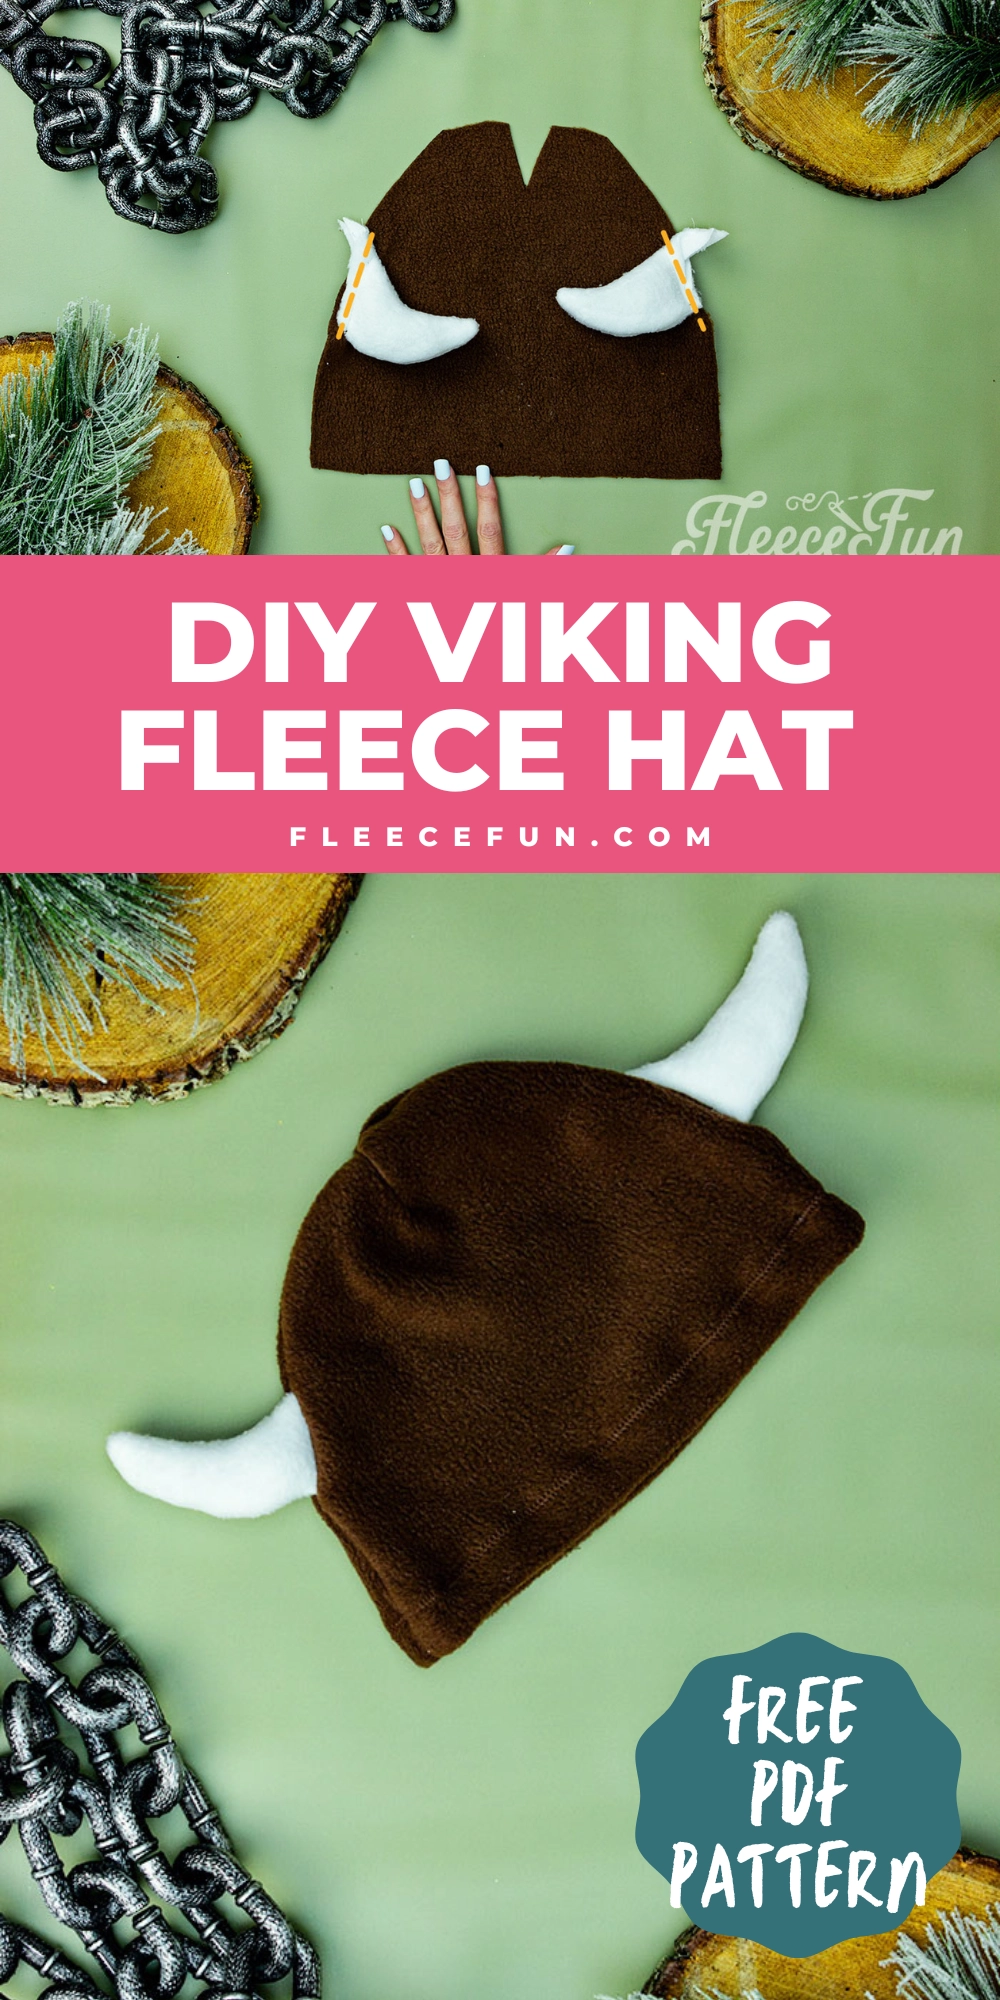
Cut two of the basic hat pattern and cut 2 of each of the horns.
Step 2 – Begin to sew the Horns
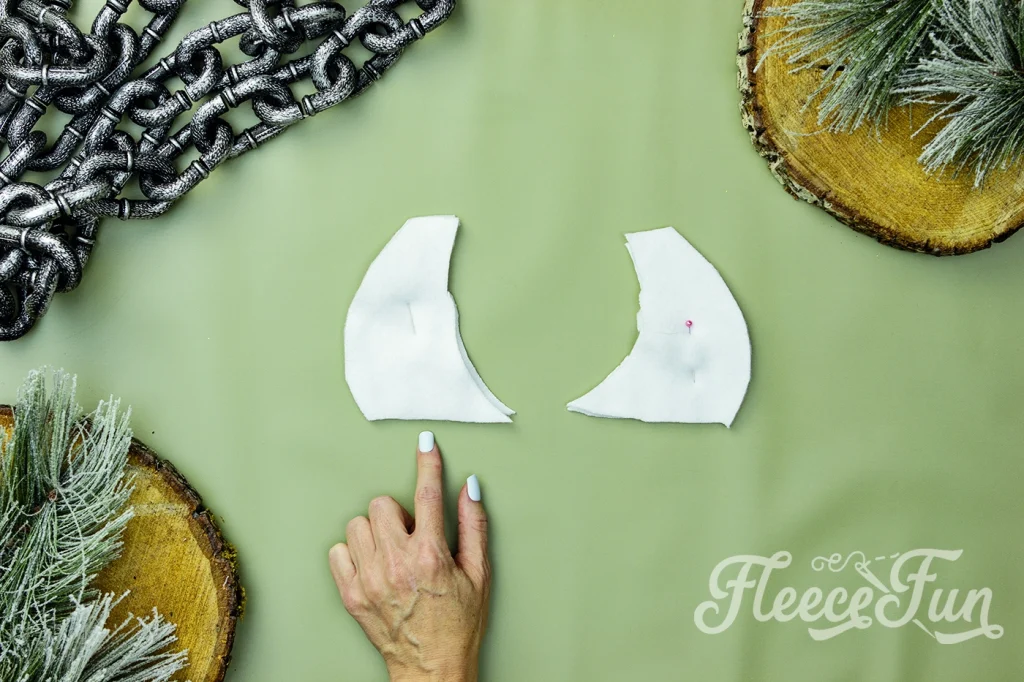
To help give the horns structure we’ll sew with a .5 inch seam allowance.
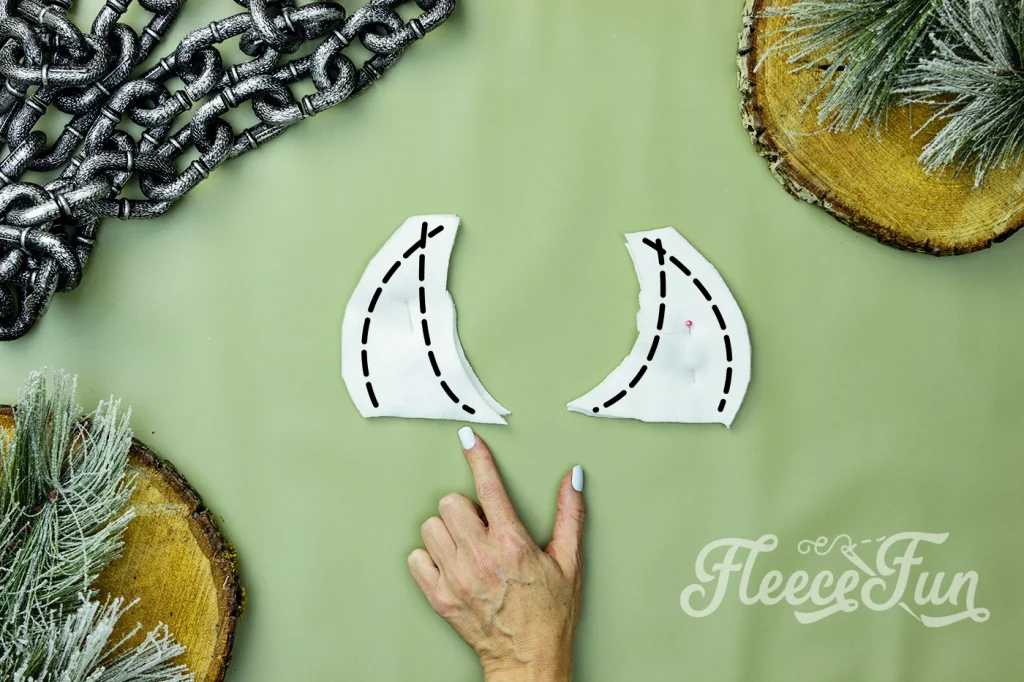
Sew all around the horns leaving the bottom open for turning.
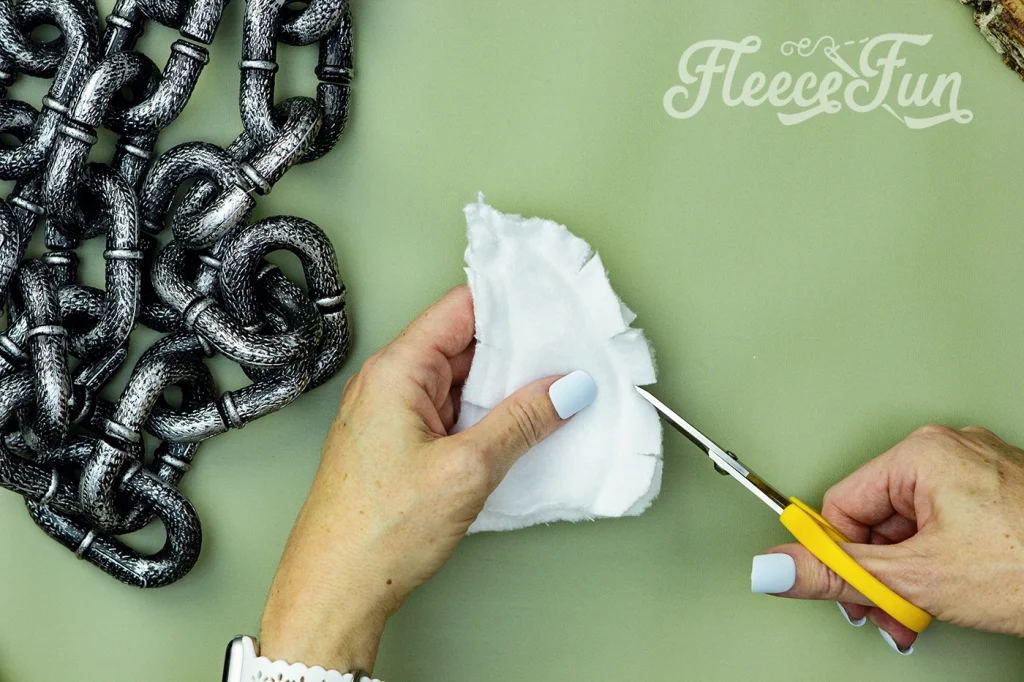
Snip slits in the curves and trip the top tip.
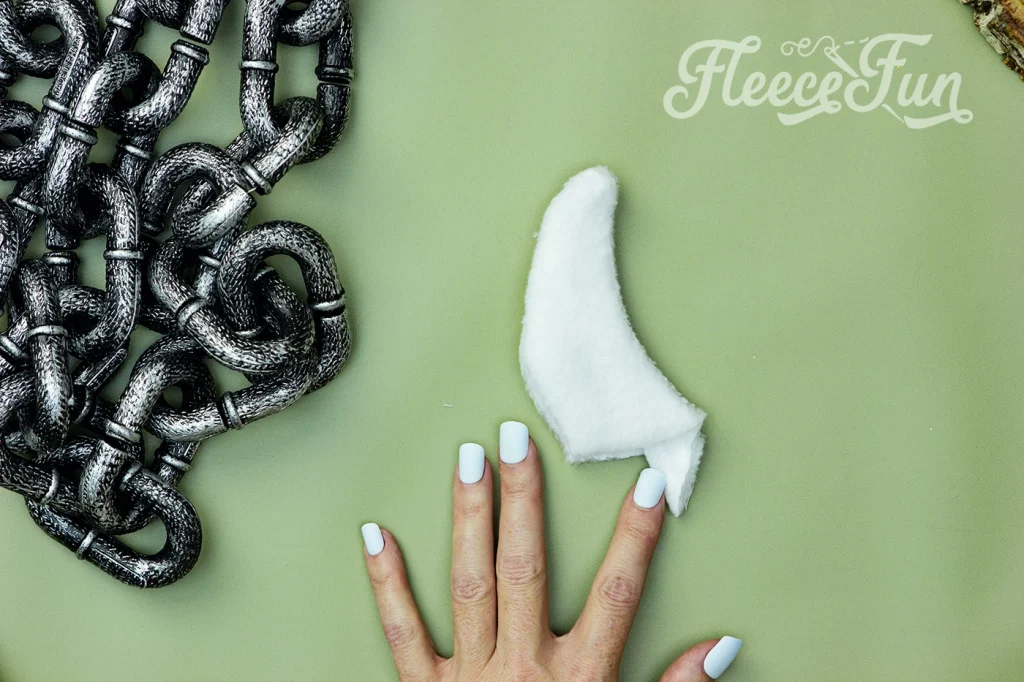
Turn right side out. Don’t worry about the seam allowance tail, it’ll be trimmed later.
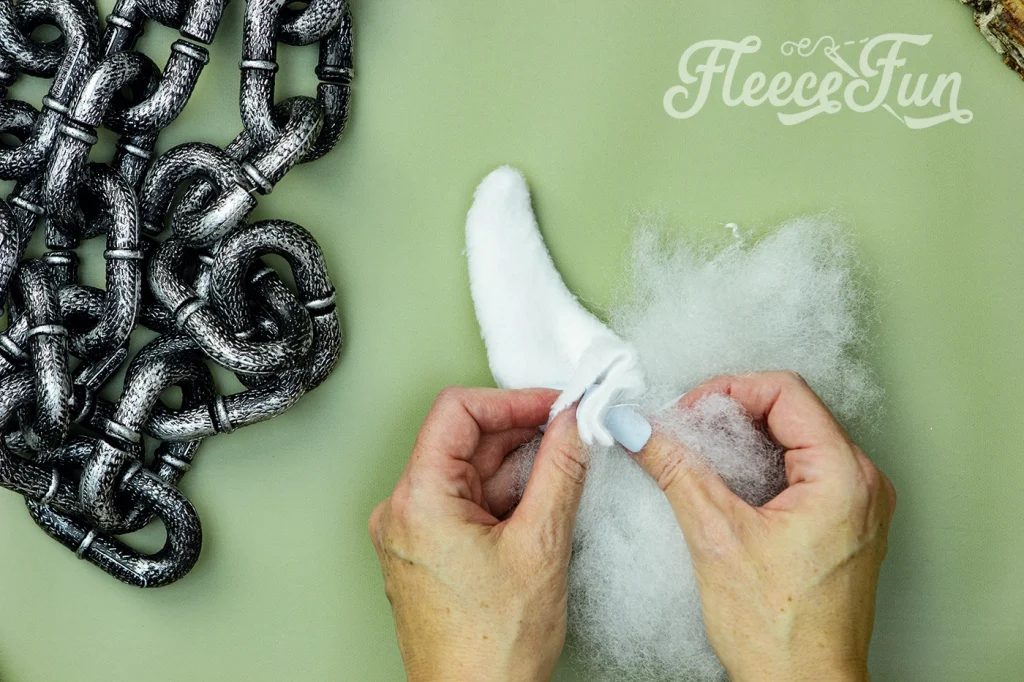
Stuff the horns to firmness.

Don’t stuff the bottom .5 inch ( about a finger width) for seam allowance.
Step 3 – Add the horns and sew the sides of the hat
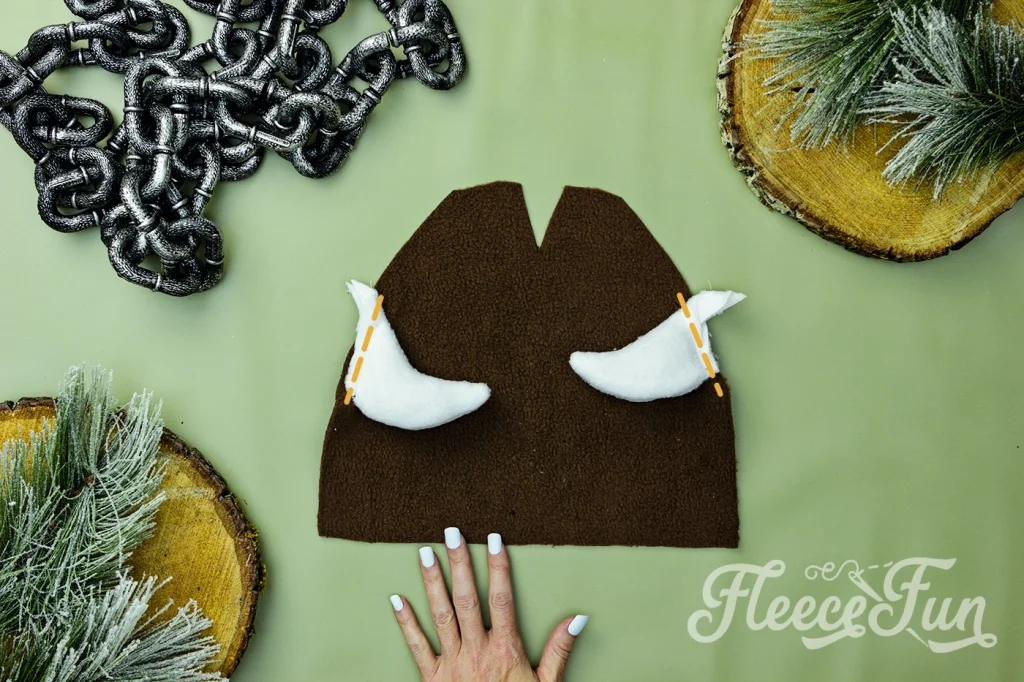
With right side of the hat facing up, place horns on the either side of the hat. Sew or tack on using a .5 seam allowance (this will make it much easier to sew the sides of the hat in a moment).
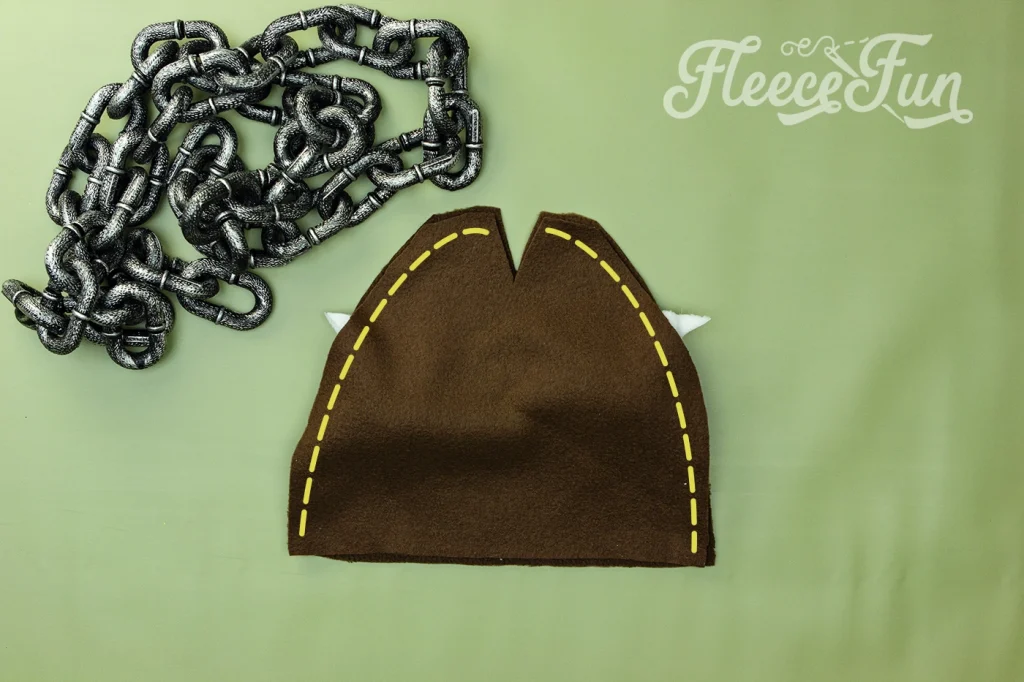
Place the second half of the hat right side facing down on top of the hat and horns. Sew the sides using a .5 inch seam allowance.
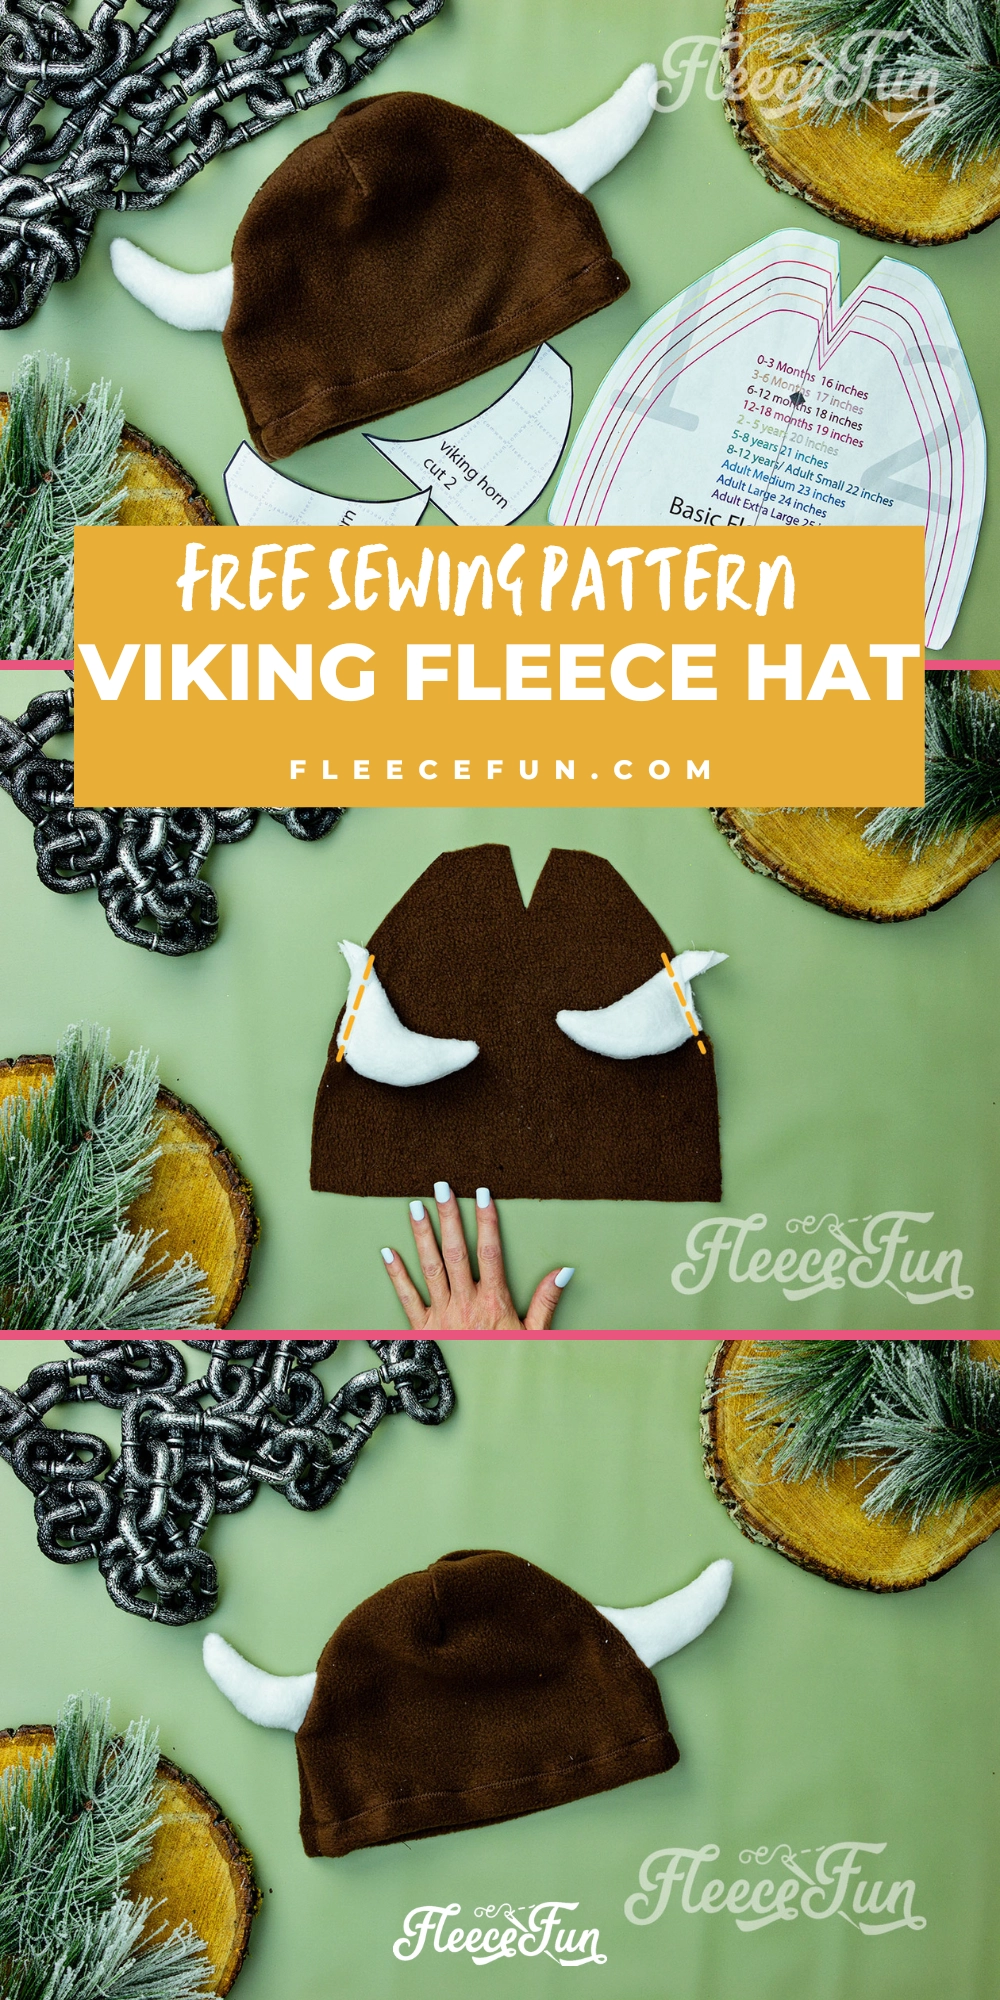
Finally finish the hat by sewing the “v” shut and turning up the brim. You can see detailed instructions on that here.
GET THE FREE SEWING PATTERN BELOW:
I only approve of Adobe reader. By downloading you are agreeing to pattern terms of use. Fill out this form to have it delivered to your inbox.
Fleece Hat with Horns How To ( original pattern)
This fleece hat with horns how to is easy to follow. ![]() The perfect hat for your little monster. Use the free pattern provided to sew it up!
The perfect hat for your little monster. Use the free pattern provided to sew it up!
A printed out version of the Free Fleece Fun Basic hat pattern PDF. You can get it here.
1/3 yard fleece (you could actually make several from this)
A few scraps of contrasting fleece for the horns 8″by”8 will cover it
Sewing Essentials (scissors, pins, etc.)
Video of Basic Hat With Horns How To here, written below:
1 – Cut out the Horn patterns
You will need to assemble the pattern. For instructions on how to assemble the sewing pattern click here.
![]() You will cut out two pieces of left and right horn.
You will cut out two pieces of left and right horn.
Pin right sides together of each individual horn (I.E. both left together, both right together).
2 – Sew the horns
![]()
3 – Turn the horns
![]()
4 – Place horns and make the hat
![]()
Place horns on right side of fabric as pictured. Pin in place.
Put the second basic hat pattern (right side facing down) on top making a sandwich. Follow the remaining steps as described in the basic hat tutorial.
Get the Free Sewing Pattern Below:

You Might also like these free Fleece Hat Patterns:
- Basic Fleece Hat
- How to make a Double Layer Fleece Hat
- Fleece Hat with Earflaps
- Slouchy Fleece hat
- Fleece Hat with Ribbon
- Monster Fleece hat
- Fleece hat with Bunny Ears
- Fleece Hat with Puppy Ears
- Fleece Dragon/ dinosaur, cat, pumpkin, viking
- Fleece Hat with Bear Ears
- Unicorn Fleece Hat
Additional Fleece Sewing Projects:
- Bow Ear Warmer Headband
- Fleece Scarf with Pockets
- Red Riding Hood Cape
- Washable Duster
- Warm Mittens
- Easy Fleece Blanket
- Quick Sew Hobo
- Child’s Fleece Robe
- Child’s Fleece Pants
![]()
SO I took this basic hat and made an acorn hat for my daughter’s halloween costume, she’s going to be Autumn. I just printed two of the patterns and only used about half of the length of the pattern to create the top, added a stuffed stem sewed in at the top. When I constructed it, I treated the acorn top part and the full hat as one piece of fabric, sewed it up and bam done. I also lined it with more brown. It turned out cute, I only wish I had put in a pipe cleaner in the stem so it would stand up better.
Cute idea!