
Free Pattern Fleece Bunny Hat Sizes Baby to Adult
This content contains affiliate links or sponsored elements, read our Disclosure Policy.
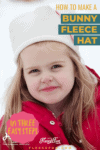

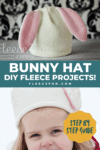


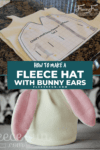
You can use this Free Pattern Fleece Bunny Hat to make an adorable topper for you little one!

YOU WILL NEED:
- 1/3 yard fleece
- 1/8 yard contrasting materials for pieces (might need 2 colors)
- Thread
- Assembled printed pattern
- scissors
- Sewing Essentials (pins, scissors, etc.)
- Sewing Machine
- Get the free pattern here.
Check out the Rest of the Halloween Hat pack 2:

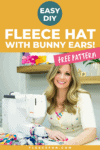
free pattern Fleece Bunny Hat (Sizes Baby to Adult) – Video Tutorial:

How to Sew a Fleece Hat with rabbit ears: Free Pattern Included
Step 1: Assemble and Cut Out the Bunny Hat Pattern
You can find instructions on how to assemble the pattern here.
Cut out the pattern pieces for the hat.
For contrast I recommend cutting out the 2 of the ear
with the hat fabric and 2 with a contrasting fabric.
Cut 2 of the basic hat pattern.
Step 2: Pin and Sew the fleece Bunny Ears to the Hat
Taking two of the ear pieces, put right sides together and line up the bottoms of the pieces.
Line up the exterior edges of the piece and pin, leaving the bottom (the flat side) open for turning.
For a baby hat use a .5 inch seam, for a child or adult hat use a .25 inch seam. Snip curves and point and turn right side out.
If desired top stitch up the center of the hat 3/4 of the way from the bottom to add character.
Step 3: Attach the Ears and Construct the Fleece Hat
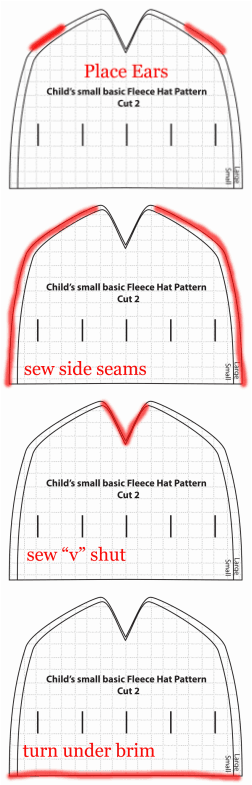
Place and pin the ears where you would like them to be on the hat (a third of the way down seams to work well). You want the tops of the ears facing in, sitting on the right side of the fabric, you will then place the other half of the fleece bunny hat (right side down) on top.
Using a 1/2 inch seam allowance, sew each side of the hat (the long curved side to the point before it dips into a “V”. Be sure to leave the bottom (the brim) open. Now that you’ve sewn the sides of the hat it’s time to close the top. Fold the hat in half so the seams you just sewed are touching.
Pin the “v” on each side closed. Sew one seam along the top of the hat closing the v on both sides. (This will make a rounded top.)Turn the brim edge under 1 inch (or more/less if you like) pin and sew a zig-zag stitch over the edge of the fabric. Snip any loose threads and turn right side out.
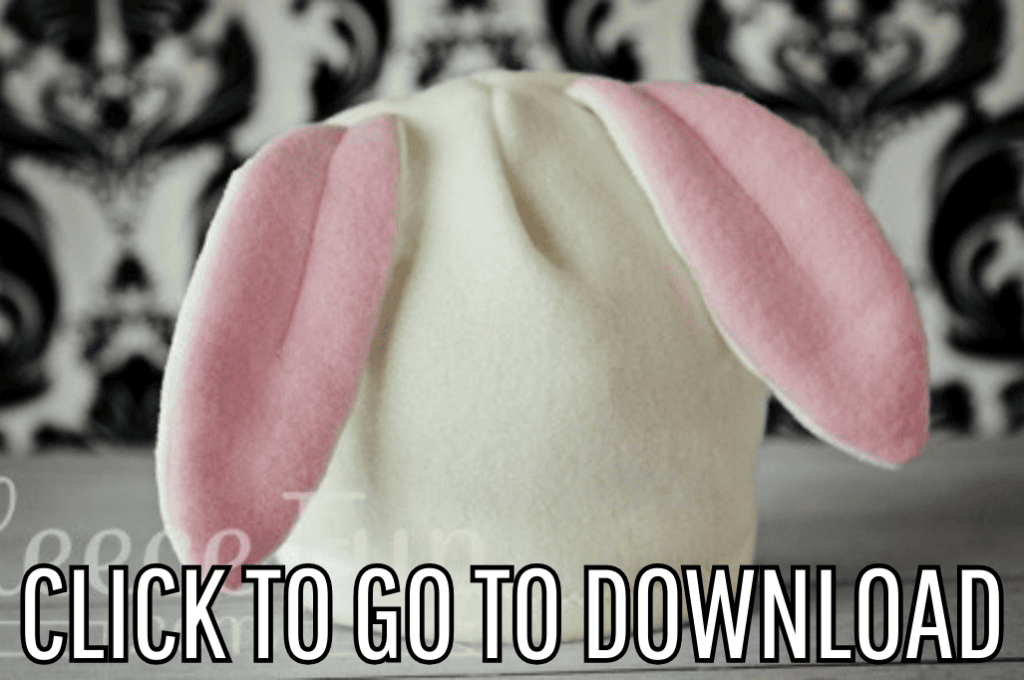
Tada! Your hat is finished.
QUICK TIP
Because of the layers, sew slowly over the sections with the ears – it will keep the stitches more even.
You’ve completed the free pattern fleece bunny hat.
Download Your Free Fleece Bunny Hat Pattern Here!
You can get a free copy of Adobe reader here. By downloading you are agreeing to pattern terms of use. Click the picture below or fill up the form to download the .pdf !
More Winter/Halloween Fleece Hats:
- Halloween Hat Pack – Dragon, Viking, Apple, Pumpkin
- Halloween Hat Pack 2
- Monster Mash Fleece Hat
- Fleece Dog Hat
- Basic Hat with Horns
- Basic Hat with Bear Ears
- Fleece Unicorn Hat
- Fleece Frog Hat
- Ladybug Hat
- Monkey Hat
- Fleece Owl Hat
More Fleece Projects!
- Basic Hat (Adult, Child, and Baby)
- Fleece Winter Hat
- Fleece Hat with Ear Flaps
- Bow Ear Warmer Headband
- Fleece Scarf with Pockets
- Fleece Vest Tummies and Tails
- Fleece Vest Monster Legs
- Fun Facts about Fleece
So cute….great tutorial . Thanks for sharing.
Thank you SO much for this pattern! Those hats are so cute! I’m going to make one for me….without the bunny ears 😉
I’m sorry if this is already answered, but I looked through your website and didn’t see it. I am pretty new to sewing and want to make the bunny hat for a friend’s 2 and a half year old daughter. Would I use the baby size pattern or child size?
Thanks so much!
That’s a hard one as kids’ head and be really different. My advice would be to make a child small, as a child will always grow into it.
-Angel