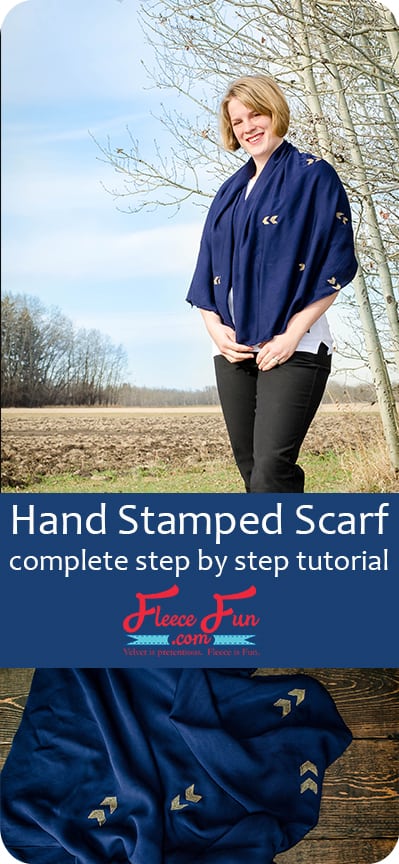
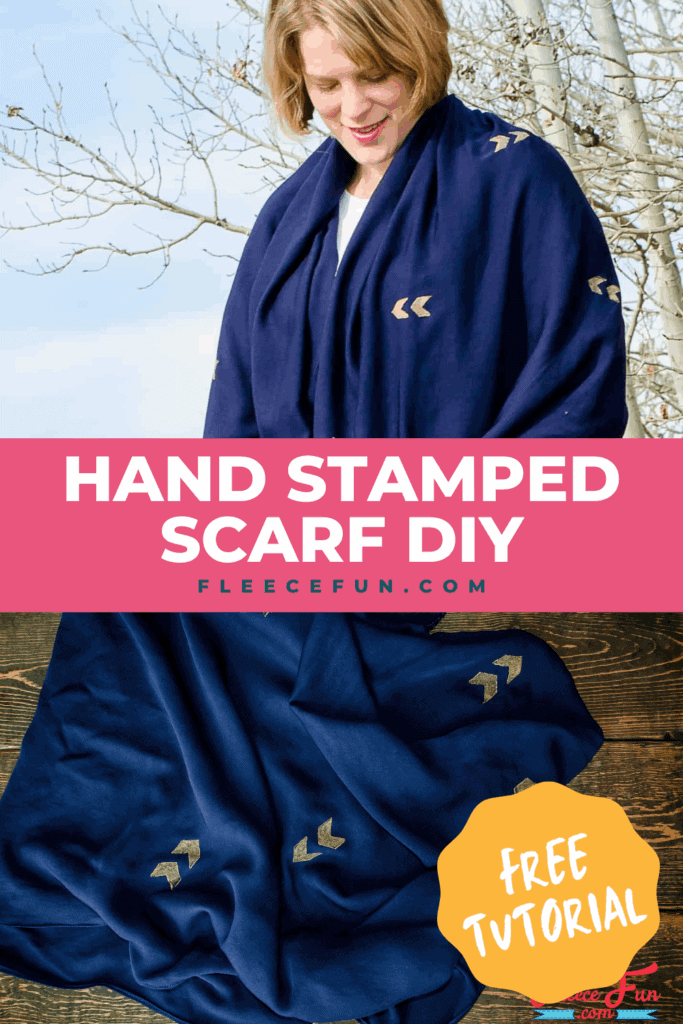
Hand Stamped Scarf Tutorial
This content contains affiliate links or sponsored elements, read our Disclosure Policy.
This beautiful hand stamped scarf tutorial makes a wonderful gift and fashion statement piece. Use the suggested design or come up with your own to make it uniquely yours.
Have you ever wanted to create your very own hand stamped scarf? With this Hand Stamped Scarf Tutorial, the possibilities are endless! You can choose from a variety of different patterns such as floral designs, geometric shapes, or even fun animal prints.
All you need is some fabric paint, stamps in your desired design, and a plain scarf to get started. Simply dip the stamp into the paint and press it onto the fabric in a repeating pattern until you have covered the entire surface. Let it dry and voilà – you now have a one-of-a-kind accessory that is sure to turn heads wherever you go!
So grab your supplies and let your creativity run wild with this fun and easy tutorial.
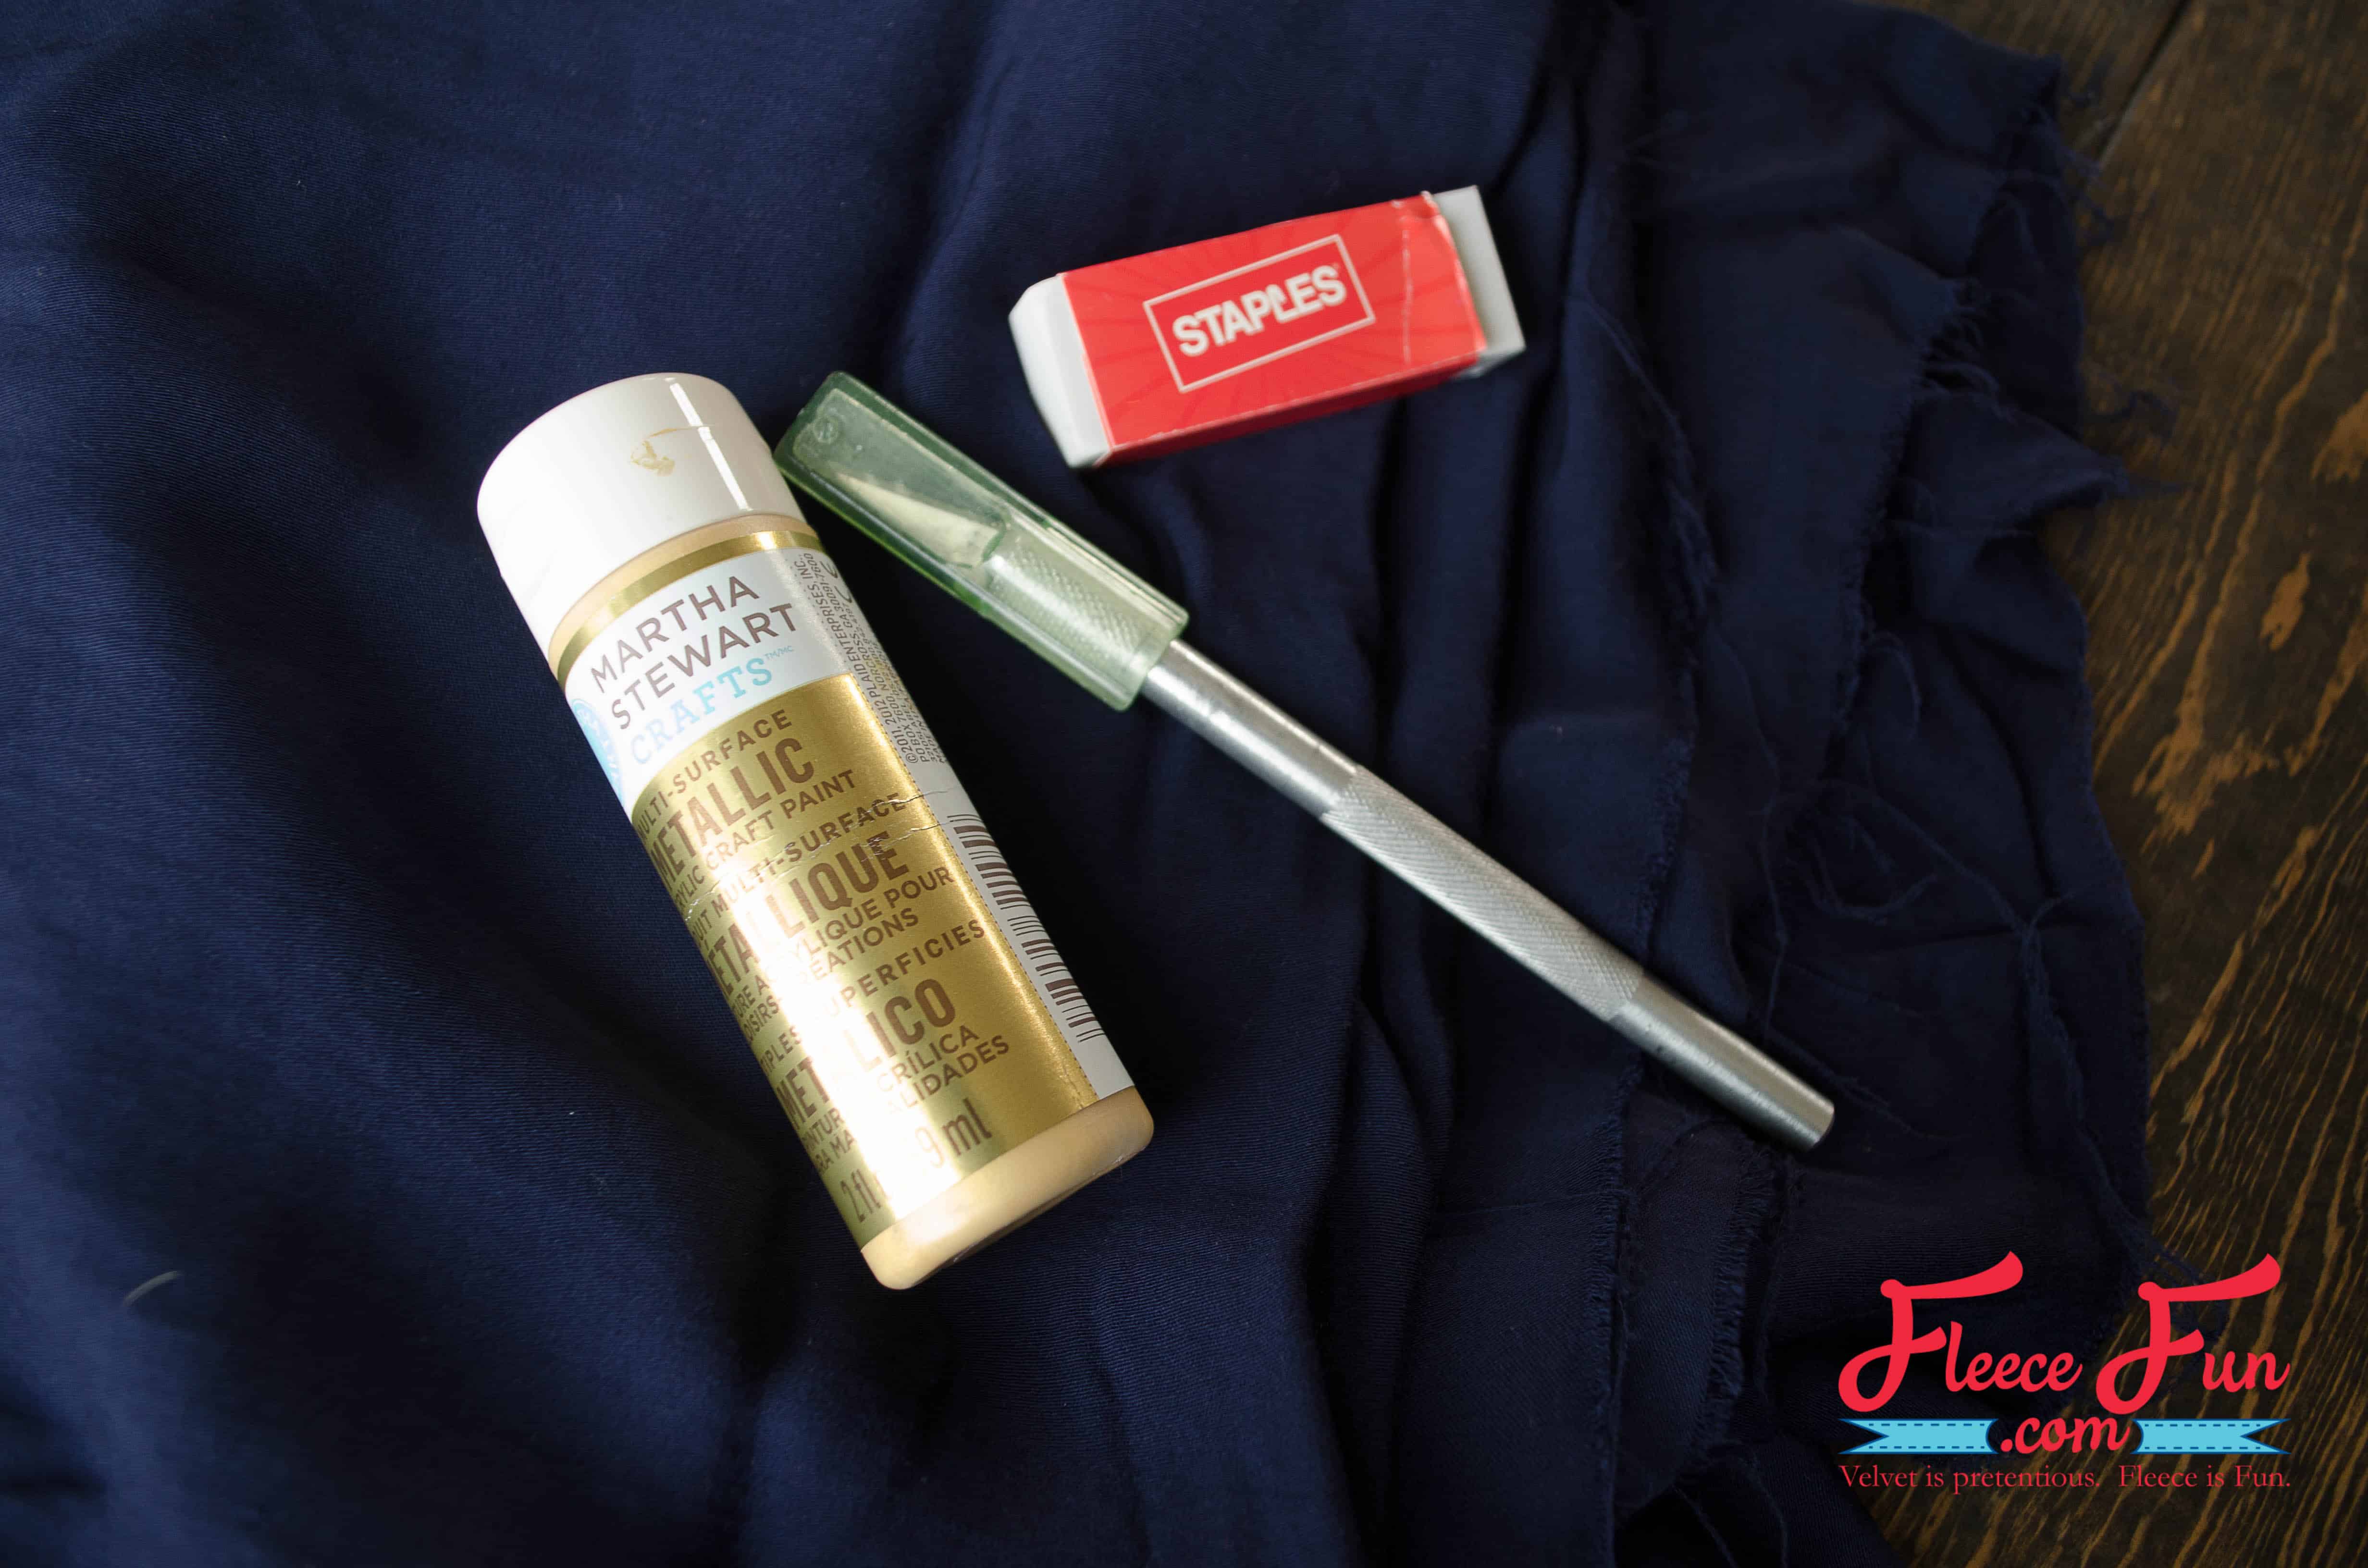
YOU WILL NEED:
- 1.25 yards of 60″ wide lightweight woven fabric. I used a super soft rayon, but you can also use cotton batiste, lawn, voile or handkerchief linen.
- Acrylic paint. You can use fabric paint but I always just use regular acrylic craft paint and never have a problem.
- White eraser
- Craft knife
Hand Stamped Scarf Tutorial
Step 1 – Design the stamp for the scarf
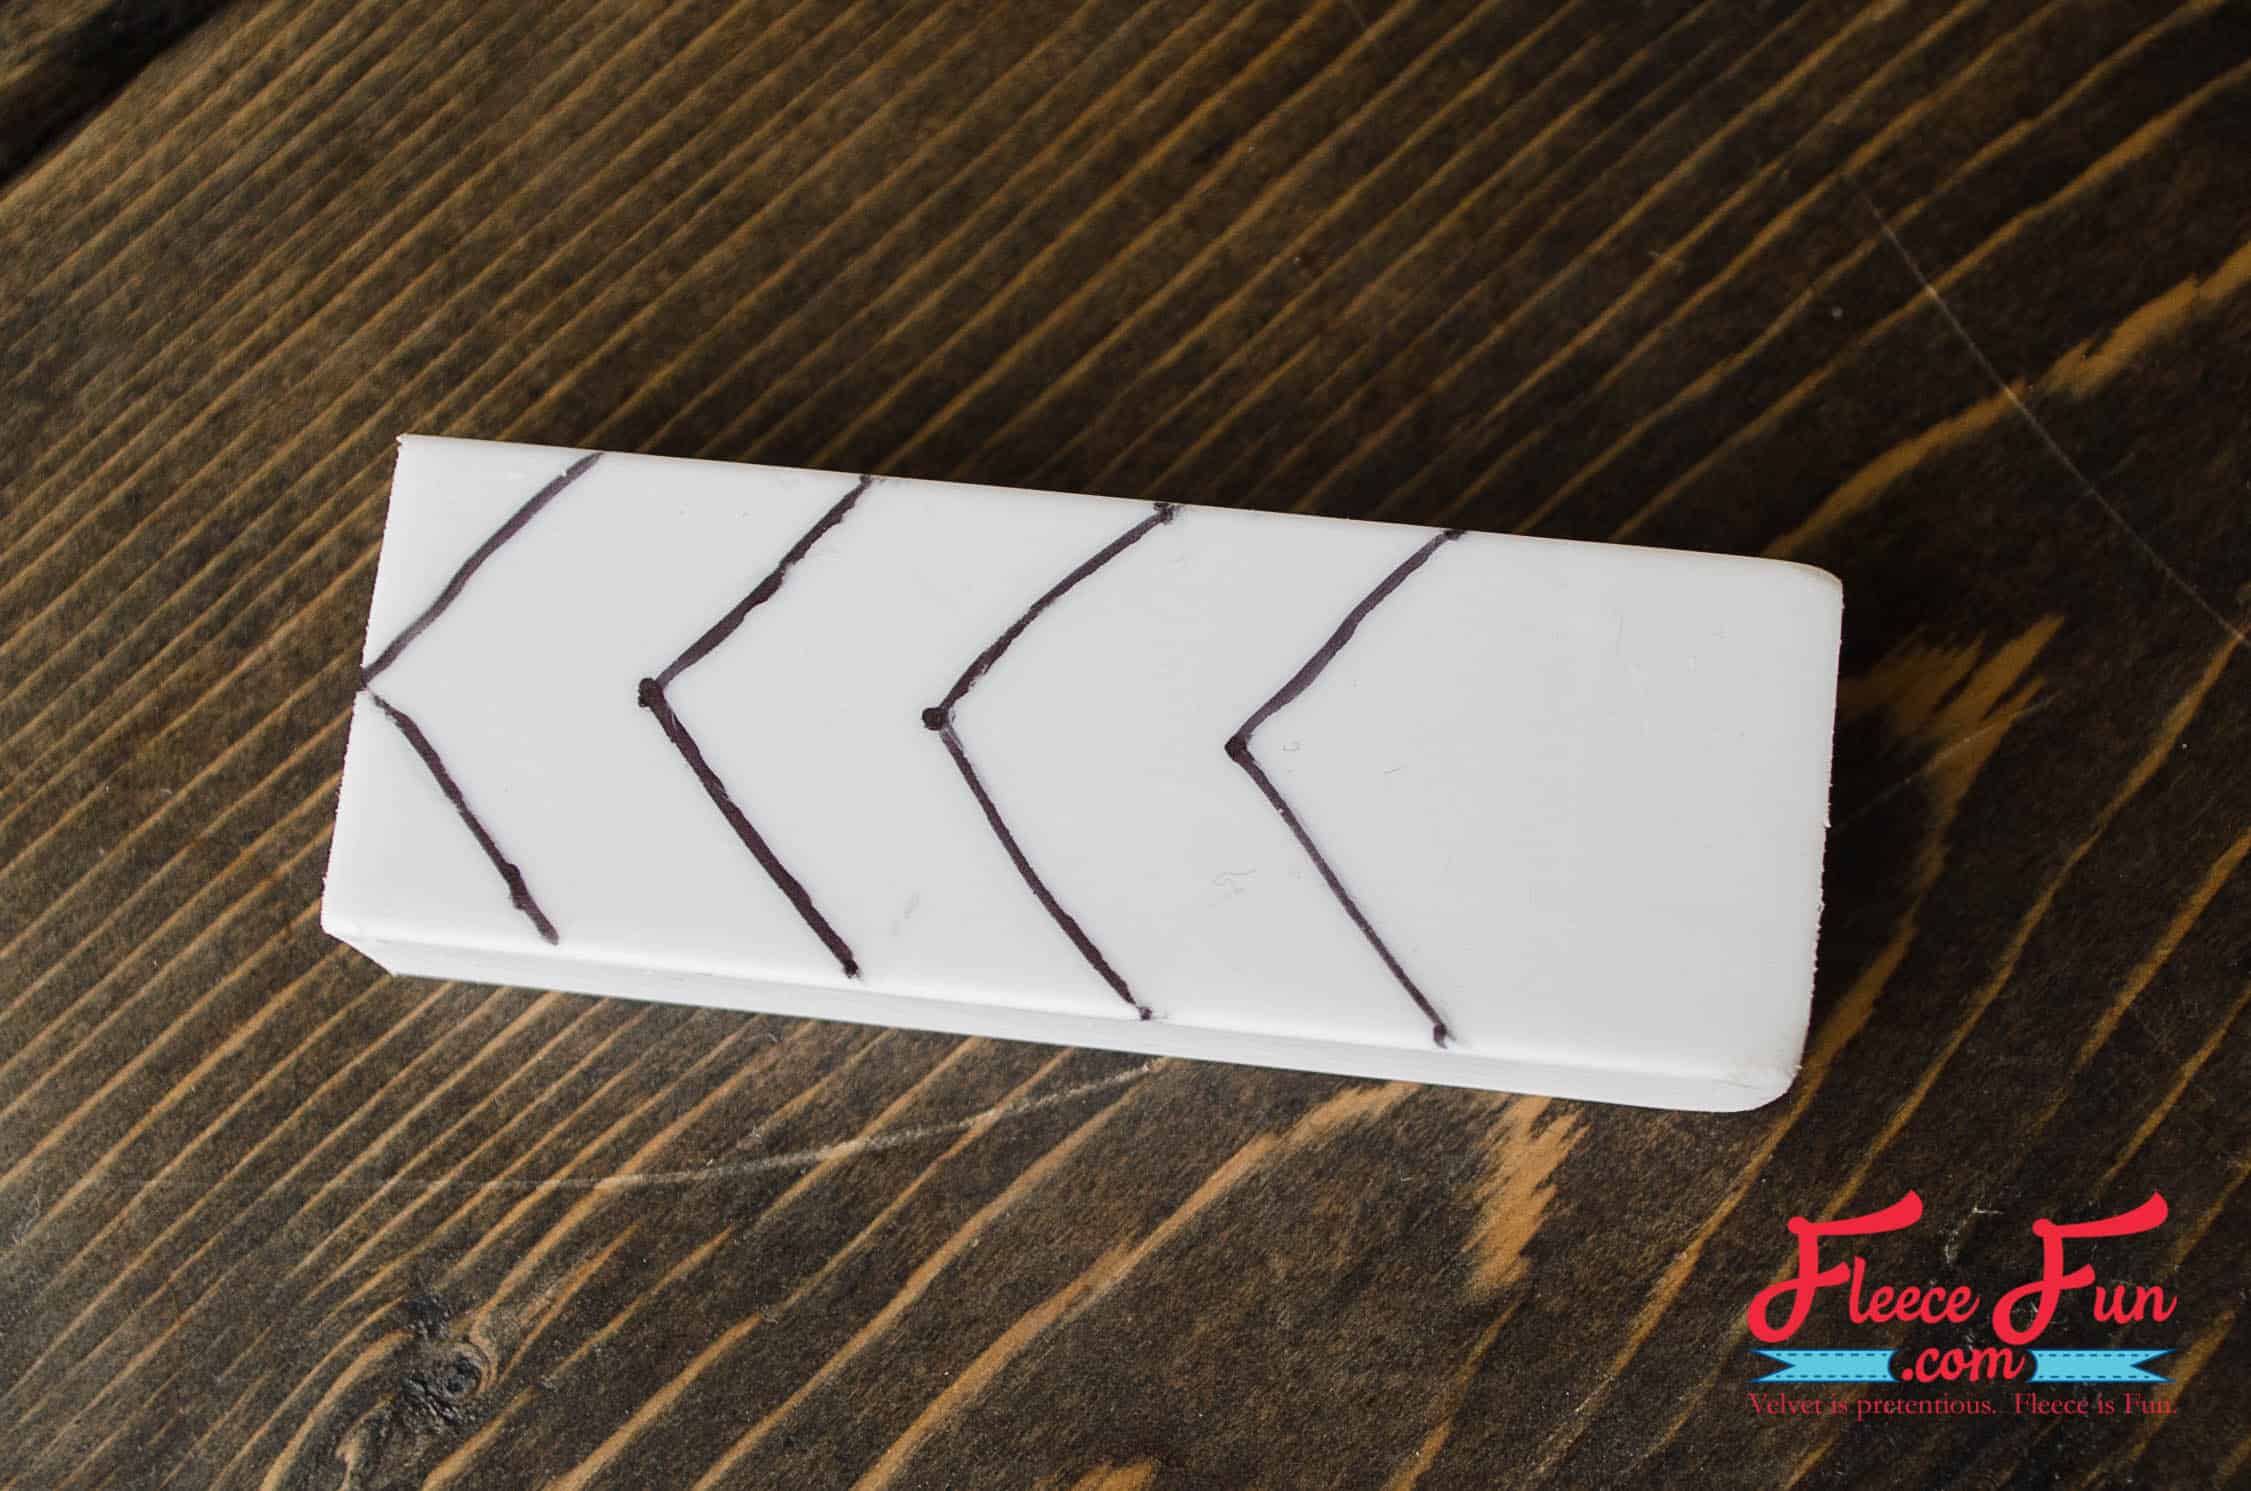
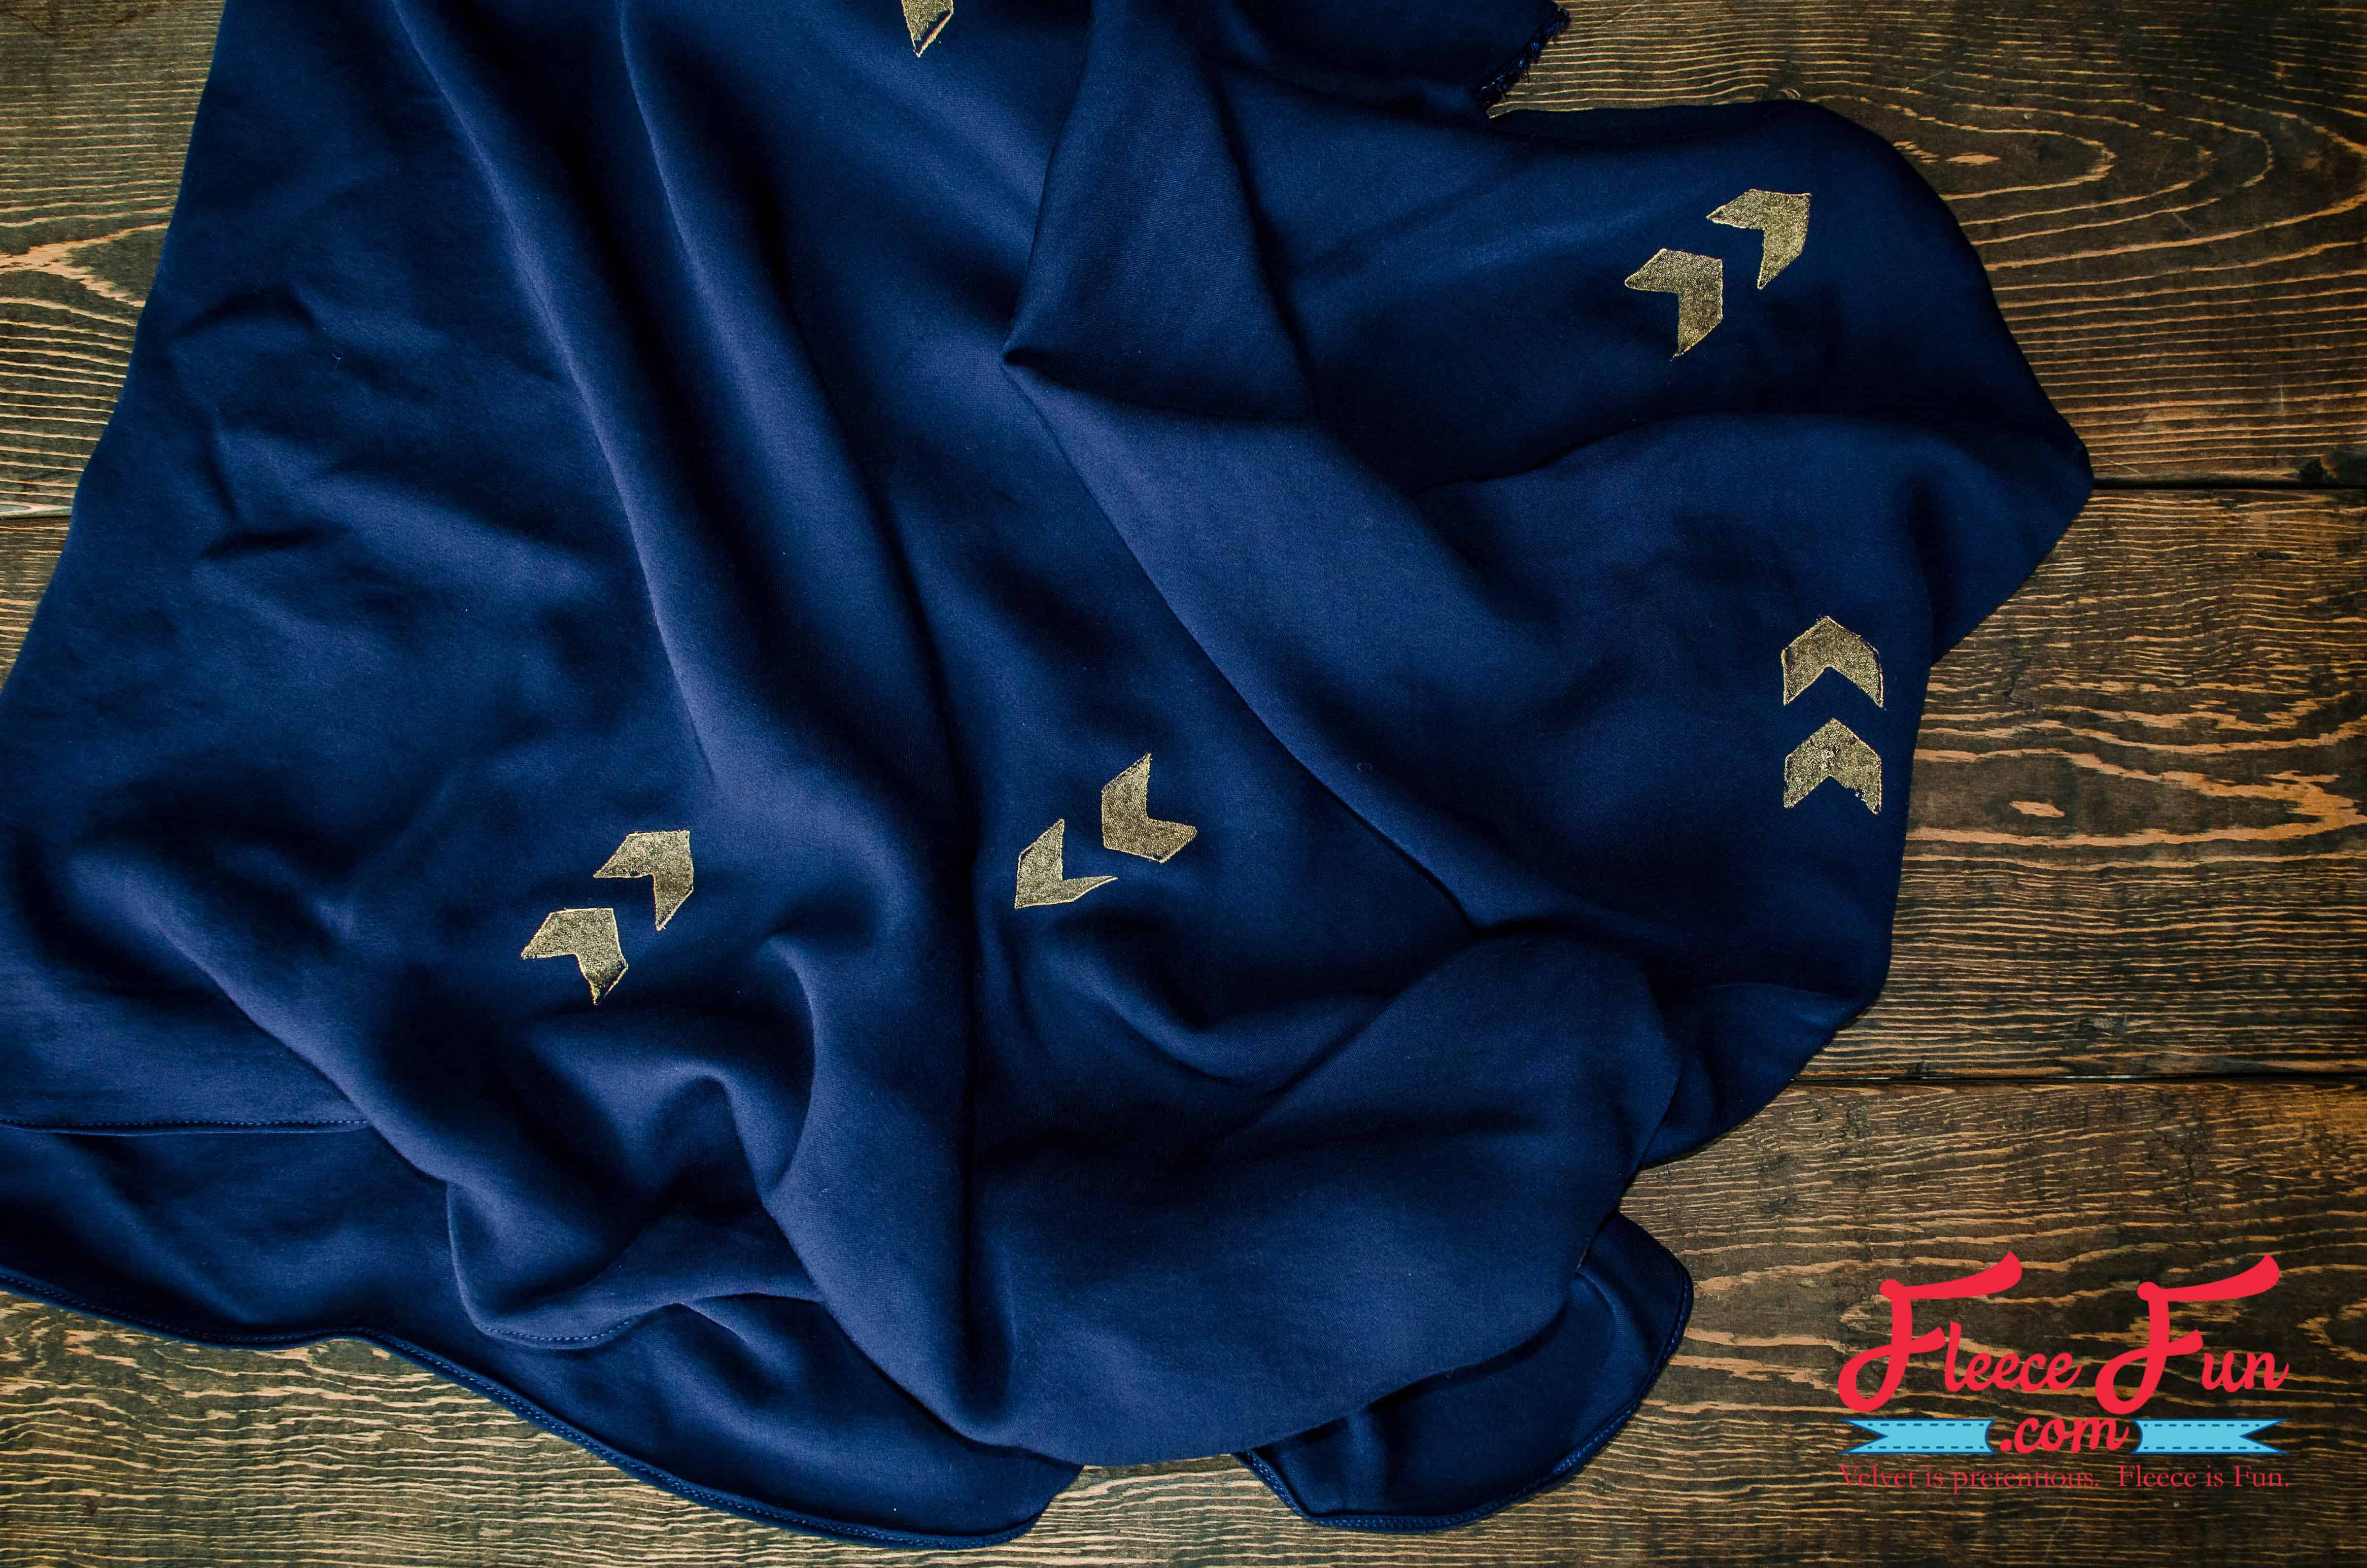
Come up with a design for your stamp and draw it on your eraser. For this method, a simple design works best.
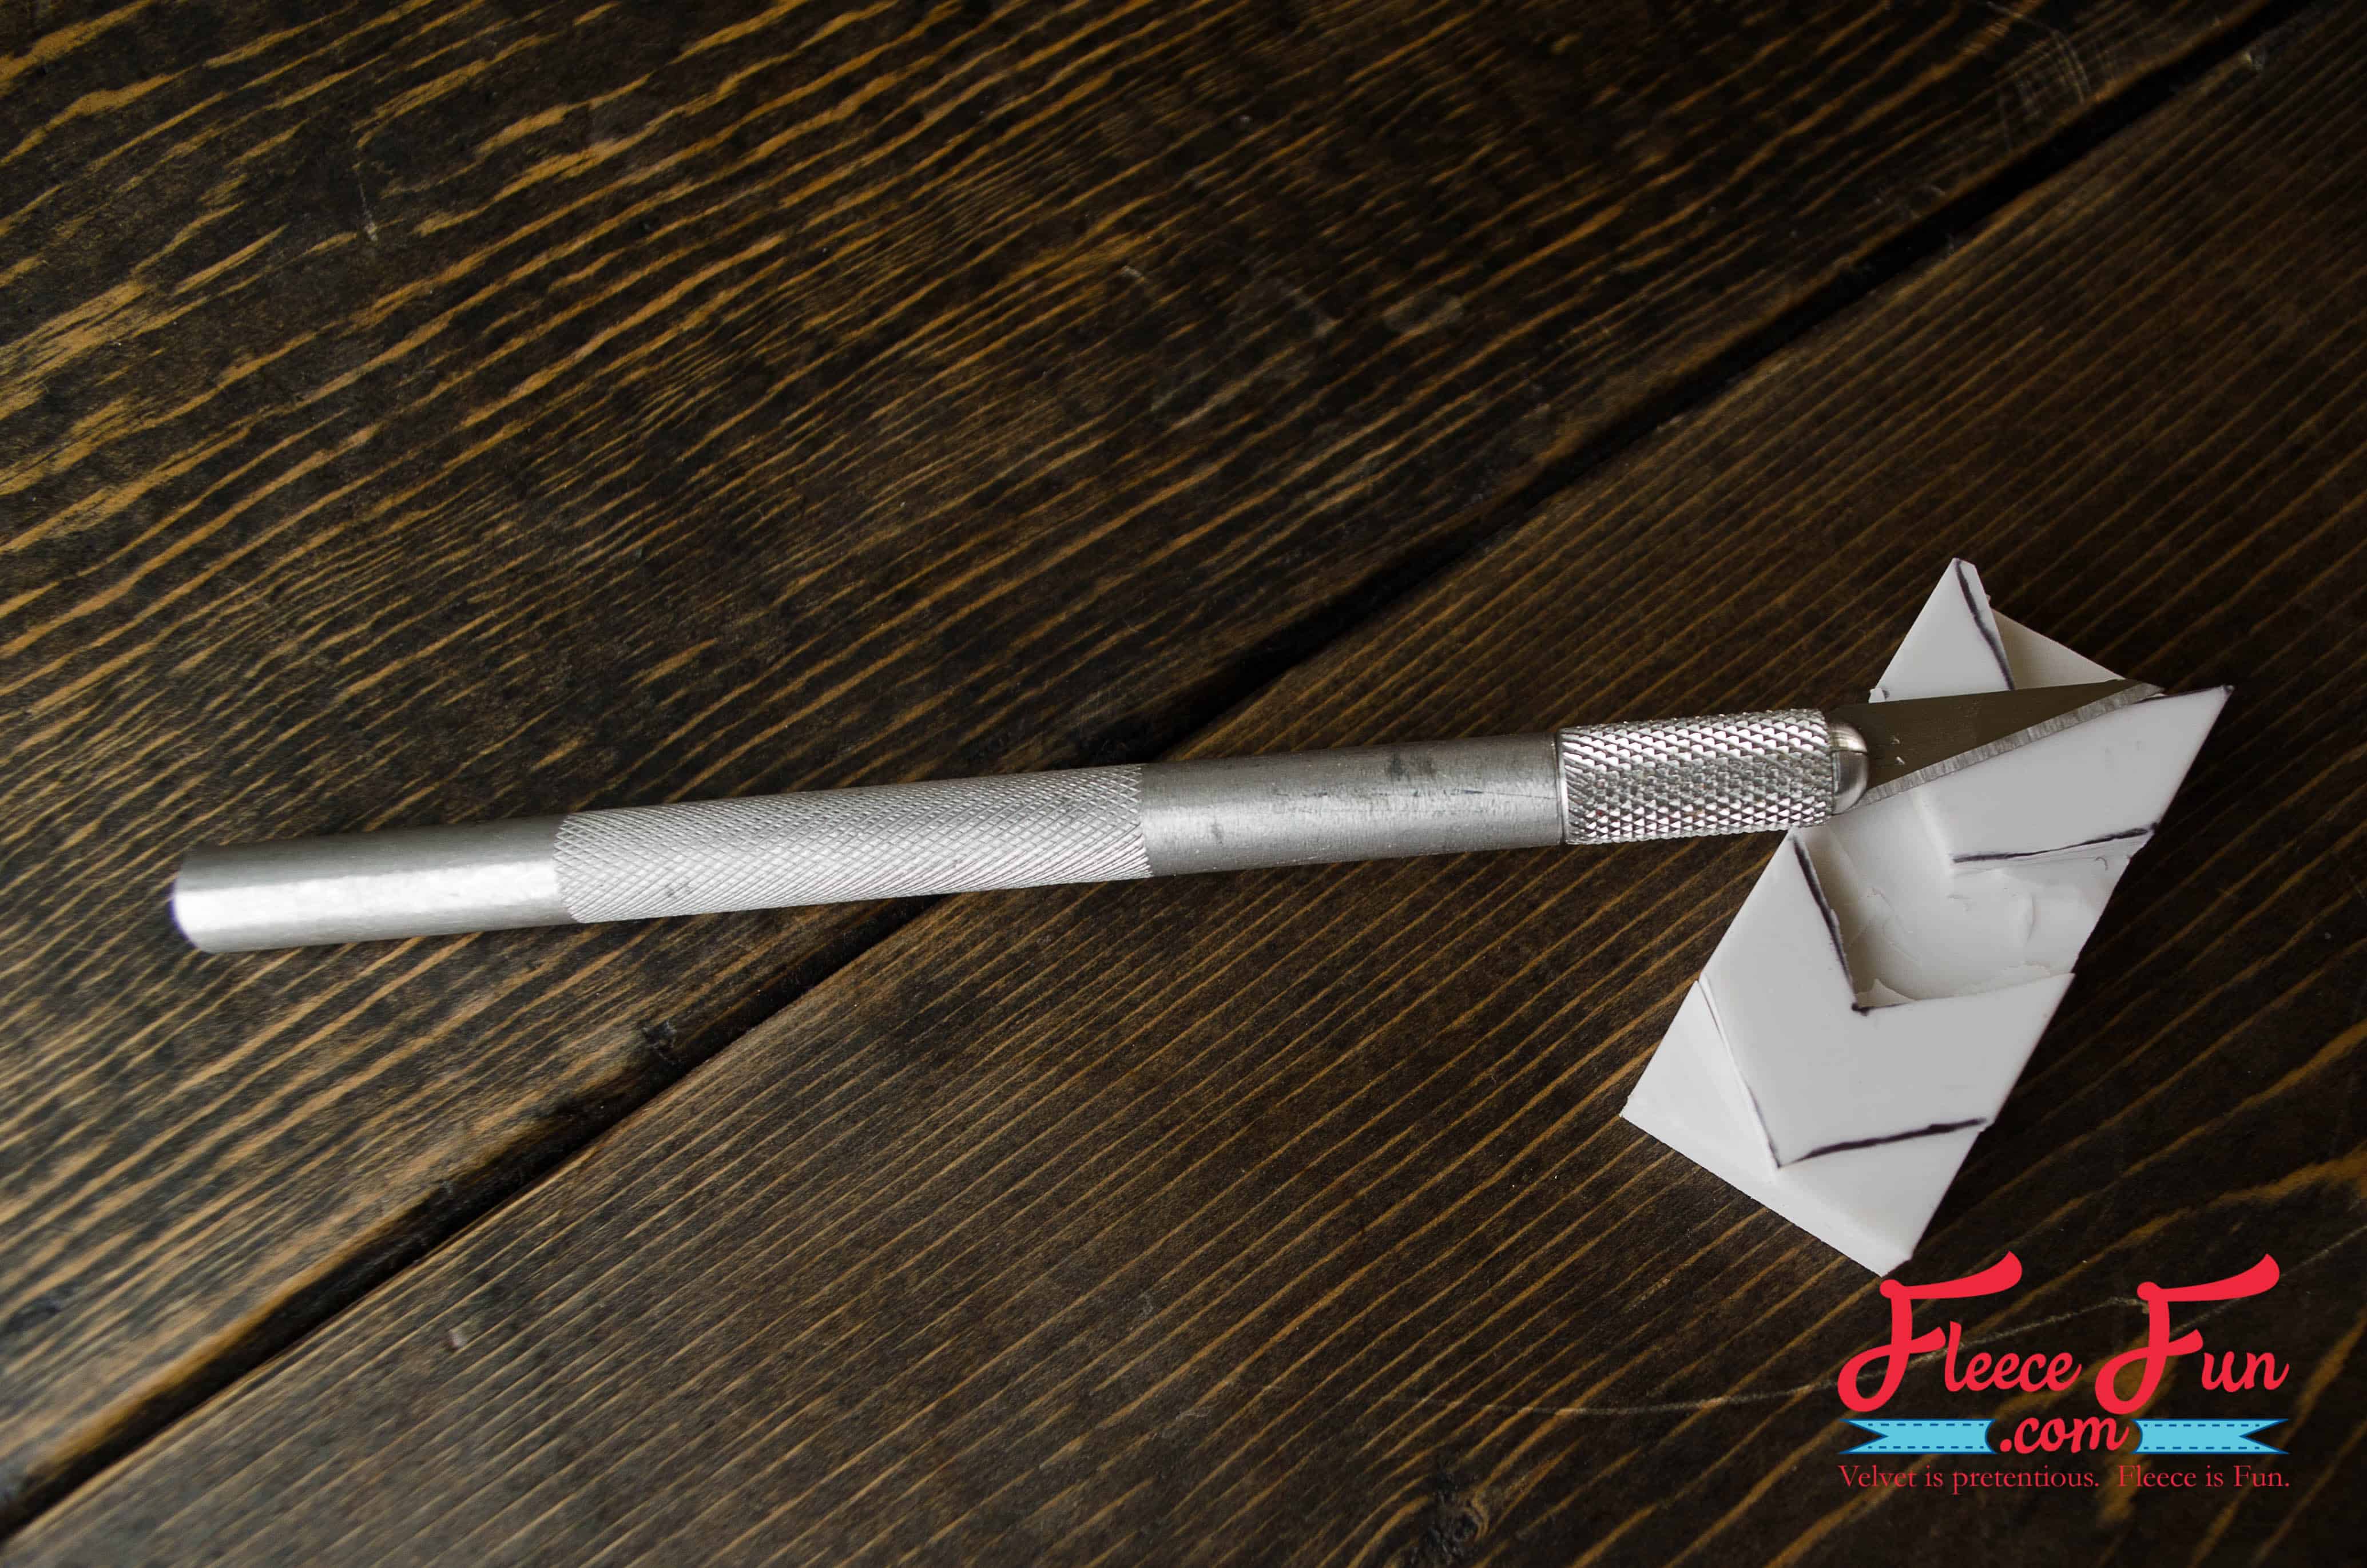
Cut out the negative space around your design with your craft knife. I cut into the eraser about 3/16″ deep. This technique works well for a hand stamped scarf—simple shapes and clean lines give the best results.
Step 2 – Prep to hand stamp the scarf

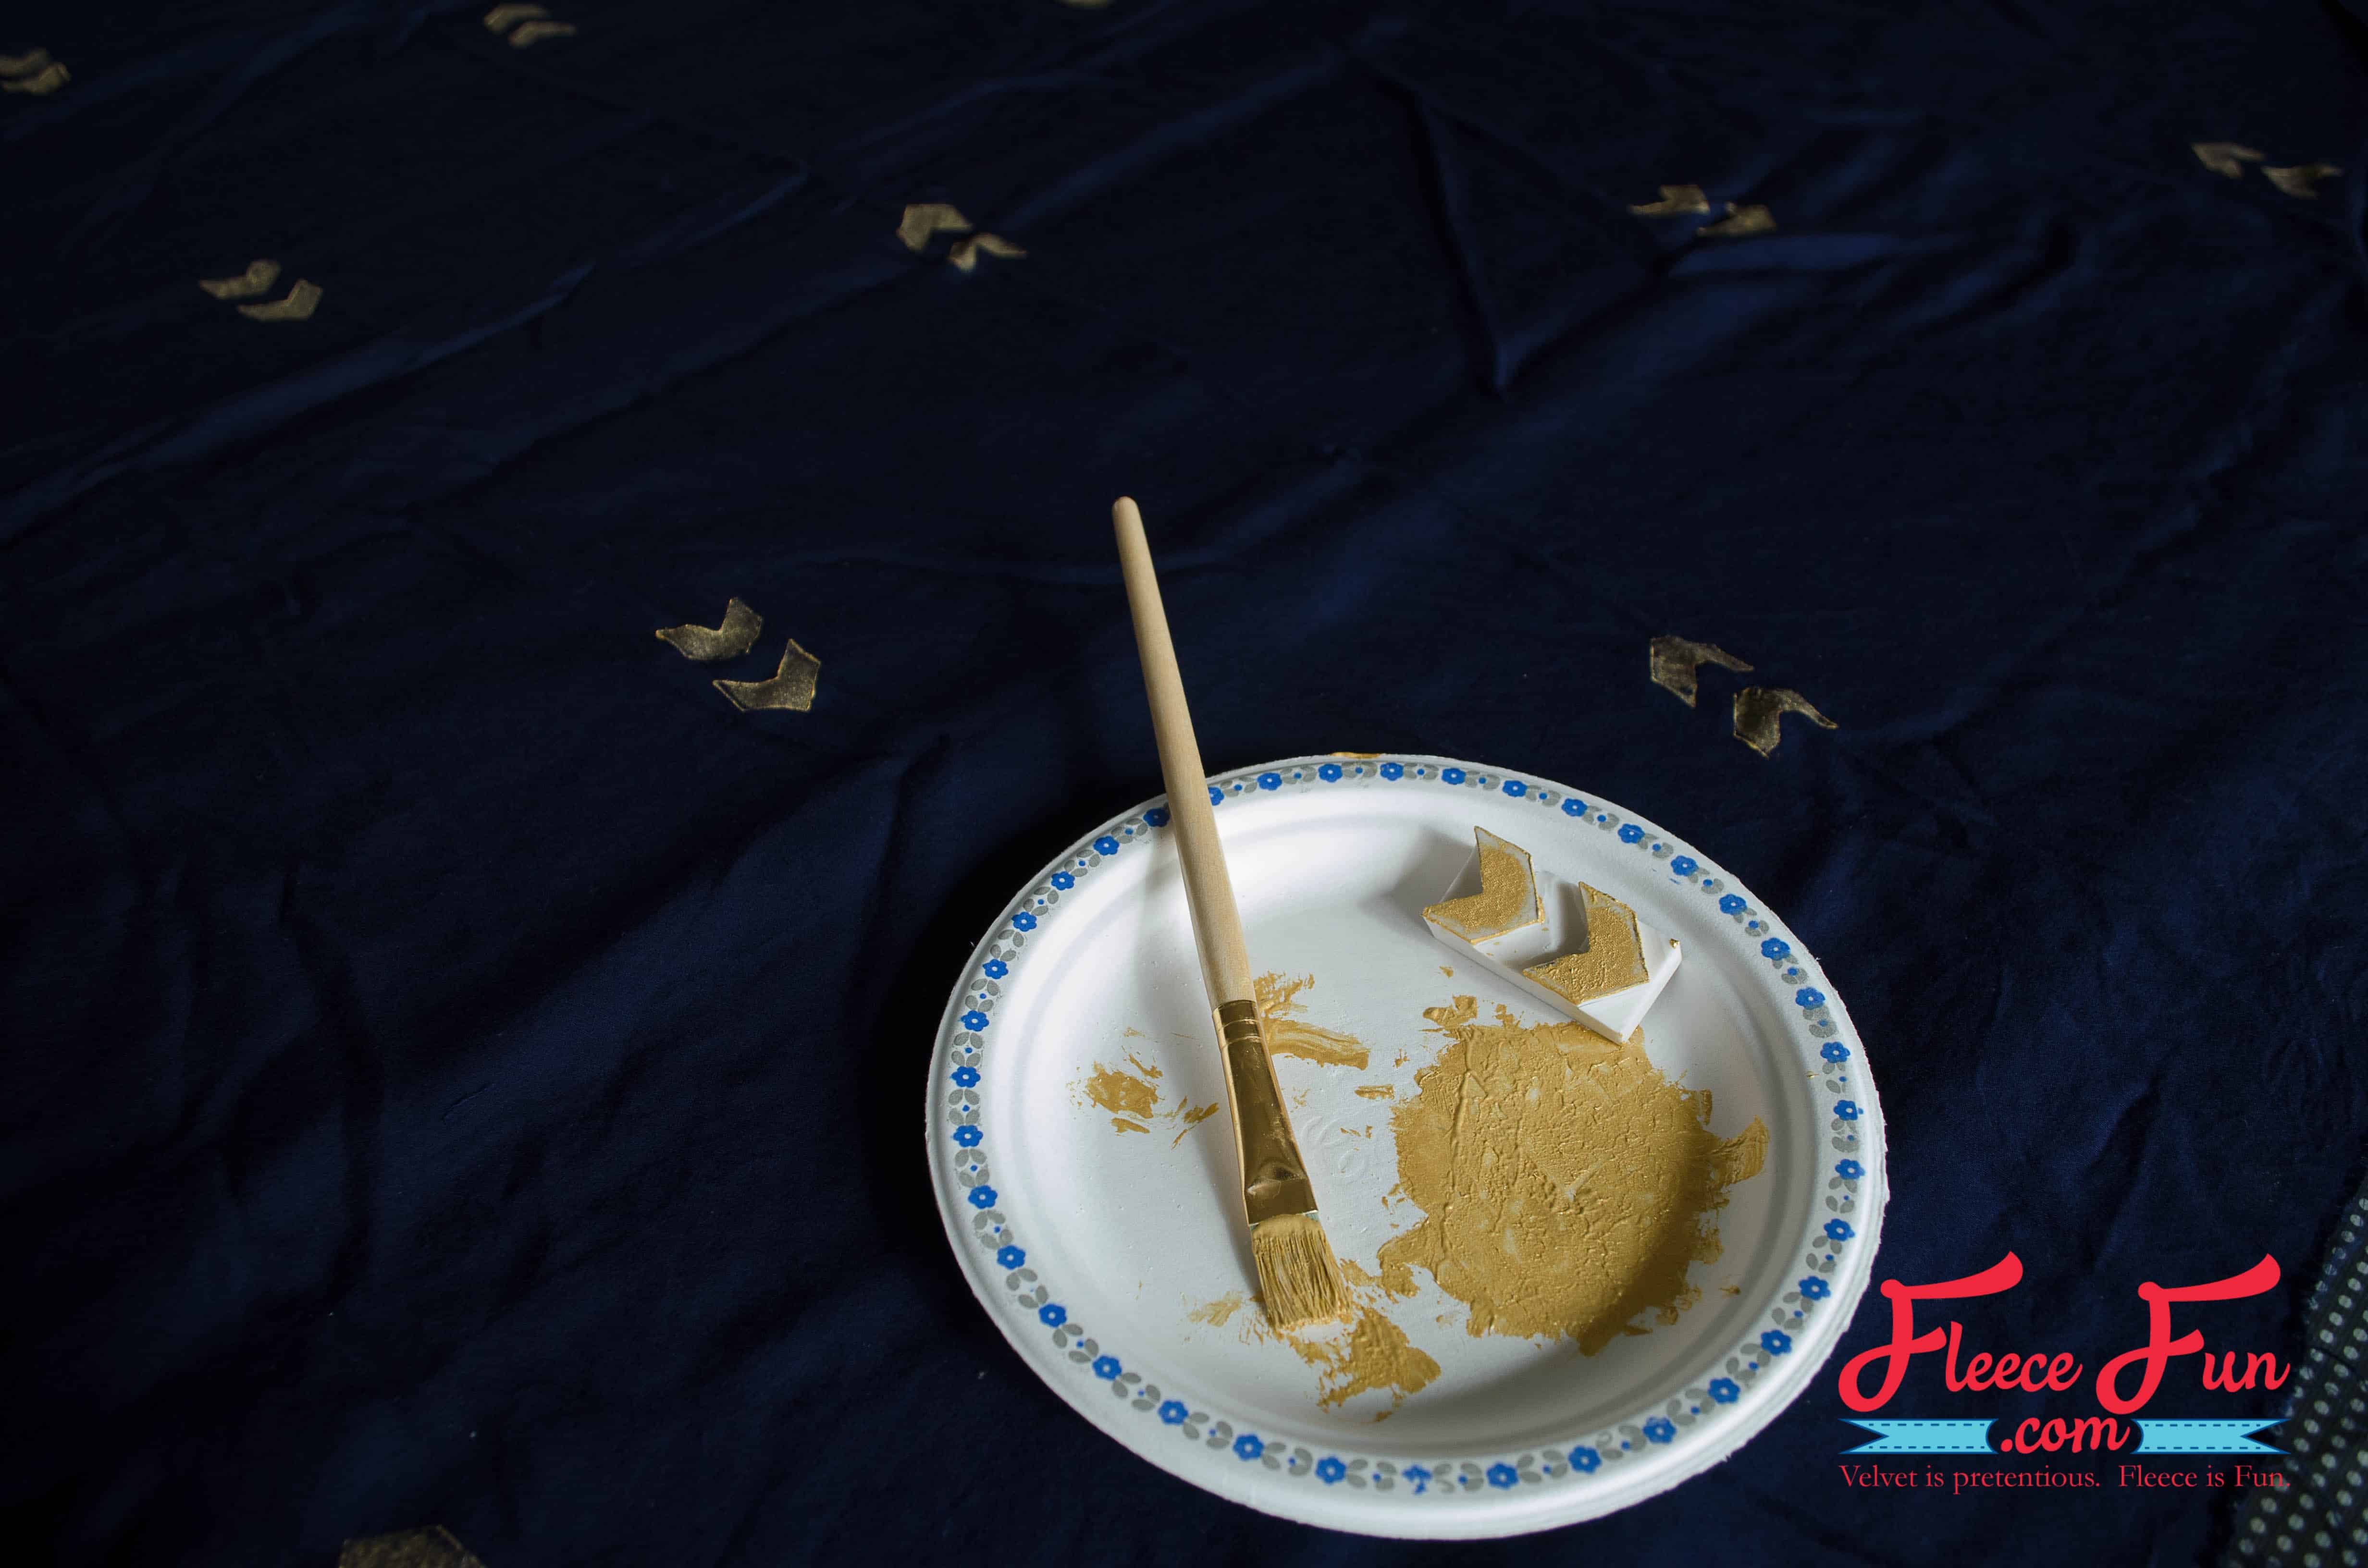
Squeeze a bit of your paint on a paper plate. Use the paintbrush to spread out a thin layer.
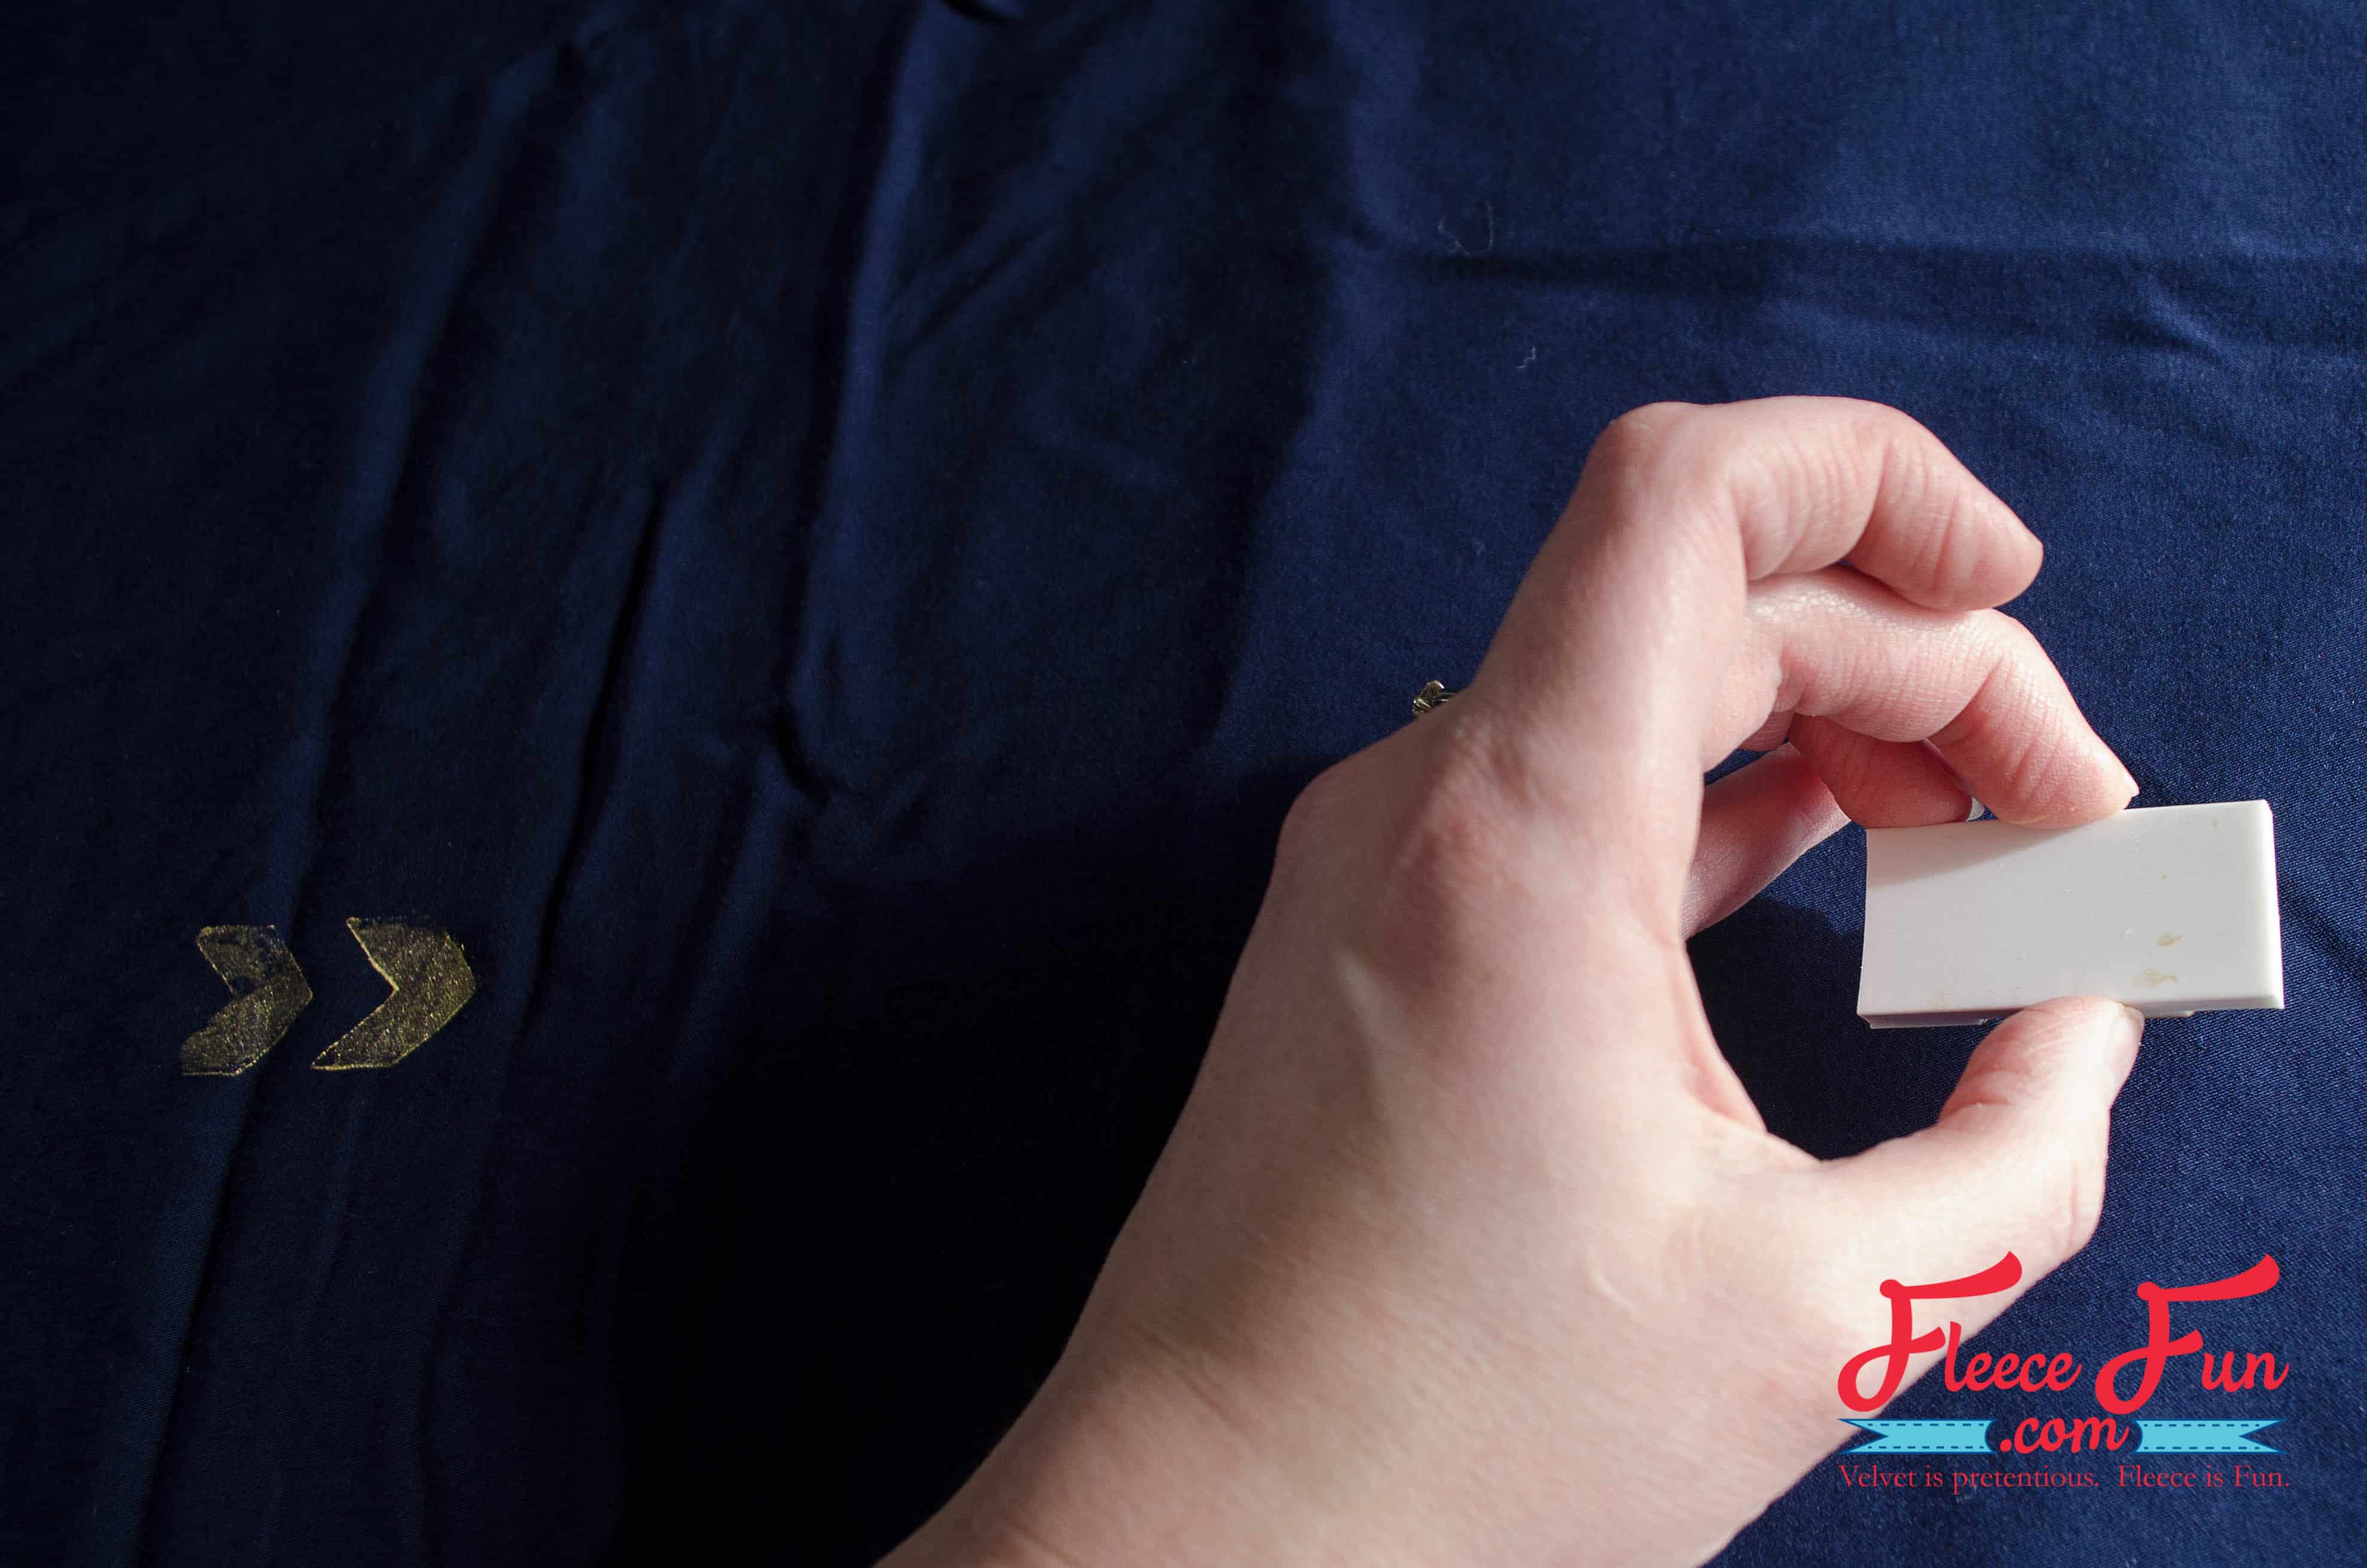
Press the eraser into the paint and then onto your fabric. I chose to do rows about 9″ apart with the arrows pointing in alternating directions, but you can do a random pattern or use a ruler to ensure accurate spacing.
Let the paint dry for 24 hours. Then heat seal it with as hot an iron as your fabric can handle.
Step 3 – Make sure your pretty scarf won’t fray
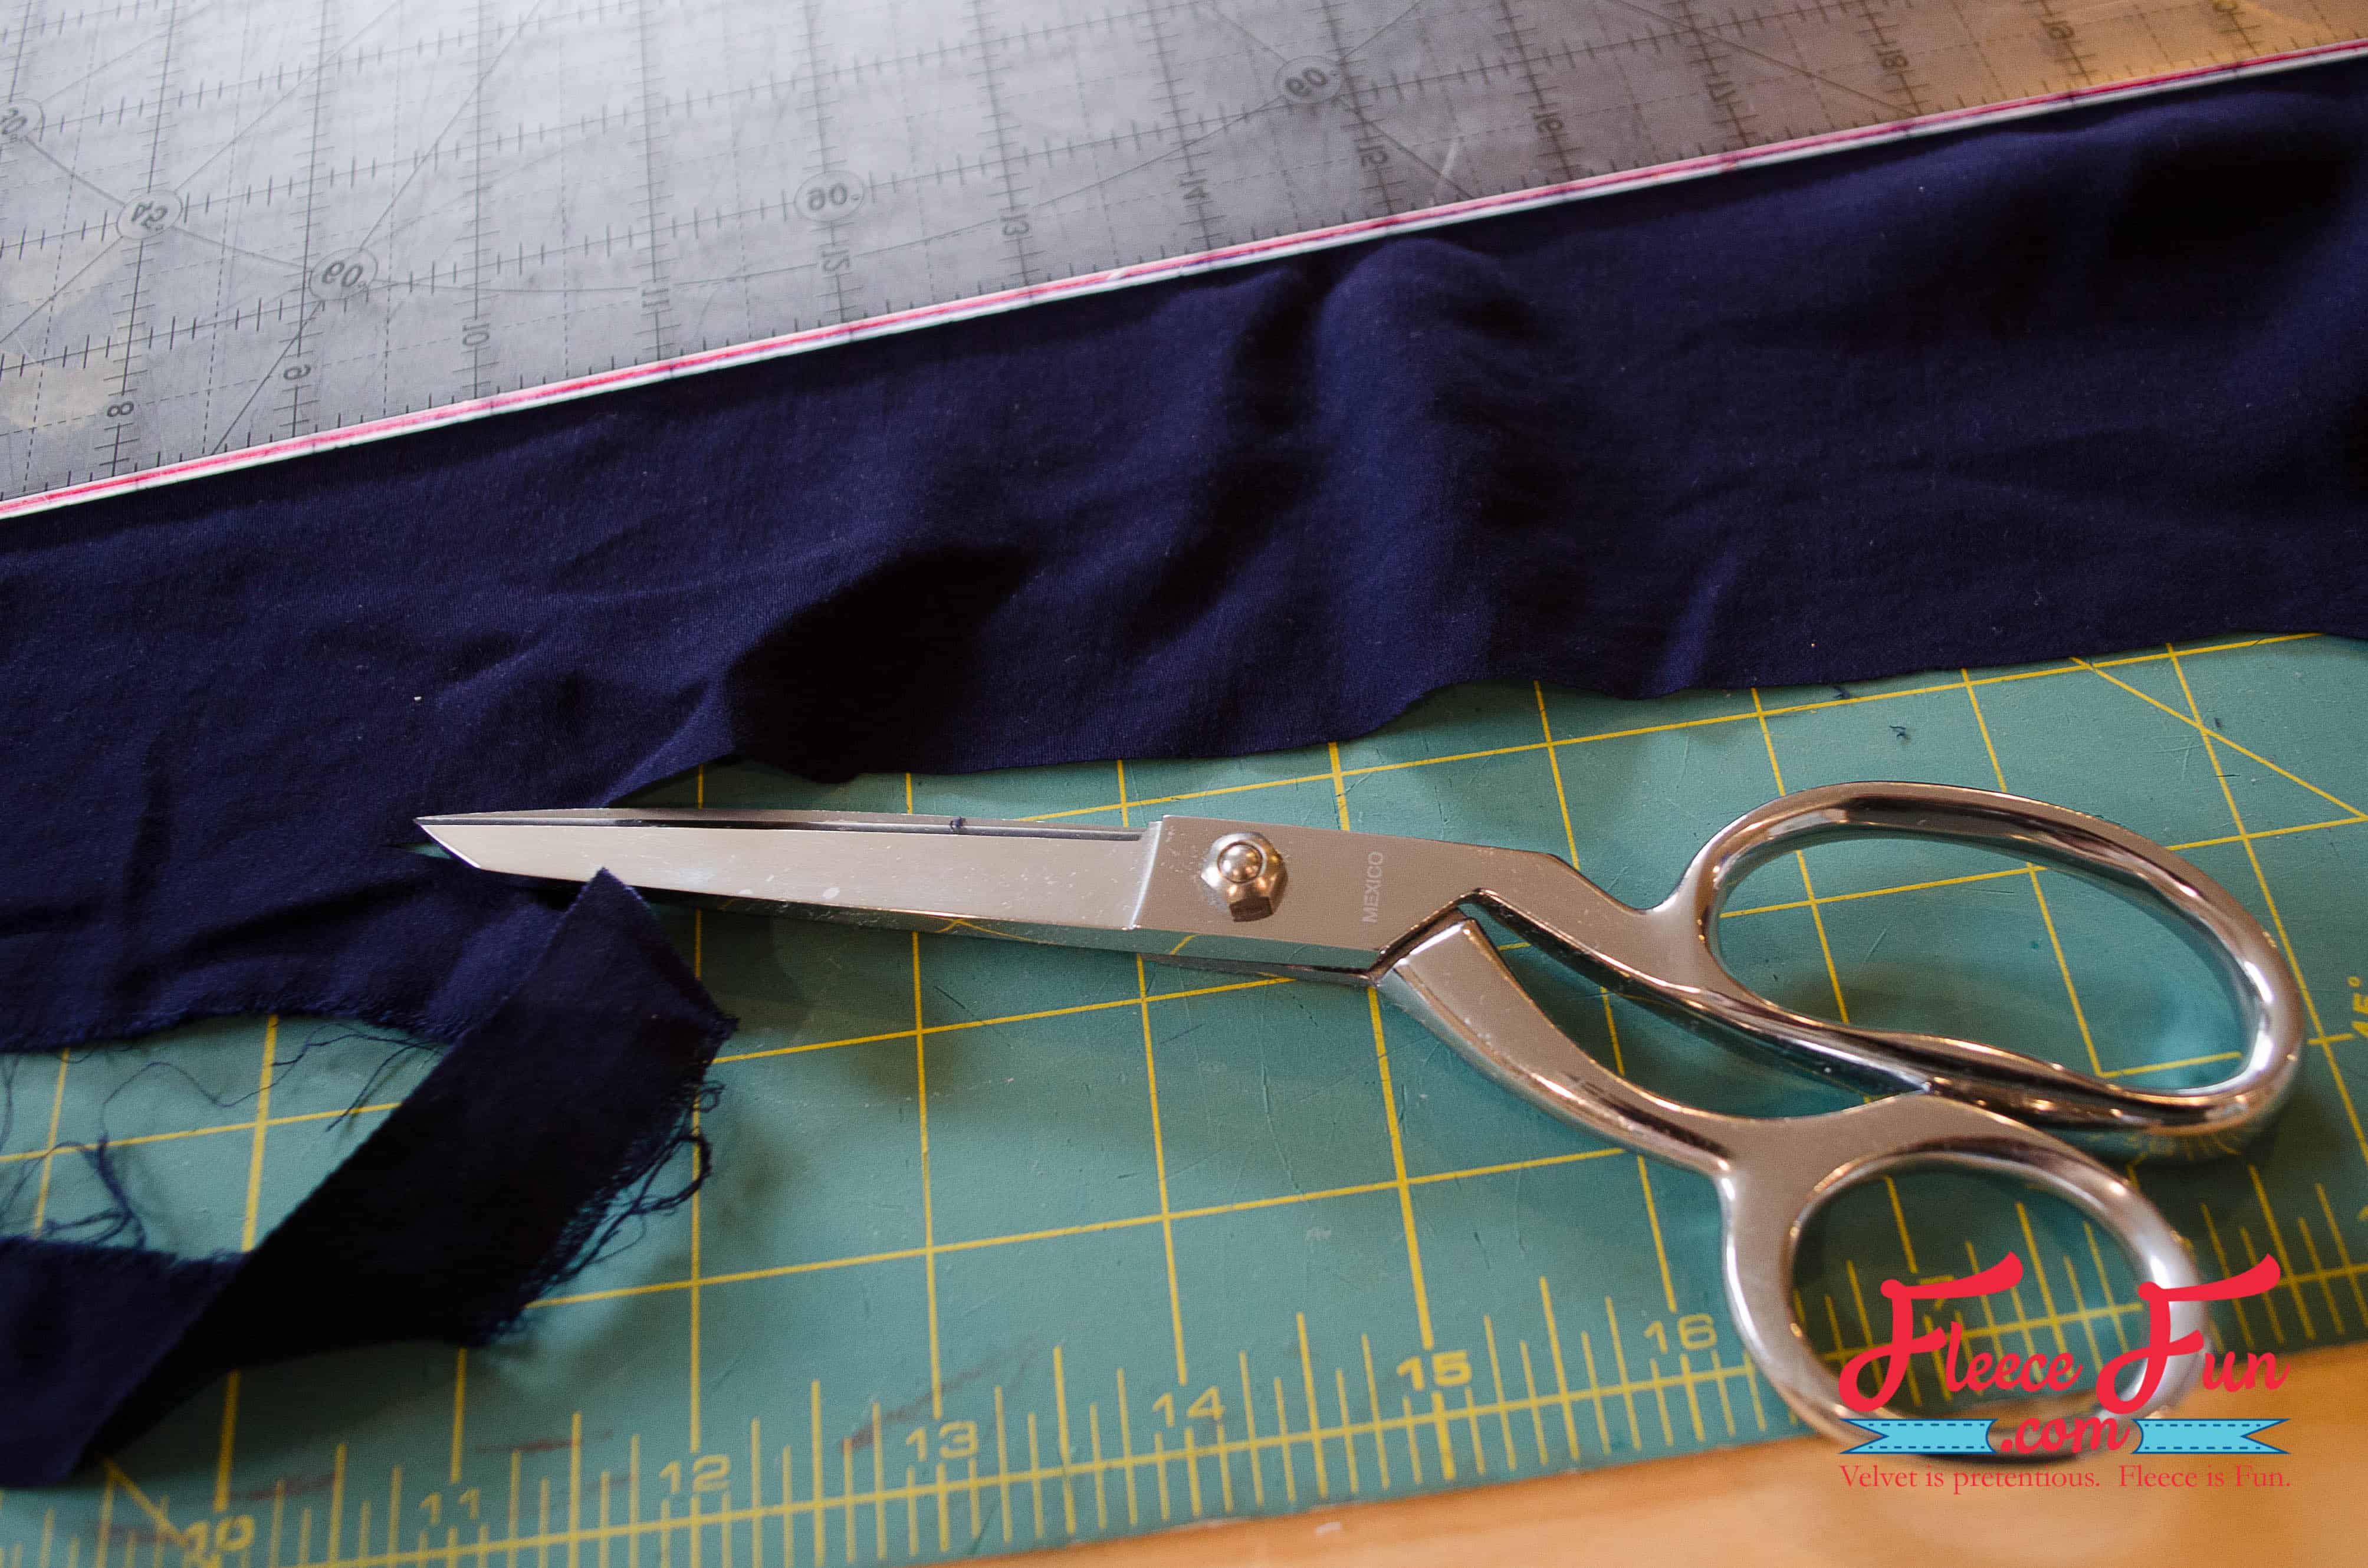
Trim the raw edges so that they are neat. I only trimmed (and hemmed) the two cut edges since the selvage edges are pretty and don’t fray. This gives the hand stamped scarf a clean, finished look without losing its handmade charm.
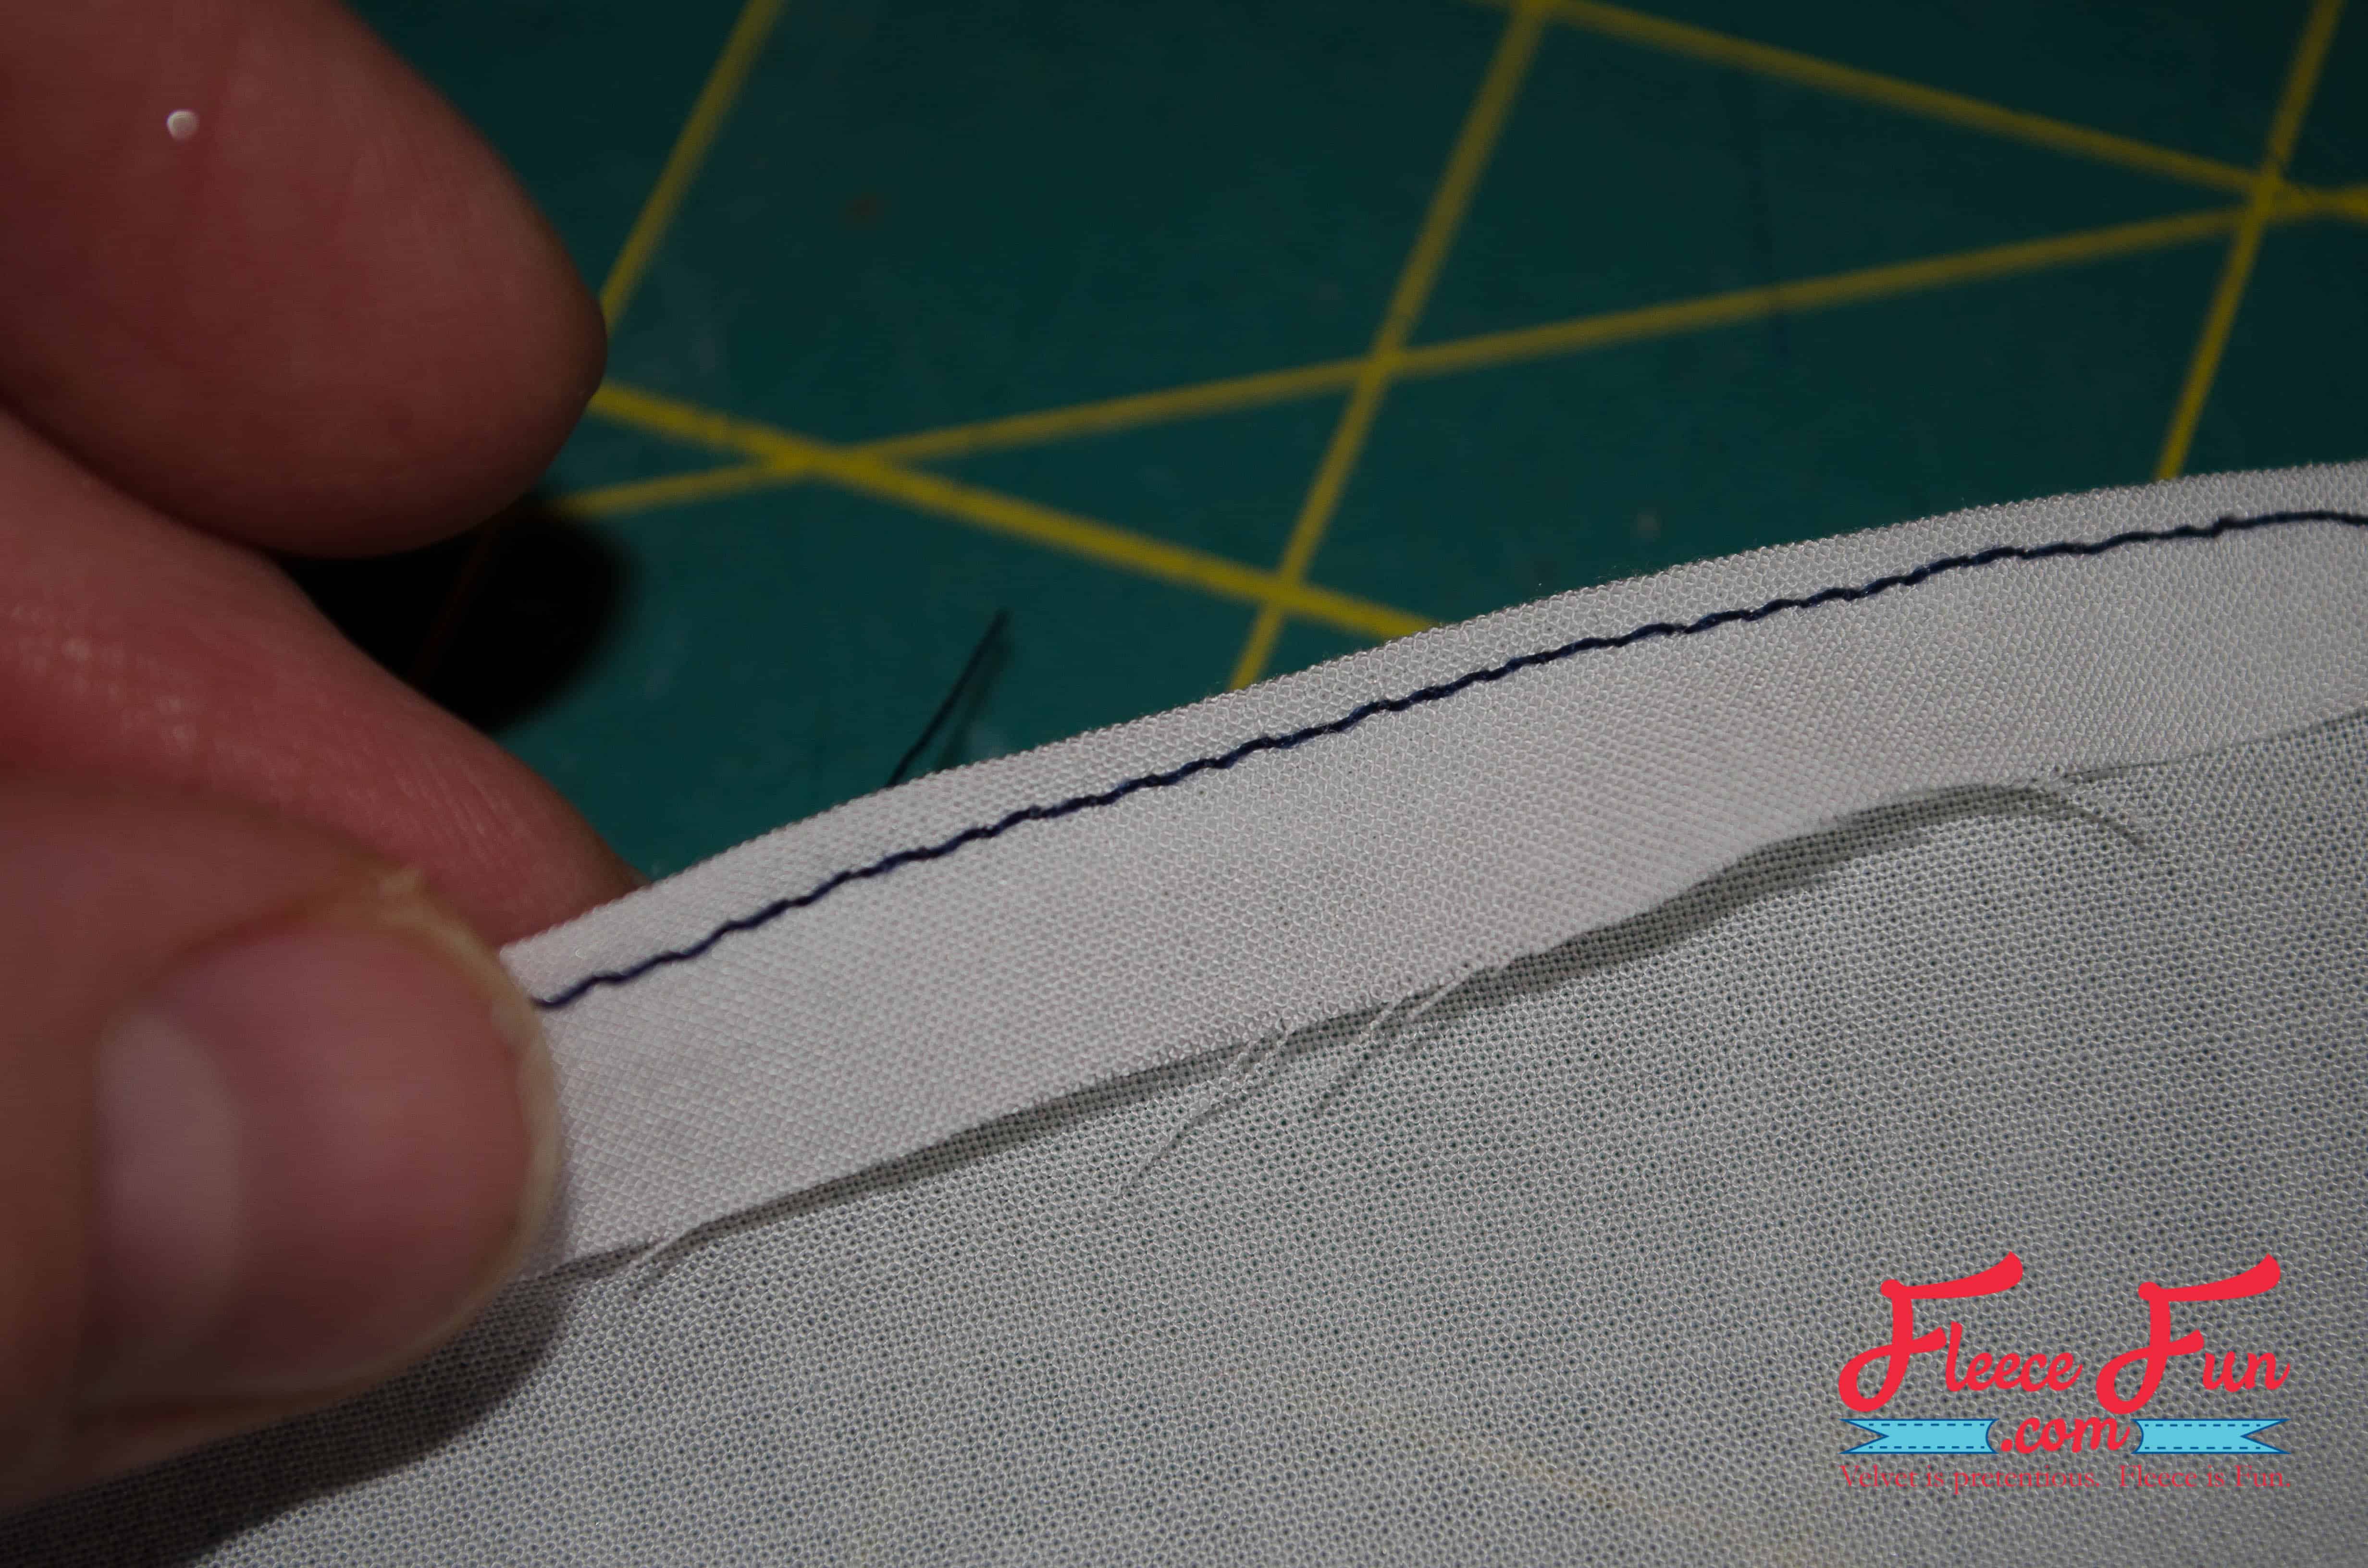
To create a baby hem, fold your raw edge about 1/4″ to the wrong side. Stitch very close to the fold, about 1/8″. (I did a demonstration with white fabric and blue thread so you can see it, but of course you’d want to use matching thread!)
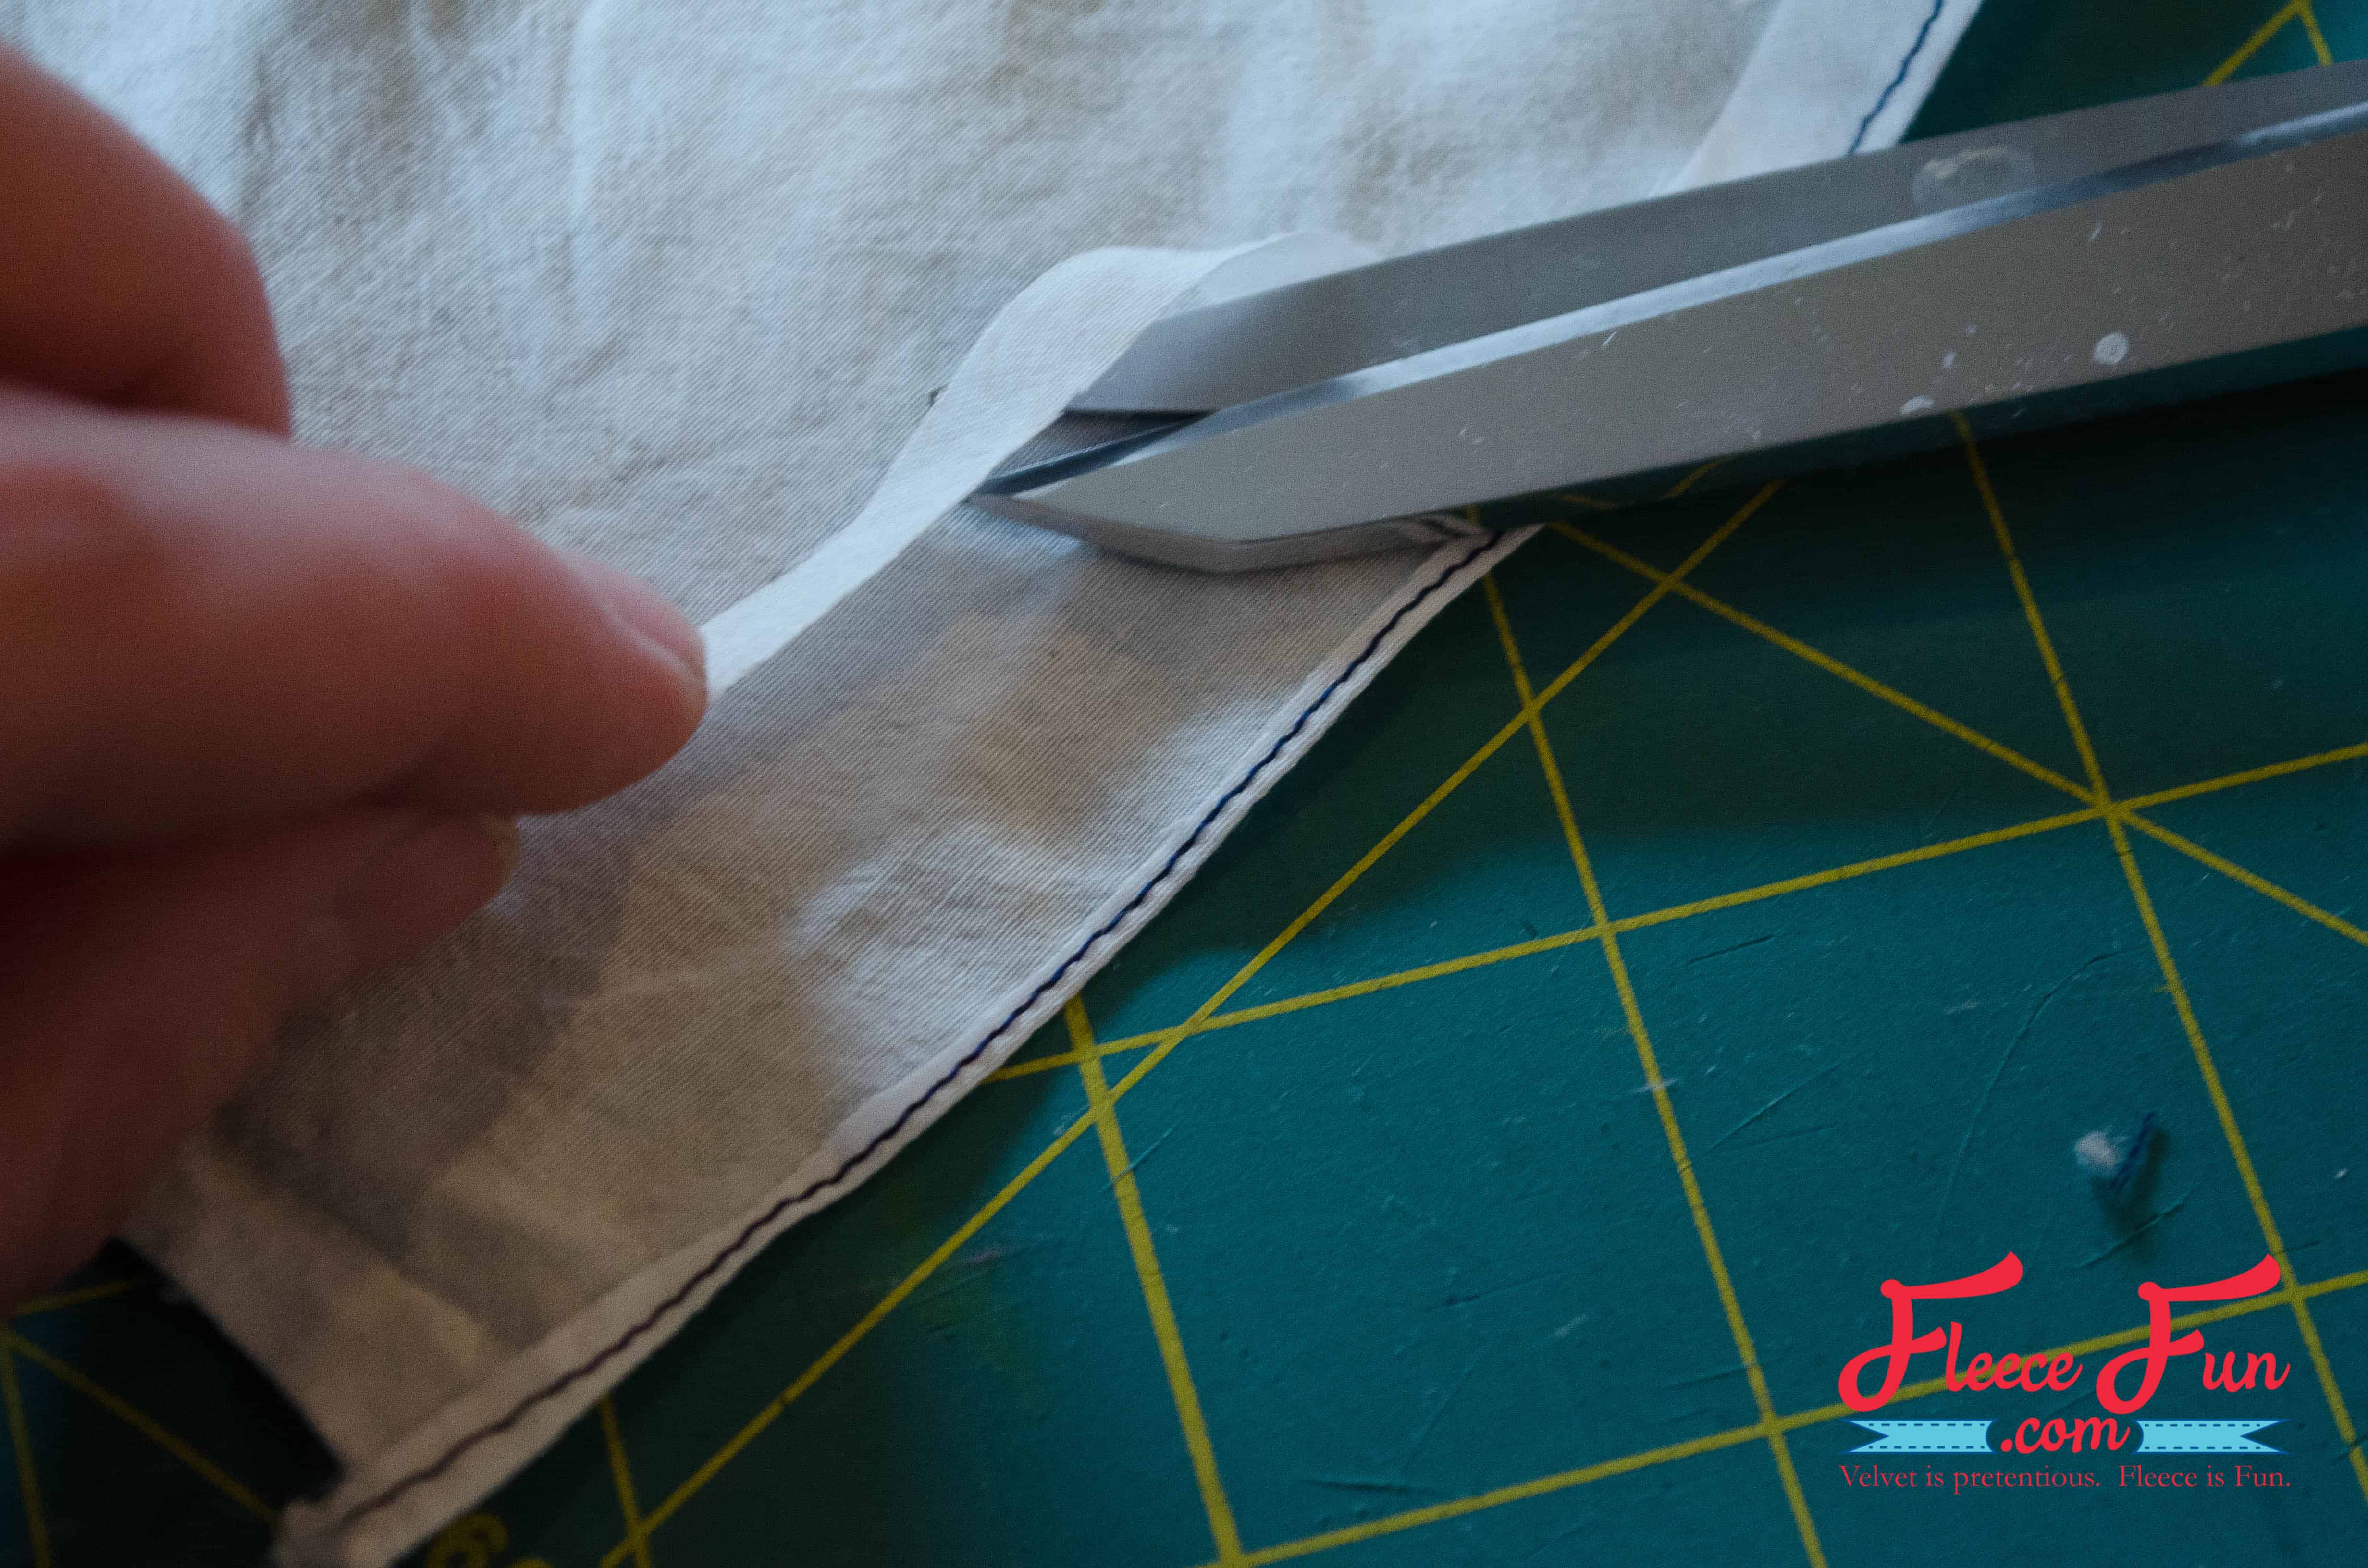
Trim the fabric as close as you can to the stitching. Be careful and use applique scissors if you have them. It really is no fun when you cut a hole in your project…I may have firsthand experience…just saying…
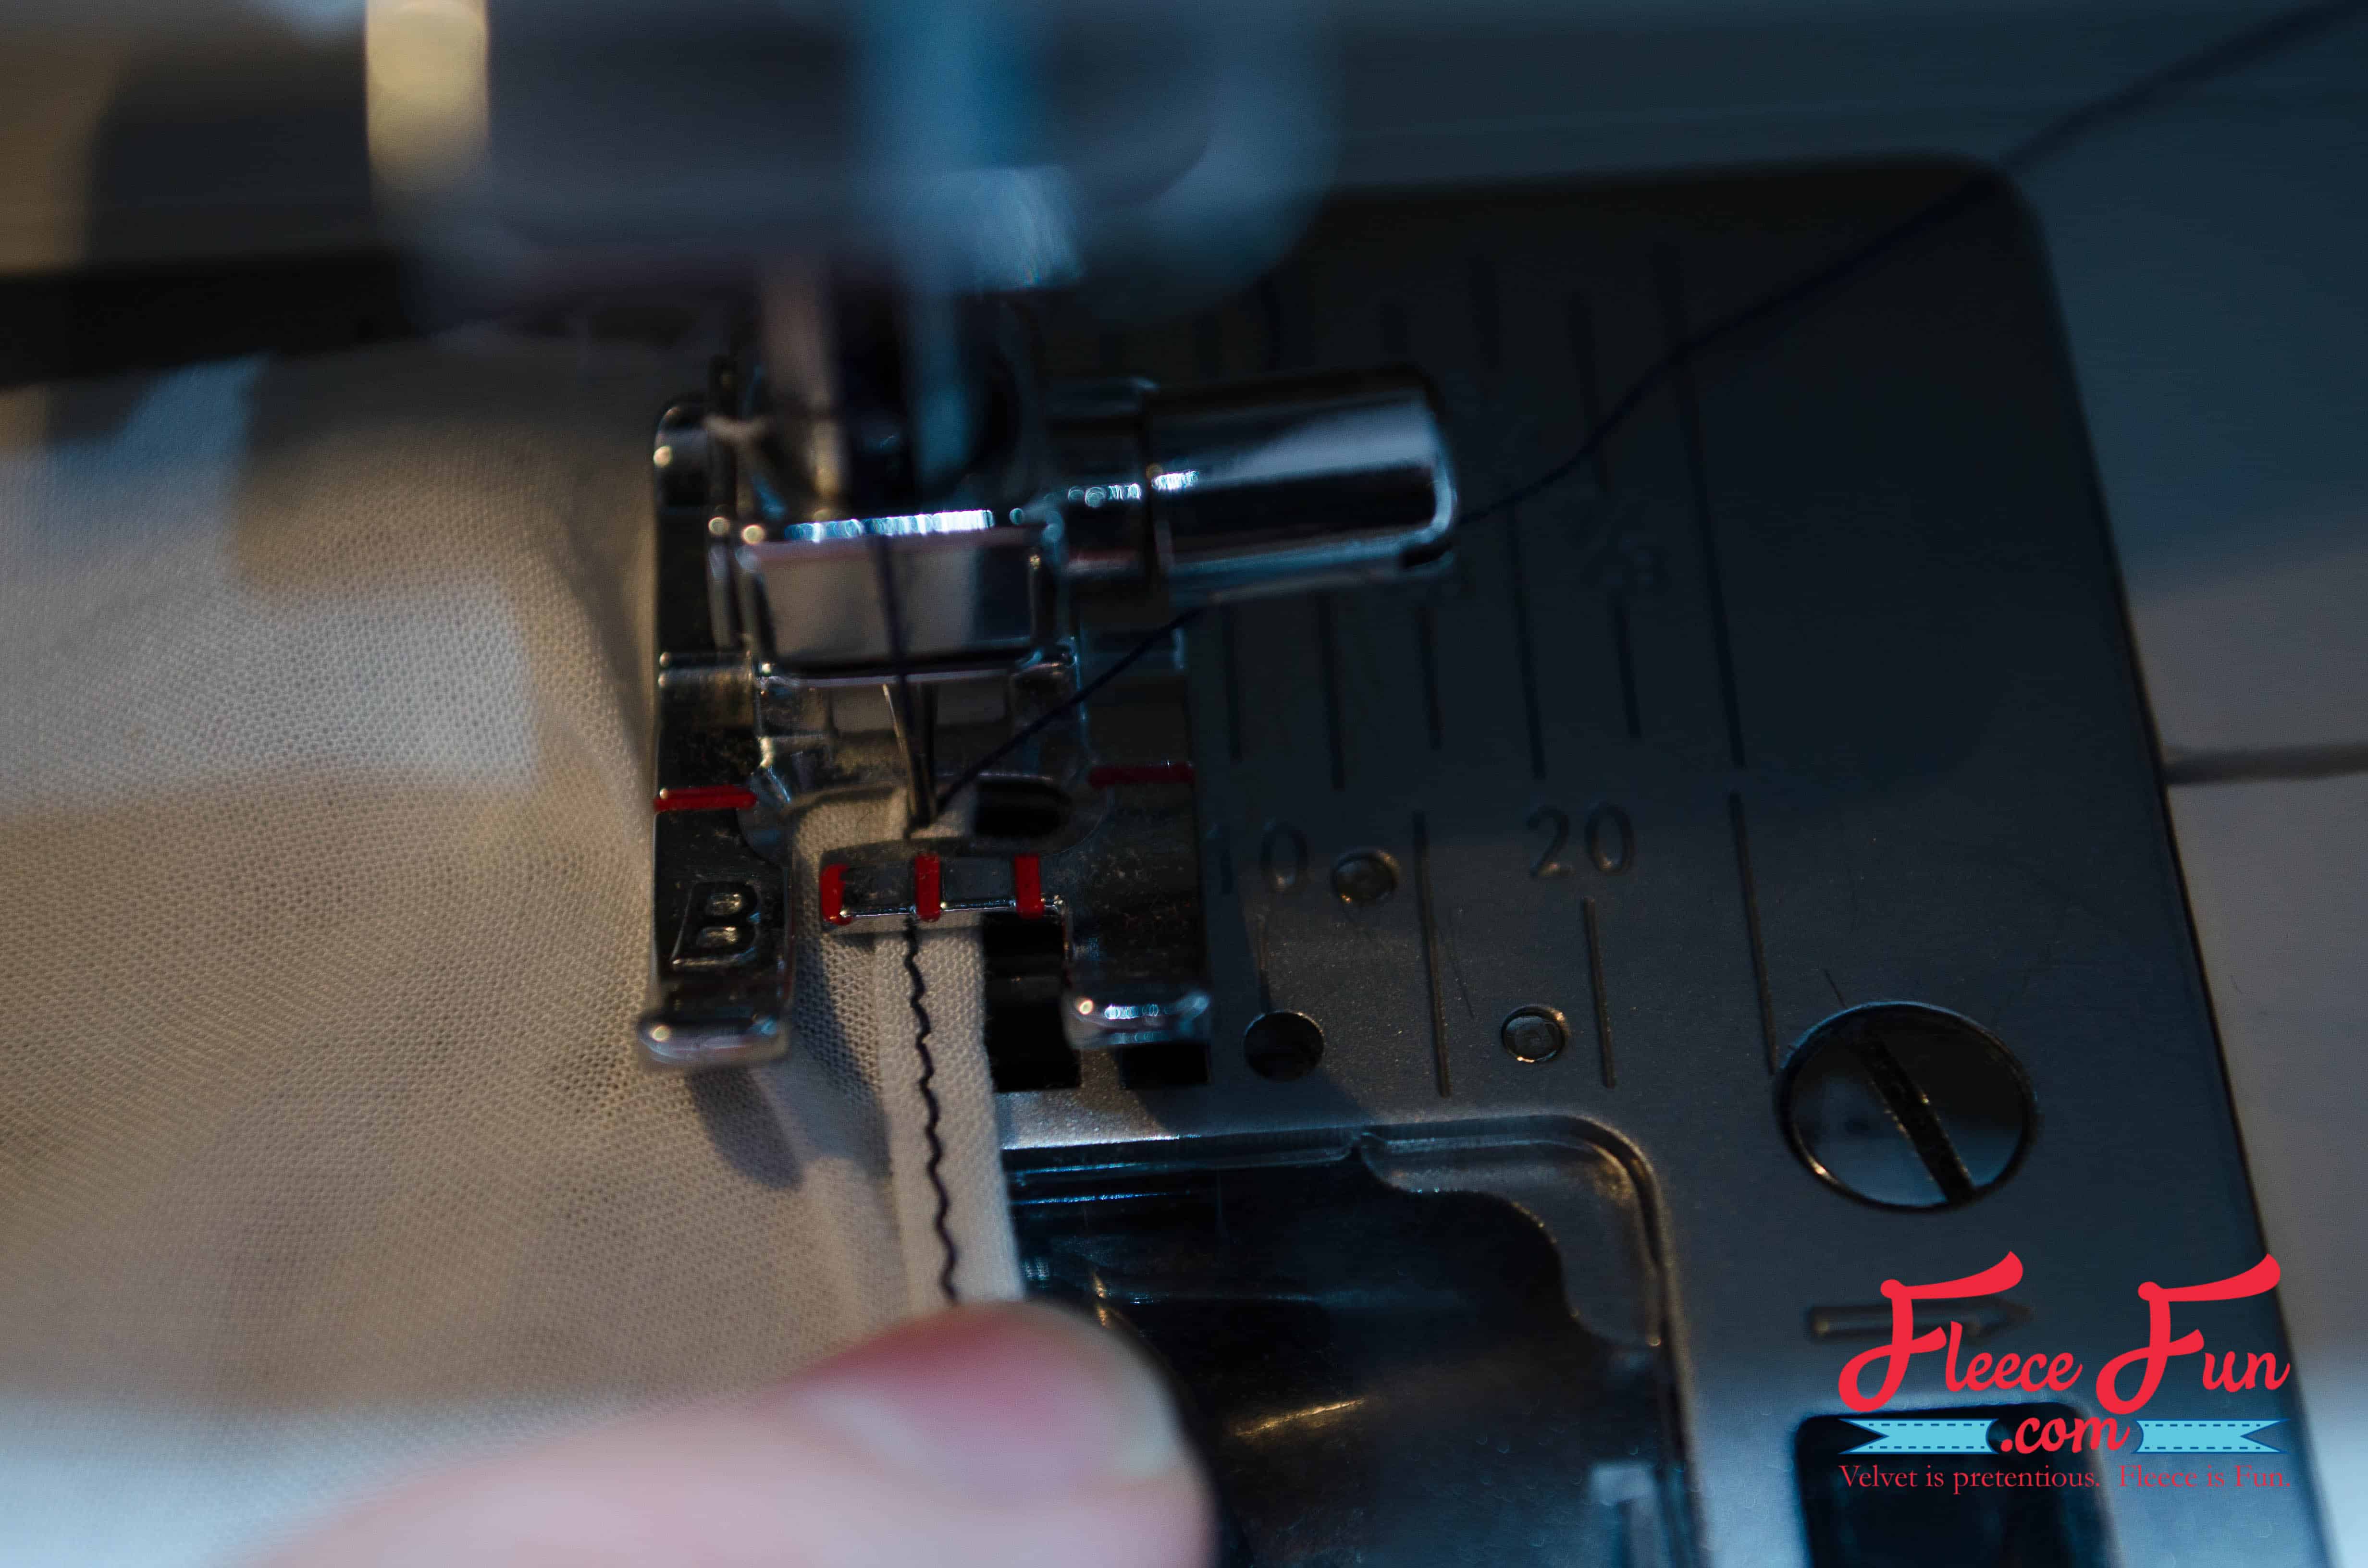
Fold the stitched line over to the wrong side and stitch over the previous stitching line.
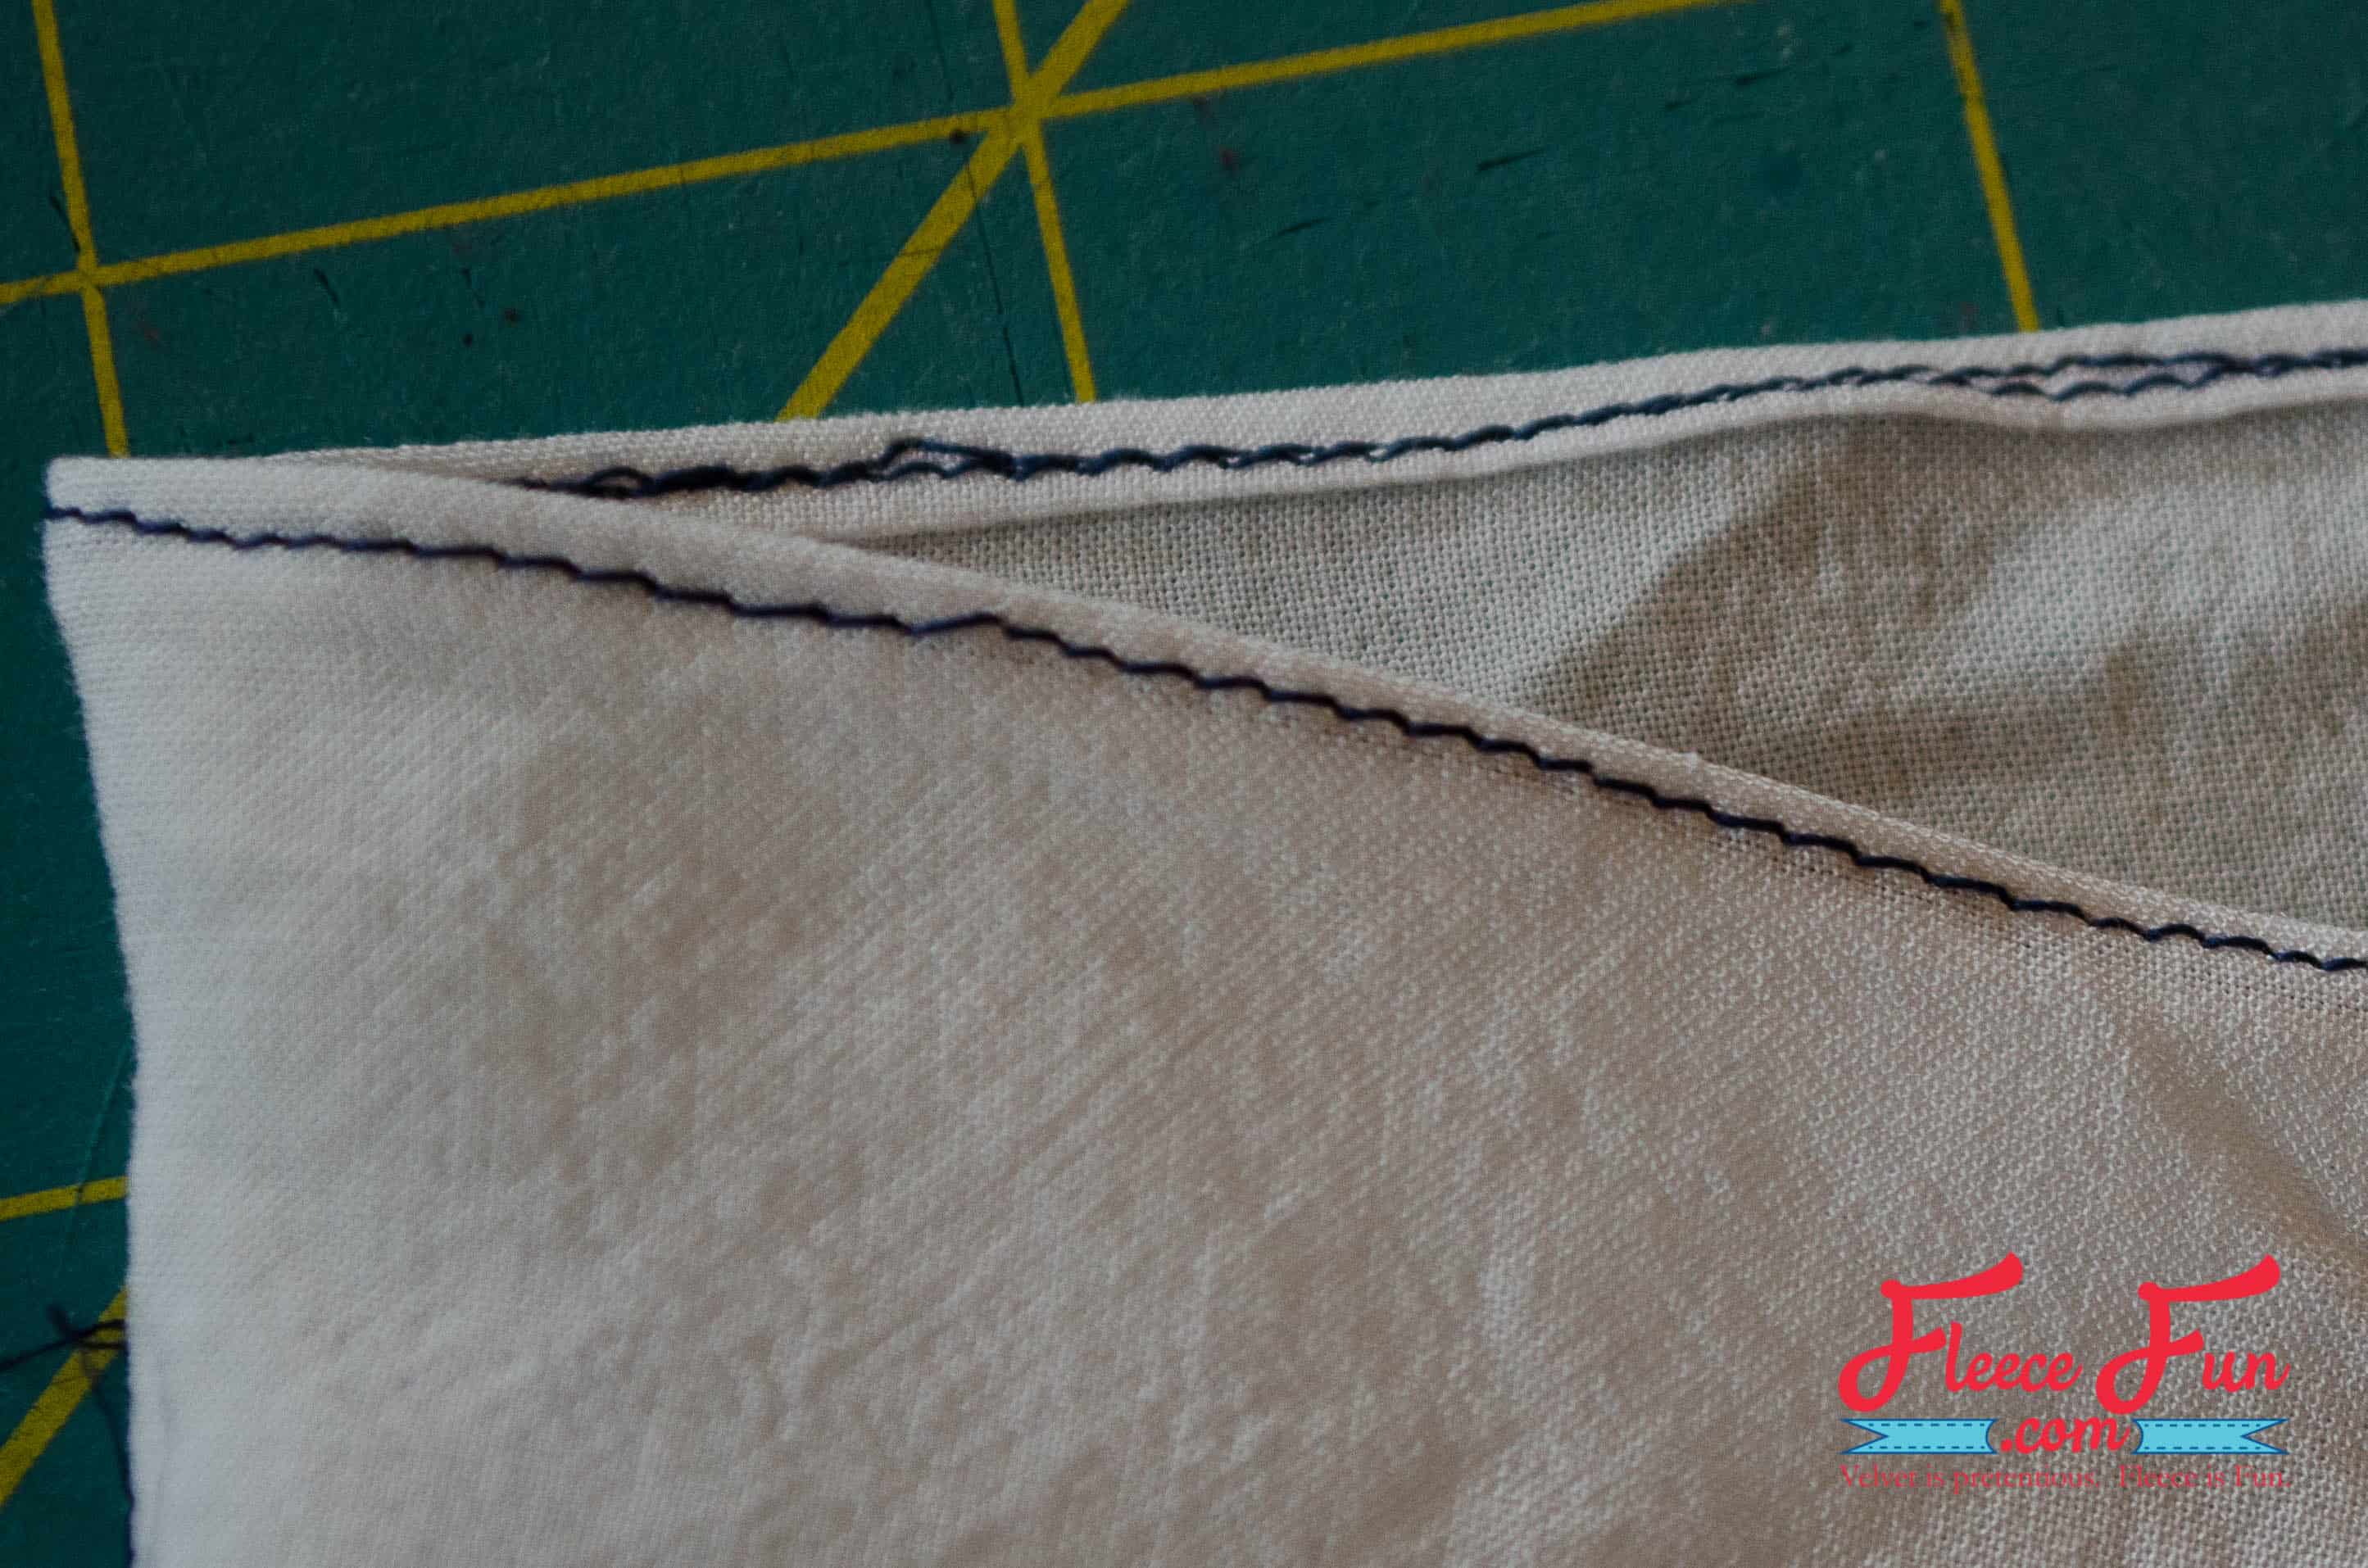
Done! You’ll see one line of stitching from the right side and two lines on the back side.
Once you’ve practiced fabric stamping and baby hems, you can apply these skills to so many different projects!

Looking for some inspiration on different color combinations for your hand stamped scarf? The possibilities are endless when it comes to creating a unique and eye-catching accessory. Mix and match bold hues like deep blue and vibrant yellow for a fun pop of color, or go for a more subtle look with soft pastels like blush pink and light mint green. You could even try contrasting colors such as black and white for a classic yet modern touch. Whatever your style may be, experimenting with various color combinations is sure to result in a one-of-a-kind hand stamped scarf that will turn heads wherever you go!
More Fleece Scarf Tutorials:
- The Lucet Scarf (cute braided scarf)
- The shirred scarf
- The Fast Fashion scarf (warmth meets a feminine touch)
- The Charmed to meet you Scarf (scrunched scarf)
- Fleece Scarf with Fur Pockets
- Candy stripe scrunch scarf
- Chevron Scarf
- Color Block Scarf
- Saturday Morning Scarf; Fleece and Jersey knit combine for the perfect scarf)
- Bow Infinity Wrap
- The Bubble Scarf
- You can see all of the Scarf Tutorials Here