Parade Scarf Or Shirred Scarf – free scarf tutorial
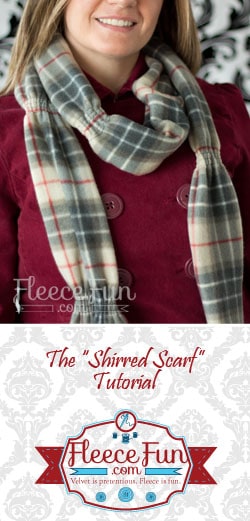
 This easy free scarf tutorial will show you how to make this scarf in minutes.
1/2 yard fleece
elastic thread
thread
rotary cutter and mat
Sewing Essentials (pins, scissors, etc.)
Download the free pattern here, tutorial below.
1 – Cut out pattern
 Print up the pattern (you can get assembly instructions here)
Cut out pattern pieces. If you are doing a color block pattern cut out each piece – if you are doing one solid color follow rotary directions.
While you’re at it why not make a matching hat? Get the free pattern and tutorial here.
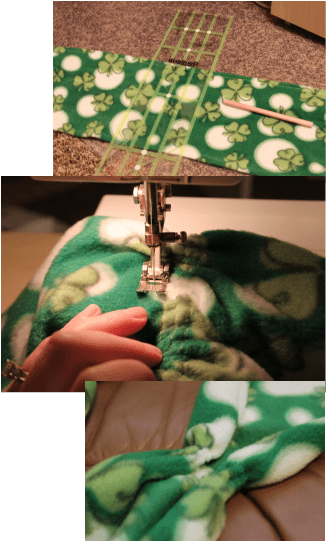
Rotary cutter – Trim off the ends of the fabric. Then fold fabric in half (I like to stick my ruler in to get a straight crisp line.
Cut your half yard of fabric in half.
Decide on the length of the scarf you want. I like a longer scarf so I am going cut one of my pieces in half and sew to the other piece (making it roughly 75 inches in length) using a .5 seam allowance.
If you are making a color block scarf sew all your pieces together with a .5 seam allowance.
2 – Sew the ends
 Because you are working with fleece, turning the edges under and sewing is optional. I do recommend turning the ends of the scarf under .5 inches and sewing along the edge of the fabric with a zig zag stitch. You can sew all the way around the scarf – but the edges are going to curl in so it really won’t be worth it.
3 – Shirring – the fun part!
 If you are making a color block scarf – you already have seams where you will be shirring. If you are making a solid scarf you will need to mark with a line where you want the gathers to take place – roughly about 15 inches apart.
Next shirring! You will need to take your elastic thread and HAND WIND it around your lower bobbin, lengthen your stitch sand loosen your tension. I STRONGLY recommend testing this out on a fleece scrap before you try this on your scarf. (Still not comfortable or confused? For a more in depth tutorial on shirring go here.)
Using the edge of your machine foot as a guide, sew four line across your fabric. repeat at each of the seams/ marks on your fabric. You’re finished!
More Fleece Scarf Tutorials:
- The Lucet Scarf (cute braided scarf)
- The Fast Fashion scarf (warmth meets a feminine touch)
- The Charmed to meet you Scarf (scrunched scarf)
- Fleece Scarf with Fur Pockets
- Candy stripe scrunch scarf
- Chevron Scarf
- Color Block Scarf
- Saturday Morning Scarf; Fleece and Jersey knit combine for the perfect scarf)
- Bow Infinity Wrap
- Want to learn how to Hand Stamp your Scarves?
- You can see all of the Scarf Tutorials Here


Is there a way to prevent the fleece scarf sides from curling? I made my husband a scarf but it curls too much to be serviceable. I was wondering if hemming the opposite way of the curl would help, what would you do?
Connie Jordan
The only way I’ve found is to turn under the fleece a 1/2 to inch and sew along the edge with a zig zag stitch to prevent it from curling under.
-Angel
What about using clear elastic? My machine would like that better!
I personally have never used it – but I believe it would work fine!
-Angel
Can you use minky for this instead of the fleece?? Love the tutorial!!
Hi Sheryl,
You can use minky, just be sure to finish the edges to prevent it from shedding all over. =)
– Angel
Thanks, Angel!! I know I hate the minky crumbs, but LOVE the fabric!!
Do you think if I hand stitched with the elastic thread, will that work?
Hmmm.. I don’t think you’ll get the same result. But using regular thread you could just “Gather” the strips and perhaps have a similar look.