
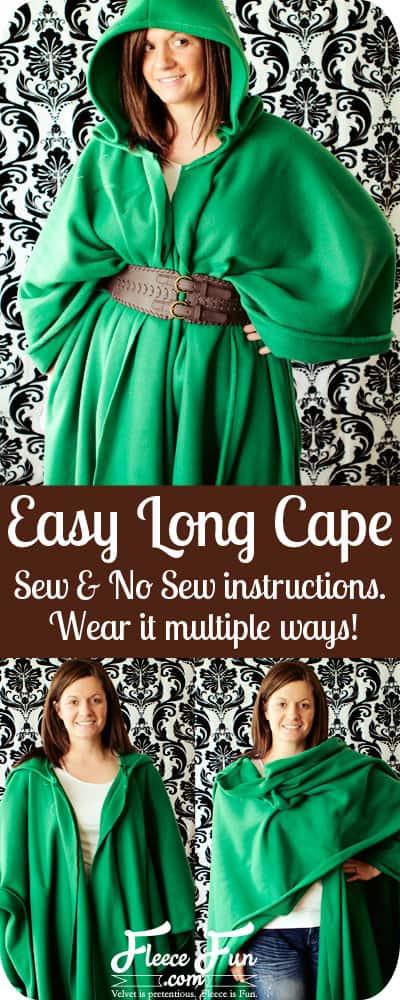
Free Long Cape Pattern Easy Sew or No Sew
This content contains affiliate links or sponsored elements, read our Disclosure Policy.


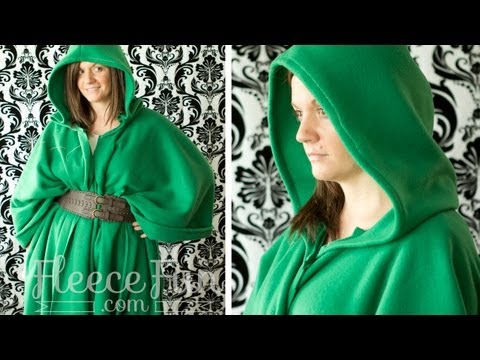
This free long cape pattern is easy to make. There are no-sew and easy options to make this cape. This cape can also be wrapped and worn in different ways to achieve different looks. Wrap a belt around it to form sleeves, wear it loose and flowing, or tie the front behind your back for a unique look. You can make it without the hood without sewing anything! Adding the hood is quick and an easy sewing project.

Hate The Ads?
This pattern with video and printable instructions is available to members of the Maker’s Studio. The Maker’s Studio is an ad free experience, no video ads, no forms, no zip files, just creating.

YOU WILL NEED:
- Printed up version of Fleece Fun’s free pattern. Get the free pattern here.
- 2 – 2.5 yards fleece for a long cape, less if you desire a shorter cape.
- Scissors
- Thread
- Scissors
- Sewing Essentials (pins, scissors, etc.)
- Sewing Machine
More FREE patterns you may also like:
The Fast Hooded cape (with video)
The Red Riding Hood cape (with video)
The Snow Princess Cape (with video)
secret Tip
The hoods on the Red Riding Hood Cape, the Fast Hooded Cape, the Easy Long Cape and The Long Hooded Cape are all interchangeable – so if you like a hood more from another cape, you can mix and match to get the look you want.
Long Cape Pattern Video tutorial
Free Long Cape Pattern Tutorial
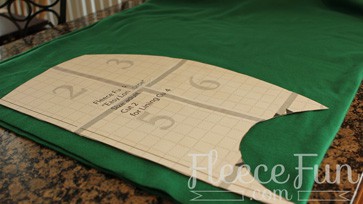
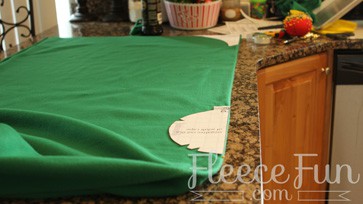
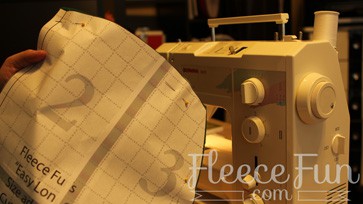
step 1 – Assemble and cut out the Cape Pattern
You can find instructions on how to assemble the pattern here.
Easy sew option:
Cut out two pieces of the hood. Set aside. Make sure remaining cloth has straight ends on each side.
Easy Sew and No Sew: The length and width of the cape is up to you. In the pattern example, I used 2 yards of fleece and the full width so it was 6 feet long and 60 inches wide. The width is good for a man, but it might be too bulky for a female. For a woman, I recommend cutting the width down to 50 inches (you can make some cute scarves with leftover fabric). Once you have the width and length that you want, it’s time to start cutting out the cape.
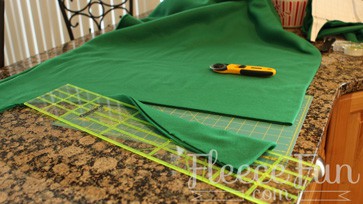
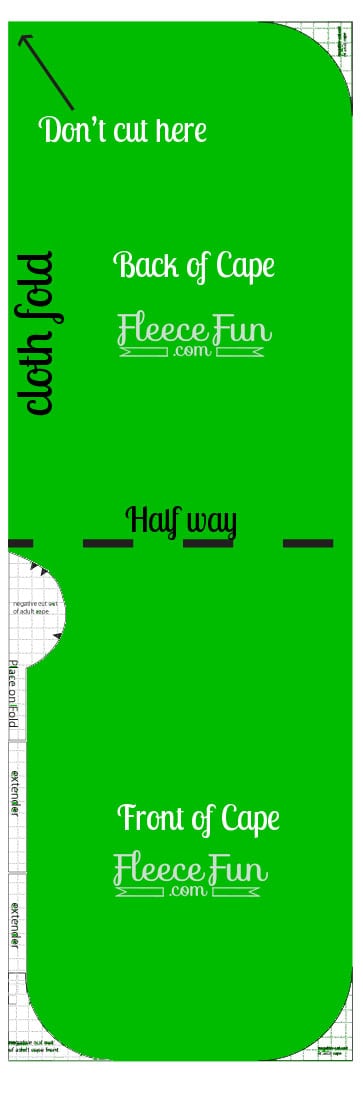
This pattern works differently, as you will be cutting out negative space and tossing it away. This means the pieces you cut out are extra and what remains is the cape. So, whereas with the hood you cut triangles outward, you’re going to cut the triangles inward on the negative cut out (only necessary for the easy sew with hood).
Step 1b – Cut the long cape pattern piece
Find the middle point of your fabric length and mark it with a pin (so if your fabric is 2 yards long, mark it at 1 yard). This will be the starting point of where we will build the pattern.
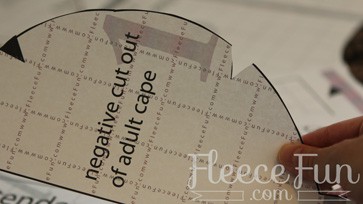
Place the negative cutout of the cape on the fold, with the top of the negative pattern piece touching the halfway mark you just made.
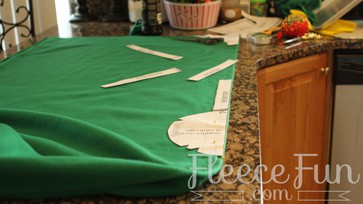
Then use the extenders to build your pattern piece to the end of the cloth, the corner piece lining up at the end to make a curved edge. Pin down. (see Diagram below if confused)
Carefully cut out the pattern piece – you just made the neck and front of your cape!
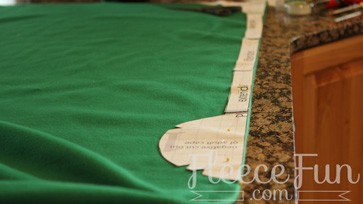
step 2 – Make the ends curved
We just made the front, but now let’s give the cape a little nicer look on the ends. Take the other curved negative cutout (the one that has two pointy ends – the wrong one is shown in the picture).
On the end where you just did the negative cut-out, take it to the edge (opposite from the fold) and cut so it’s curved. Then go to the opposite end of the cloth (the side that you didn’t cut out the neck hole) and place it on the edge of the fabric opposite of the fold. Cut a curve.
If you are doing the no-sew version of the cape your finished!
If you are making the sew version there are a couple more steps.
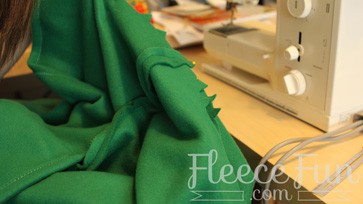
step 3 – Make the hood
Take the two hood pieces and using a .5 inch seam allowance,
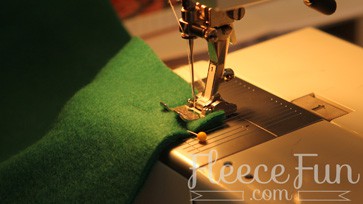
sew them together.
Then turn under rim of the hood by 0.5 inch.
Sew using a zigzag stitch along the edge .
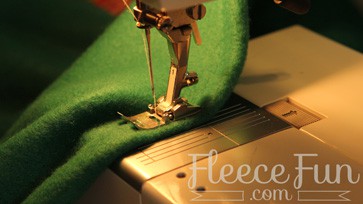
step 4 – Attach the hood to the cape
With the right sides together, line up the triangles from the hood and the cape with each other. Pin.
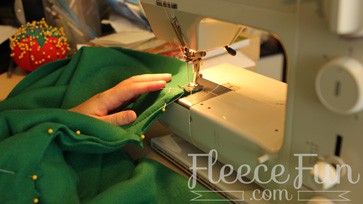
Sew together using a 0.5 inch seam allowance. Trim threads and you’re done!
Download the free long cape pattern here:
You can get a free copy of Adobe reader here. By downloading you are agreeing to pattern terms of use. Click the picture below and fill up the form to download the .pdf!

YOU MIGHT LIKE THESE cloaks/Capes TUTORIALS:
- Long Hooded Cloak Pattern (Free)
- Fast Hooded Cape (with video)
- How to Make a Cloak in 20 Minutes
- The High Low Cape with Pixie Hood
- How to Make a Child Cape or Car Seat Poncho
- Cowl Capelet Free Pattern
- The Amazing Cape Secret on Fleece Fun
- See more of our Cape Patterns here
MORE CAPES FOR YOUR HALLOWEEN COSTUMES:
- Harry Potter Inspired Wizard Cloak
- The Red Riding Hood Cape (with video)
- Batman Cape Costume Tutorial
- Queen Elsa Cape Tutorial (Includes Jacket Warmth)
- The Snow Princess Cape (with video)
- Easy Superhero Cape Tutorial
- The Best Free Cape Tutorials for Halloween
More No Sew Projects:
- No Sew Blanket Tutorial (with flannel!)
- How to Make a No Sew Fleece Tie Blanket (better method with templates!)
- How to use the Tie Blanket Ruler!
- How to Make a No Sew Tie Quilt
- No Sew Hobo purse
- Satin Flower hair clip
- No Sew Fleece Flower
- No Sew Art Smock
- Ragged Tassels ( Cute for decorating)
- The Lucet Scarf
- No sew baby car seat Canopy
- See all of FleeceFun’s No Sew Projects!
Thanks for a great pattern, just in time for cold weather.
Just finished assembling the pattern! Could I use this to make a hip-long, wool-blend cape? Maybe even line it with something like a thin cotton fabric or polyester?
Sarah, as long as you finish the edges or line the cape it should work fine. Keep in mind that the tutorial assumes you are using a fabric that won’t unravel so you will have take additional steps to turn under edges. line or serge the edges.
– Angel
Thank so much for the pattern. I haven’t sewn in almost 10 years and just finished one of these capes with a lining for my daughter’s costume…one more to go for my second daughter. And I also adapted the idea to make a ghost costume for my son (no opening in the front and an extra large hood).
Thank you for making it easy to start sewing!
Eva, Vancouver Canada
So I cut the hood out and then cut the remainder in a straight line? That’s the only confusing part to me is the hood
Tiffany,
could you specify the remainder of what? exactly? Want to help you!
– Angel
Great style can’t wait to try & make it
About how long is the finished cape from shoulders to the bottom?
As long you desire to make it – this pattern is flexible you determine the length yourself.
i AM TRYING TO MAKE THE RED RIDING HOOD CAPE FROM THE MOVIE IN 2011 AND i WANT IT TO BE REALLY LONG.LIKE IN TH E MOVE i AM GOING TO ORDER THE RAW SILK FROM INDIA AND WANT TO KNOW IF THIS PATTERN WILL WORK WITH THE SILK. IN AS MUCH CAN i MAKE IT AS LONG AS THE ONE IN THE MOVIE? IF SO DO YOU KNOW HOW MUCH MATERIAL i WILL NEED? IF THIS PATTERN WONT WORK CAN I USE THE SHORT CAPE PATTERN AND JUST MAKE IT LONGER? OR MAYBE COMBINE THE TWO PATTERN? THANKS IN ADVANCE FOR YOUR HELP
Hi Daphne,
There are a lot of questions there! Silk will work if you finish the edges. This pattern is designed to fit on material that is 60 inches in width – so be mindful of that. HOWEVER I don’t know the width of the material, your height etc. You’ll need to figure out your own yardage. People have extended the cape – but I don’t offer this option as it does take some effort and pattern design knowledge as this is a circular cape, which allows it to lay nicely. My free patterns are offered “as is”.
My recommendation is to find and buy a long cape pattern you like that is designed to work with the material you desire to avoid heartache ( especially with expensive imported silk!). =)
– Angel
Hi,
I want to make my 13 year old a full length red riding hood cloak. I have looked at both of your tutorials and would like to know if the hood on the smaller red cape is the same shape as the one on this green adult long cape? I really like how it lays in the ‘red’ version. If they are different shapes or lay differently, can the hood from the smaller red cape be sewn to this longer green cape? Thanks
The red hood’s base is larger than the green’s. However I think you might be able to make it work – You’ll just need to gather the base of the red hood a little to make it fit.
– Angel
This really is a super quick and easy project, just as you prmised!! Thanks for the video, you made every step very clear and easy to understand. And getting the FREE pattern…..wow!! what a deal. Thanks again for this easy* friendly* fun project. I’ll be visiting often to see what’s new.
All the best*
Keri
Have made the Little Red Riding Hood cape for my grand daughter for Halloween! It came out really good and all I have to do is add the ribbon! I lined the hood and the front and bottom with about 6 inches of red flannel with wolves on it! I’m trying to make a cape for my cousin! I’ve alreasdy bought his favorite team fleece! He is wheelchair bound from a swimming accident last summer! Do you think I can use this cape pattern for him! I have been looking for a cape pattern for the handicap and have not found one yet! Would you make it that he can sit on it or make it short in the back? Everyone wants to sell you a cape already made!
Thanks
Jan
I fell in love with this as soon as I saw it and have just made one for my daughter however I do not understand why the cut out for the neck is not central on the pattern. I followed the pattern (I think!) and the cape is lopsided with more material on one side than the other and it looks bad:( any help?
Claire,
oh no! That’s not good! I most definitely didn’t design it to be lopsided. Could you email me a picture to see if I can figure out what went wrong?
I just wanted to say thank you for the great pattern! I just made this yesterday, definitely easy enough for a raw beginner 🙂 I used fleece as a liner, and flannel for an outer layer, and it’s so cozy! My husband will love it. For the record, mine was not lopsided, sorry Claire, I think you may have done something wrong.
Thankyou so much for this pattern! I know it’s kinda late to say this, but it was the main part of my Halloween costume (and all future Harry Potter cosplays). Now even my friends are asking for their own! Thanks!
Thank you for the pattern! How hard would it be to make sleeves on this? I am hoping to use this for a fairy god mother costume to complement my daughter as Cinderella. Any tips?
What I would do is just sew two seams, on on each side from the out side edge to about half way in to make sleeves.
Thank you so much for this pattern! I adapted it a little to make a warm, fleece-lined Dragonrider-styled cape with a nice leather closure and imitation leather “dragonscales” all down the back and shoulders! My girlfriend loves it!
My very first sewing project ever with my 1972 Sears-Kenmore 148.12170, and it went great thanks to you!
That’s awesome Noah – your girlfriend is lucky to have someone who will make things for her! =)