
Little Fun and Frilly Skirt Jelly Roll Skirt tutorial
This content contains affiliate links or sponsored elements, read our Disclosure Policy.
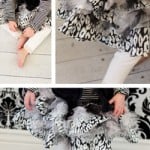

This jelly roll skirt tutorial uses long ruffles and tulle for extra fluffiness. This skirt is big, puffy, and great for pictures.
For the skirt:
1 yard cotton fabric (fabric 1)
1 yard contrasting cotton fabric (Fabric 2)
3 yards tulle (in alternating colors if you like)
Thread (lots of it)
Pins (lots of them)
Sewing Machine
.75 wide elastic approx 15 inches depending on child’s waist
You could also use a jelly roll or dessert roll to make this skirt
Sewing Essentials (pins, scissors, etc.)
Sewing Machine
Little Fun and Frilly Skirt Jelly Roll Skirt tutorial
1 – Cut out the pieces if you aren’t using a roll
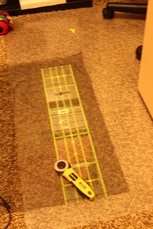
Normally I would have you print up the pattern (you can get assembly instructions here) but this skirt is all long strips).
Basically this jelly roll skirt tutorial is made out of a bunch of fabric strips sewn together so there is not need for a pattern! For my little girls that is a 5T (but I did also try this on my girl who is in 12 mo, and it worked for pictures) I cut the following:
In the top (more visible fabric) or patterned fabric I cut
5 – five inch wide strips the width of the cloth so (5 inches by 40 inches)
1 – six and a half wide strip the width of the cloths (6.5 inches by 40 inches) (if using a roll you will want to sew two strips together to make it a little wider.)
Of the under cloth I cut:
4 – five inch wide strips the width of the cloth (five inches by 40 inches)
Note: IF you use a jelly roll the skirt will be shorter – so you will need to add layers. Basically I make each tier 1/2 bigger, and it will make it very full. Try increasing it 1/3 for a less full skirt.
2 – Begin to gather and sew

With right sides together, sew 2 strips of fabric “1” together end to end (so it becomes 80 inches in length). This will be strip C. Sew 3 strips of fabric “1” together so it becomes 120 inches in length. This will be strip E. Of fabric 2, cut one strip in half, sew one half to one strip so it becomes 60 inches in length. This will be strip B Then sew 2 strips of fabric 2 together plus remaining half end to end so it a is a total of 100 inches in length. This will be strip D. The top strip that is six and a half inches wide is strip A.
Then if you have a serger, finish the ends of the cloth, to prevent unraveling. You can also zigzag around the edges or cut with pinking shears to prevent the fabric from unraveling ( some jelly roles are already cut with pinking shears). I chose to do baby hems so the skirt would last a long time. You will want to finish the ends in some fashion because of all the gathering this skirt entails.
3- begin to build the skirt

Sew a basting stitch ¼ inch from the top of strips C and E. Gather strip E to be the length of strip D, with right sides together, sew together using a straight stitch and a ½ seam.
Repeat. gather strip C to length of strip B and sew.
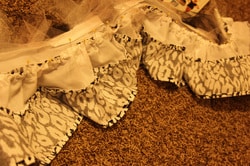
If you desire to add tulle to the jelly roll skirt tutorial (although it’s cute without it too) place strips along the top of strips B and D in a repeating pattern. The length should be a tad longer than the under cloth (fabric 1)so it will peak out from under the ruffle. (There are no hard fast rule here just eyeball it). Sew the tulle to the skirt using a short straight stitch.
4 -Build the Rest of the Skirt
Sew a basting stitch ¼ inch from the top of strips D and B. Gather strip D to be the length of strip B, sew strips B and D together using a straight stitch and a ½ seam.
On Strip A fold down top 1 inch and sew casing for elastic – being sure to leave a 1 inch gap to insert elastic.
Then gather strip B to be the length of strip A and sew strip B to strip A – right at the seam where you just sewed the casing.
5 – Final Steps

You now have a long ruffle – it’s time to make it a skirt.
With right sides together sew the ends of strips D and E together (taking care that strip C is out of the way.
Next , with right sides together, sew strip A ( and the casing top of strip A, but not he ruffle) together. Flip skirt right side out.
Now with right sides together, sew the ends of strip C together. With right sides together sew the ends of the ruffle section of strip A together.
Run elastic through casing at top of skirt sew, elastic together and sew seam shut. Now you have a great skirt for photos, play and even Sunday – if your girl likes big skirts!
More Free Girls Skirt Patterns:
- The Simple Pencil Skirt
- The Circle Skirt ( no math needed!)
- The Fleece Ruffle Skirt
- Midi Yoga Skirt (comfy and easy!)
- The Sweater Upcycle skirt
- The Pleated Skirt
More Girl Patterns:
- The Fall Cape for Girls
- Flannel Nightgown Pattern
- The Bow Tie Headband
- Satin Flower Hair Clips
- How to Make a Flower Fascinator
- Drawstring Back Pack
- Pocket T-shirt for 18″ Doll
Thanks for posting this. I think I would like to alter this to use on 18 inch doll.
Did you make the alterations for 28″ goll? If so, are you willing to share with me what you did? Thanks.
Sorry Nan,
I haven’t done that for this pattern.
– Angel
I just love the pictures and going to attempt this for the new baby girls in my life. Thanks for the tutorial.
I don’t see a link to the pattern. Where is it?
Thanks,
Sharon
This particular tutorial doesn’t have a pattern. Just follow the directions. 🙂
I love your patterns and tutorials but this one has me stumped. I was wondering if maybe next time you make one could you make a video on how to make it. I am having a little bit of a problem following the directions, and I find your videos very helpful when they are on here with some of your patterns. Thank you.
Hi, the skirt appears to be cute but it’s very difficult to see what the finished product looks like. The pics with the child wearing it against a background of the same color/print makes it difficult to get a good look at the skirt. A pic of the skirt against a solid background might work best. Thanks!
I am a little confused and really want to make one for a first birthday coming up! More pics or a video pretty please?!?!?
Jen, I’m sorry but I don’t have time right now to make a video. Could you tell me where you are stuck and I’ll try to help.
To make it longer, would I just add another layer? My 5 year old is very tall with really long legs. 🙂
Yes adding another layer would work, or you could just make the strips wider to make it longer.
You could save much time, effort, frustration and thread by using a gathering foot — available for all sewing machines. I have one on my serger!!! a real time saver. It joins, gathers one layer to another and finishes edges all in one step! The regular machine gathering attachment will gather and join layers in one step, but not finish off the seam as well as a serger, but if you don’t have a serger it sure beats gathering and so forth.
Thanks for the tip Beverly!
Hi I have a very chunky 18 month old and I’d love to make this for her for Christmas this year. By then she will be 20 months, almost 21 months. What sizing/length would you recommend for the pieces of fabric?
As it states in the tutorial, I recommend using 5 inch strips by 40 inches. That should work fine. =)
– Angel
I am wanting to make this for like a 12 month old how many strips do i need to cut and such?
Hi,
My little boy is now 16 months and he still uses this quilt size. But the strips are 5 inches wide by the width of the cuddle. So you’ll just need to do the math and figure out how big you want your quilt to be. (Minus the seam allowance. the strips are 4 inches wide).
Good luck with your quilt!
I just want to say thank you for your awesome site and all your great ideas! Thank you so much for sharing! Last year I made hats for my sons whole class at school and our nieces and nephews for Christmas! BIG HIT!! Best wishes to you for nothing but Gods blessings and continued success!
Wow a whole class?! That’s awesome. Thanks for all the warm words. 🙂
Love the pictures of your girls and I remember it’s next to impossible to get kids to stand still for pictures, so maybe you could also post just a picture of the skirt it’s really hard to see what it looks like in the pictures. Thanks for all your great patterns.
God Bless stay safe and well.