
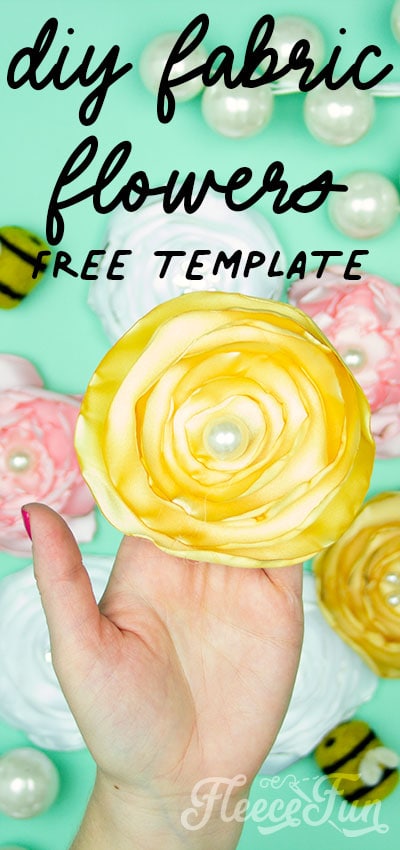
DIY Fabric Flowers (free template)
This content contains affiliate links or sponsored elements, read our Disclosure Policy.


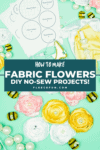
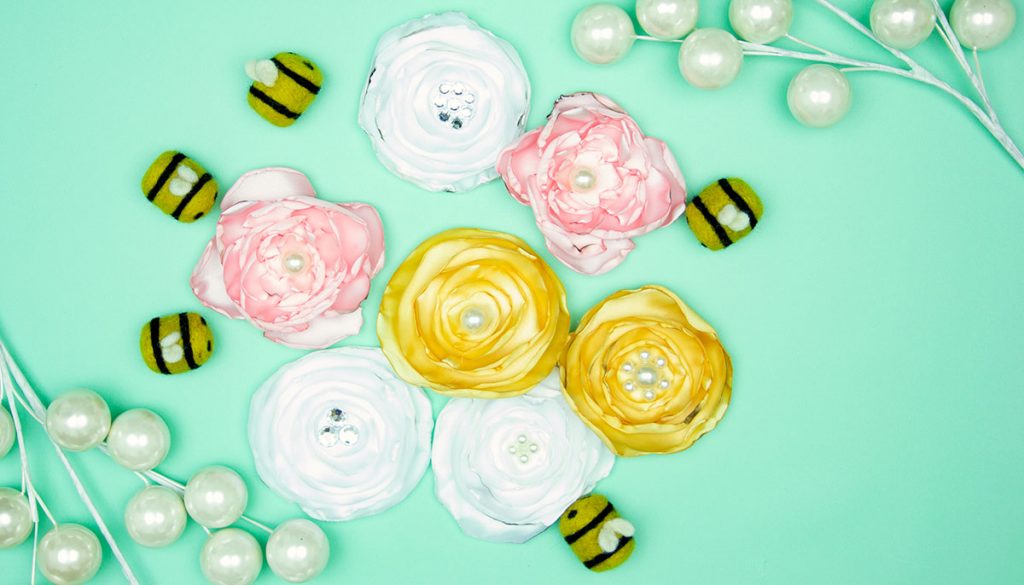
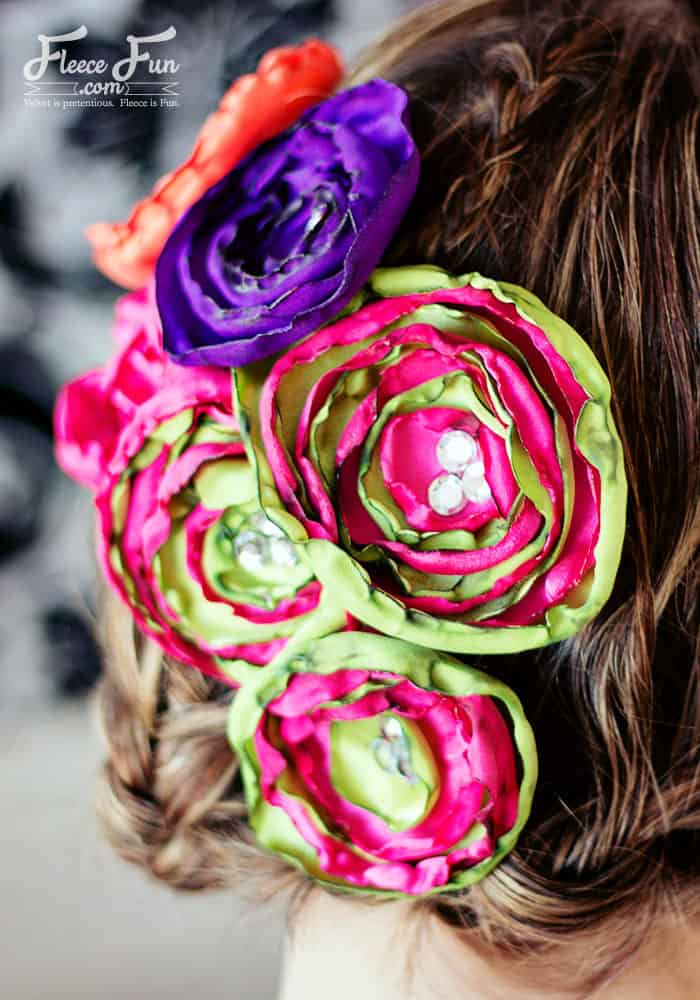
These no sew DIY Fabric Flowers can be used on scarves, hats and purses. You can make a beautiful clip that can work on many crafting projects! Perfect for vintage style weddings, dresses and fascinators.

Make the flower look a little more singed for a vintage look or just melt the edges for a beautiful satin flower that is a fabulous and inexpensive to make! Add a little flower pin to a fleece headband or a baby car seat cover for some extra dazzle.


YOU WILL NEED:
- 1/8 yard satin (must be satin this project WILL NOT work with other fabrics)
- Glue gun
- Pen
- Candle
- Felt Circles
- Barrette clips or pin clips (optional – found these cool combo ones too!)
- Jewels/beads for the centers
- Get the free pattern here.
Perfect for decorations at weddings and parties too!
Video Tutorial Here – Full picture tutorial below:
How to make DIY Fabric Flowers (no sew):
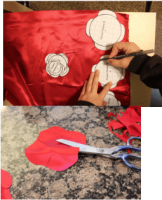
Step 1 – Cut out Pattern

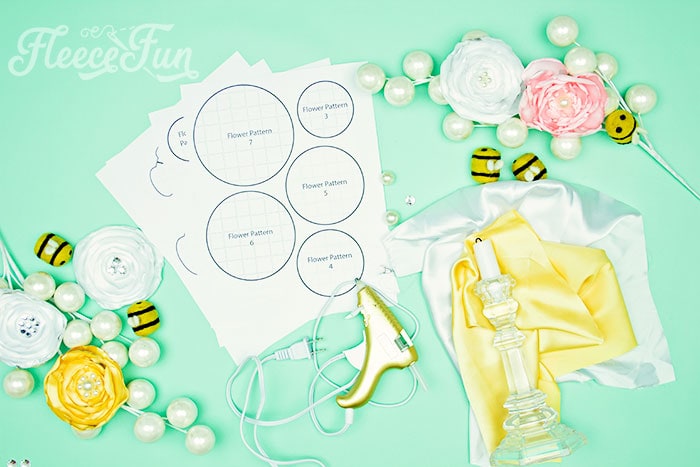
Download the Free template by filling out the form below and print up the template.
Print up the pattern (like to print this pattern on card stock).
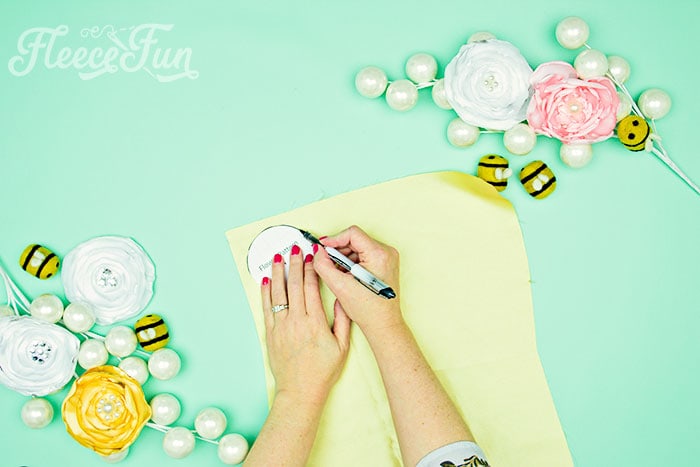
Cut out and trace circles onto cloth. Don’t worry about marking up the cloth as we’re going to melt the edges.

Cut out the flower circles from the satin cloth.
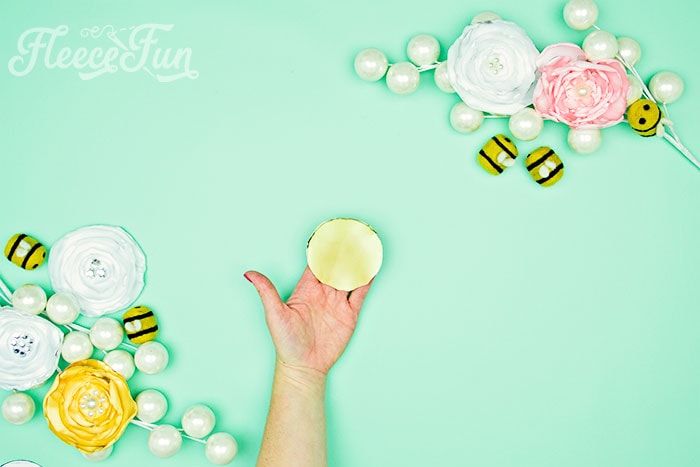
Don’t worry about it being perfect either – it won’t matter in a minute.
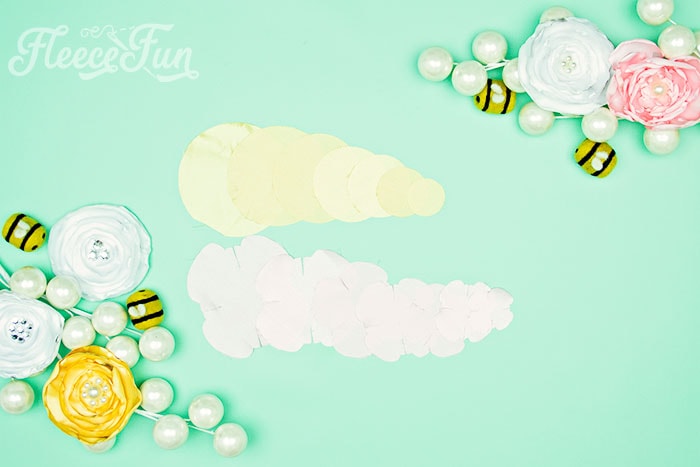
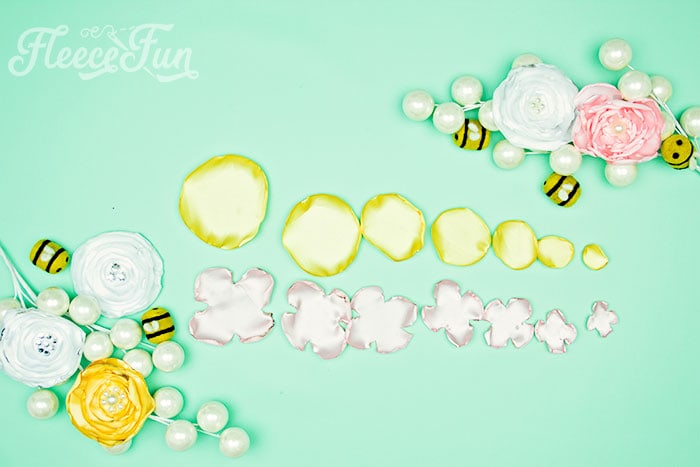
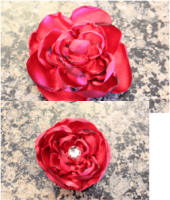
For pattern b (the DIY satin rose) notice that there are slits between the rounded corners to make the “petals”. You have the option for pattern B cut out a circle of the first pattern to be the bottom of the flower (this can help hold the flower together better – it will be the same size circle as you the largest one you use from pattern b.
So if you make a flower you used up to size 5, you will cut a size 5 circle of the non-petal pattern to cup the rest of the flower. It makes the flower neater and prevents the “petals” from drooping). I opted not to do this with my rose so you could easily tell the two flowers apart while I was working.
Step 2 – Singe the Edges of the DIY Satin Flower
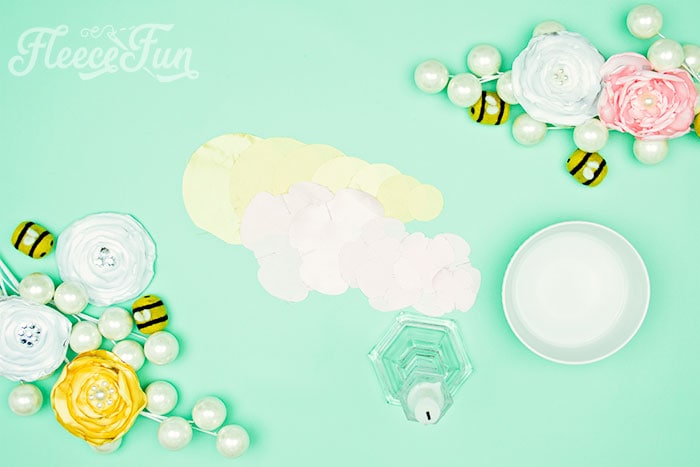
Be sure to have a bowl of water nearby for singed fingers.
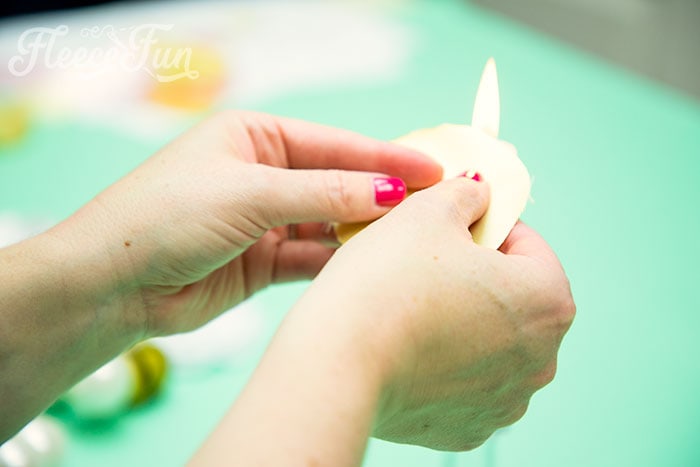
Light the candle (be sure to have adult supervision) carefully melt/ singe the edges of the fabric. Do this by slowly rotating the edges of the circle at the flame. Be careful to not leave one spot near the candle too long as this can cause the fabric to blacken (this can be done on purpose for a vintage/ spooky look) too much or even catch fire.
Quick Tip
Have the right side up (satin/slick side facing you) as you melt the edge hold the circle at a slight angle (the end tipped up ward as pictured above) this will cause the edges to curl up and be the right direction for the prettiest effect.

(This takes some practice so be patient, but it all comes together in the end – mess ups are nearly impossible to see). The DIY fabric flower will get hot and can light on fire – be careful and again have that bowl o water handy. (By the way you do this at your own risk – I’ve singed fingers doing this.)
For the Rose (flower b) to get the “v” between the petals simple spread around the flame to melt both sides. Then continue on as you did above with the circle and gently melt all the edges to prevent fraying. Do this to each layer of the flower and set aside.
Step 3 – Stack and arrange the DIY fabric flower

After you have singed all the edges, stack the circle inside each other (you may have to remove some circles to get the flower to lay right). For the Rose (flower b) make sure that you stagger the flower so the petals cover any gaps.
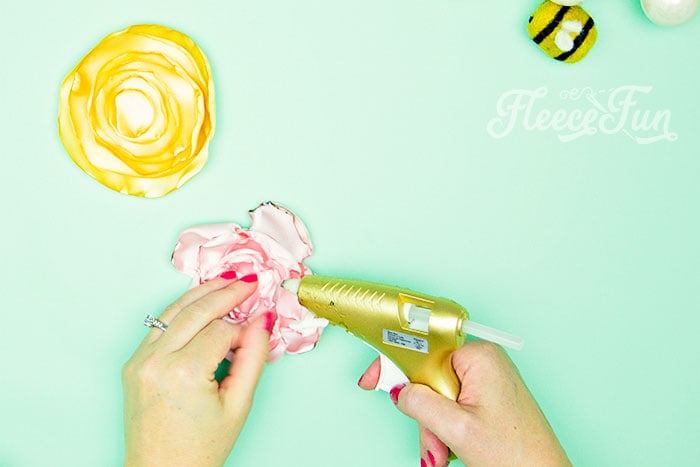
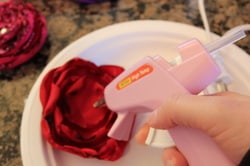
Step 4 – Glue the flower together
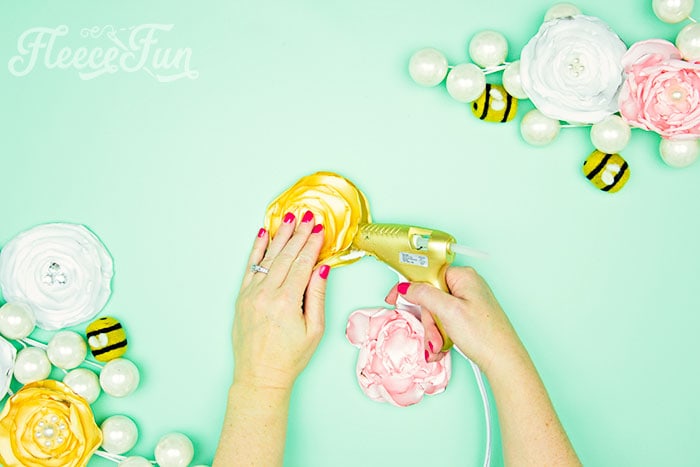
Glue each circle to the one below it, taking your time and making sure that each circle sits how you want it to.
For the satin rose DIY fabric Flower the process is the same,
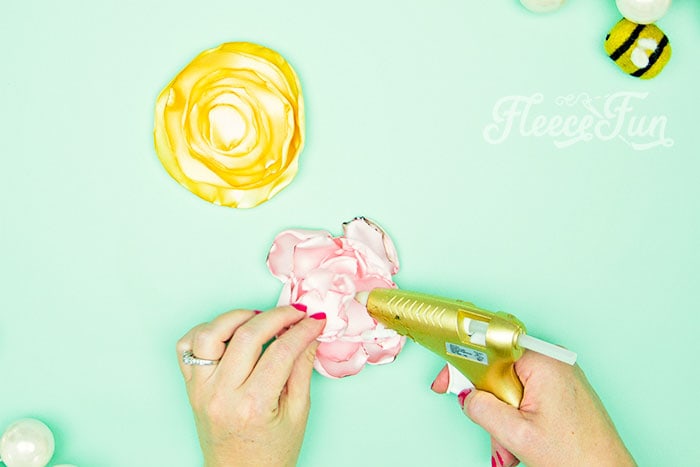
just make sure that the petals stagger.
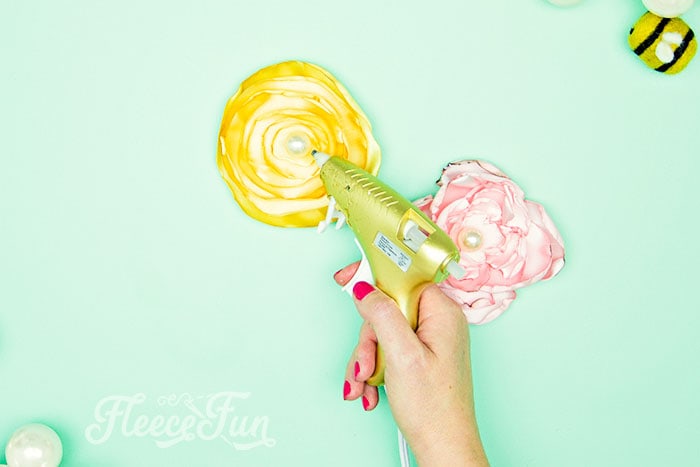
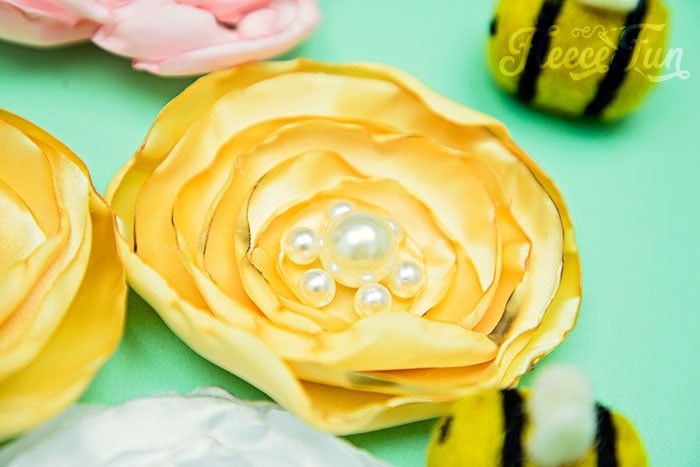
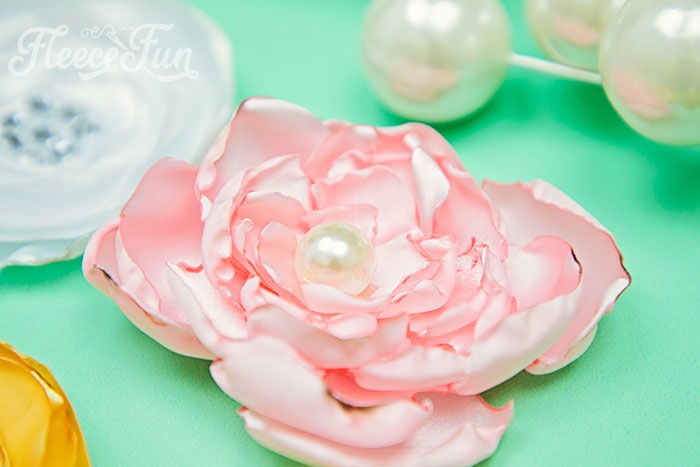
Glue a jewel or bead in the center to cover up the stitches, or just to add some fun drama.
Step 5 – Attach or clip to the back to the flower
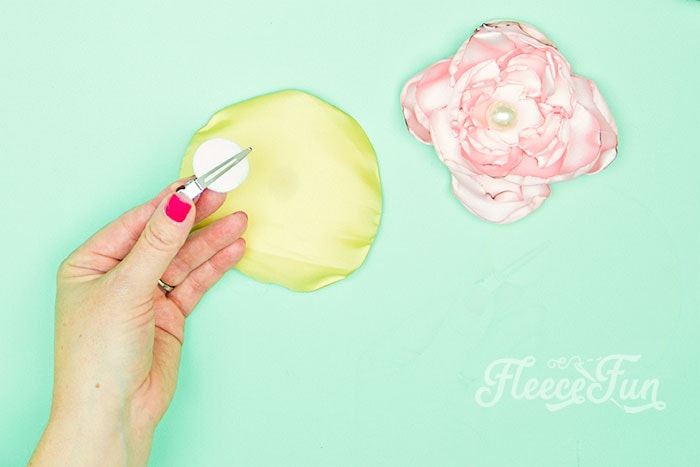
Cover one side of the barrette/ clip with a felt circle using hot glue.
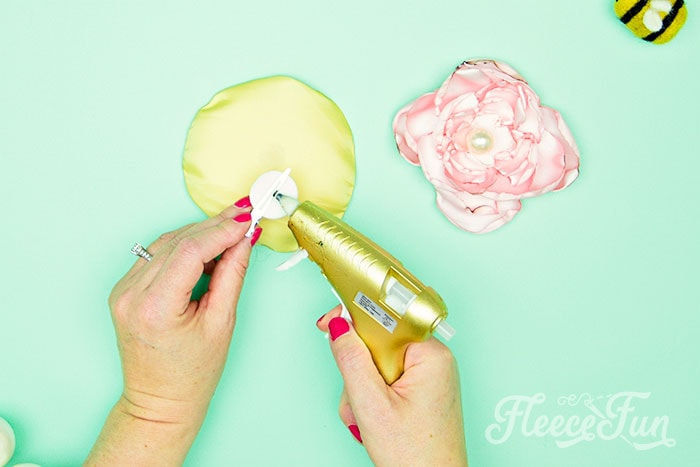
then glue that to the back of the fabric flower.
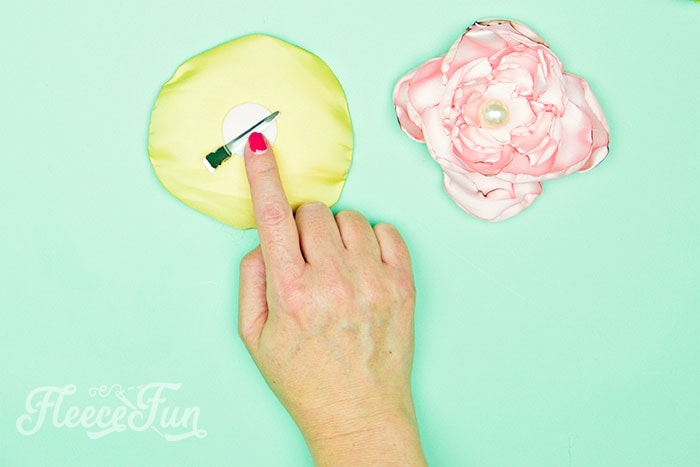
You could also glue pin back to it as well.

I’ve seen some people put both a pin and a clip backing on the flower to make it more versatile. Personally I just like the clip because my little girls wear these in their hair.

You’ve completed the DIY Fabric Flowers tutorial!
Download the free DIY Fabric Flowers pattern here.
You can get a free copy of Adobe reader here. By downloading you are agreeing to pattern terms of use. Fill out the form to get it sent right to you. You can purchase SVG files for the pattern here.

you might like these Flower Projects:
- Felt Sunflowers
- No sew Fleece Flower
- DIY Felt Flower Art
- Giant Paper Sunflower
- How to Make a Flower Fascinator
More No Sew Projects:
- No Sew Hobo purse
- How to Make a No Sew Fleece Tie Blanket (better method with templates!)
- How to use the Tie Blanket Ruler!
- How to Make a No Sew Tie Quilt
- No Sew Blanket Tutorial (with flannel!)
- No Sew Art Smock
- Ragged Tassels (Cute for decorating)
- The Lucet Scarf
- No sew baby car seat Canopy
- No sew cape
- See all of FleeceFun’s No Sew Projects!
see more GIRL PATTERNS:
- Apron for Teens and Tweens
- The Simple Pencil Skirt
- Child Apron Tutorial!
- Flannel Nightgown Pattern
- Fleece Ruffle Skirt
- The Fun and Frilly Skirt
- Fingerless Gloves Pattern
- Holiday Bow Tie Headband Free Pattern Handmade Gift Idea
- Pocket Tee Shirt for 18″ Doll Free Pattern
Also Seen as:
DY Fabric Flowers ( No Sew Free Template)
Equipment
- Scissors
- Candle
- Glue Gun, glue sticks
- Bowl of water
Materials
- .25 Yards Satin
- 1 piece Metal clip
- 1 felt circle
- 2-5 pieces beads or jewels
Instructions
- Download and print up the FREE template/ pattern

- Cut out the pattern and trace onto the fabric. Cut out the pieces.

- Singe the edges of the flower layers using a candle.

- Stack the flower with the completed layers.
- Hot glue the layers together.
- Add a jewel or bead to the center

- Finish it by gluing a clip to the back!


Video

I would like to suggest a tool instead of a candle or a lighter….versa-tool you can shop and find them for less than 25 dollars but you can use it on wood, for stenciling, soldering…and for burning edges on fabrics and ribbons.
Always keep a bowl of ice nearby for flaming satin, or singed fingers!!!
Love it! So much fun to make!
I love this I am so glad I came across this I am going to share this with my daughter she is all the time crafting and making hair items and I believe she will fall in love with your roses. Thank you so much for putting this out and making it free!
Really loved your flowers! At the end it looked very nice and expensive but very easy to make.Thank you I sure will try it out with my four girls. Love all the other great ideas too!Thank you very much for sharing.
You continue to amaze me with your ideas and willingness to provide simple and clear instructions. Can’t wait to try! Thank you.