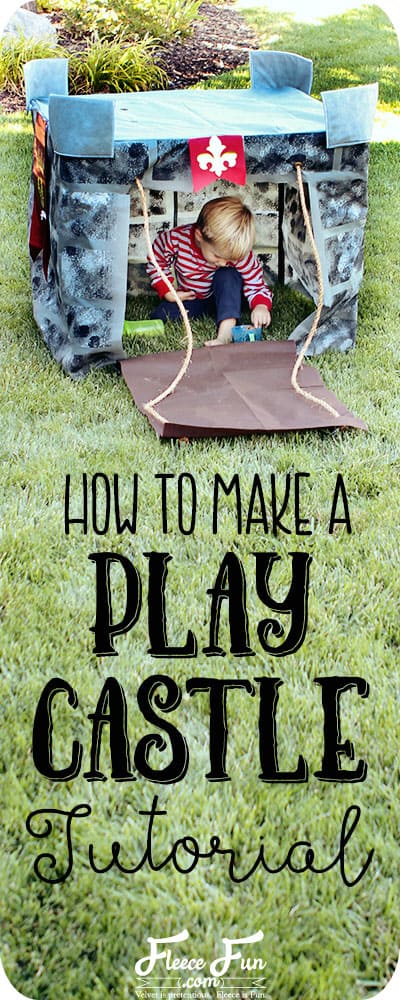
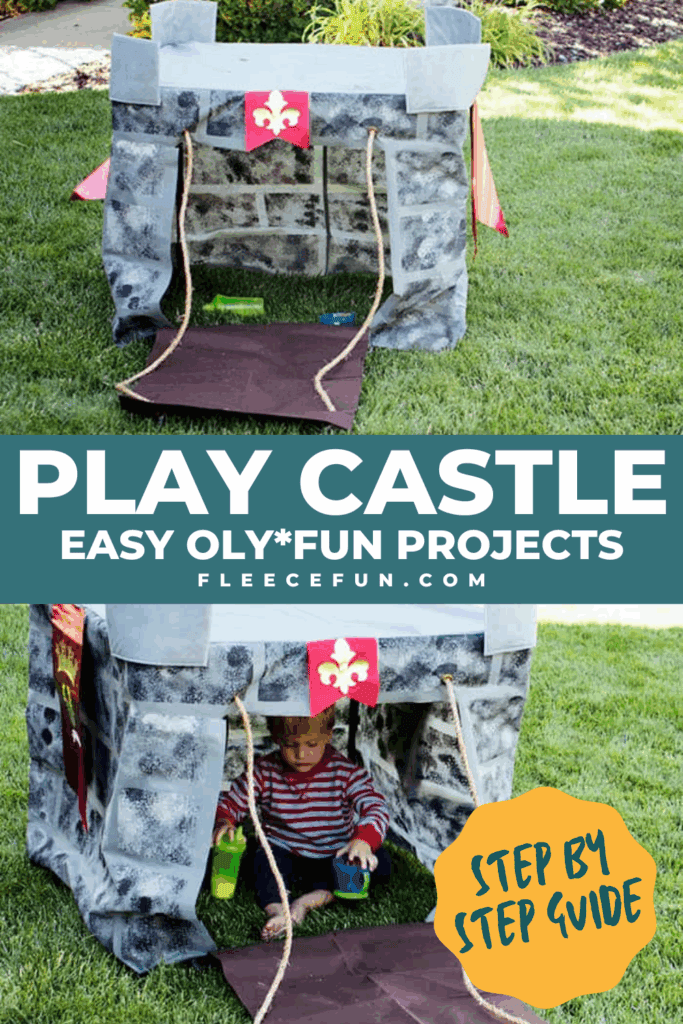
How to make a play castle tutorial
This content contains affiliate links or sponsored elements, read our Disclosure Policy.
This post is sponsored by Fairfield. This fun play castle fits over a card table to make a sturdy and cute place for your toddler to play. The faux draw bridge will give your little knight complete privacy to hold his “round table meeting”. The best part is that it folds up into a bag for easy storage when not in use. This little play castle is easy to make thanks to Oly*Fun cloth.
YOU WILL NEED:
- 3 3/4 yards of Slate Oly*Fun off the bolt

- 1/2 yard of red metallic OLY*Fun
- Scraps of gold metallic Oly*Fun
- 1yd Hot Fudge (brown) OLY*Fun
- Acrylic paint in light grey and black
- Natural sponge
- Masking tape
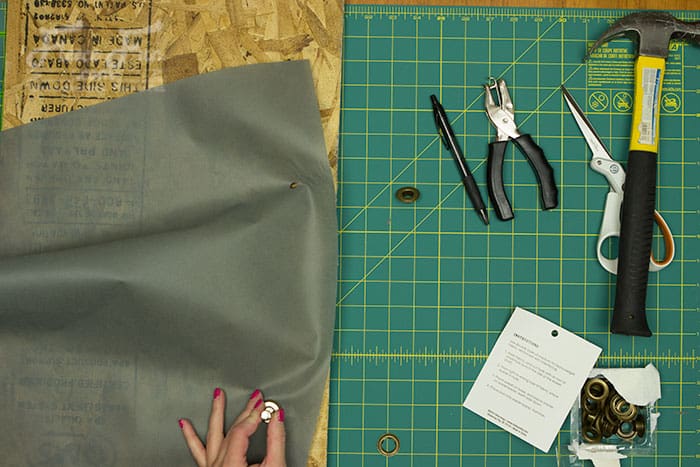
- 8 sets of 15/32 inch (12mm) grommets
- Grommet setter
- 1/2 yards of Stiff interfacing
- 1 yard of sew on velcro
- 2 yards of 3/8″ rope (I used natural but you can use synthetic)
- Rotary cutter ruler and mat
- Die cuts for decoration – I used the following:
- Crown
- Regal Crest
- Fleur de Lis
- Card table to place the castle on
- Hot Glue Gun
- Sewing Essentials (pins, scissors, etc.)

How to make a play castle instructions:
Step 1 – Cut out the pieces to the castle
For the Castle you will need to determine the measurements of your card table. They can vary slightly from card table to card table. I own this card table that we got at Walmart. It is 27 inches tall and 38 inches wide on top. So I know that my side fabric is 27 inches tall and (38 x 4) inches long. For a .5 inch seam allowance. I will add 1 to the table top and .5 to the side fabric.

I will cut the table top which is 39 by 39 square.
For the side fabric I will cut 72 inches off the bolt. Since OLY*Fun is 60 inches wide off the bolt. I will just Cut a piece that is half the length I need (72 inches). Keeping the fabric folded in half (as it came off the bolt), cut off the two inches from the top (making it two separate pieces). Sew the two pieces together to make a rectangle that is 27.5 inches tall and 142 inches long.

For the bag I will cut a rectangle that is 20″ by 15″

To make the drawbridge later, first take a piece of Hot Fudge (brown) OLY*Fun that is double the length of the height of table (in my case 54 inches long) keeping the full width of the craft pack (20″)

For the play castle’s spires cut 4 rectangles that are 11 by 7 from the Slate (gray) Oly*Fun
Cut 4 rectangles that are 10 by 6 from Stiffen
Then, cut 2 flags that are 18 by 10 from red metallic (just cut a triangle from the center to make the two points).
Cut 1 small flag 6 by 6 for opening
Cut any additional decorations form Die Cuts as Desired
Step 2 – Paint the stones

Sew the Two pieces of side fabric together using a .5 inch seam allowance to make one long pieces of fabric that is 27″ tall and 142″ long. Lay the pieces of fabric out on the floor.
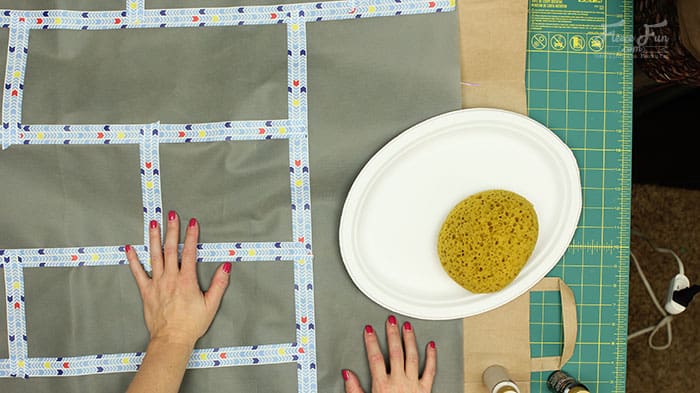
Using masking tape, tape off blocks using a staggered pattern. My block are 5 inches tall and 10 inches wide – but this is completely up to you. Leave an opening for the door that is 9 inches wide at each end (the ends will be the front of the castle).

Once it’s all taped off, use your sponge and paint to make the blocks. There really are no rules – just have at it – don’t think to hard about it.

Be sure to have a barrier beneath the cloth in case the paint bleeds through.

Allow the paint to dry then remove the tape.
Step 3 – Make the bag top to the play castle
Taking the bag piece add two grommets on either side of what will be the bag opening or top.
Then lay the bag on the center of the castle top. Mark where the grommets lay.
Punch grommets where the markings are to the handles later.
Pin the bag in place and sew on the top leaving the side with the grommets open.
Step 4 – Sew the side to the top

Cut out front door by cutting out a 9 inch by 23 inch rectangle on either end of the side panel (they will meet in the front to form the door).

Pin wrong sides of the top and side panel together. The seam should line up with the center of the back and the ends should meet in the front.
Note:
The ends won’t meet up perfectly – this is to prevent too much stress on it when taking the castle on and off the table.
Sew the side panel to the top using a .5 inch seam allowance. Sew the flag over the gap to hide it.
Note:
The bag should be on the inside of the fort. So the side with the bag on it is the wrong side of the fabric.
Step 5 – Make the play castle’s Drawbridge

Fold the Brown fabric in half and hot glue together to make the brown panel.
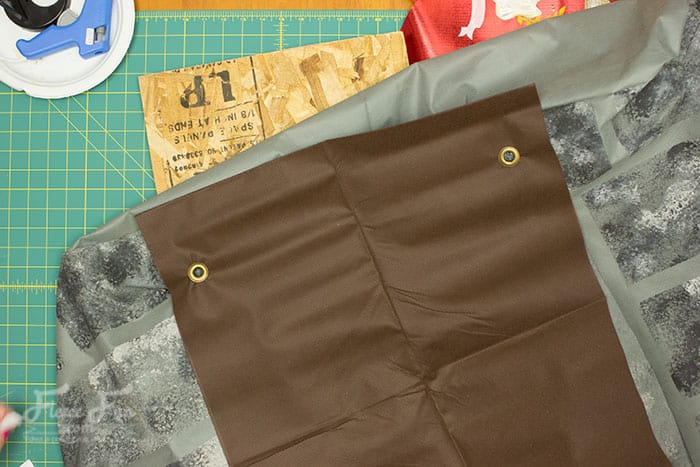
Add a grommet to either side. Line up draw bridge with the front opening and mark for grommets on the play castle.
Add grommets to castle and sew the bottom of either side of the draw bride to the bottom entrance of the castle.

Measure the rope from the castle to the drawbridge extended and add a little for tying a knot at either end. ( for my castle it was 42″.
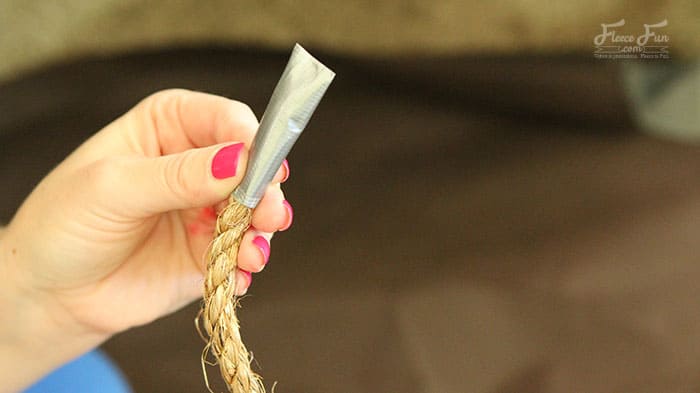
Cover the ends with duct tape to prevent fraying.

Test to make sure the length is right.
Step 6 – Make the spires

Fold grey rectangle in half. Place Stiffen rectangle inside – sandwiched between the gray fabric.

Sew a Zig Zag stitch along the edge of the stiffen – cut away excess gray fabric to make a clean line. Sew or hot glue 2 inches of Velcro to each end of one side of the rectangle.
Decorate flags. Glue on décor and 2 inches of Velcro on either side of the wrong side of the flag.

Glue the other half of the Velcro onto the play castle exterior.
Step 7 – Storing the Play Castle

The castle basically works like a quillow. Remove the velcro elements. Flip the bag right side out and stuff the castle in. Use the rope for the handles.
More Oly Fun Projects:
- Puppet/ Play Theater
- Easy Book Bag Tutorial
- No Sew Art Smock
- Flag Football Belt
- No Sew Knight Costume
- Butterfly Costume Pattern & Tutorial
- You can see all of my Oly Fun Projects here
- You can see more of my Doll and Toy Patterns here!
More fun summer projects!
- How to make a Teepee for Parties!
- How to Build a Pirate Ship Out of PVC
- Pirate Party Facebook Event Timeline Art
- Pirate Party Game: Captain Hook’s Ring Toss
- Free Printable Drive-In Theater Cars
- Free Printable Drive-In Theater Signs
- Free Printable Drive-In Theater Tickets
- 7 Rainbow Party Décor Tips