
How to Decorate a Notebook with Cricut and EasyPress 2
This content contains affiliate links or sponsored elements, read our Disclosure Policy.
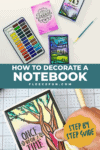
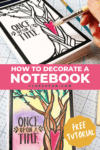
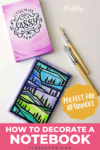
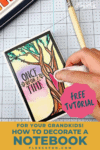
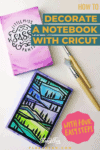
Handmade Gift Idea: You can learn how to decorate a notebook with this easy to follow step by step tutorial with lots of pictures and clear instructions. Make a cute keepsake or handmade gift with this DIY.

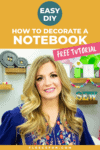
This is a sponsored post on behalf of Cricut. The tutorial and thoughts are my own. You can learn how to decorate a notebook with this easy to follow tutorial. These notebooks are fun and fast to make. Personalize them as a handmade gift. Or use this as a classroom craft! The possibility are endless.
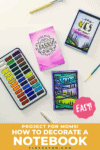
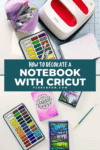
YOU WILL NEED:
- Cricut Maker (or Explore)
- Fine Point Blade
- Light Grip Mat
- Everyday Iron On in the color of your choice
- EasyPress 2 (I used the 6″ by 7″ size)
- EasyPress Mat 8″ 10″
- Blank Canvas Notebooks (like these)
- Watercolors
- Watercolor brushes
- BrightPad
- Weeding Tools
- Matte Mod Podge (optional)
- Access to Cricut Design Space
How to Decorate a Notebook Tutorial:
Step 1 – Cut out your designs
I already have a few ideas that I’ve put together in Design Space. But the truth is any design that you can cut out of heat transfer vinyl will work!
Using your fine point blade cut out the vinyl.
Step 2 – Weed the Vinyl
Using your BrightPad and weeding tools weed the vinyl.
Step 3 – Transfer the Vinyl to the books
Heat up your EasyPress 2 and set it to canvas setting. I love how the smaller 6″ by 7″ inch size is perfect for this project!
Heat up the notebook a little and then place the design on it.
Use EasyPress 2 on the book’s cover. Just a side note, my nine year old thought this was a fun project and wanted to decorate a few notebooks. I was completely comfortable with her using the EasyPress under my supervision. Thanks to the timer and the base to sit it in when not in use it’s a great easy to use tool.
Open the book and heat the design from the other side.
Allow the design to cool and remove the film. By the way Cricut now has the StrongBond™ Guarantee – meaning that they stand behind their product. And if you use it as directed and it for some reason doesn’t work they’ll replace the vinyl.
Step 4 – start painting and decorate your notebooks
Now to the really fun part. Use water colors to add a really handmade beautiful look to the books!
Once the Vinyl has cooled use the watercolors to anyway you wish to make the design yours.
Quick Tip
You can paint the cover with plain water to make it look more blended and pastel.
But be mindful that you don’t use too much water or you will cause the cardboard of the cover to warp.
Once you’ve completed the cover, use a damp paper towel to clean off any paint that is on the vinyl.
Finally you can coat the cover in a thin layer of Mod Podge to seal it – but I confess I didn’t do this to any of my books and it hasn’t affected them. 🙂 That’s how you decorate a notebook.
This is a sponsored conversation written by me on behalf of Cricut. The opinions and text are all mine.
love this How to Decorate a Notebook tutorial? see More Cricut Crafts & Tips!
- Cricut Maker for Beginners: Easy Party Decor
- Your Top 3 Cricut Maker Questions Answered
- Cricut Maker Cover Tutorial
- 3 Last Minute Gifts with a Cricut Joy
- How to Use JPEGs to Make a T-Shirt in Cricut Design Space
- 25 Personalized Gift Ideas Using Cricut Tools
- How to Get Started Cutting a Quilt with Cricut
- How to Get Started Quilting with Cricut
- Is It Time to Upgrade Your Cricut Machine?
- Luggage Tag DIY with Cricut
More Cricut Projects!
- DIY Sewing Room Décor
- Tips for Working with Iron-On Mesh
- DIY Tiara (Free Pattern & SVG)
- How to Make a Knight Helmet (Free Template)
- See all of FleeceFun’s Cricut Tutorials!