
Luggage Tag DIY with Cricut (free SVG file)
This content contains affiliate links or sponsored elements, read our Disclosure Policy.
This is a sponsored conversation written by me on behalf of Cricut. The opinions and text are all mine. This cute luggage tag DIY is easy to personalize and make your own with a few materials and a Cricut machine.
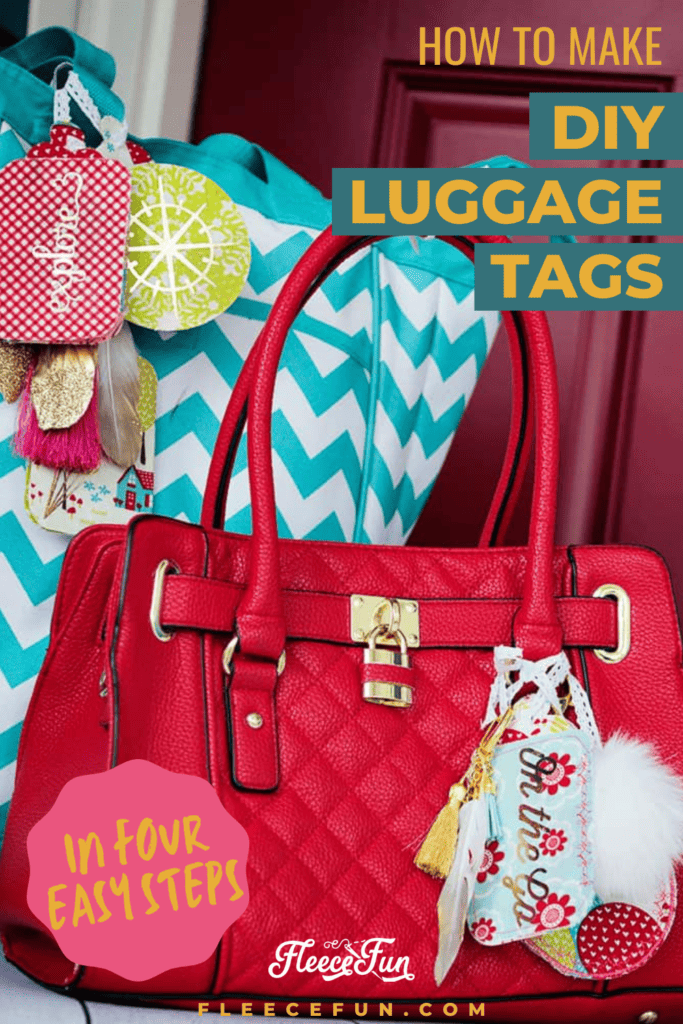
Make several up as Handmade gifts for friends and family. Mix and match fabrics and add embellishments to make these one of a kind personalized luggage tags.
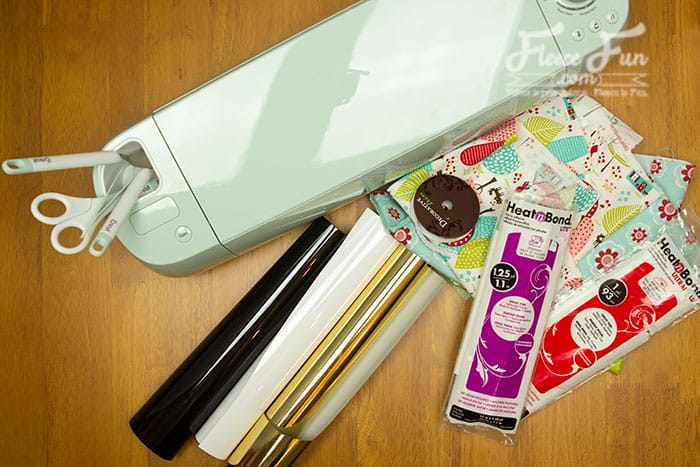
YOU WILL NEED:
This project can be completely no sew or you can use sewable Heat and Bond to sew the tags.
- Fleece Fun’s Free SVG files (at the end of the post)
- Cricut Explore Air™
- Cricut Design Space™ app
- Fabric 12 by 12 squares (scraps will work)
- Heat and Bond (no sew or sew)
- Iron on Vinyl (I used gold, black and white)
- Ribbon
- Embroidery thread (optional for sew version)
- Iron
- Sewing Essentials (for sew version)
- StandardGrip mat
- StrongGrip mat
- Jewelry charms (optional)
- Ribbon
- Press Cloth
- Get the free SVG Files here!
Luggage Tag DIY
Step 1 – Prep Your Materials
Prep your Materials. Iron on Heat and bond to 12 by 12 cut squares of e fabric. In the example I chose four fabrics to mix and match with.
Quick Tip
Fabric and interfacing not lining up perfectly? Protect your ironing board with a piece of paper that you can just toss when you’re finished.
Step 2 – Design Your luggage Tags in Cricut Design Space
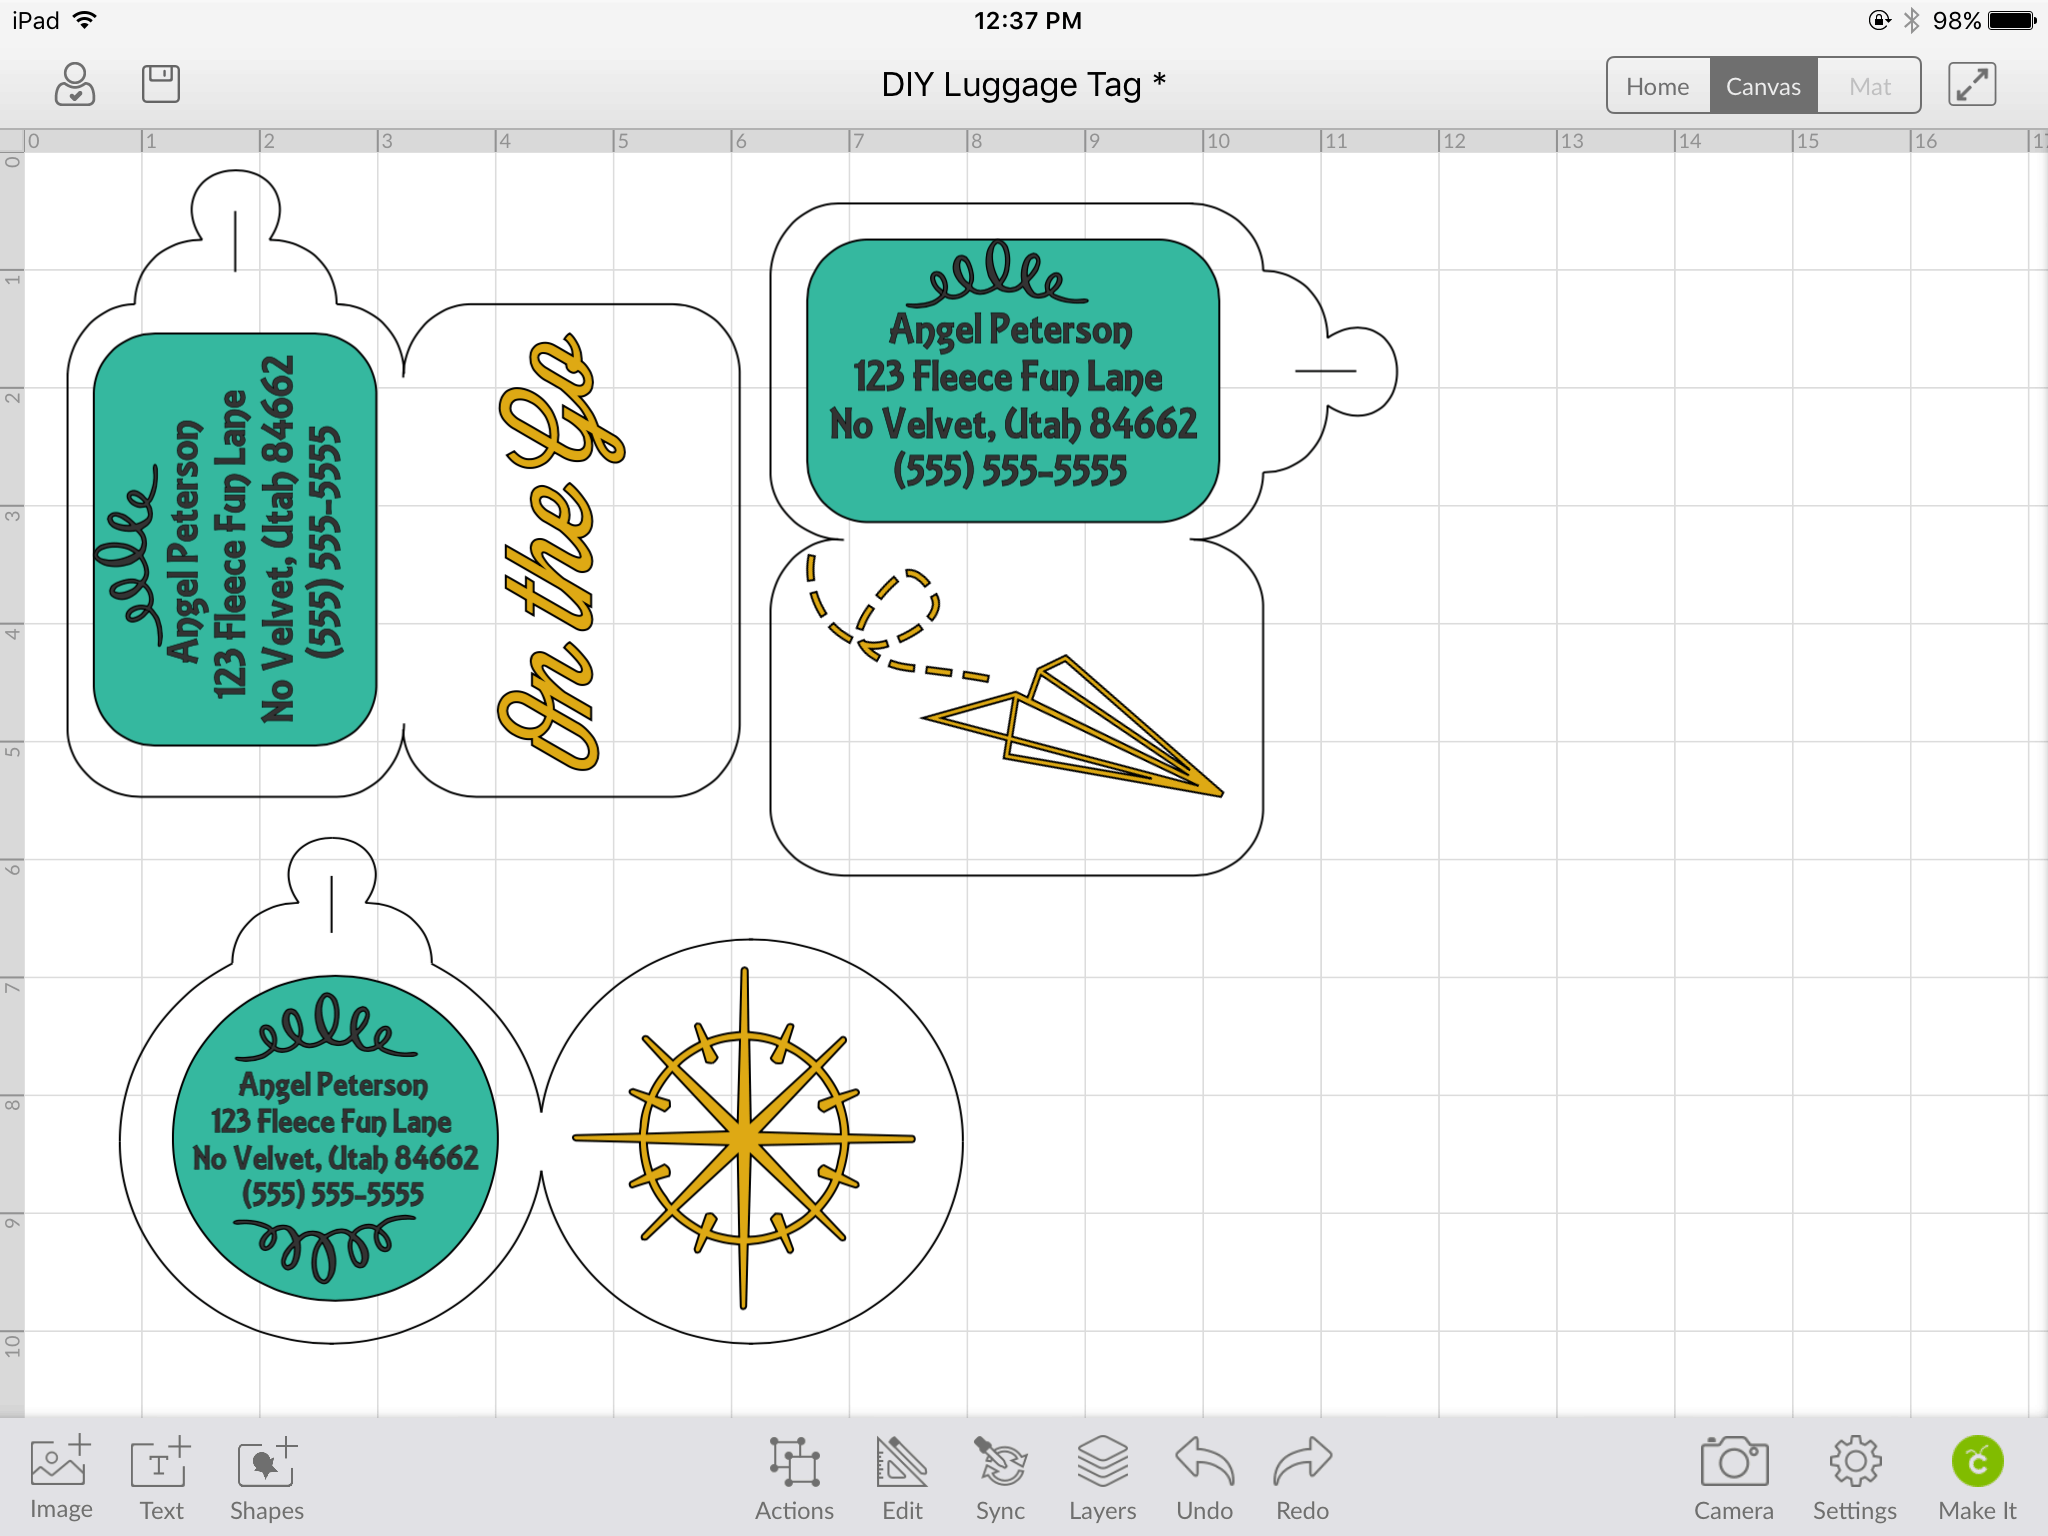
Lay out the SVG files (located below) in Cricut design space. Plan what images or phrases you want on the exterior and how you want the interior to look. On some of the interiors I layered the vinyl so you could easily read the address with a white shape behind the words.
Once you have it all set up to cut out how you want it’s time to cut! By the way there are tons of pre layed out project in Cricut Design Space like this one that you can just cut and go!
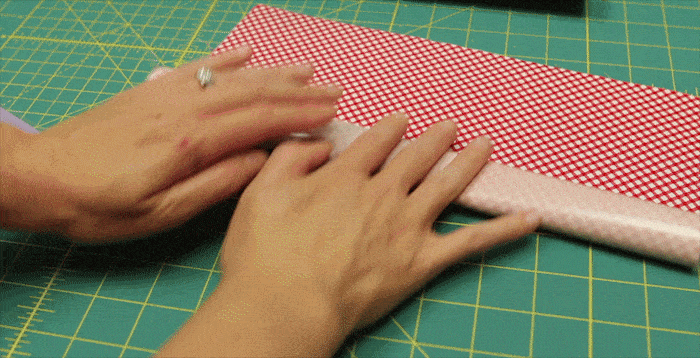
Here’s a trick I learned to get the fabric on the StongGrip mat smoothly:
Let’s set up the tags first.
With your Cricut set to bonded fabric
Simply cut the DIY Luggage Tags out of cotton fabric backed with Heat and Bond mounted to a strong grip mat.
Then MIRROR the tags and cut out the tags again from a different fabric.
Quick Tip
Getting the floppy fabric on the strong grip mat can be kind of a pain. But I figured out this handy trick. Roll up the fabric so the shiny (Heat and Bond side) is on the outside. Take the edge that is loose, and line that up with the top of the mat. Press down. Let the roll unroll over the mat. Then press it down smooth so the mat grips the bonded fabric well.
Step 3 – Assemble the diy luggage Tags
Put the tags wrong sides together and iron them together. If using sewable interfacing topstitch around the edge of the tag. Fold tags and iron the crease.
On the sewable tags, sew the flap crease to strengthen it, on the no sew after it cools, it should stay in place fine.
Step 4 – Cut and Add Vinyl, and Finish the Tags
Cut out the desired vinyl/address for the tag. For the exterior I chose graphics.
Weed the vinyl.
On some of the tags, I layered the vinyl on top of the a white background to make it easy to read.
If you want to add this additional shape, it’s up to you.
Quick Tip
Firm flat surface plus heat, a little pressure and patience make for a good transfer. In the photo I am using a a left over piece of coriander from out kitchen counters. It works great!
Add a strip of ribbon through the top slit to complete the tag.
You’re finished with the luggage tag DIY. To add extra interest you can attach feathers or jewelry chard to it – but these are not a good idea for air travel. 🙂
Download the free diy luggage tag SVG Files!
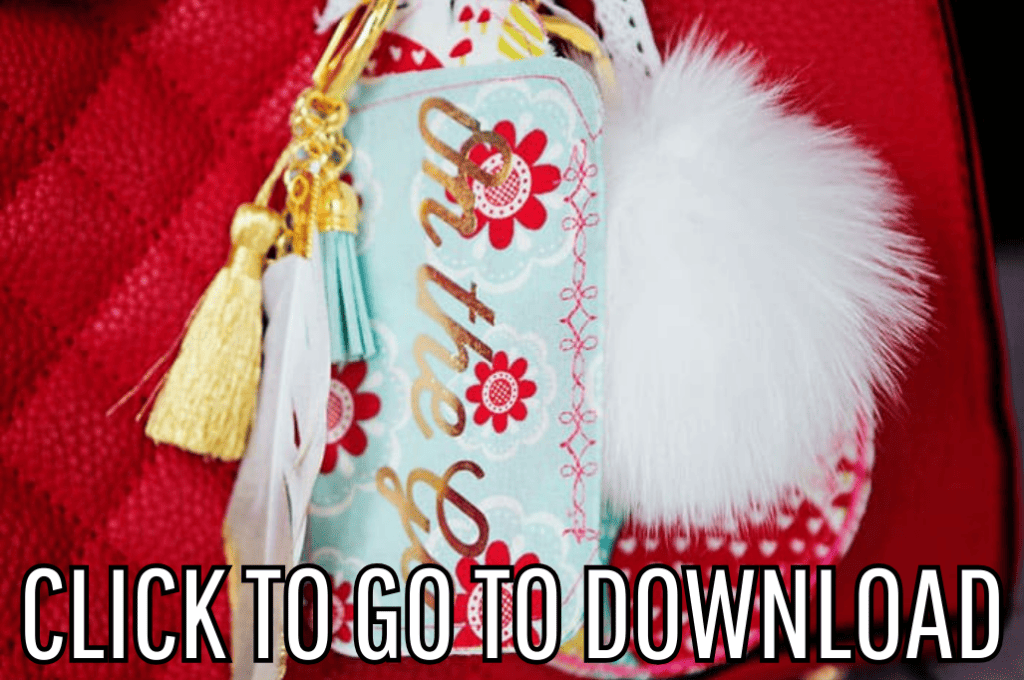
You can get a free copy of Adobe reader here– it is the ONLY reader I recommend. By downloading you are agreeing to pattern terms of use. Click the picture below and fill out the form to download the .svg!
I was invited to participate in the Cricut Party Blogger Program Kickoff.
This experience is based strictly on my opinion. Others may have a different opinion or experience with the product listed above. I was provided the sample free of charge by the company or PR agency and I have given my honest opinion.
This is a sponsored conversation written by me on behalf of Cricut. The opinions and text are all mine.
More Cricut Crafts & Tips!
- Cricut Maker for Beginners: Easy Party Decor
- Your Top 3 Cricut Maker Questions Answered
- Cricut Maker Cover Tutorial
- 3 Last Minute Gifts with a Cricut Joy
- How to Use JPEGs to Make a T-Shirt in Cricut Design Space
- 25 Personalized Gift Ideas Using Cricut Tools
- How to Get Started Cutting a Quilt with Cricut
- How to Get Started Quilting with Cricut
- Is It Time to Upgrade Your Cricut Machine?
- How to Decorate a Notebook
More Cricut Projects!
- DIY Sewing Room Décor
- Tips for Working with Iron-On Mesh
- DIY Tiara (Free Pattern & SVG)
- How to Make a Knight Helmet (Free Template)
- See all of FleeceFun’s Cricut Tutorials!
So clever! We usually forget tags and use the ones provided at the airport…this is a way cuter option!
This is awesome
These are so fun! Can’t wait to try them out!
I totally thought that was paper and didn’t realize it was fabric, because it looks so flat and stable! I love these cute tags and will be making some for my luggage!