
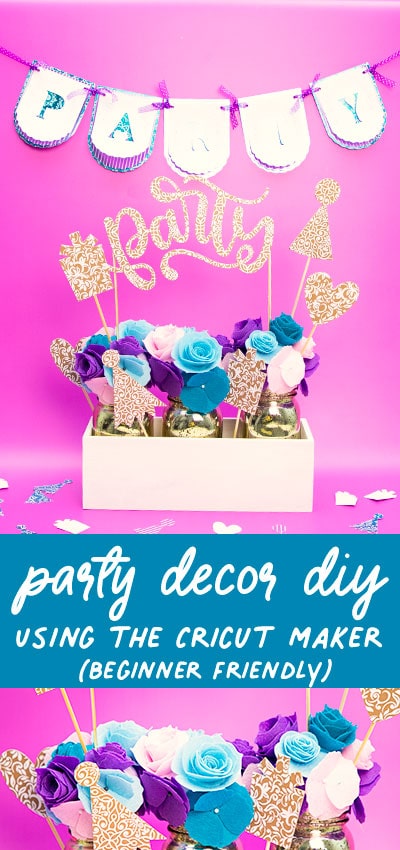
Cricut Maker for Beginners – Easy Party Decor
This content contains affiliate links or sponsored elements, read our Disclosure Policy.


If you’ve been following my blog for a while – it’s obvious that I love the play and create with my Cricut Maker! But the majority of my tutorials assume that you’re familiar with the machine and know how to use it. But what about those of you who have never used a Cricut Machine or just got a Cricut Maker? This tutorial is for you! This tutorial is the Cricut Maker for Beginners where I walk you step by (baby) step through how to make some cute party décor.
We’ll start off in the simple (and possibly more familiar) area of paper crafting a banner and some confetti and move on to using some of it’s more advanced tools like the rotary cutter and knife blade!
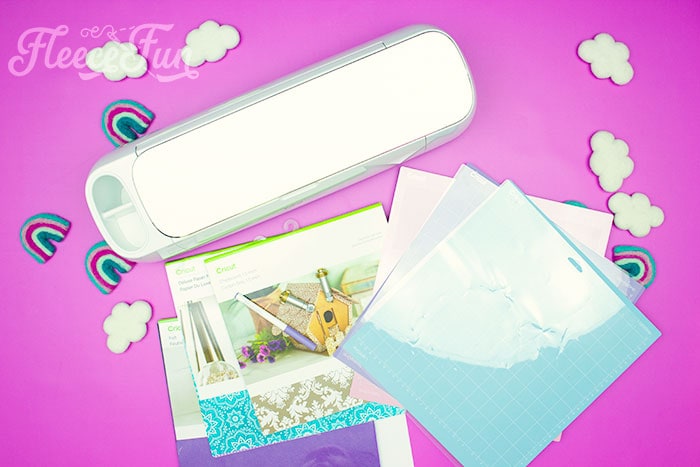
YOU WILL NEED:
- Cricut Maker
- Fine Point Blade
- 4 sheets of patterned 12″ by 12″ Card stock (I used “Mystic” Deluxe foil embossed paper)
- 1 Sheets plain white Card stock
- 4 yards of ribbon
- Cricut Fine Point Pen
- Light Grip Mat (the blue mat)
- Cricut Design Space (the program and app are free)
- This File I have all ready to go
- Cricut Access
- Rotary Blade (be sure that the blade is sharp)
- Felt (I used the Cricut Felt Sampler, Spring Rain)
- Fabric Grip Mat (the pink mat)
- Knife Blade
- Strong Grip Mat (the purple mat)
- Masking Tape
- Cricut Chipboard (I used the demask sampler)
- Glue Gun and Glue sticks
- Gold mason Jars
- Styrofoam balls
- Bamboo skewer sticks
- Pins
- Foam
- Wood Box

Once you’ve gathered all your materials it’s time to get started!
Cricut Maker for Beginners – Easy Party Decor Tutorial

Getting Started with Cricut Design Space: A Beginner’s Guide
Circut Design space is the FREE program that you use to run a Cricut Machine. You download it as a program on your Laptop/desktop or as an app on your phone/tablet. The cool thing is you can save projects to “the cloud” and access the file on any of your devices. Before purchasing a Cricut machine I recommend downloading and playing with Cricut Design Space – since it’s the software that you’ll use to make all of your projects.
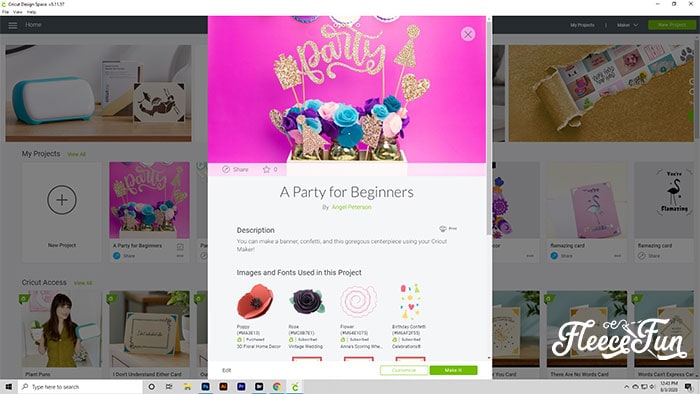
Using Design Space open up this file that I have set up for you.
In the file I use art fro Cricut Access. Cricut Access for a low (monthly or annual fee) allows you to use thousand of graphic art, designs, and projects.
note
It doesn’t give you access to all of the designs, some art (like Disney Licensed art) costs extra.
Cricut Design Space can be it’s own deep dive – but to keep things simple and beginner friendly I’ve set things up for you.
When the project comes up hit the “Make it” button.
Make sure that your machine is plugged in and the Bluetooth is linked to your computer or phone/ tablet.
How to work with a Pen and Fine Point Blade and the Cricut Maker
Part of the Banner has some Drawn elements that use a pen. In this section of this Cricut Maker for Beginners tutorial, I’ll show you how to use the pen and Fine Point Blade to make a party banner.
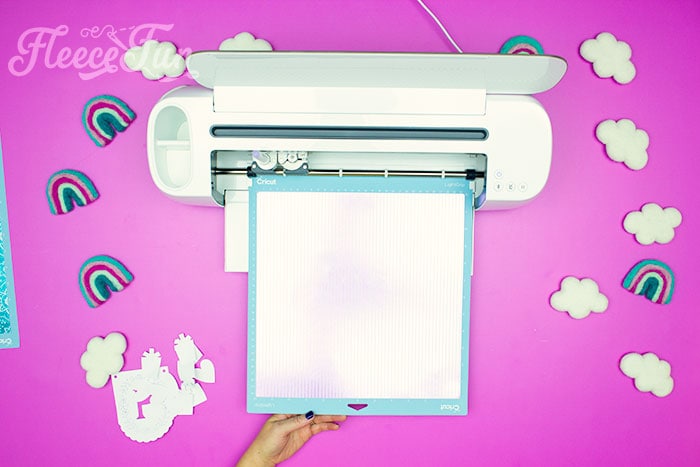
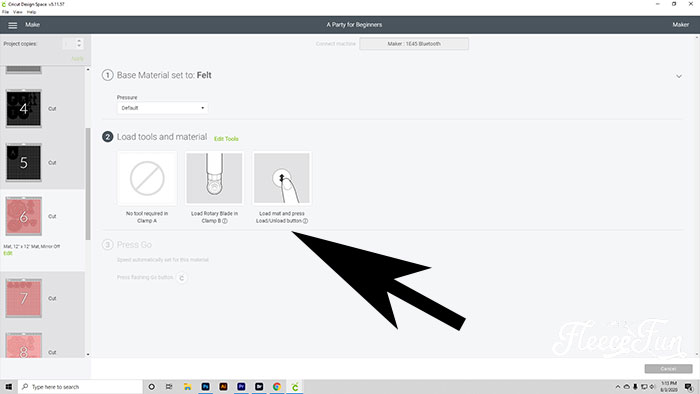
You should be at this screen:
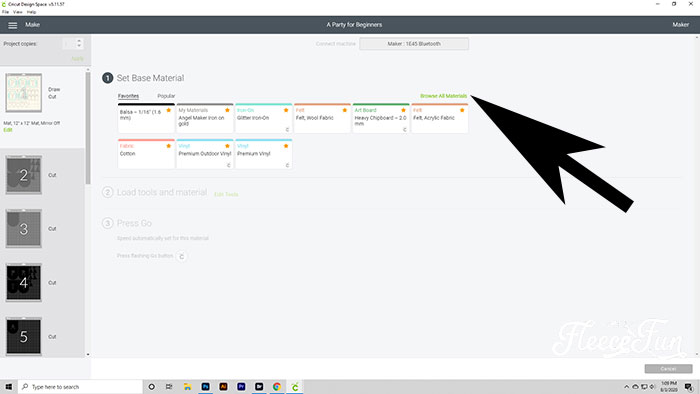
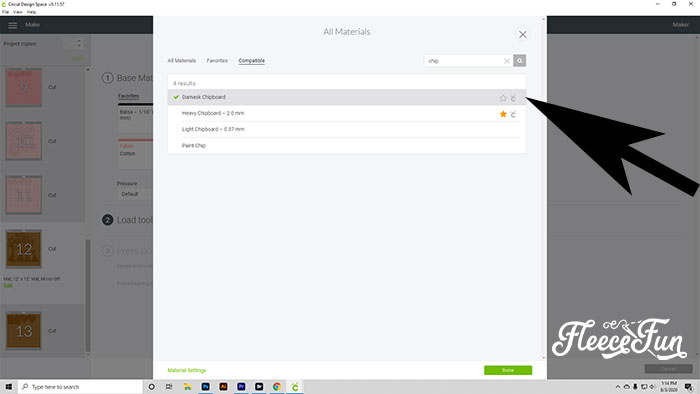
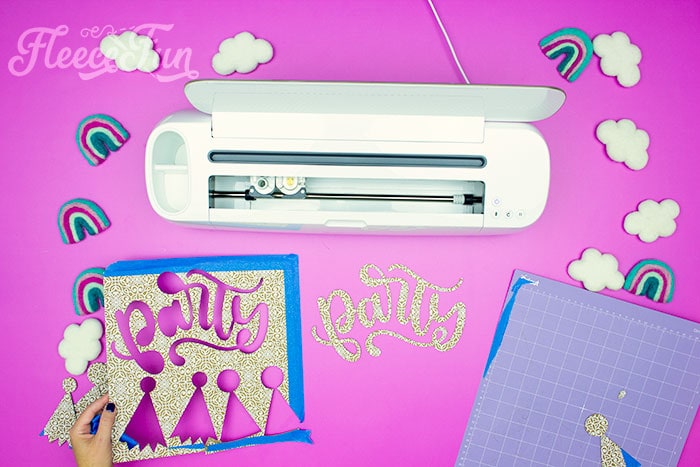
First thing we’re going to cut out is the banner. I’ve set it up so the first five mats are the paper banner and confetti items. Set the base material – click browse all materials.
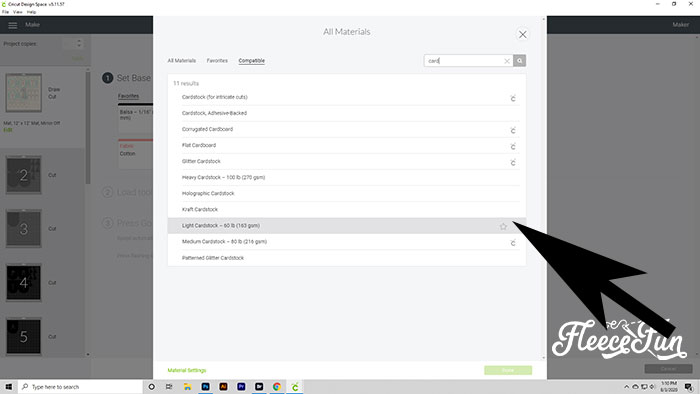
The Cricut Maker can cut literally 100’s of materials – so I find it easier to use the search bar than scroll through everything. I found light weight cardstock and select it.
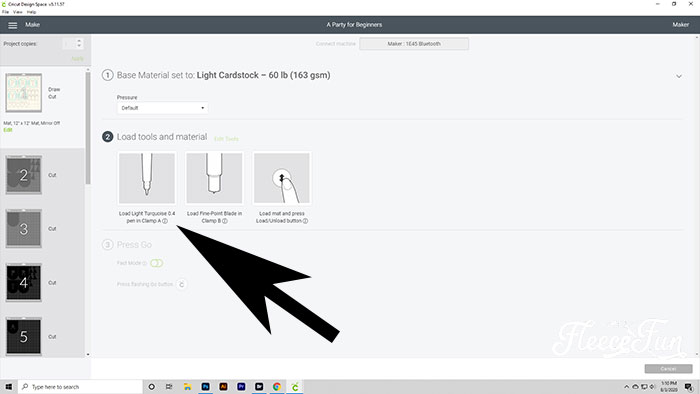
Notice that we need to load the pen AND the fine point blade for this .
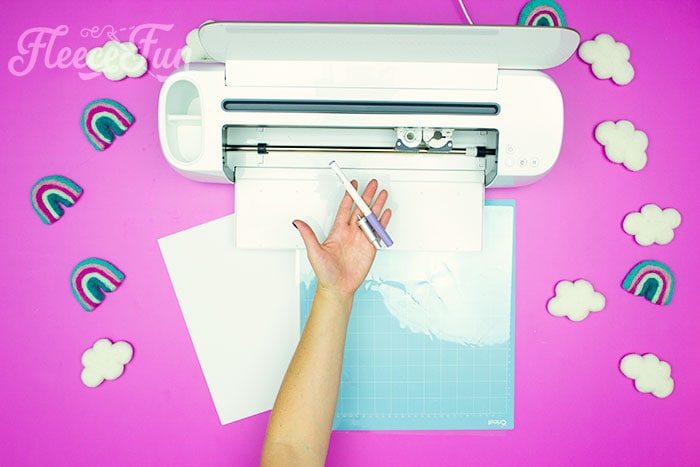
Put the pen in side “a” and the blade in side b.
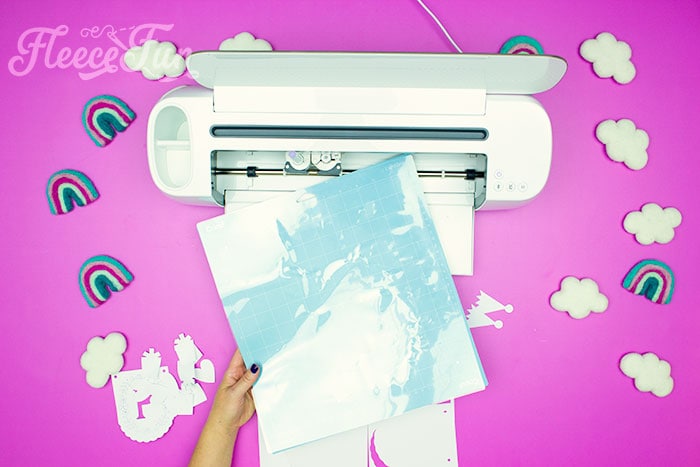
Put the white cardstock on the light grip mat. Then sliding it under the guides on either side, butt it up against the rollers and load it hitting the arrow button on the Maker.
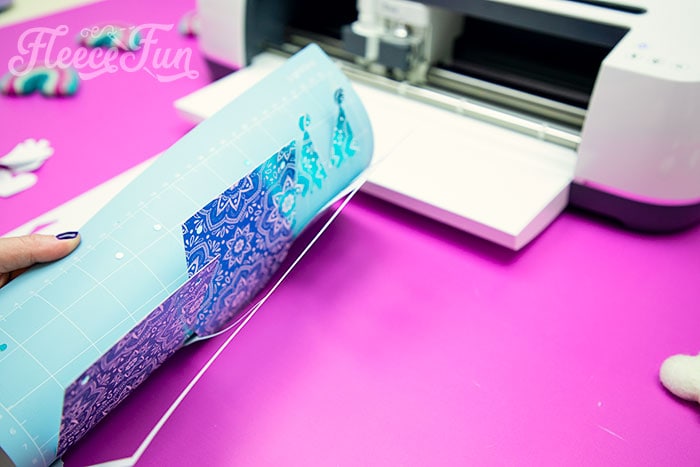
The machine will draw the pen elements first and then cut it out. Cut out mats 2 and three in a different color and mats 4 and five in another.
Quick Tip
To easily get the light cardstock off the mat, try flipping and and bending the mat to get the paper off.
Once you’ve cut out all the paper elements, put the clear cover back on the mat to help maintain it’s stickiness during storage.
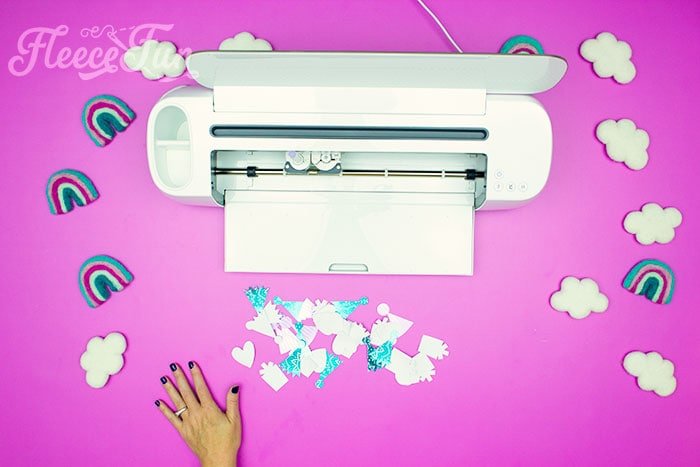
Gather the confetti elements and save them for decorating later.
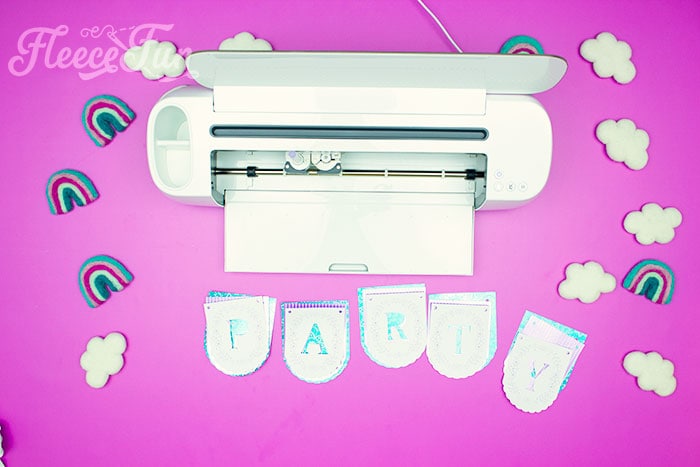
Take all of the banner elements you just cut out and layer them. Line up the little circles on each side of the banner layers.
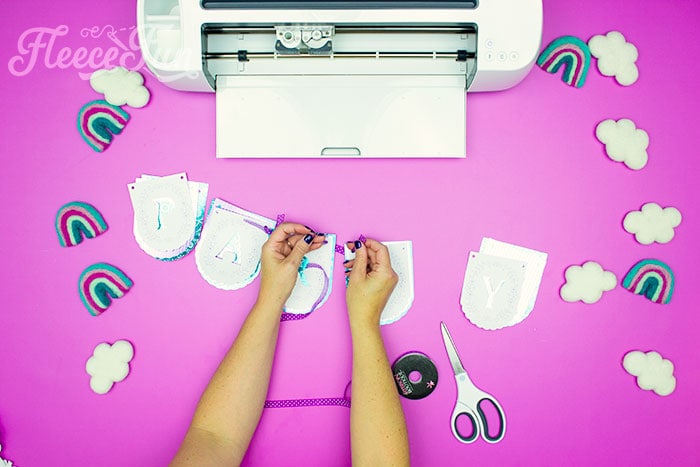
Cut 8 inch sections of ribbon, and threading through the holes on one side of each letter, tie the banner together.
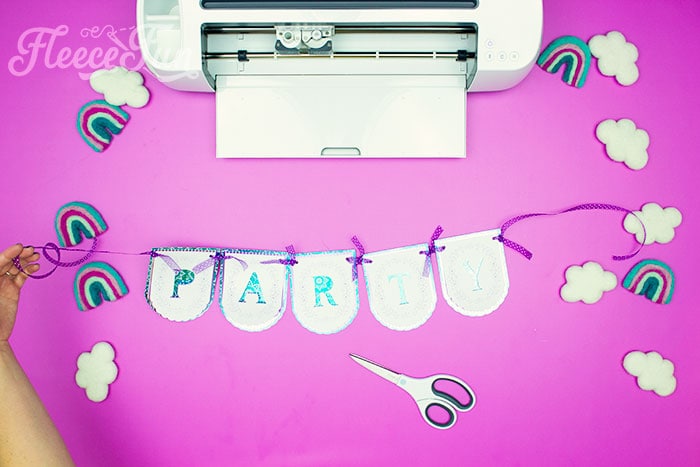
Tie an extra long length (about 2 feet) on either side for hanging.

Set the banner aside.
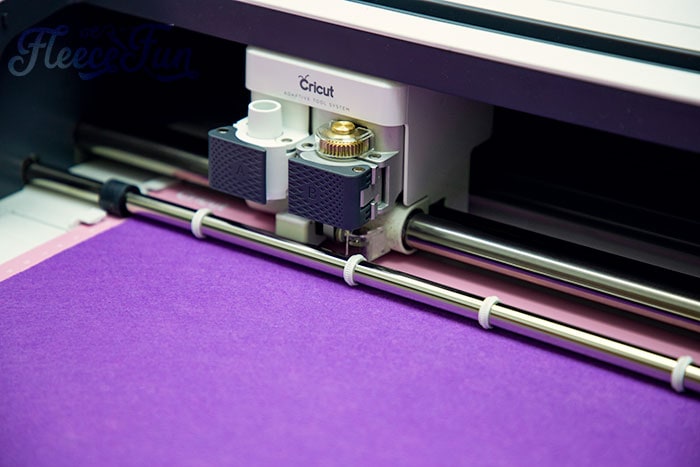
How to use the Cricut Maker Rotary Blade to Cut Felt
To make the felt flowers for the centerpiece this section of this Cricut Maker for Beginners tutorial will show you (a beginner) how to use the Rotary Blade to cut fabric.

To cut out the flowers I’m going to use the rotary blade with a fabric grip mat. Felt is one of my favorite things to cut out with my Cricut Maker. It will cut everything from nice 100% wool felt to the super cheap acrylic felt you can buy off the bolt.
note
With the Cricut felt you can use a fine point blade – but I want to show you how to use the rotary cutter.
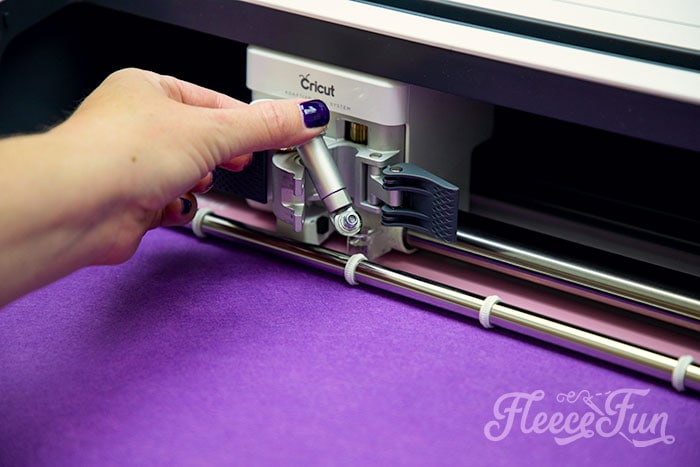
Take the pen and the fine point blade out of the machine.
On the “B” side lace the rotary blade, the clear plastic housing should be facing out and the exposed gear on top should be in towards the machine.
Fold the metal fastener across.
Then lock it by bending the b tab into place.
The rotary blade is now ready to use.
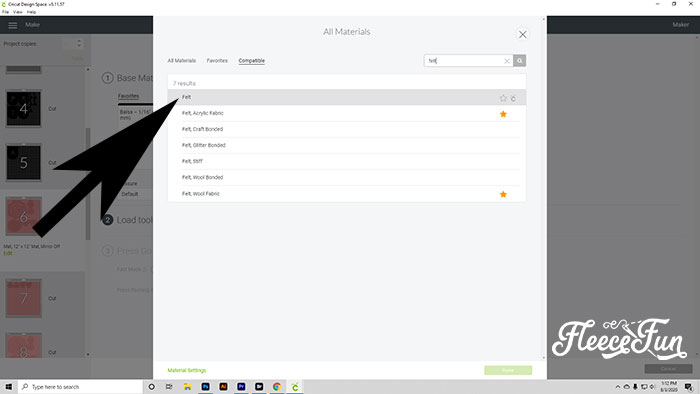
In Design space we need to tell the machine that we’re cutting with a different material. Click the letters that say “Base Material Set to….”. By clicking it this will allow you to select a different base material. We’re going to choose the felt that has the little Cricut symbol next to it.
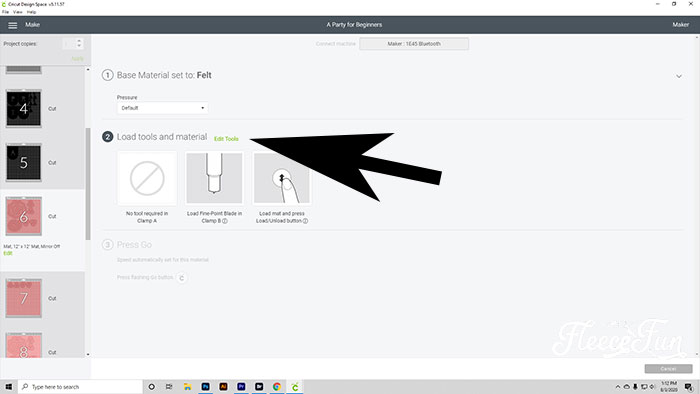
You’ll notice that it sets the default to the Fine Point blade. I prefer the fabric mat for flowers – so to change that click “edit tools”
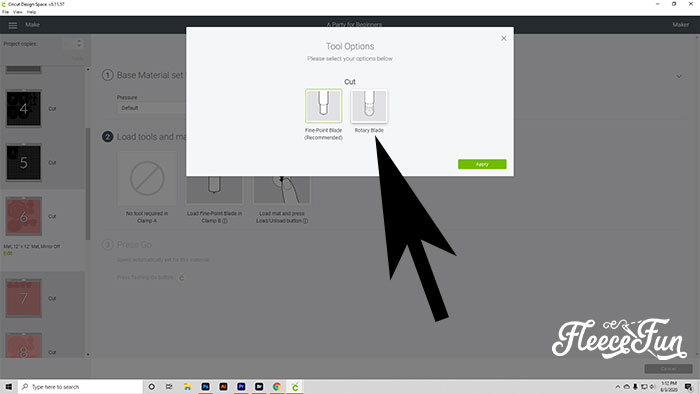
This box will come up – click “Rotary Blade”
Now the Rotary Blade should be selected.
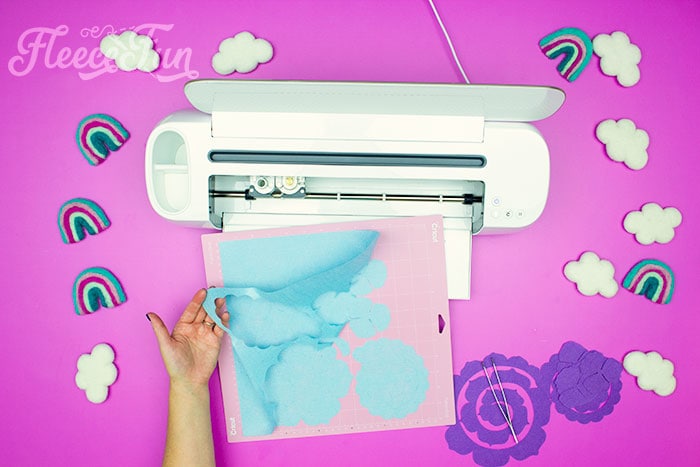
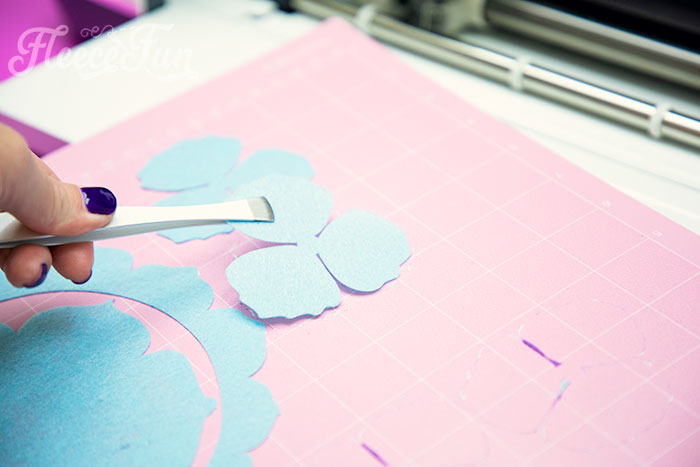
Cut out the felt flowers in different colors mats 6 to 11.
Quick Tip
Using the fabric tongs makes it easy to get the pieces off the fabric mat without touching it.
Set the flower pieces aside – we’ll have time to assemble the flowers in a minute.
Cutting the Chipboard pieces with the Cricut Maker Knife Blade for Beginners

Now it’s time to cut out some fun chipboard pieces to add some dimension and style to the centerpiece. I love the knife blade but for it to turn out you need to make sure that everything is prepped right for cutting.
prepare all the materials
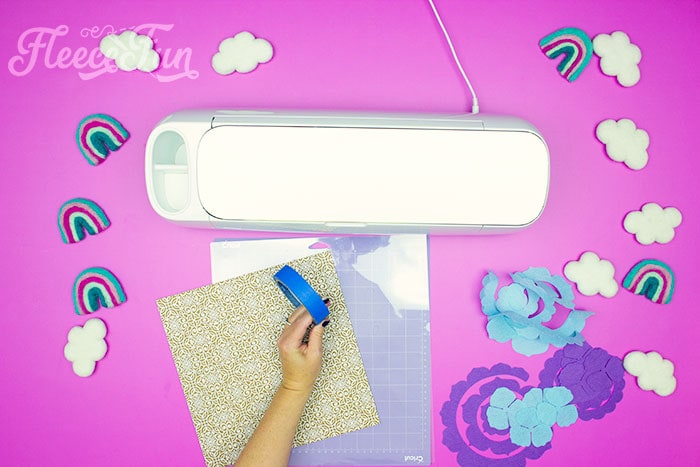
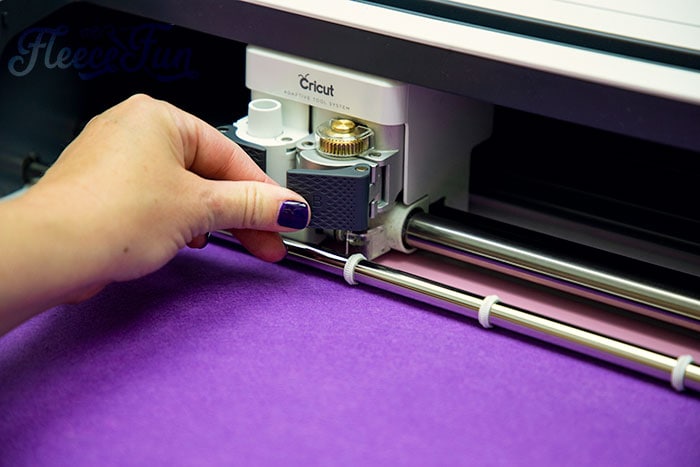
In addition to using the purple Strong Grip Mat – the edges of the material need to be taped down to prevent them from popping up while cutting.
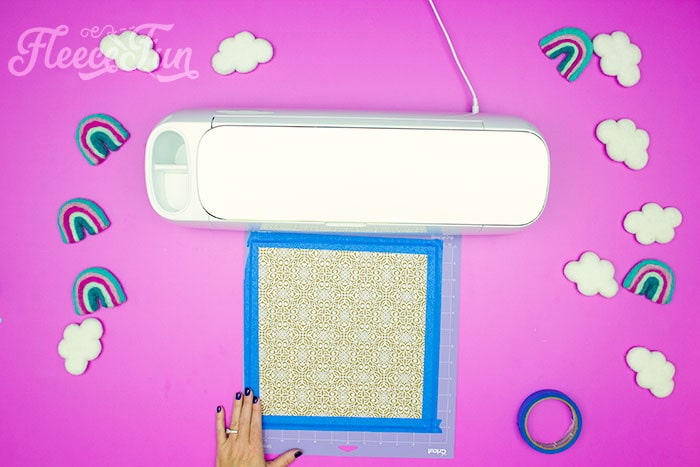
Make sure that the tape is half on the edge of the material and half on the mat. Make sure that the tape doesn’t extend off of the mat.
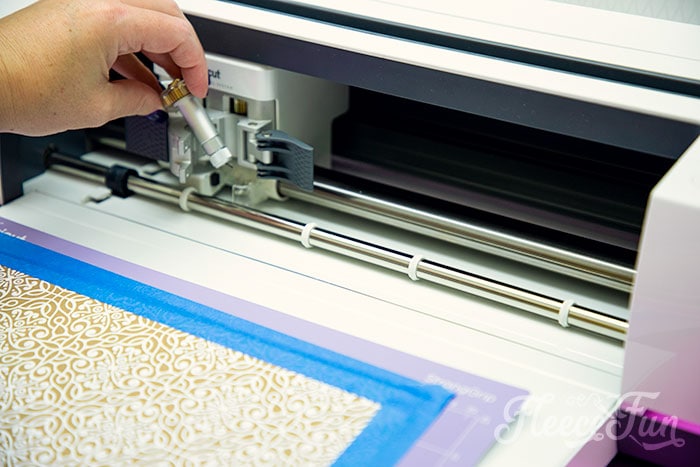
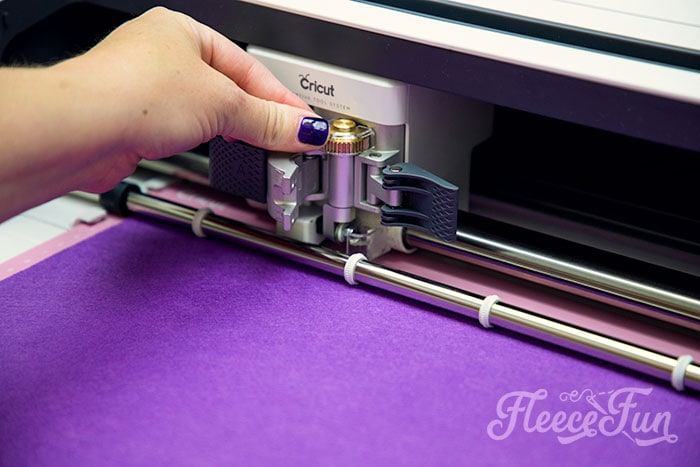
Replace the rotary blade with the knife blade – the process is exactly the same as the rotary blade.
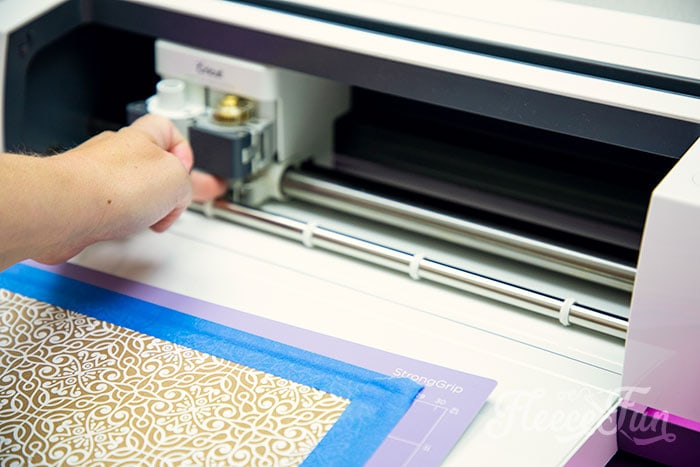
Make sure the plastic is facing out and the gears connect.
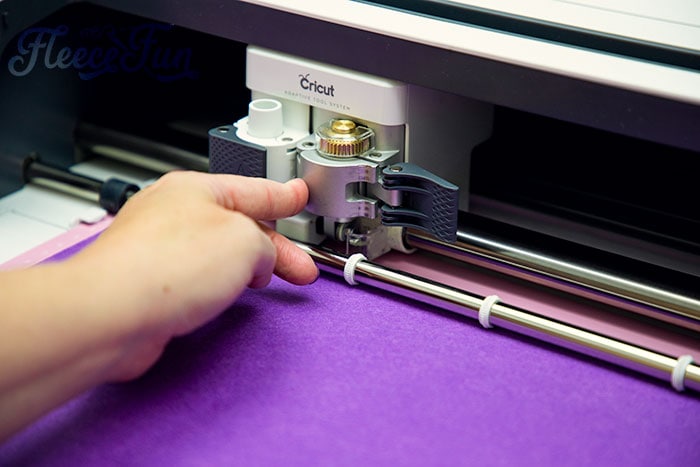
Push the four “Star wheels” all the way to the right side of the roller. (The first time might be difficult – they do move I promise)
In Design Space, click “Base Material set to…” and select the correct material (Damask Chipboard).

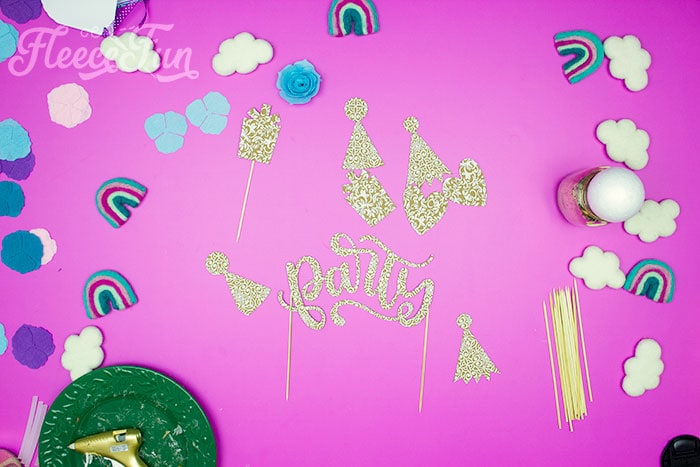
To give you the best cut click mat 12. Making sure that none of the images over lap, center the word “party”. the material is only 11″ by 11″ so make sure that is within 11 inches on the end.
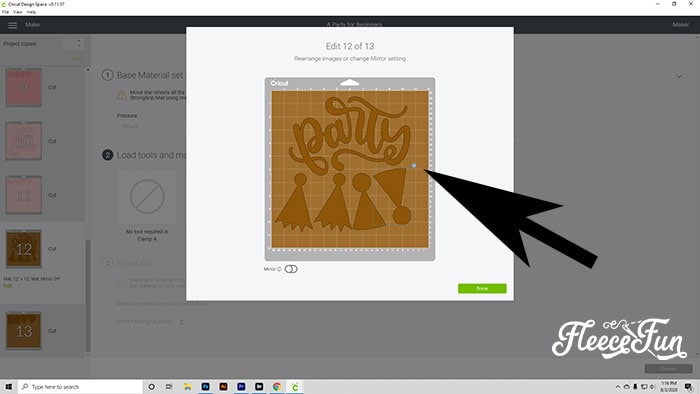
Then select the last party hat – its not going to fit on the material, rotate it so it will fit. Click “save”.
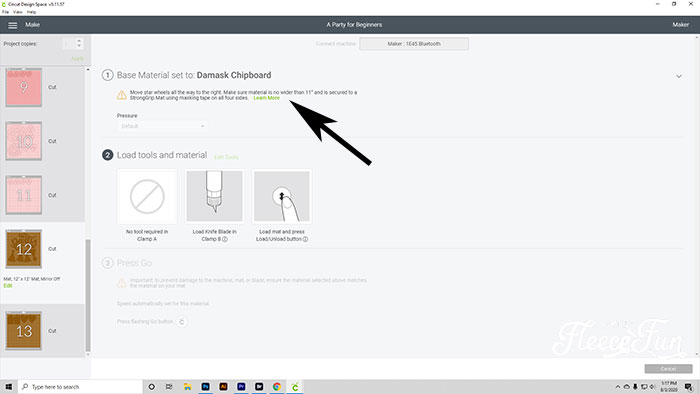
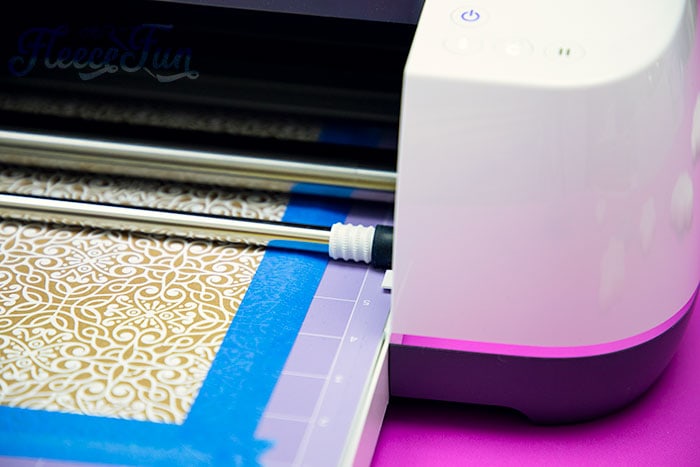
Notice the reminder to move the star wheel – but we’ve already done that so it’s time to start cutting!
Start cutting!
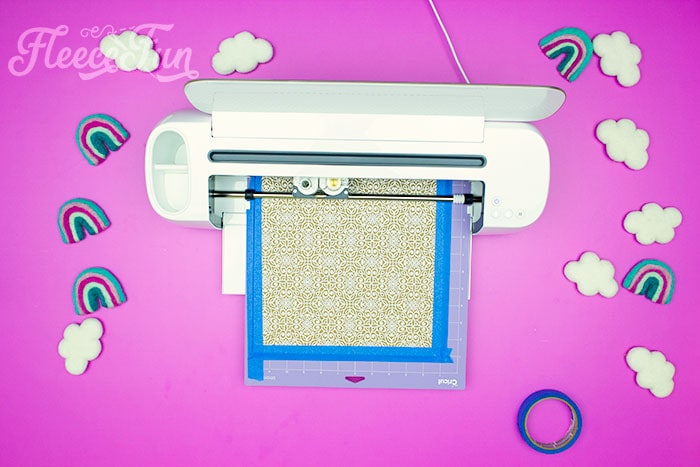
Load the material into the machine and hit the “go” or Cricut button. Unlike the other tools this one makes several passes. The more intricate the cut – the longer it takes to cut out. My advice is keep an eye on the machine – but do other things while it’s cutting. While I’m using the knife blade I’ll work on other projects or clean my studio space. Once it’s done cutting it will ask you if it needs to make more passes on the material. The cut looked good to me so I unloaded that mat.
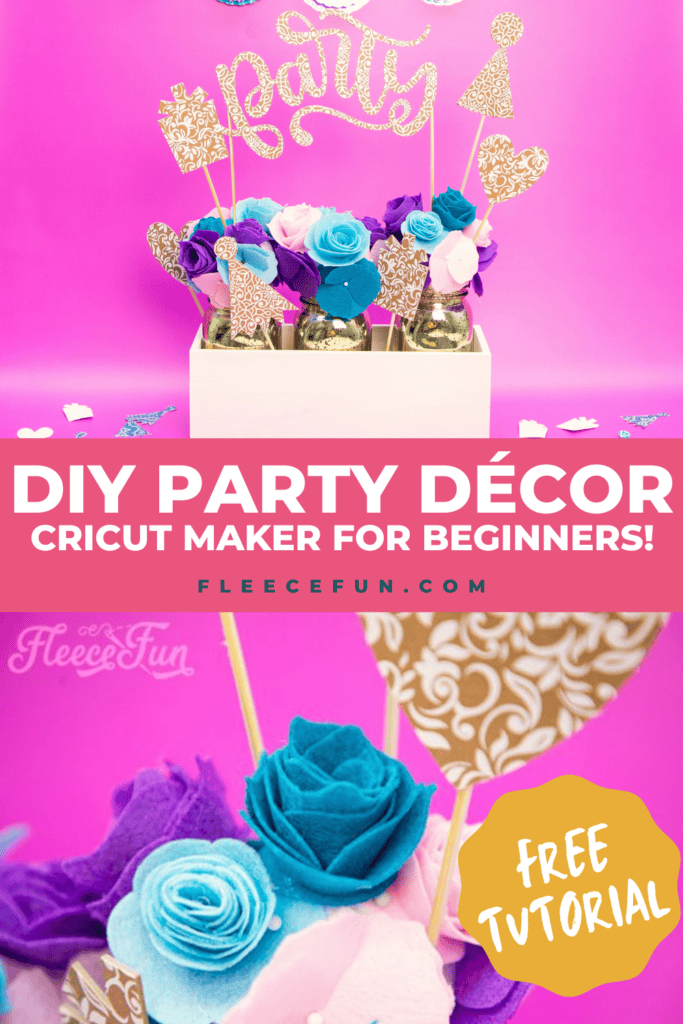
Isn’t that gorgeous?! Now it’s time to bring the centerpiece together and complete this Cricut Maker for Beginners tutorial.
Assembling the Centerpiece
Gather the cut fabric flower pieces and the chipboard pieces. You’ll also want the glue gun, mason jar, styrofoam ball, pins and skewers.
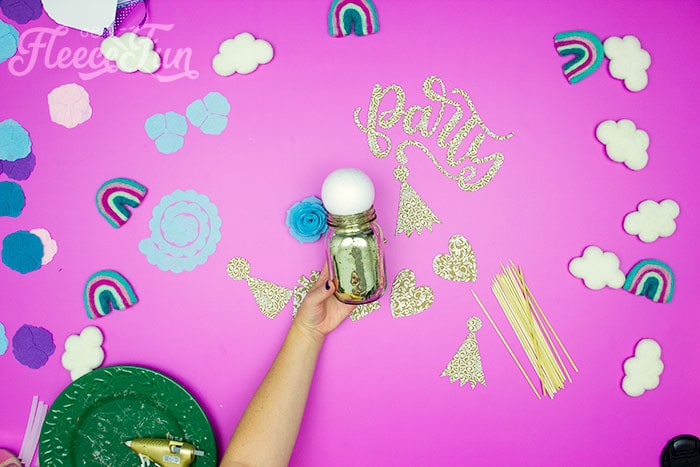
Glue the styrofoam ball to the top of each mason jar.
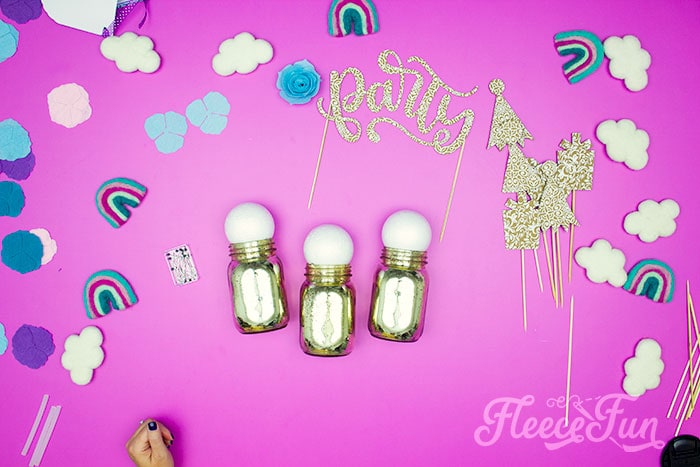
For the Centerpiece we’ll use a total of 3 jars.

Let’s start with the felt flowers.

The poppy’s are easy. there are 2 to a flower, just layer and stick a pin in the middle to place on the ball.
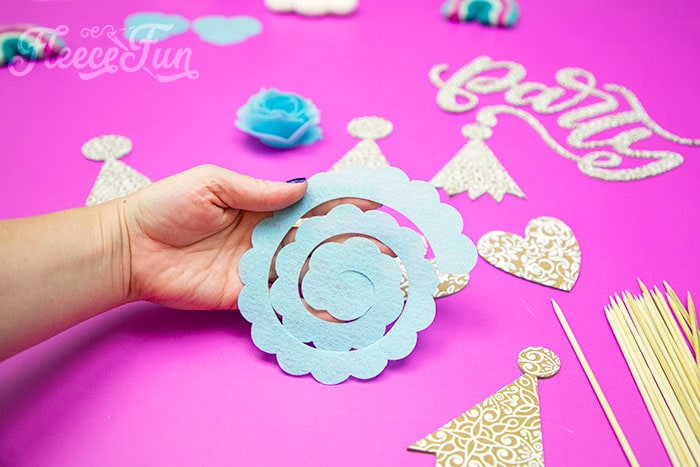
For the spiral flowers – start with the outside of the spiral.
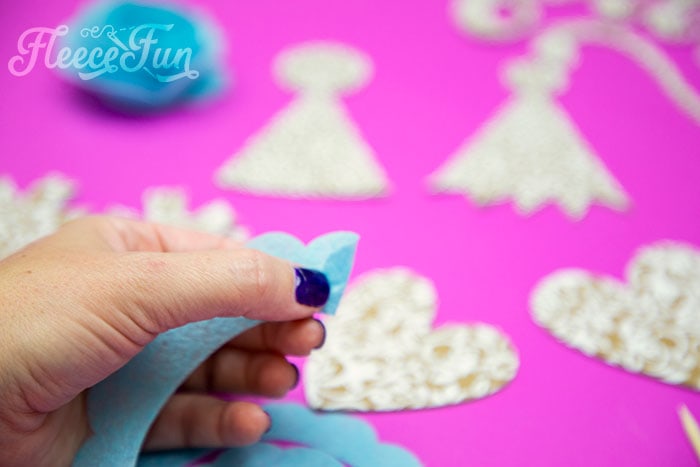
I like to fold the first “bump” in half and glue it so the center is nice and tight.
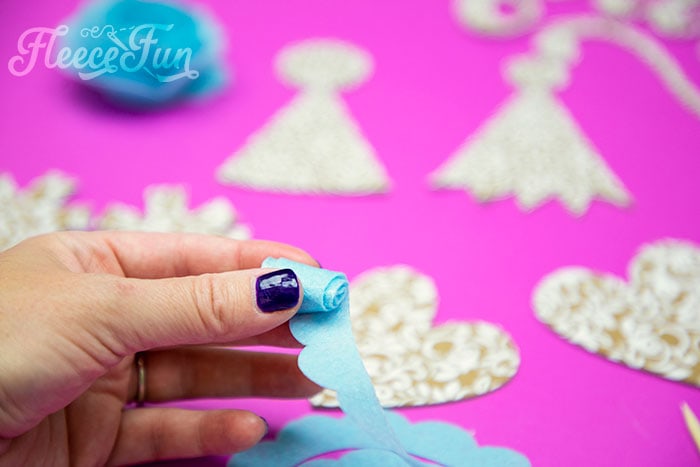
Begin to roll the flower. and continue to roll it to the end.
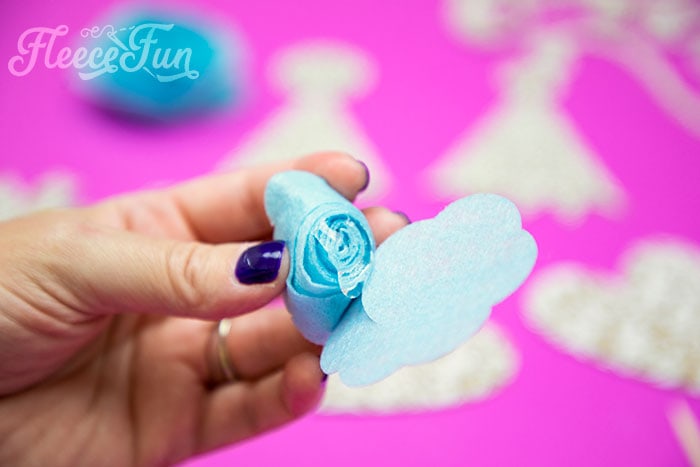
Once you roll it to the circle at the end, place an “x” in hot glue across all the layers on the bottom,
and then sit it on the circle at the end.
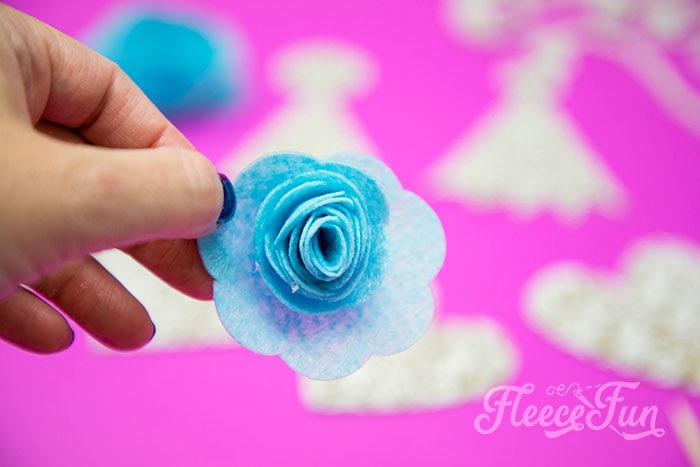
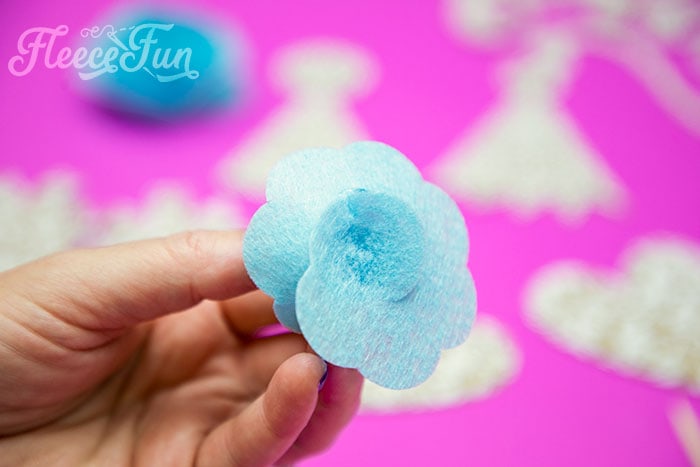
While the glue is still warm you can fluff and tweak the flower a little. Repeat these steps with all the spiral flowers.
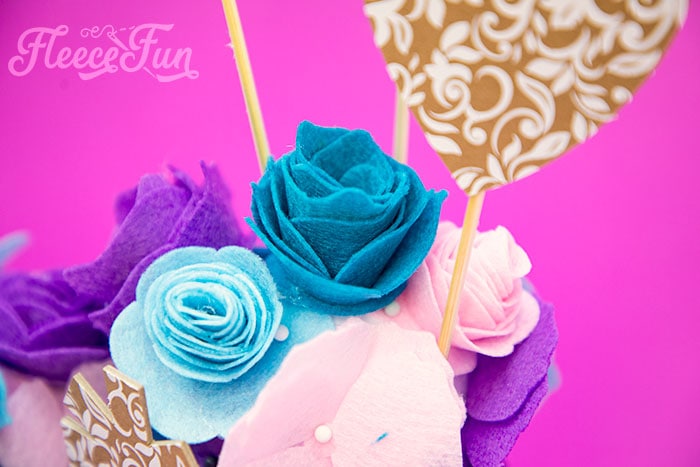
Use the pins to place onto the styrofoam tops of the mason jars. I love to use the pins so I can adjust the flowers as needed.
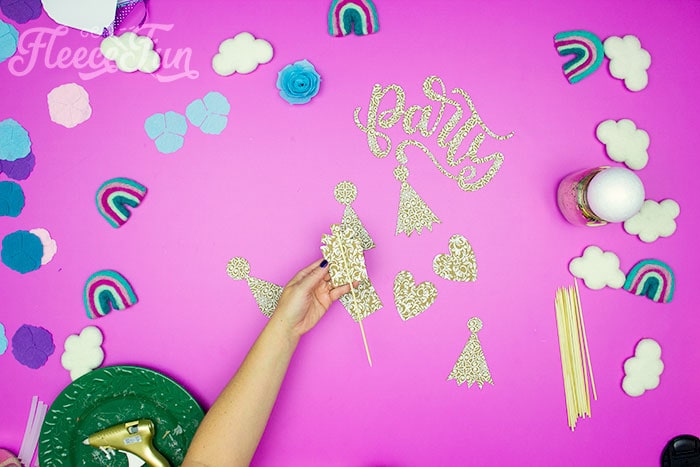
For the Chipboard peices, hot glue the skewers to them.
For the word “party” use two on each side.

Place the jars in the box and then push the skewers into place.
Congrats! you just completed your first big project – Cricut Maker for Beginners. You’ve used a pen, Fine Point Blade, Rotary Blade, and Knife Blade!
More Cricut Crafts & Tips!
- Your Top 3 Cricut Maker Questions Answered
- Cricut Maker Cover Tutorial
- 3 Last Minute Gifts with a Cricut Joy
- How to Use JPEGs to Make a T-Shirt in Cricut Design Space
- 25 Personalized Gift Ideas Using Cricut Tools
- How to Get Started Cutting a Quilt with Cricut
- How to Get Started Quilting with Cricut
- Is It Time to Upgrade Your Cricut Machine?
- Luggage Tag DIY with Cricut
- How to Decorate a Notebook
See More Cricut Projects!
- DIY Pineapple Decor
- Cute Craft Room Trash Can DIY
- DIY Placemats for the Holidays
- How to Sew a Quilt the Easy Way
- See all of FleeceFun’s Cricut Tutorials!
More Party Ideas!
- Pirate Party Invitation Printable
- Rainbow Party Décor Tips!
- Printable Drive-In Theater Candy Label
- Printable Drive-In Theater Large Circles Tickets
- Printable Drive-In Theater Signs
- Pirate Party Centerpieces
- Pirate Party Game: Captain Hook’s Ring Toss
- Pirate Party: Land Lubbers Dry Dock Sign
- 7 Awesome Pirate Party Games (Free Printables)
- Pirate Hat, map and flags free printable Pack
- 3 Last-Minute Gifts with a Cricut Joy
This is great. I just purchased a Cricut. Now I can learn how to use it. Thanks
Yay! You’ll LOVE working with it! Enjoy!