
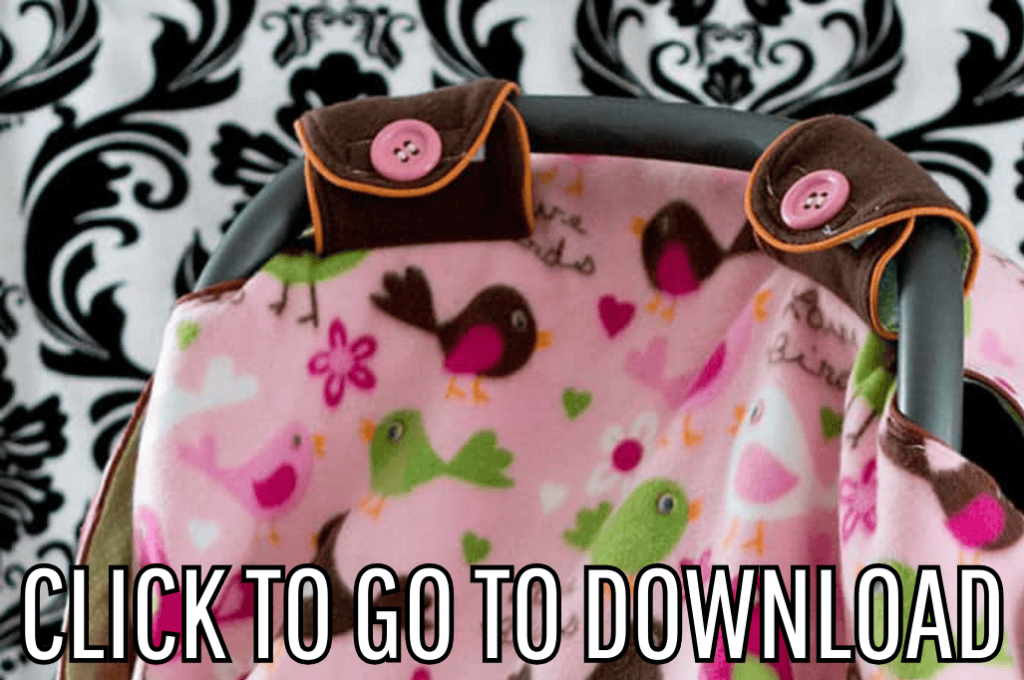
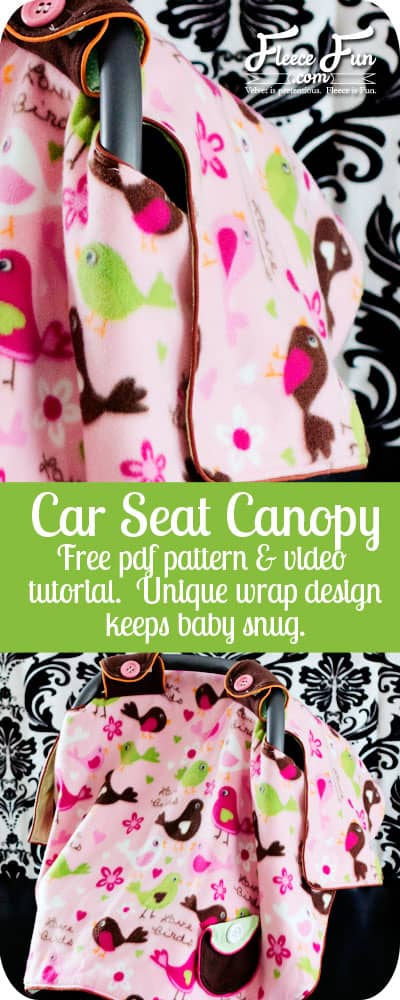
Free Baby Car Seat Canopy Pattern / Tent / Cover How To
This content contains affiliate links or sponsored elements, read our Disclosure Policy.


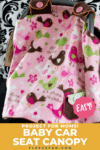


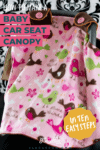

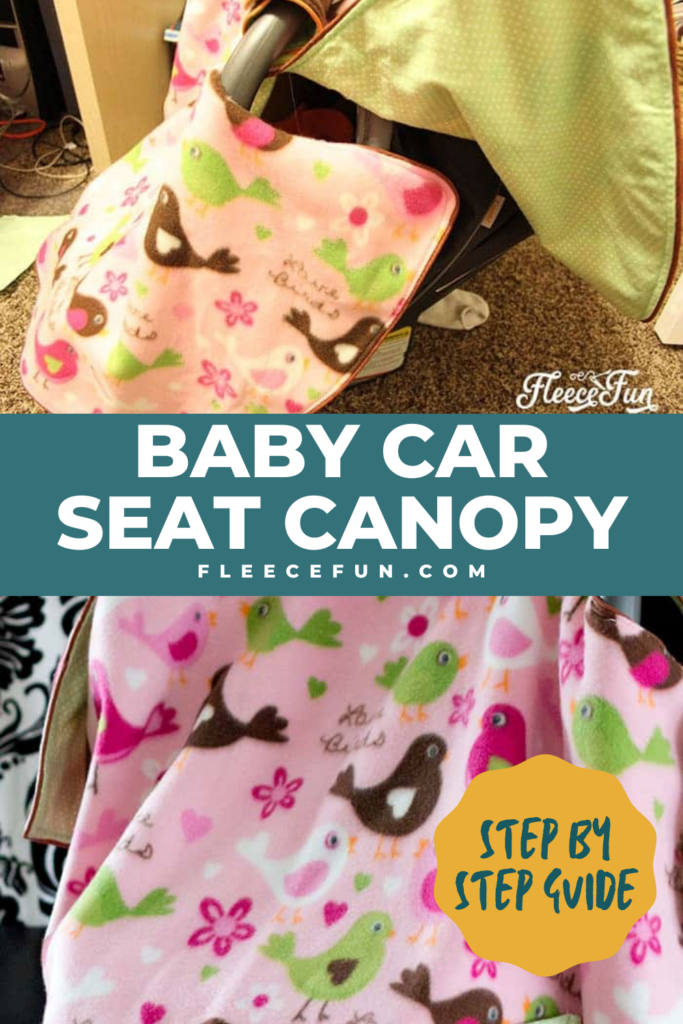
Free Sewing Pattern: You can make a baby car seat canopy or tent! This free baby car seat canopy pattern includes a pdf and video tutorial to walk you through it step by step. With easy to follow written instructions as well.
This free baby car seat canopy pattern is easy to make and is a great shower gift. You can make a beautiful car seat that will survive the washer, and several kids! This can be made from fleece, flannel or cotton fabric. Please be sure to wash flannel and cotton before sewing as it may shrink in the wash. Looking for a Stretchy version of a Baby Car Seat Canopy? You can find that free pattern here.
YOU WILL NEED:
- A printed out version of the Free Fleece Fun Baby Car Seat Canopy PDF (see below).
- 1 and 1/3 yards fleece (a little extra of a different color if you want contrasting straps)
- 1 and 1/3 yards flannel
- 6- 8 inches sew on Velcro
- 5 – 7 yards small cording (3 packages of wright’s – optional)
- Washable cloth marking pen or pencil
- Iron
- extra buttons, ribbon for decorating
- Sewing Essentials (if sewing)
- Get the free pattern here.
Here is the video tutorial, full step by step picture tutorial below.

Free Baby Car Seat Canopy Pattern / Tent / Cover How To
step 1 – Cut out the baby car seat canopy pattern
Assemble the pattern. You can find assembly directions on this page. There is a picture in the download as a reference guide.
Place the line on the fold and cut 1 from the fleece. Be sure to mark the top of the cut out piece with a pin (or mark from washable pen) as the pattern is not symmetrical.
Place the pattern on the flannel lining and cut out again (be sure to pre -wash the flannel before you sew!) Be sure to mark the top of the cut out piece with a pin (or mark from washable pen) as the pattern is not symmetrical.
Cut out 4 of the straps (2 exterior 2 lining). I recommend using the flannel especially on the straps to keep the fleece from stretching. In this pattern I used some brown fleece for a contrasting color on the straps.
Save your fleece scraps! There’s enough left over to make a cute hat and other things for the baby!
step 2 – Begin to sew
If you’re not using cording on the baby car seat canopy pattern skip to step 3. Personally I love how cording looks next to fleece. There’s something about cording that says “pro”. Here is how I sew cording.
I pin the cording in place on the right side of the fabric. Lining the edge of the cording up with the edge of the fabric. I like to start in the middle of the pattern where it comes in.
Using a zipper foot (or a cording foot if you have one), I sew right next to the cording all the way around the cover. (The needle is on the left side of the foot, and the foot is butted up next to the cording)
If you are capable of sewing cording and two pieces of fabric together at the same time – you are awesome, I bow down to you – I can’t. =)
step 3 – Pin the lining to the top of the cover
Matching pattern at the top (remember where I had you place a pin or mark so the pieces could match up?)
Pin right sides together. Pin the fleece and the flannel lining together (cording should be sandwiched between the two).
Leave a gap of about five inches for turning. (Again I like to start and stop in the middle section where is comes in.)
Quick Tip
Pin from the middle of the pattern (where is comes in) out – it will pin better)
step 4 – Sew the top and lining together, turn
If you are not using cording, sew all the way around with a straight stitch with a .5 seam allowance.
With cording, use a zipper foot, butt foot up against cording and sew all the way around – be sure to leave gap open for turning. The tighter, closer you are to the cording the better it will look – take your time to make it look right.
Turn the cover right side out and admire your work!
step 5 – Sew Closed the Gap
You can blind stitch the gap closed by hand…or I just machine stitch it closed, It’s in an inconspicuous spot that will be covered any way – and the machine stitches are stronger and will last longer than my hand stitches.
step 6 – Top Stitch the baby car seat tent
If you are doing the cording – you probably are sick of sewing around the cover – but just one last time. It’s worth it – promise.
On the right side of the top piece of fabric, using your zipper foot butt the right side up against the cording, with the needle on the left.
This will give you some nice top stitching that will make your cording pop. No cording – top stitch .5 inches from the edge of the fabric.
Quick Tip
You’re working with a lot of fabric – so careful that it doesn’t fold up under the needle – I like to pin the cover a little to prevent this from happening.)
step 7 – Make the straps
Follow the cording instruction in step two.
Place right sides of fabric together pin and sew, leaving a gap at the bottom (not the rounded side) for turning of 2 to 3 inches.
Sew, turn, and sew gap shut like you did on the cover.
Then top stitch as you did on the cover.
step 8 – Add the Velcro
Using the guides on the pattern for reference place the “hook” side (the pointy side) of the Velcro on the interior of the strap – sew into place by sewing a straight stitch along the edges, turning at corners (all four sides) of the Velcro.
note
This stitching will be able to be seen on the other side – either use thread that won’t be easily seen or make sure your stitches are nice and straight as they will be seen.
Again using the guides on the pattern for reference place the other side of the Velcro (loop) on the exterior of the strap.
Straight stitch all four sides into place.
step 9 – Sewing Straps onto the baby car seat canopy pattern
Using the baby car seat canopy pattern as a guide, mark the stitching pattern onto each strap.
This is how you’ll sew it onto the cover.
Pin the Straps onto the cover. Make sure the lining fabric is flat underneath.
If you have access to the car seat you are making this for – I recommend that you lay the cover on it to gauge where the straps should go. Otherwise you can put them where I have the straps the picture – with the caveat that all baby car seat are different and what works for one might not work for another.
Sew the straps to the cover.
step 10 – Finishing up the the baby carseat tent!
This baby car seat canopy pattern is different from other baby covers. I don’t like how most just hang from the bar onto where the baby is. This cover is made to prevent that and to stay in place if it’s windy. Just do this final step!
Place you’re amazing looking cover on the car seat if you have access to it.
See how the edges fold over in the picture – with a single pin – pin where the top and bottom meet in the middle.
Using a washable marker pencil draw on the top and bottom where that point is on each side. The mark on the top will be on the interior lining and the mark on the bottom will be on the exterior of the cover.
Sew a small amount of Velcro (about on inch) the hook on the top interior where the mark is – the loop on the bottom exterior of the cover.
Now your little one will be snug as a bug! You could also make this pattern with flannel, or cotton since all the edges are finished. Send me a picture I would love to see your work!
Download the free baby car seat canopy pattern:
I only approve of Adobe reader. By downloading you are agreeing to pattern terms of use. Fill out the form to have it delivered to your inbox.
More Baby Car Seat Covers and Canopies Patterns:
- Stretchy Baby Car Seat Cover Pattern (Free)
- Baby Car Seat Cover or Tent with Window How-To
- No-Sew Baby Car Seat Canopy Tent How-To
- Traditional Basic Fleece Baby Car Seat Cover or Tent Tutorial (DIY)
More Adorable Baby Projects!:
- Bib with Pocket Tutorial
- How to Make a Baby T-Shirt Tutorial (Free Pattern)
- Baby Knit Sundress Tutorial (Free Pattern)
- Monster Softie Pattern (Free)
- Sunshine Softie – Free Baby Toy Sewing Pattern
- ABC Baby Blocks Free Pattern and Tutorial
- How to Make a Pacifier Clip
Hi Angel,
I absolutely love your pattern for the baby car seat canopy. I made one for my own baby, and I’m working on another as a gift for a friend. I’m not really a “seasoned” seamstress, so this comment might seem silly, but the only part I have trouble with is the place where the two large curves come together to form that upside down “U”, towards the side of the car seat handles where it closes up like an envelop. That “U” part is really difficult for me to navigate, and my “U” always ends up looking puckered. Any tips on how to avoid this would be appreciated!
Hi Sadaf,
To keep the fabric from looking puckered there are a few things you can do:
Be sure you pin it well so the fabric doesn’t shift.
Really slow down as you navigate that inner curve.
And finally be sure to snip little slits in the fabric on the curve (taking care not to snip through your seam) when you are finished sewing. when you turn it right side out it will help it lay better.
Other than that, practice makes perfect. Keep up on the sewing and those puckers will disappear! =)
Thank you! That was really helpful.
So I printed the pattern and pages 13 & 14 are on the same page. According to the layout they are supposed to be on two separate pages. I can’t figure out how to fix this and assume they were scanned in that way. I can probably figure it out, but if you could fix it for future use that would be great.
Hi Mandi!
the reason why 13 and 14 are on the same page is because they are partial pages, so I thought it would be better to conserve paper and put them on the same page. Sorry for the confusion.
-Angel
I have a question. I was making the cover using cotton. It’s not wide enough though, did it print correctly? Also, is the top 1?
Hi, i am trying to get the baby car seat canopy pattern but it doesn’t appear that the link is working, or my computer isn’t working right. would you be able to send me the pattern in an email?
Thanks
Hi Regina!
Yes 1 is the top. Sometimes cottons can have a slim width, but I have made this pattern out a cotton several times, so i’m guessing the fabric you chose really shrank in the wash. An easy and quick fix is to just lay the pattern down on the cloth, and instead of worrying about the “place on fold” edge being on the fold, have it hang off the edge of the cloth, and make sure the rest of pattern is on the fabric. The pattern will still work, the cover will just be a little smaller.
Another option is to print the pattern at 90% and see if it will fit then.
Best of Luck,
Angel
What is the final measurement (height & width(of the finished product? The pattern i printed looks really large.
where did you get your cording. i cant seem to find it online. or do you use cord with the wrights bias tape
Hi Anna!
It’s wright’s cording – should be right next to the bias tape at your local store. =)
Angel
its not letting me download the pattern !! help
Hi Olga,
Are you clicking on the pattern envelope? The brown envelope with the picture on it?
– Angel
yes ive tried it many times already ! can i just get it emailed ?
I don’t have a lot of experience sewing so this might be a silly question, but…..
What side do I trace the pattern on the flannel?
What side do I trace the pattern on the fleece?
Thanks!
Hi Seri!
If you’re new to sewing it can be confusing. For this pattern the right side of the fabric ( the colorfulside) will be facing you, however it will be folded so the color ful side should also be touching the counter. Fabric comes folded on the bolt and you will place the pattern on the fold. You will do this the same way for the flannel and the fleece. Typically patterns are not traced, but you pin the pattern to the fabric and cut it that way. There are a few reasons for this method:
1. The pattern won’t shift so you’ll get an acurate cut
2. On more complicated patterns you can keep the labeled pattern peice attached to the fabric until you need it so you know what it is.
Good luck with your project!
Angel
I saw a friend’s carseat cover and had to figure out how to make one myself, so I searched and found your instructions. Love, love, LOVE! Thanks for the video and the great pattern. (The shape and details are MUCH cuter than the one I was trying to copy!) I’m working on my second- did the first for a girl, the second for a boy, both with cotton on one side and minky on the other. Used the scraps to make bibs to match and still have lots left over so I’m going to peruse the other patterns. Thanks again for such a great project that is now my go-to gift! Pics to follow. 🙂 🙂
Eleanor
I printed the pattern and assembled it as you demonstrated in the video. Are you using 60″ fabric or 45″? When I use 45″ flannel, i am an inch short in fabric on the fold side. Is there a way to fix this? Or can I just shorten the pattern by an inch?
Katie,
If it’s shortened an inch it will still work fine.
– Angel
I am making a cover with a directional print and so I was wondering which way to place the pattern on my fabric. Does the smaller section (pages 1-6) cover the back of the car seat or the front?
Page 1-6 will sit on the back of the car seat.
Thanks!
Can you tell me where you got the actual blanket material?? I love the little birds on it!
I got that particular material at JoAnn’s but that was two years ago!
– Angel
Just made this for my little ones car seat. It turned out awesome! It was so easy to make and I’m not a seasoned seamstress either. I can sew a straight line and sometimes that even iffy! Thank you ‘sew’ much for the tuturial. Now I have to go throw the baby in the car seat and go out for a drive so I can try it out! Thanks again!
Thank you so much for sharing this pattern! I was looking for one that the sides wouldn’t be flying up during windy days. This is prefect! I have completed it and it fits great. With your permission I would to like to post pictures on Pinterest and link to your site for anyone interested in making. Thanks again!
As long as you link to me that would be great! So happy you had success.
– Angel
BTW…this was made for my granddaughter’s carseat. My daughter loves it for her lo’s carseat. I’m thinking I might make a lightweight one for spring.
I’ve never pinned anything so not sure if I will get it done. Would love to send you a pic of my final product. The front is ABC no-pill fleece pastel letters on white background. The lining is gray flannel with various sizes of yellow dots
Hello, I can not get the PDF to open, Can you please help.
Thanks in advance.
Robin
should be in your in box. =)
Absolutely love your pattern. I bought an actual Carseat Canopy for my great niece and was disappointed with it but gave it to her anyway. It didn’t seem to cover the carseat very well. I came across your pattern and decided to give it a try and made one for my grandson. I love the way it covers the carseat fully and keeps the wind and elements out. The pattern was easy to follow. I have son and daughter in law have been asked by many people where they got the cover and I have been asked to make a few more covers and now give them away as baby presents.
thank you angel I like your pattern and I made one for my baby boy.
Downloaded this carseat pattern a few months ago. Made two with the flannel and fleece. Both turned out adorable. When my daughter goes places, she is always asked where she got it. I am now making three more for the summer with a lighter flannel and cotton fabric. Thanks for the free pattern.
Hi,
I found this pattern and I think is wonderfull. I’m new sewing so I have a lot of dudes.
the first one is this: Can I make it just with cotton?(Cotton on both sides)
If yes, I would need something to put between the two piece of fabrics?
Thanks a lot!
I’ve made this pattern myself out of cotton and it works great!
i love it!!!!!! my printer did not have enough ink but I still print it out and its all dead colors on the paper now but I managed to make it and put it together , it is very easy to assemble….. thankyou so so much this is incredible, thankyou for your time and effort, all though I washed my fabric before using I bought it at JoAnns and it got really ugly when I took it out of the washer the flannel or the thread of the flannel was coming apart hopefully its still enough fabric to make it. oh and by the way I purchased only 2 yards of cording that I purchased too at joanns but only that much because its way too expensive, where did u buy urs? got mine for 4.99 a yard.
How are you suppose to meet the raw ends of the piping so the white cording doesn’t show? I love everything about the cover and directions but the piping makes me sad.
I opened a small amount of the end of the cording fabric that I am stiching and cut a piece of cord out and then inserted the end of the new cording into the other so the cords but up against each other and the two fabrics overlap, then sew as if it was one piece.
Thank you so very much for posting this pattern. I was exactly what I was looking for. You took all of the hard work and measuring out of the job at hand.
Hugs-
tried to join but never got email conformation to click on…checked junk mail and not there eather! 🙁
I just recieved it! yea! 🙂
Hi i tried downloader the pattern to adobe reader and when i open is says that it is damaged and cant be repaired. What do i do?
Do you place the tabs at an angle or straight to sew onto the cover. I am having a little trouble with placement. Love the pattern. Thanks
I place them straight on if I don’t have access to the car seat. If I do have access to the car seat I try to custome fit the straps ( which might require an angle)
Good luck with your project,
Angel
i cannot get download to work for pattern.
Sent it to you!
Hi Angel, just printed your patern for the carrier canopy and I probably assemble the pattern wrong, when I fold my pattern in two to see if it’s the same all the way around, it is not. One side is shorter by approx 2 inches. Is this the way it is suppose to be. thanks and I can’t wait to put it all together
Hi Diane.
The pattern is not perfectly symmetrical – you’ve assembled it correctly.:)
THANK YOU FOR YOUR PATTERNS OF THE CAR SEAT COVER. I made one for my grandson and for my two new born niece was was 12/1/13 and other one was 12/12/13 I love your patters. i starting to learn HOW sewing with yOUR EASY PATTERS
Hello! I just wanted to send a note to anyone who is interested in this project but is a little discouraged, please don’t be! I am not a seasoned sewer at all! I woke up one day and decided that I wanted to sew things (granted I was 7.5 months pregnant and that may have been a part of my nesting hahahah) – I sewed a couple blankets and then I saw this and thought ‘what the heck – give it a try’ – honestly, the canopy turned out beautifully! I watched Angels video a few times and the pattern was super easy to follow . Just go slow around those corners 🙂
Awesome tutorial Angel! I LOVE LOVE LOVE your site and you have empowered me to concur many projects that look difficult but you have simplified. This one is a great example of that! For beginners – definitely give it a shot!
xo
I used your awesome pattern to make one as a gift for a friend. Only now, I wish I was having another wee little one so I could make one for myself!! I love it that much!! I tweaked it only a little… Used buttons instead of Velcro. And added the straps to both sides so that its reversible! Love it! Thank you for the pattern! I wish I could post the pics here… Can I email em to ya?
Hi Becca,
You are of course welcome to send me a picture of your creation! Also I just started a flickr group where people can share their photos as well – http://www.flickr.com/groups/fleecefun/
I made this canopy for my first grandchild, and it turned out beautifully. I am planning to make two more in the near future. I am a stickler for detail, so I really appreciate all of your wonderfully detailed instructions, both in your video and in your written instructions accompanied by your pictures. The pattern was so easy to assemble after I printed it. I made my own binding using 8/32 cotton cording and cutting bias strips from a contrasting color. I got nervous when I washed my flannel and it seemed too narrow for the pattern, but after I gave it a good pressing, it seemed to “spread out” so the pattern just fit. ( Pressing works wonders at times. ) The only deviation from the directions was to sew a longer velcro strip along the edge of the rear flap and also where this spot meets the front flap. I thought it would hold it a bit more securely. Thanks for so generously sharing your design and outstanding instructions.
Jean,
Thanks for sharing your tips!
-Angel
I made one of these for my son. I live in the high dessert and I loved how this held the cover in place in the wind. Now I am making a warm fleecy one for my baby due in the next two weeks.
Angel, I love your pattern. I was wondering if there was any sort of average area to put the velcro to make the envelope. My grandbaby is due in 6 weeks and is 1000 miles away. Because we live in a smaller community the car seat she has choosen is unavailable to me. I have gone to Target and tried it on their car seat but was curious if you had an general approximation!
Thanks, Penny
Hi Penny,
I would say about 4 to 6 inches in from the curved in section in the middle would be a good rough estimate. Congrats on the grandbaby!
Thank you for the pattern I just made this cover with bug fabric and it turned out awesome. The detailed directions are easy to follow and with the pattern it’s super easy to make. I only wish I could post a picture of it to show it off : )
LOVE, LOVE, LOVE this pattern! I just made this using cotton with light weight batting for the cold winter to come, I also made it reversible. This pattern is super easy and very functional, the how the side fold and close.
I love this pattern. My mom made one for me when I had my little man a couple years ago. I just made one for a friend this weekend. I posted pictures of both of them on my blog today if you want to check them out. Thanks for the free pattern. This cover is seriously awesome. Great work.
Thank you for this amazing pattern! I’ve had so many compliments on the cover. It sits like a flared skirt. I’m going to take a picture of it and post it on Pinterest with a link to your tutorial (hope that’s ok).
I just found this pattern and am going to make it for my daughter, who is expecting the first grandchild.
What do I print it out at? 100% When I download it prints at 67%
thank you
It needs to print true to size at 100% – 67% is big difference. Make sure that “fit to page” is NOT selected.
question, the print out above do I suppose to print in on Regular sized paper?
Yes 8.5 by 11 inch paper
Would this work on a baby trend car seat?
Thank you
Hi,
I’m sorry I am not familiar with that brand. I would assemble the pattern and lay it over the seat to test it.
I made this pattern for a dear friend who welcomed twins in February… during our Michigan Winter. I used fleece and flannel in coordinating colors. She was so happy to have a warm and cozy cover and also a privacy shield. She has shared that the compliments continue wherever she goes. Thanks a bunch for this great pattern. I’m considering making one of cute nursery fabrics for spring.
This is a great idea for a free baby car seat canopy pattern! I love the fleece fun fabric!
This pattern is absolutely adorable! I love how cozy and practical it looks for our little ones. Can’t wait to try it out—thank you for sharing such a wonderful DIY project!
I absolutely love this free baby car seat canopy pattern! The step-by-step instructions are clear and easy to follow. I can’t wait to make one for my little one. Thank you for sharing such a wonderful project! ❤️
I absolutely love this baby car seat canopy pattern! The step-by-step instructions are clear and easy to follow. Can’t wait to make one for my little one—such a stylish way to keep them cozy and protected! Thank you for sharing this!
I absolutely love this free baby car seat canopy pattern! The step-by-step instructions are super easy to follow, and the fleece makes it so cozy for my little one. Can’t wait to try it out and customize it with some fun prints! Thank you for sharing such a wonderful resource!
I absolutely love this baby car seat canopy pattern! It’s so cute and practical, plus the PDF makes it super easy to follow along. I can’t wait to try it out with some colorful fleece for my little one. Thank you for sharing such a wonderful project!
I absolutely love this idea! The baby car seat canopy looks so cozy and stylish. The PDF pattern is super helpful, and I can’t wait to try making one for my little one. Thank you for sharing this fantastic project!
I love this baby car seat canopy pattern! The fleece material is such a cozy choice, and I appreciate the free PDF. Can’t wait to try making one for my little one! Thank you for sharing this adorable DIY project!