Ultimate Ladybug Cookies

This content contains affiliate links or sponsored elements, read our Disclosure Policy.

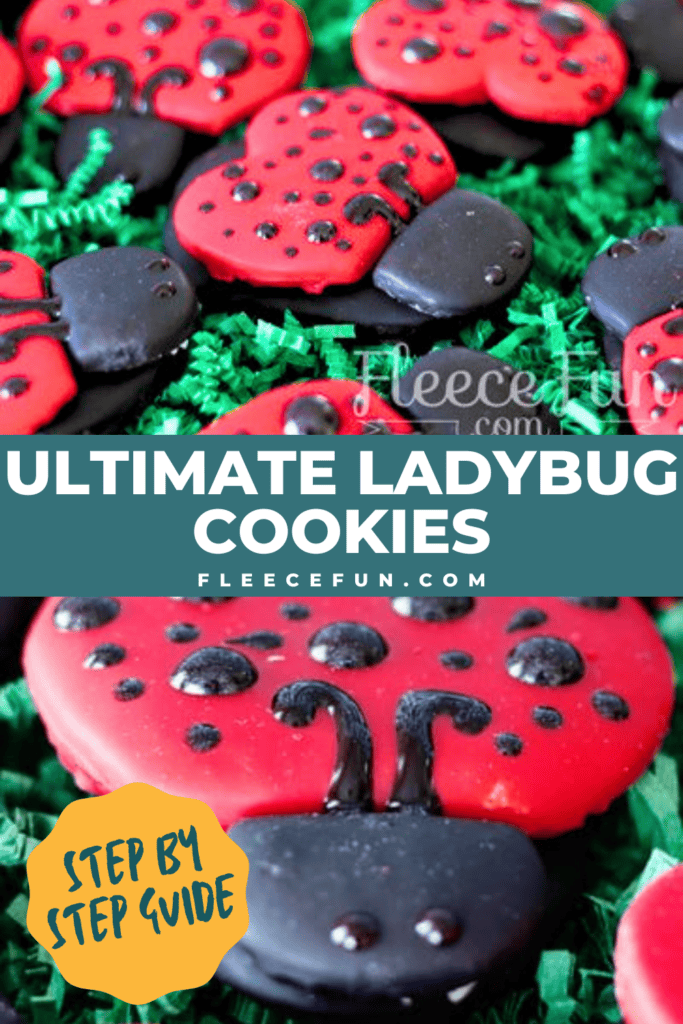
A friend of the family was throwing a Ladybug-themed family. She asked my husband (who’s known for his love of baking) to make ladybug cookies. So we took to the web and to Pinterest…. and couldn’t find anything we liked! So we put our heads together and came up with what is the Ultimate Ladybug Cookies.

It takes a little work, but the results speak for themselves. So here’s how to make them, step by step.

YOU WILL NEED:

  • Egg shaped cookie cutter
  • Small tulip cookie cutter
  • Heart shaped cookie cutter
  • Sugar cookie dough
  • Royal icing
  • Red food coloring
  • Black Food coloring
  • Decorating gel (we used black sparkling gel)
  • Butter cream frosting for dirty icing.

Step 1 – Prep the cookies shapes

Prep the cookie shapes. These ultimate ladybug cookies aren’t just treats… they’re little showstoppers. Bright red, perfectly spotted, and full of that “you made these?!” magic. We started making them for a sweet family friend, and now they’ve become one of our most-requested desserts. Follow the step-by-step tutorial and bring these charming ladybugs to life in your own kitchen.

For each lady bug cookie, you will need the following shapes cut out:

Cut the shapes out.

1 egg shape, 1 tulip shape, with the top cut off, and 1 heart shape with the point cut off.

Bake the cookies according to the recipe using. These ultimate ladybug cookies aren’t just treats… they’re little showstoppers. Bright red, perfectly spotted, and full of that “you made these?!” magic. We started making them for a sweet family friend, and now they’ve become one of our most-requested desserts. Follow the step-by-step tutorial and bring these charming ladybugs to life in your own kitchen.

Bake the cookies according to the recipe you are using. Once baked, allow the cookies to cool completely before decorating an ultimate ladybug.

Step 2 – Painting the LAdybug cookies

Preparing the royal icing. These ultimate ladybug cookies aren’t just treats… they’re little showstoppers. Bright red, perfectly spotted, and full of that “you made these?!” magic. We started making them for a sweet family friend, and now they’ve become one of our most-requested desserts. Follow the step-by-step tutorial and bring these charming ladybugs to life in your own kitchen.

Prepare and tint the royal icing to the desired colors.

Painting the egg-shaped cookies. These ultimate ladybug cookies aren’t just treats… they’re little showstoppers. Bright red, perfectly spotted, and full of that “you made these?!” magic. We started making them for a sweet family friend, and now they’ve become one of our most-requested desserts. Follow the step-by-step tutorial and bring these charming ladybugs to life in your own kitchen.

Using clean, washed sponge brushes, paint the egg-shaped cookies and the tulip cookies with black frosting.

Painting the heart-shaped red.

Paint the clipped heart-shaped cookies red.

Placing the cookies on wax paper. These ultimate ladybug cookies aren’t just treats… they’re little showstoppers. Bright red, perfectly spotted, and full of that “you made these?!” magic. We started making them for a sweet family friend, and now they’ve become one of our most-requested desserts. Follow the step-by-step tutorial and bring these charming ladybugs to life in your own kitchen.

Place the cookies on wax paper and allow them to dry completely. Once the tops have dried, gently flip the cookies over so any frosting that has leaked underneath can fully dry as well.


Step 3 – Assemble the ladybug cookies

We’re going to use buttercream icing as the “glue” for the ultimate ladybug cookies.

Assembling the ladybug cookies. These ultimate ladybug cookies aren’t just treats… they’re little showstoppers. Bright red, perfectly spotted, and full of that “you made these?!” magic. We started making them for a sweet family friend, and now they’ve become one of our most-requested desserts. Follow the step-by-step tutorial and bring these charming ladybugs to life in your own kitchen.

Start with the egg cookie as the base of the ladybug.

Placing a small drop of frosting on the back of the heart.

Place a small drop of frosting on the back of the heart cookie and attach it to the egg base.

Adding the frosting to the back of the tulip cookie. These ultimate ladybug cookies aren’t just treats… they’re little showstoppers. Bright red, perfectly spotted, and full of that “you made these?!” magic. We started making them for a sweet family friend, and now they’ve become one of our most-requested desserts. Follow the step-by-step tutorial and bring these charming ladybugs to life in your own kitchen.

Next, add frosting to the back of the tulip cookie and line up the flat edge with the heart, then press it onto the egg base.

Allow the frosting to set.

Allow the frosting to set.

Step 4 – Decorating the lady bug

decorating the ladybug cookies. These ultimate ladybug cookies aren’t just treats… they’re little showstoppers. Bright red, perfectly spotted, and full of that “you made these?!” magic. We started making them for a sweet family friend, and now they’ve become one of our most-requested desserts. Follow the step-by-step tutorial and bring these charming ladybugs to life in your own kitchen.

Use decorating gel to carefully add the eyes, antennae, and spots to your ladybug cookie.

These ultimate ladybug cookies aren’t just treats… they’re little showstoppers. Bright red, perfectly spotted, and full of that “you made these?!” magic. We started making them for a sweet family friend, and now they’ve become one of our most-requested desserts. Follow the step-by-step tutorial and bring these charming ladybugs to life in your own kitchen.

Take your time and add small details to bring your ladybug to life.

Allow the gel to set completely.

Once finished, allow the gel to set completely.

Completing the cookies. These ultimate ladybug cookies aren’t just treats… they’re little showstoppers. Bright red, perfectly spotted, and full of that “you made these?!” magic. We started making them for a sweet family friend, and now they’ve become one of our most-requested desserts. Follow the step-by-step tutorial and bring these charming ladybugs to life in your own kitchen.

Now you have the ultimate ladybug cookies, ready to display or enjoy!

LOVE THIS ULTIMATE LADYBUG COOKIES? SEE MORE FOODIE FRIDAY SPECIALS:

MORE DELICIOUS RECIPES:

how to make a ladybug cookie tutorial

Leave a Reply

Your email address will not be published. Required fields are marked *