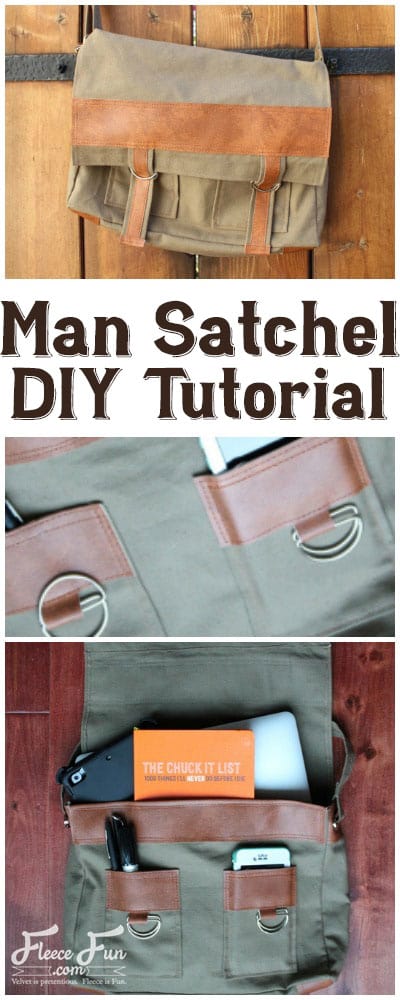
How to make a Man Satchel DIY tutorial
This content contains affiliate links or sponsored elements, read our Disclosure Policy.
Hi everyone! My name is Alicia and I am usually over on Sew What Alicia sharing sewing tutorials! I am so excited to be sharing a tutorial, How to Make a Man Satchel DIY, here on Fleece Fun with you so you can have a handmade holiday even for the men in your life (this could totally be for a gal too!) Bags can be so intimidating but with a little patience you can create this satchel that will have them thinking you bought it at the store!

YOU WILL NEED:
Supplies:
- 1 yard faux leather
- 1.5 yards canvas
- 4 D Rings
- 2 Grommets
- 1 Adjustable Slider
Fabric Cuts:
- From the canvas cut:
- (1) 14″ x 10″
- (2) 3″ x 10″
- (1) 3″ x 14″
- (2) 5″ x 6″
- (2) 3″ x 7″
- (2) 2″ x 54″
- From the leather cut:
- (2) 2″ x 4″
- (4) 2″ x 3″
- (2) 3/4″ x 7″
- (2) 1″ x 4″
- (2) 1″ x 2″
- (1) 2.5″ x 13.5″
- (1) 4″ x 13.5″
How to Make a Man Satchel DIY Tutorial.
Step 1 – Make the exterior pockets

We will start with the front of the satchel. We are going to add two pockets. Grab your two 5×6 pieces of canvas. Press the edges under 1/2″.

Now grab the leather strips that measure 2×4 and 1×4. Use the small strip to attach the D-rings. Pin it in place tucked under the bigger strip. Top-stitch around the four edges of the 2×4 strip.

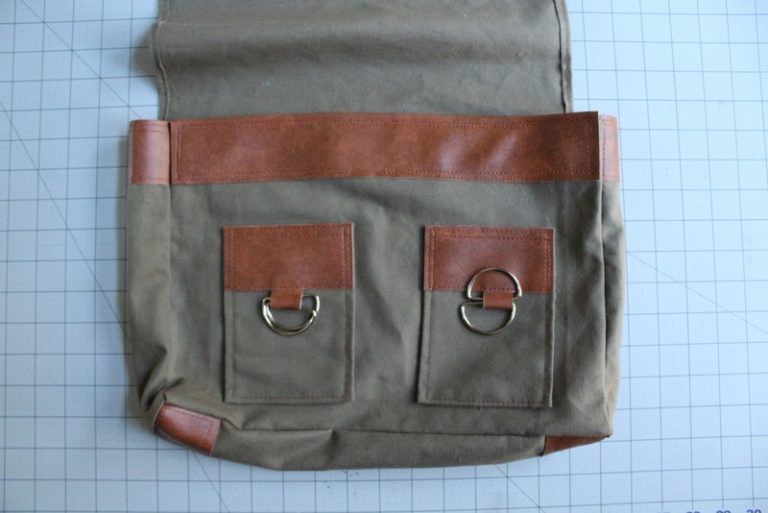
Repeat the steps with both pockets. It should look like the picture above.
Now line the pockets up on the front of the 14×10 canvas piece and top stitch around three edges, leaving the top open to serve as the pocket.
Step 2 – Add the sides and Bottom pieces of the Man Satchel DIY

Next grab the 3×10 strips of canvas and two of the 2×3 pieces of leather. Top stitch the leather onto one end of each strip.

Place one of these on either side of the front piece with the pockets. The leather should be at the top.

Sew these in place using a 1/4″ seam allowance.
Place the remaining 2×3 pieces at either end of the 3×14 strip. Top stitch them in place.

Then line up the strip along the bottom of the front piece, face down.

You will sew down the short edge along the long edge and then up the other short edge to attach all three sides of the bottom strip.
Step 3 – Attach the side/ top flap

Next line the entire piece you just created up with the 14×20 piece. Again sew down, across, and up to attach it along all three edges of the front piece.

Press the raw edges, or pin, of the flap under 1/4″ and top-stitch these seams in place.
Step 4 – Add leather trim

Take the 4×13.5 strip and fold it in half to cover the remaining raw edge of the front piece. You will fold it directly in half and top stitch around all 4 sides.
It should look like this.
Step 5 – Complete the Man Satchel DIY

Take your 3×7″ strips. Press the edges in until they meet. Then grab your 3/4×7″ leather strips and top stitch them in place on top of where the canvas meets.

Use your 1×2″ tabs and fold it over the end to finish the edge of each strip.

Now on the front flap of the satchel you will line up your 4×13.5″ strip a few inches up from the bottom edge. Pin the strips you just created under the bottom edge of the leather strip. Carefully line them up so that they can be pulled through the D rings. This will be the closure for the bag so take care. Top-stitch the 4″ strip in place around all 4 sides.

Add grommets on either side of the bag. Use the leather strip on the top of each side strip to add stability for the grommet.
Step 5b – Make a Strap
The last step is to create a strap. I made a 1″ wide strap because that is what my slide adjuster would accommodate. Sew your two 2×54″ strips together to create a really long 108″ish strip. Then use the same method as before of pressing the edges in until they meet in the middle. Then use a zig zag stitch to pull the sides together. You could also use the tube method to create the strap. Attach the strap and the slide adjuster to create an adjustable strap.
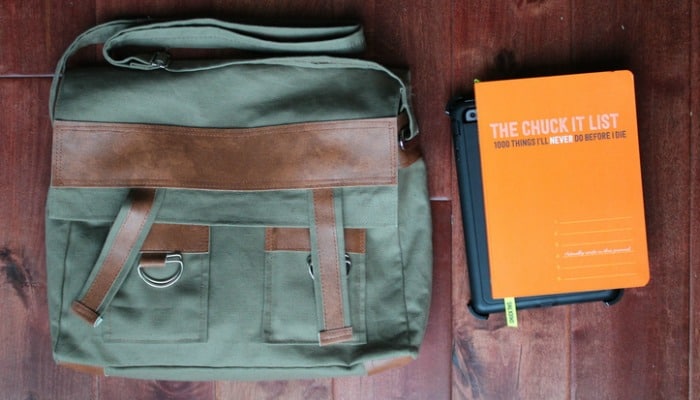
That is it! Project complete. A few notes, you could do a set length strap and not use an adjuster but I wanted the Man Satchel DIY to be adjustable so it could be worn over the shoulder or as a messenger bag. This would also allow for a thicker strap since you wouldn’t have to put it through a slide adjuster that restricts the width.

Thanks for letting me share these Sharpie home décor projects with you! You can find me over on Sew What Alicia sharing sewing tutorials and other great sewing tips!
Connect with Sew What Alicia
Facebook // Pinterest // Instagram
Other Free Bag Patterns:
- All of the Free Bag and Purse Patterns available
- How to Make a Binder Pouch Tutorial
- Pokeball Toddler Backpack
- Pumpkin Tote Bag
- No Sew Hobo
- The Blogger Bag
- Leather Tote Bag
- Quick Sew Hobo
- Wine Bottle Gift Bag
- The Easy Book Bag
- Diaper Bag Tutorial
- Shave Kit Case
- The Tablet Cover
- Quilted Leather Clutch
- Little Purse Tutorial
- Child Sheep Purse Tutorial
- Drawstring Backpack Tutorial
- Sleeping Bag Pack