
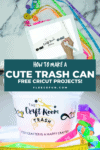
Cute Trash Can DIY (Craft Room Decor)
This content contains affiliate links or sponsored elements, read our Disclosure Policy.
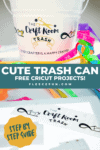

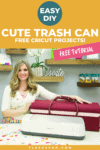
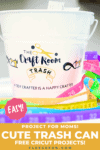
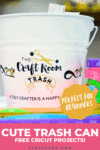

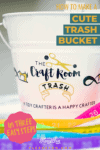
I love how this cute trash can turned DIY out! It’s really fast and fun to make. Also, it’s good for me to have things around that keep my craft room tidy. It’s one of things I’m really working on in my newly remade craft/sewing space – you read more about that here.

I wanted a small trash can that I can have next to me on my work surface, that I can just put scraps/ thread/ in easily. Since it was going to be on my work surface, I want it to but cute because I didn’t go through all the work of redoing my space to have it ugly again!
The great part about this project is that you can size the art to work for whatever trash bin you want. It’s easy to do in Cricut design space.
YOU WILL NEED:
- Cricut Maker or other Cricut Machine
- Fine Point Blade
- StandardGrip Mat
- Permanent Vinyl ( I used black, and glitter gold)
- Transfer tape ( for the glitter vinyl you will need to use the StrongGrip transfer tape)
- Weeding Tools
- BrightPad
Cute Trash Can DIY tutorial:

Step 1 – Cut out the Vinyl
Using the design space file cut out the vinyl.
I opted to use black and glitter gold Permanent Vinyl –
but you can use any color that you want.
Step 2 – Weed the Vinyl and Add the Transfer Tape
Once everything is cut out with the Cricut Machine, weed the vinyl.
Then add transfer tape.
Quick Tip
If you use the glitter vinyl be sure to use the strong transfer tape, but don’t use the strong transfer tape on the regular vinyl! Also if you choose to cut out 2 of the logo, just reuse the transfer tape.
Step 3 – Apply the Vinyl to Your Cute Trash Can DIY
There are layers to this trash can logo, so there’s a specific order that you will want to apply the vinyl.
Apply the largest grouping to the trash can first.
This is the grouping that has the wording on it.
Once that’s added, put on the scissors, be sure that the strong grip tape doesn’t pull up the vinyl you just put on, so tip the tape closer to the scissors.
Next add the ribbon around the trash.
And then the two sewing machine inserts.
Finally add the “A Happy Crafter..” wording below.
Take some time to make sure that the vinyl is smooth and adhered to the trash can.
That’s it you now have a cute trash can for your craft space!
like this Cute Trash Can DIY? see more More tutorials for Organizers!
- Origami Fabric Basket Tutorial
- IKEA Fabric Stool
- How to Make a Binder Pouch Tutorial
- Ribbon Book Mark
- Sewing Machine Mat Tutorial
- Craft Room Hanging Organizer Tutorial
- How to Make a Giant Pegboard for Your Craft Room
- Cricut Maker Cover Tutorial
- How to Make a Pin Cushion Tutorial (Bracelet Style)
- Make Giant Buttons Wall Decor
- Tips on How to Paint Stripes on Walls
- See all of our Organizer Tutorials
fun Cricut DIYs for every room!
- DIY Pineapple Décor
- DIY Felt Flower Art
- Valentine Cozy Home Sign DIY
- St. Patrick’s Day Upcycle Book Craft
- Patriotic Pinwheel Wreath DIY
- DIY Disney Savings Jar
- St. Patrick’s Day Ombre Shadow Box
- DIY Sewing Room Décor
More Cricut Projects!
- Cricut Maker for Beginners: Easy Party Decor
- Your Top 3 Cricut Maker Questions Answered
- DIY Placemats for the Holidays
- How to Sew a Quilt the Easy Way
- See all of FleeceFun’s Cricut Tutorials!