
Diy Felt Flower Art That’s Easy and Beautiful
This content contains affiliate links or sponsored elements, read our Disclosure Policy.


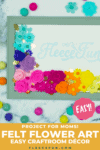


I love the look of this DIY Felt Flower art. It’s happy fun and when combined with HTV on canvas makes a fun and interesting piece of art. I opted to use my website’s logo for the art, but really it can by anything you want it to be.
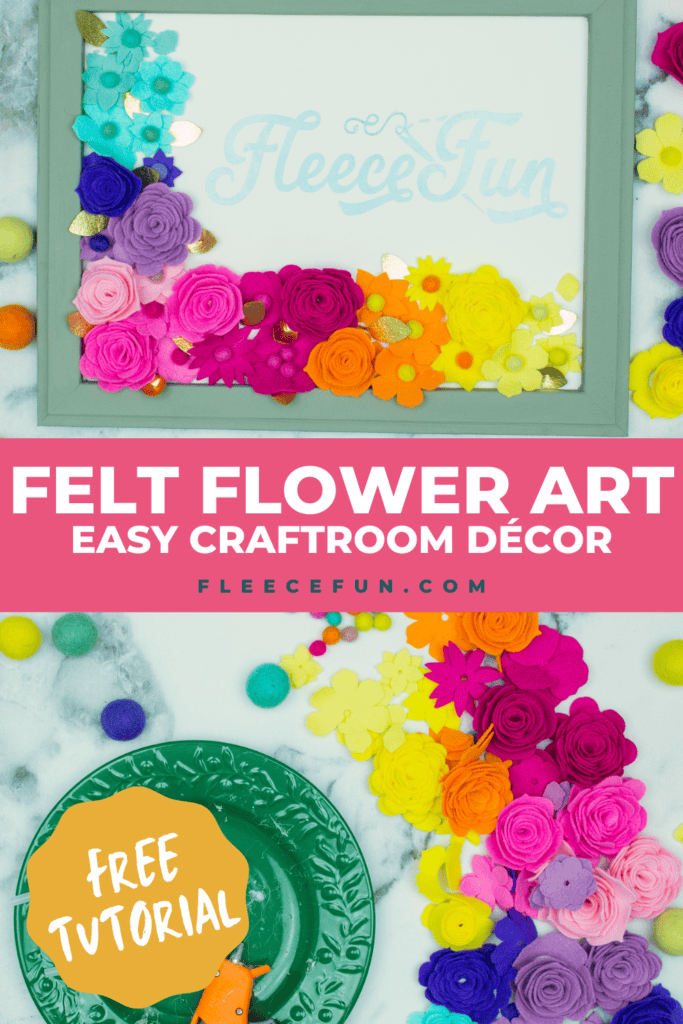
There is so much art in Cricut Design space, that I’m sure you’d have no trouble making this for a wedding, home décor or party! I made this as Craft room décor for my sewing room makeover. I love how it turned out.
YOU WILL NEED:
- Cricut Maker
- Rotary Blade
- Finepoint Blade
- EasyPress, EasyPress Mat
- Reverse Canvas (I found mine at Michael’s)
- Felt – I used the “Pot of Gold”collection by Benzie Design
- Small felt pom poms I used these
- Heat Transfer Vinyl (HTV)
- BrightPad
- Access to Design Space
- Weeding tools
- Glue Gun and glue sticks
- Paint (for the frame)
- Paintbrush
- Smart phone (to make it easier)
- FabricGrip Mat
- LightGrip Mat
Diy Felt Flower Art Tutorial:

Step 1 – Cut out all the felt flowers (this takes a little time)
Place a large sheet of felt on the FabricGrip mat. Using the file I have set up for you in Design Space, Cut out all the fabric flowers. I have them color coded for reference. It takes a little while to cut it all out, but is would take a heck of a lot longer to do it by hand!
Step 2 – Cut out the HTV
Using a LightGrip mat cut out the HTV.
Next, using your BrightPad and weeding tools, weed away the excess.
Set aside.
Step 3 – Paint the frame
Paint it the color you desire (or leave raw) set aside to dry.
Step 4 – Assemble the Felt Flowers
I prefer to use a glue gun for this, but felt glue will also work. Begin to assemble the felt flowers.
Some flower’s require winding. Once they are wound you glue the circle at the end to the bottom.
Other felt flowers you build.
Taking the smaller piece and putting it on top.
I chose to finish some with a felt ball for interest.
Step 5 – Arrange the diy felt flower art
Once all the felt flowers are assembled, get a general idea of how you want them to flow.
Step 6 – Plan the layout for your diy flower art
Now it’s time to figure out the placement of everything before it’s all glued down/ ironed on. Layout the canvas and the frame. Place the vinyl. Mark with a pencil each of the corners on the canvas, so when you go to glue one you know how it was sitting.
Arrange the fabric flowers how you think look best. With your phone take a picture, so you can recreate it again.
Step 7 – Iron on the HTV
Clear the canvas of everything except the HTV.
Iron it on using the EasyPress (by the way the mat – totally worth the investment, it’s made my projects better). Be sure to use the recommended setting for canvas the a HTV you are using
Step 8 – Bring it all together to complete the DIY Felt Flower Art.
Now that the HTV is on, It’s time to bring all those elements together!
Using the pencil marks as guides glue the frame to the canvas.
Using the picture you took as a reference, begin to glue the felt flowers into place.
Fill in with the flowers until your DIY Felt Flower Art is finished!
I love how this gives a great pop of color in my sewing space and I love the dimension and texture that the flowers give. What would you decorate your frame like? Would you use similar colors? Let me know in the comments below.
How do you make homemade felt flowers?
Making felt flowers is a just a matter of deciding on a shape and , cutting and layering the felt. You can achieve this by using rolled spirals for tight looking roses. You can cut star shapes and layer them for a different look. It’s just a matter of playing around with the the felt to get the look you want if you don’t want to use the templates in Cricut Design Space.
How do you make big felt flowers for your art?
To make really big felt flowers, you’re only limited by the size of the fabric and your imagination. If you’re using a cricut the maximum width is 11 inches. You can of course make them bigger if you choose to cut them by hand. However the bigger the flower the “floppier” it will be giant flower work better from card stock and stiffer material for this reason.
How do you make a felt flower wreath?
It’s pretty much the same principles as explained in this tutorial only you use a wreath for your base instead of a frame.
How do you make diy felt flowers without sewing?
While you can sew felt flowers together I prefer using a hot glue gun. The hot glue set fast making it easier to prevent the flower from unrolling and since it’s clear can be easily hidden. Basic white glue also works great with felt, but you will need to hold things in place longer while it dries/ sets.
How do you cut flowers out of felt?
The easiest way is to use a Cricut Maker. If that’s not an option there are a few things you can do to make your felt flowers look as nice as possible. Use SHARP scissors. Lightly trace the pattern onto the felt rather than cut around a pattern or template. Take your time cutting to make the edges look nice.
You might like these fun Cricut DIYs for every room!
- DIY Pineapple Décor
- Cute Craft Room Trash Can DIY
- Valentine Cozy Home Sign DIY
- St. Patrick’s Day Upcycle Book Craft
- Patriotic Pinwheel Wreath DIY
- DIY Disney Savings Jar
- St. Patrick’s Day Ombre Shadow Box
- DIY Sewing Room Décor
More Cricut Projects!
- Cricut Maker Cover Tutorial
- 3 Last Minute Gifts with a Cricut Joy
- Acorn Template (Free JPEG & PDF)
- DIY Custom Sewing Labels
- How to Make a Cute Craft Trash Bucket
- See all of FleeceFun’s Cricut Tutorials!
More Flower Projects:
- DIY Fabric flowers
- Felt Sunflowers
- No sew Fleece Flower
- Giant Paper Sunflower
- How to Make a Flower Fascinator