
Cricut Maker Cover Tutorial Tips and Tricks
This content contains affiliate links or sponsored elements, read our Disclosure Policy.


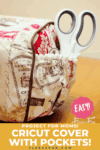

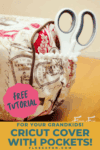
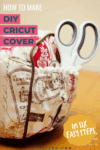
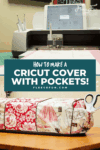
Today I’m sharing my tips on a pattern that Cricut offers in Design Space – The Cricut Maker Cover Tutorial. It’s been so much fun playing with my new favorite toy/ tool the Cricut Maker. It’s so amazing what it can cut! This tutorial makes a cover that fits nice and snugly over your Cricut Maker and has great side pockets for holding tools.
YOU WILL NEED:
- Cricut Maker
- Access to Design Space (the pattern is located there)
- 1/2 Yd. stripe fabric (for outside I used Timeless Treasures Vintage Sewing in red)
- 1/4 Yd. pattern fabric (for accent and ends)
- 1/2 Yd. coordinating fabric (for lining)
- 12 x 24 FabricGrip Mat
- 1/2″ elastic (12″)
- Home sewing machine
- Matching thread
- Extra wide double fold bias tape
- Embellishment, ribbon, or piping (optional)
- Fabric Marking Pen
- Sewing Essentials (scissors, pins, etc.)
Cricut Maker Cover Tutorial Tips:
Step 1 – Cutting out the elements
You will need to cut out rectangles of fabric for the maker to cut out the pieces. Cut out the following:
(2) 9″ x 18″ piece of your primary outside fabric (gray mat – in the example I’ve sewing it’s the fabric with the sewing notions and dresses on it)
Quick Tip
You are cutting one of the two front rectangles make sure that if your fabric is directional that the pattern in going in the right direction.
Place a 12″ x 14″ piece of your primary outside fabric (gray mat)
Quick Tip
I cut this wrong the first time! This make is cutting out the outside pockets. So you want to make sure that your fabric is going in the direction of the arrow. Meaning The side that is 12 inches should be going in the direction of the pattern.
Place a 9.5″ x 18″ piece of accent fabric (yellow mat in the example it’s the red and white flowered fabric) With both the accent pieces if the fabric is directional it needs to go the length in the fabric (like in the first primary fabric picture.)
9″ x 14″ piece of accent fabric (yellow mat)
12″ x 20″ piece of lining fabric (mint mat -it’s the lining so direction doesn’t matter here – no one will see it!)
9″ x 7″ piece of lining fabric on your mat (mint mat)
Hand cut a 17.5″ x 21.5” 22″ piece of lining fabric for the inside of the dust cover (no mat used)
Quick Tip
Cut the lining a little bigger – the math seems to be off and the lining is half an inch too small. I’ve talked to Cricut and hopefully the directions will be corrected soon.
Step 2 – Cut the cover pieces using the Cricut Maker
Mat 1 gray mat- Place a 9″ x 18″ piece of your primary outside fabric right side down on the mat. (top 1)
Mat 2 gray mat- Place a 9″ x 18″ piece of your primary outside fabric right side down on the mat. (Top 3)
Mat 3 yellow mat- Place a 12″ x 14″ piece of your primary outside fabric right side down on the mat. (puter pockets)
Mat 4 yellow mat – Place a 9.5″ x 18″ piece of accent fabric right side down on the mat. (Top 2 – center accent strip)
Mat 5 mint mat – Place a 9″ x 14″ piece of accent fabric right side down on the mat. (outer side)
Mat 6 mint mat – Place a 12″ x 20″ piece of lining fabric on your mat. ( pockets lining and lining side)
Mat 7 mint mat – Place a 9″ x 7″ piece of lining fabric on your mat, with the 7″ side running the length of the mat, and the 9″ side across the top of the mat. (other lining side)
Quick Tip
If you used a different type of fabric like I did for the lining be sure to change your material settings when you are cutting out the items.
Step 3 – Begin to Sew the Cricut cover
Quick Tip
Since the seam allowance on these sections is .5 inches I am going to recommend that you if you sew on the piping first (my piping is .25 not .5 so it was easier to sew on first)
Assemble the top of the dust cover by aligning the tabs on pieces 1-3, and sewing right sides together.
The contrasting stripe of fabric goes across the top center of the machine, from front to back.
Press the seams toward the darker fabric, and top stitch if desired. Set top aside.
Quick Tip
My fabric was lighter and I knew I wanted to use my Cricut Maker cover right away. So once you’re finished sewing sections take a paper towel and some water and dab the washable marker so it will lighten and disappear.
Step 4 – Begin to work on the Cricut Maker cover pockets
Quick Tip
I wanted to add a fun mini pom pom detail to the top of my pockets so before I sewed the pocket sides together I added the trim to the top. You can also do this with ribbon or ric rak.
Sew the pocket pieces (6) right sides together across the top, at a 1/2″ seam allowance,
then open so the elastic can be attached to the lining side. Tack the elastic to one side of the pocket, just below the seam.
Fold the pocket down, and sew across both pieces of fabric, 1/2″ from the fold, to create a casing. Attach a safety pin to the free end of the elastic.
Run the elastic through the casing, then tack in place at the far corner of the pocket
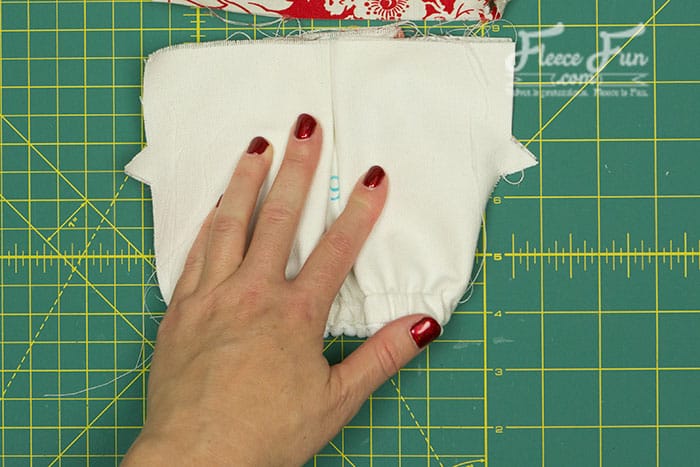
note
Since my lining fabric didn’t have a “Right” or “wrong” side I left the fabric pen side out so you could see – but on your cover the pabric pen sides ( or wrong sides) should be touching on the interior)
Pin the bottom pleat,
then baste the pocket onto the right side of the accent fabric ends—pieces 4 and 5—using a 1/4″ seam allowance. Make sure to catch the ends of the elastic in the basting stitch along the edge of the end piece.
Quick Tip
From here on out you’ll be using a .25″ seam allowance.!!!
Quick Tip
If you want to add cording to the sides like I did – do it now.
Step 5 – Sew the lining
Sew the lining fabric end pieces into the 17.5″ length of the hand cut lining piece, with right sides together. Pivot the fabric as you go around the turn to keep the edges of the curved and straight pieces flush. Do not gather. Use a 1/4″ seam allowance for the ends
Step 6 – Sew around the Cricut Maker cover
Sew the pocketed end pieces onto the cover top in the same manner as the lining, with right sides together. Notch around all curves with snips, or use pinking shears to trim the seam allowance and prevent fraying.
Cutting notches around the curves allows the corners and curves to turn smoothly without puckering when the project is right side out.
Place the lining into the cover top, with right sides out for both. Your cover should resemble its final form at this point, so feel free to check fit and look on your machine!
Quick Tip
Line up the end seams to make sure that the lining fits well.
Use extra wide double fold bias tape as binding around the bottom. This seals both sides of the dust cover together—no need to turn inside out! We used piping on this example, as well, but embellishment with piping or ribbon is optional.
When you get to the end of the bias tape, simply trim at an overlap of 1″, and fold the raw edge under.
Top stitch over the binding to secure around the entire cover.
You’re finished with the Cricut Maker Cover Tutorial!
Want to check out the other 49 FREE projects included with your Cricut Maker?! Click the pictures below to see how some of my blog buddies created these projects with their Maker!
love this Cricut Maker cover tutorial? see More for Organizers!
- Origami Fabric Basket Tutorial
- IKEA Fabric Stool
- How to Make a Binder Pouch Tutorial
- Sewing Machine Mat Tutorial
- Ribbon Book Mark
- Craft Room Hanging Organizer Tutorial
- How to Make a Giant Pegboard for Your Craft Room
- How to Make a Pin Cushion Tutorial (Bracelet Style)
- Cute Trash Can DIY Craft Room Decor
- Make Giant Buttons Wall Decor
- See all of our Organizer Tutorials
Cricut Crafts & Tips!
- Cricut Maker for Beginners: Easy Party Decor
- Your Top 3 Cricut Maker Questions Answered
- 3 Last Minute Gifts with a Cricut Joy
- How to Use JPEGs to Make a T-Shirt in Cricut Design Space
- 25 Personalized Gift Ideas Using Cricut Tools
- How to Get Started Cutting a Quilt with Cricut
- How to Get Started Quilting with Cricut
- Is It Time to Upgrade Your Cricut Machine?
- Luggage Tag DIY with Cricut
- How to Decorate a Notebook
More Cricut maker Projects!
- DIY Felt Flower Art
- Valentine Cozy Home Sign DIY
- Acorn Template (Free JPEG & PDF)
- DIY Custom Sewing Labels
- See all of FleeceFun’s Cricut Tutorials!