
No Sew Fleece Flower (free pattern)
This content contains affiliate links or sponsored elements, read our Disclosure Policy.
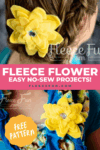


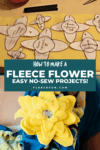
You can make a beautiful flower without sewing a single stitch! This adorable No Sew Fleece Flower can be made without glue! Perfect for young crafters or those just getting started – this step by step tutorial is fast ,easy and fun to make. Simple grab some fleece scraps and you’re ready to go.

YOU WILL NEED:
- Fleece scraps
- 12 inches of ribbon
- clip
- crystal jewel (optional)
- glue gun (optional)
- Get the free pattern here.
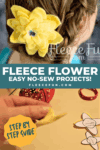
No Sew Fleece Flower (free pattern) Instructions
Step 1 – Cut out the free flower pattern

Print up the pattern (you can get assembly instructions here)
Cut out pattern pieces.
Step 2 – Begin to Build the No Sew Fleece Flower

Taking the Smallest piece (piece 1) Fold it so two of the petals meet. Snip small slits into the flower. Fold again so the other two petals meet and snip two more slits, You should have fours slits that form a box (see pictures). Taking care that none of the slits run into each other.
Step 3 – Begin threading the fabric flower
Cut your ribbon so you have 2 six inch strips. With right side of fabric facing up, thread one across from right to left , and thread the other across top to bottom flip over.

For the piece number two, instead of folding it in half petal to petal, you are going to fold it so it looks like half and X. Cut two small slits, fold in half again the other way and cut two small slits, to form the box like in step 2.
The reason you are folding it differently is that this causes the petals to stagger, making it look great! For piece 3 you will fold it petal to petal. Alternate between the two folding methods for each piece of the No Sew Fleece Flower.
Step 4 – thread and build, then tie off.

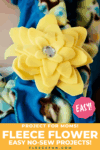
Line up your four slits with the ribbon and pull the ribbon through each piece. Once you have mad the flower the size you want, tie the ribbons together and slide a clip under them. If you would like glue a jewel or a charm to the center. It’s finished!
Download the free pattern here, tutorial below.
You can get a free copy of Adobe reader here. By downloading you are agreeing to pattern terms of use. Click the picture below and fill up the form to download the .pdf !

More Flower Projects:
- DIY Fabric flowers
- Felt Sunflowers
- DIY Felt Flower Art
- Giant Paper Sunflower
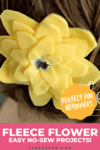
- How to Make a Flower Fascinator
love this No Sew Fleece Flower? see More No Sew Projects:
- No Sew Hobo purse
- How to Make a No Sew Fleece Tie Blanket (better method with templates!)
- How to use the Tie Blanket Ruler!
- How to Make a No Sew Tie Quilt
- No Sew Blanket Tutorial (with flannel!)
- No Sew Art Smock
- Ragged Tassels ( Cute for decorating)
- The Lucet Scarf
- No sew baby car seat Canopy
- No sew cape
- See all of FleeceFun’s No Sew Projects!
you’d love this Fun Easter Crafts
- How to Make a Bunny and Egg Banner for Easter
- Easter Centerpiece DIY – Bright and Fun
- Easter Egg Button Decor Craft Tutorial
- Free Easter Banner Printable Craft Tutorial
- Free Easter Printable
- Printable Pinwheels for Spring
- Fleece Eggs and Fleece Basket Pattern
- More Easter Holiday Projects
