
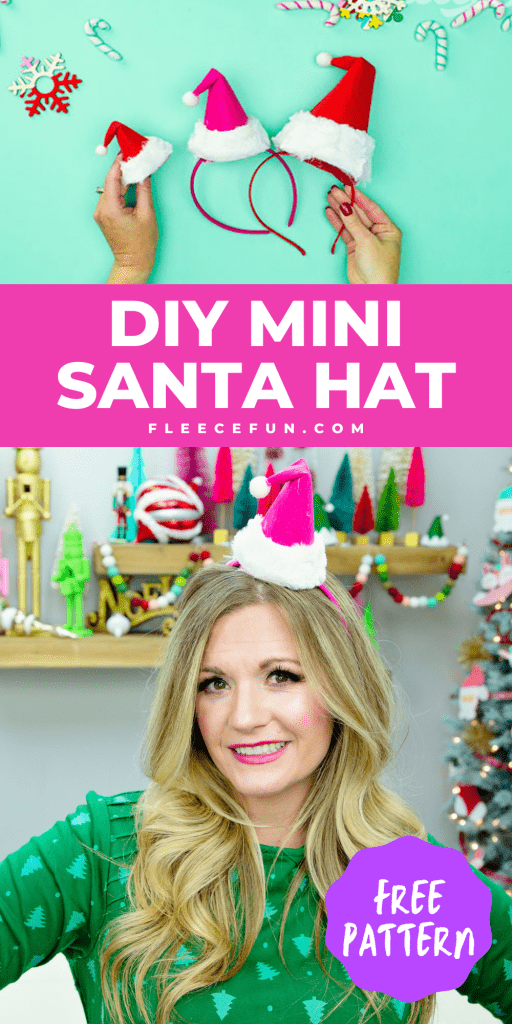
DIY Santa Hat Headband (free pattern and SVG files)
This content contains affiliate links or sponsored elements, read our Disclosure Policy.


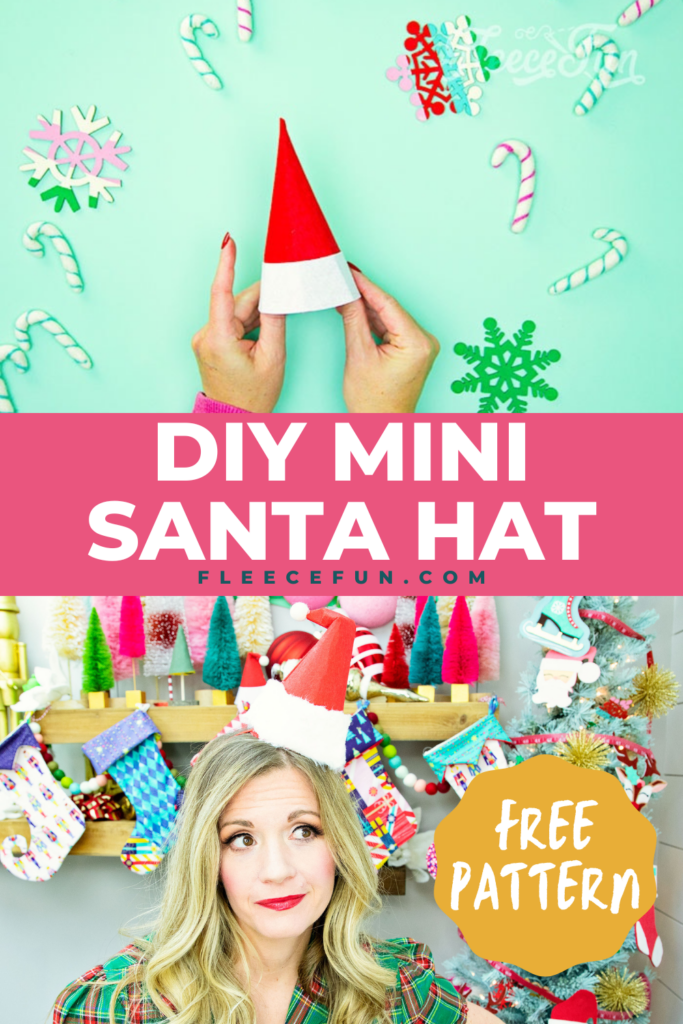
You can make this DIY Santa Hat Headband with this free pdf pattern and SVG file! This cute Christmas hat headband is perfect for ugly sweater parties, school performances and holiday events. With just a few materials you can easily make a mini Santa hat for yourself or friends.
I’m providing an SVG file to so you can use your cutting machine to cut if out in a flash. This mini hat comes in 3 sizes small ( 4″), medium (6″) and large (8″) so you can make it just the size you want! While I am making this out of stiff felt you can also use cardstock ( I just love the look of felt!). I’ve also included an elf variation of the hat too!

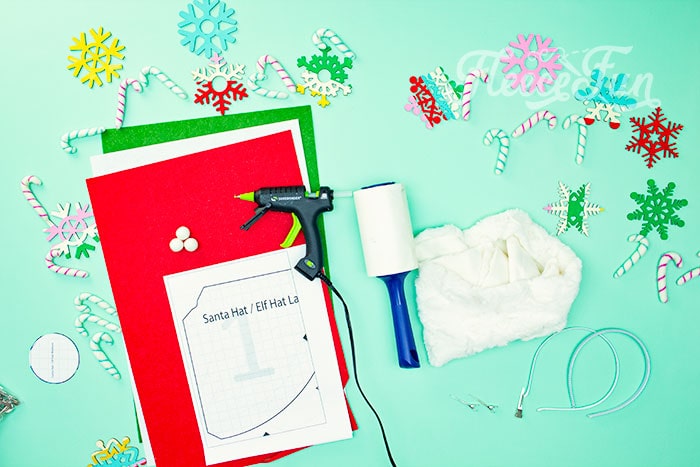
YOU WILL NEED:
Please note that the paper you print the printable on will affect the color nicer paper ( i.e. more expensive paper) tends to yield better results.
- 1 sheet of stiff felt in red (or whatever color you want your hat to be)
- 1 sheet of stiff felt in white or 1/8 yard of white faux fur for the brim
- A white PomPom
- 1 headband
- Glue gun and glue sticks
- Scissors or Die Cutting machine like a Cricut Maker
- Lint roller (especially if using faux fur)
- Pen
- Get the free pattern and SVG file here.
note
You can use cardstock instead of felt
DIY Santa Hat Headband (free pattern and SVG files) Instructions:

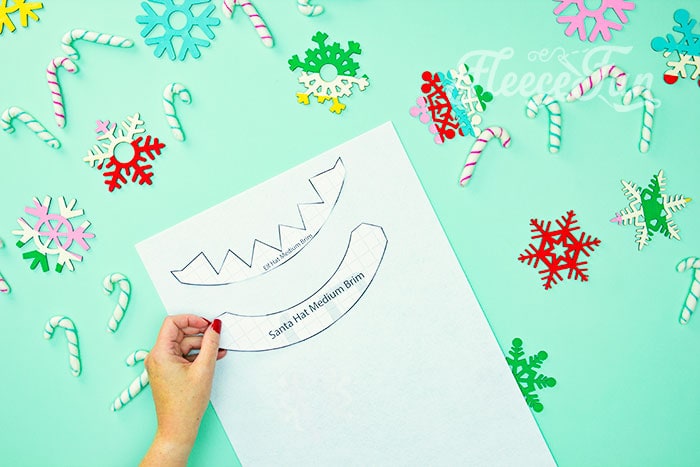
Step 1 – Cut out the Mini Santa Hat headband pattern

If you’re making the large size you will need to tape the pattern together. For the Medium and Small sizes no assembly in necessary.
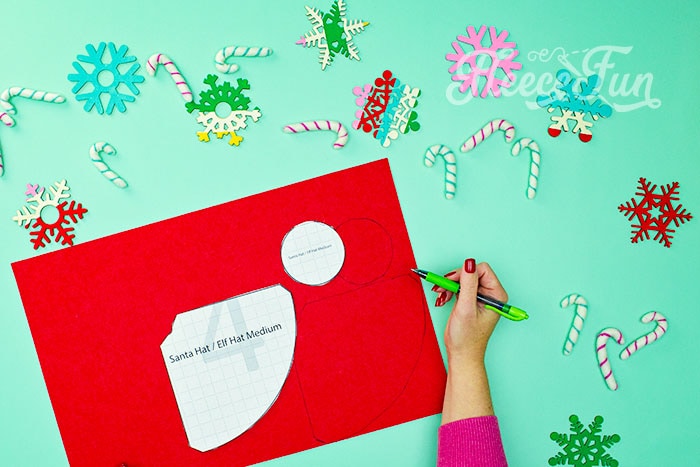
Trace the desired size of Santa Hat and circle onto the felt using a pen. And cut out
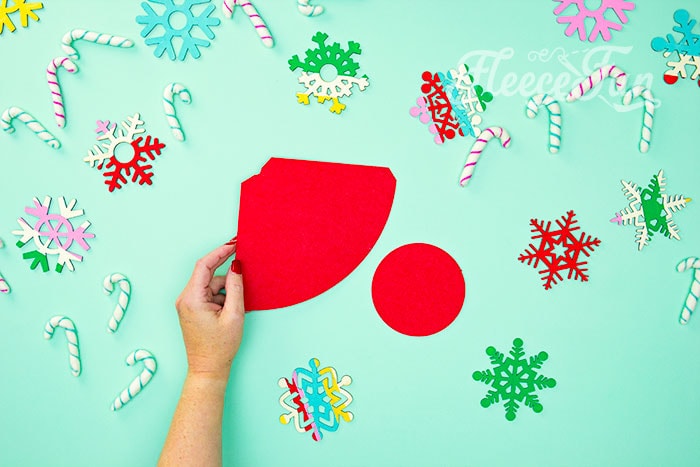
Set these pieces aside.
From the white cut out the desired brim.
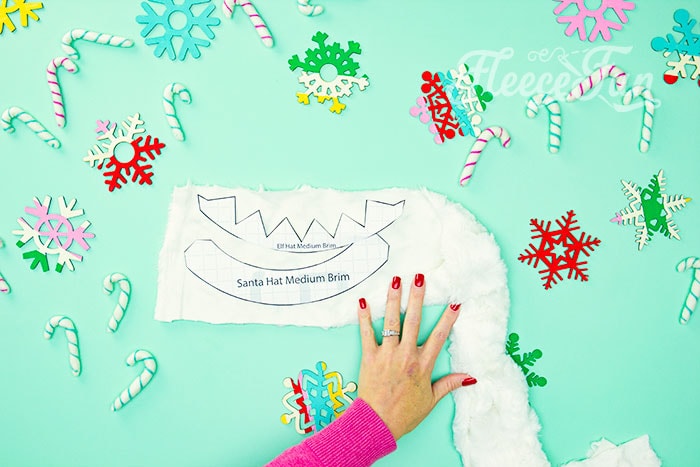
If using faux fur trace and cut from the WRONG side (the not furry side) of the fabric. Once cut take faux fur outside and shake off excess. All of these pieces can also be cut out using the SVG file.
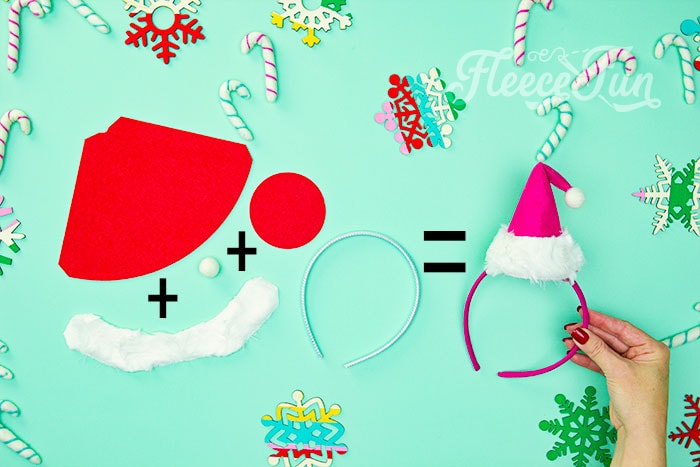
These items make up 1 DIY Santa Hat Headband.
Step 2 – Make the Cone Section of the DIY Santa Hat
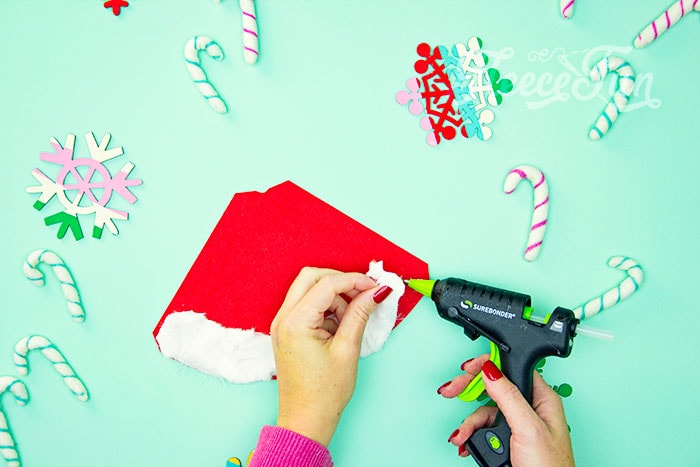
Line up the brim with the bottom of the hat.
quick tip
If it doesn’t quite line up try flipping the hat over. Glue the brim in place.
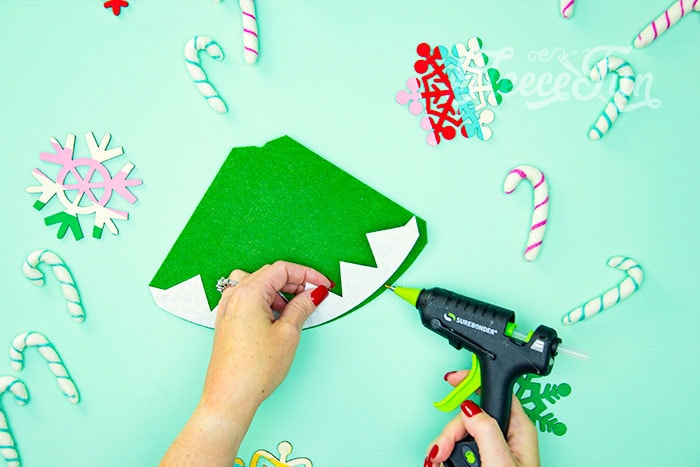
If making the elf version make sure that you glue down the tops of each point so the brim will stay in place.

Once the brim is secure flip the hat over.
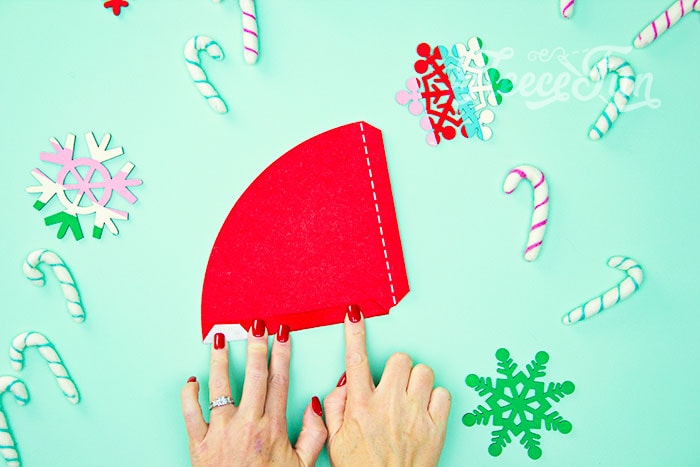
Fold in each side of the cone using the slants at each end as a guide. These will serve as the seam to glue the cone together.

Finger crease each side of the Christmas hat.

With each side folded down bring the cone together.
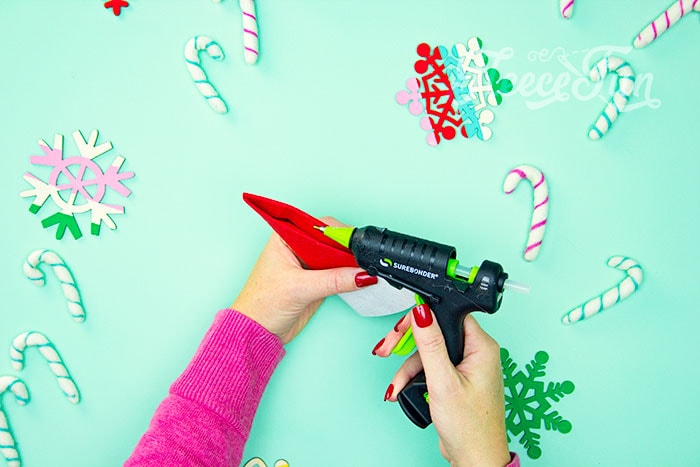
Hot glue along the seam and hold the hat in place to let the glue set.

Once the glue is cool pop out the hat and help shape the cone.

Step 3 – Bring personality to the Christmas Headband

Glue a pompom to the top of the hat.

Fold the top over and inch or two at the seam and glue down.
Step 4 – Add the Santa Hat to the Headband
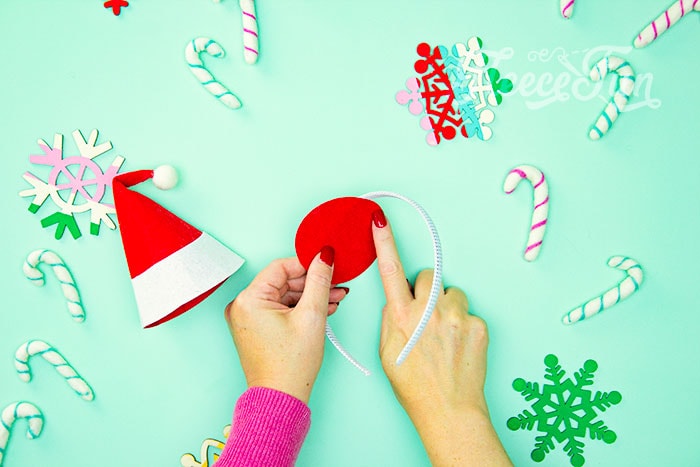
Taking the circle to the hat glue it to the underside of the headband off center.

Place the Santa hat on top of the headband and glue the circle to the inside of the hat – leaving some space around the head band at each side too flex.

If headbands aren’t your thing you glue a clip or a comb to the underside.

That’s how you make a Santa Hat Headband!
A few ideas:
- Leave off the headband and use the Christmas Hat as a tier tray décor.
- Use the clip version and the small size and turn it into an ornament.
- Place a jingle bell inside the hat before gluing it to the circle/headband for some fun holiday noise.
DOWNLOAD THE FREE PATTERN HERE.
You can get a free copy of Adobe reader here. By downloading you are agreeing to pattern terms of use. Fill out the form to get it sent right to you.

Projects for the Perfect Christmas Party
- Modern Christmas Wreath DIY Felt
- DIY Christmas Earrings
- How to Spray Paint a Pre-Lit Christmas Tree
- Christmas Advent Calendar DIY
- Homemade Christmas Tags
- Cozy Christmas Tall Tree Pillow Tutorial
- 6 Ways to Engage Kids This Christmas
- 5 Tips for Outdoor Christmas Decorating
- Santa Hat How-To
- Holiday Bread Wrap
- Mason Jar Cover Gift Idea
Explore More Christmas Projects You’ll Love
- Snowflake Ornament DIY
- Printable Holiday Gift Tags
- Mini Holiday Gift Tags
- Hot Chocolate Printables for Mason Jars
- Felt Fox Ornament DIY
- Felt Lanterns Handmade Ornament
- Mini Top Hat Ornament Tutorial
- Quilted Christmas Table Runner Tutorial
- High Heel Christmas Stocking
- Printable Handmade Gift Planner
I used this to make my youngest’s gift this year. He asked Santa for a spider stuffy that is “ready for Christmas” with a Santa hat. We were able to find a stuffy he would like but no one had a hat to fit it so we made the small one for your headband and put a piece of elastic strap on it so it would stay on but he could take it off if he wants to. It’s perfect! He is going to love it.