Felt Elf Tutorial Handmade Ornament
This content contains affiliate links or sponsored elements, read our Disclosure Policy.


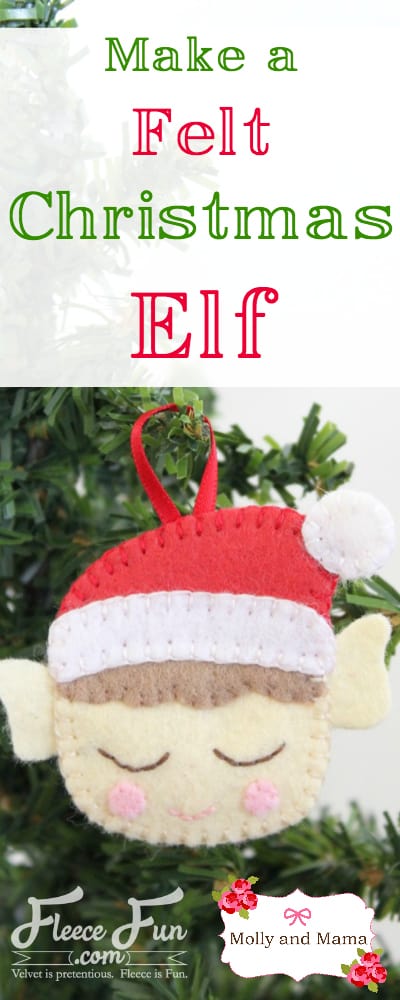
Hi, I’m Lauren from Molly and Mama , and I’m so excited to be sharing this cute little Felt Elf Tutorial Handmade Ornament with you! He’s the perfect size to adorn a hair clip, a gift tag or an ornament. And he’s super quick to make! This quick ‘scrap busting’ tutorial will have you feeling the Christmas Spirit in no time!

YOU WILL NEED:
Finished Size – 6cm (2 1/2”) across and 5cm (2”) high
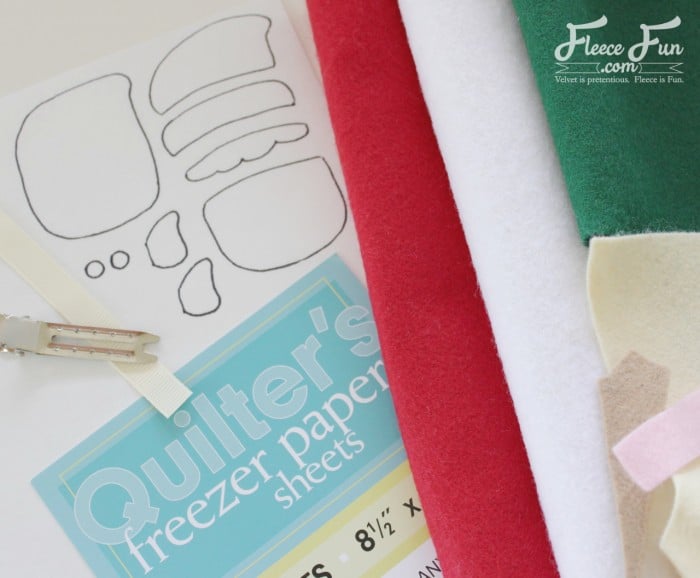
- Scraps of 100% wool felt – a fair skin colour for the face and back, pink for the cheeks, brown for the hair, and Christmas colours like red or green and white for the hat
- Small scissors with short sharp blades for cutting felt
- Freezer paper
- Tracing paper and pen
- Embroidery floss in pink, brown, fair skin colour, white and red or green to match the hat
- Sewing Essentials (scissors, pins, etc.)
- 48mm (1 7/8”) double pronged alligator clip
- 12cm (4 7/8”) of 10mm wide grosgrain ribbon
- Hot glue gun
- Get the free pattern here.
This tutorial uses whip stitch, back stitch and blanket stitch. All of these are very easy stitches to master, and you can find many helpful images, and tutorials online.
For this project, I chose to use freezer paper for my templates as it’s really handy for cutting out very small felt pieces. You could also trace your templates onto normal tracing paper, and pin them in place. For the smaller pieces like the ears and cheeks, you could use a low adhesive sticky tape to position them on the felt. It peels away easily, after you’ve cut out the shape. But the great thing about using freezer paper, is that your templates are reusable, which is a wonderful time saver if you’re planning on making a few elves!
Let’s Get Sewing!
Felt Elf Tutorial Handmade Ornament
Step 1 – Cut out all your felt elf pieces
Using your template print out, trace all the template pattern pieces onto the paper side of the freezer paper. Don’t forget to include two circles for the cheeks, two for the hat pom pom, and two ears.
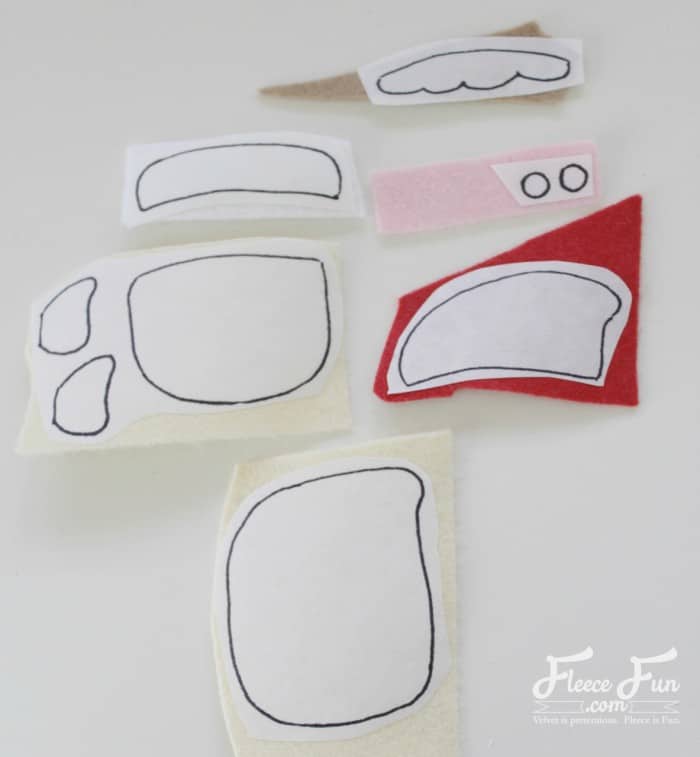
Select your felt colours. I chose a fair skin colour, brown hair and a red and white hat. So I found tiny scraps of wool felt that fit all my template pieces.
Roughly cut around each piece of freezer paper. Heat your iron to a warm non-steam setting. Place the freezer paper over your felt and gently press down so the freezer paper adheres to the felt. Be sure to test your iron temperature on a scrap of felt first – acrylic craft felt won’t be suitable for this project; it will melt. So make sure you’re only working with wool felt.
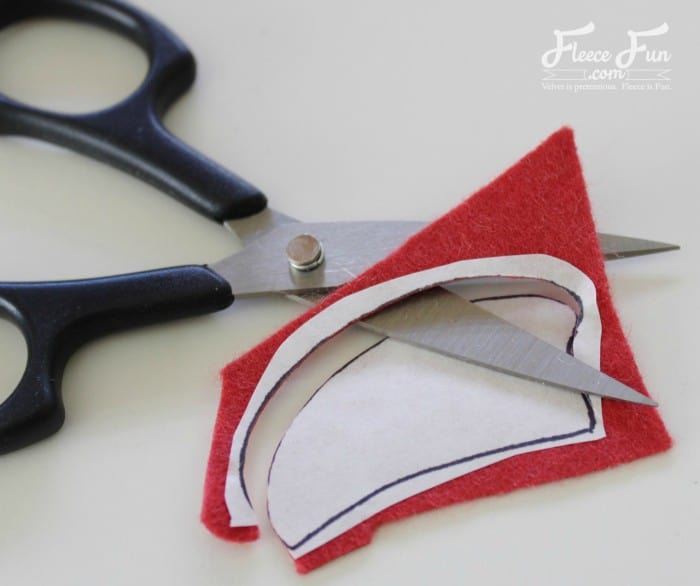
Now it’s time to create each felt shape by cutting along the line on each template. Use your small scissors and maneuver the felt carefully through the sharp blades. This will help give each felt piece crisp edges.

As you cut out each piece, gently peel away the backing paper. Store and label these template pieces, as they’ll be suitable to reuse a number of times.
Step 2 – sewing the elf hair and face
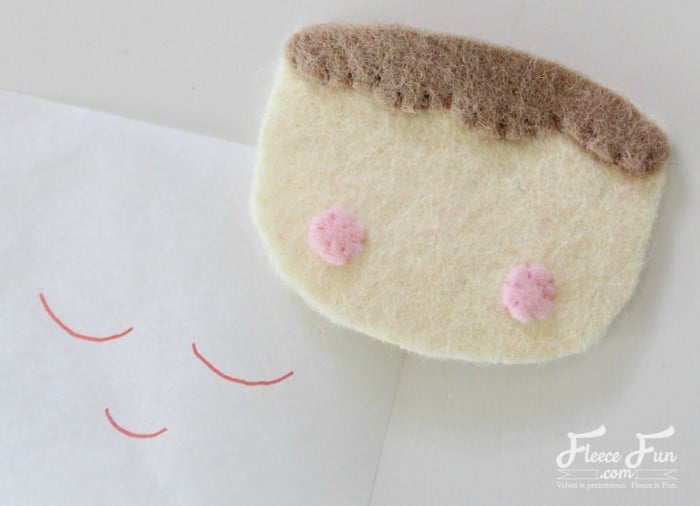
Sewing the felt hair and cheeks
Place your hair piece of felt with the straight edge overlapping the straight edge of the face piece. Pin or hold in place.
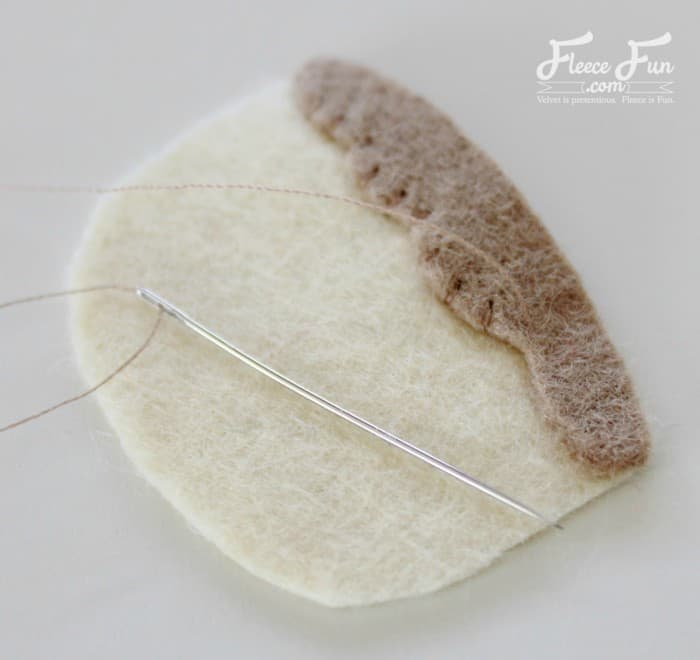
Thread your sewing needle with a single strand of embroidery floss to match the hair colour. Use a very small whip stitch to sew the hair to the face along the curvy base of the felt. There is no need to stitch across the top (as later it will be covered by the band of the hat).
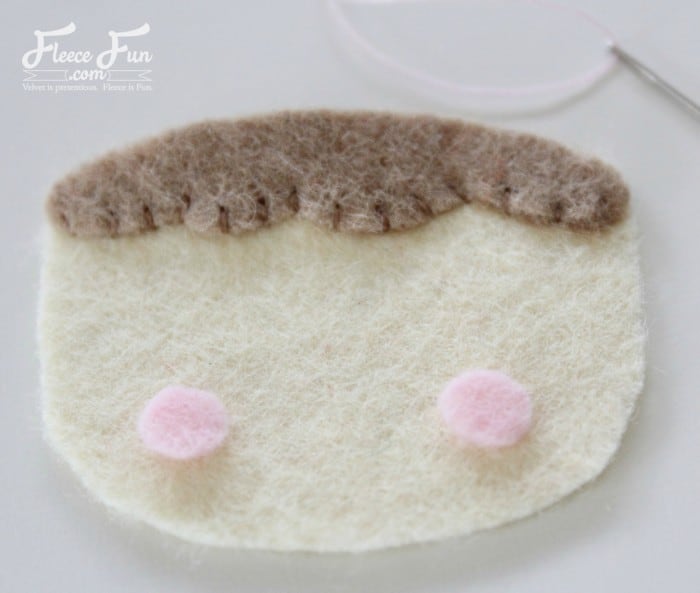
Use a single strand of pink sewing floss to secure the two pink cheek circles to the face. Use the template as a placement guide for the pink felt. Carefully hold them in place as you stitch.
Stitch the felt Elf Face
Back stitch the face using two strands of embroidery floss. I chose a pale pink for the mouth and brown for the eyes. You may choose to draw the mouth and eyes on freehand, using a water soluble marking pen. However, I have chosen to use tracing paper to sew through. This method is great for obtaining a very neat and uniform finish for this Felt Elf Tutorial, and it can be used on all sorts of projects too!
Trace your face (mouth and eyes) onto a small square of tracing paper. (Use a pen or marker that dries well and won’t stain your floss as you stitch through it).
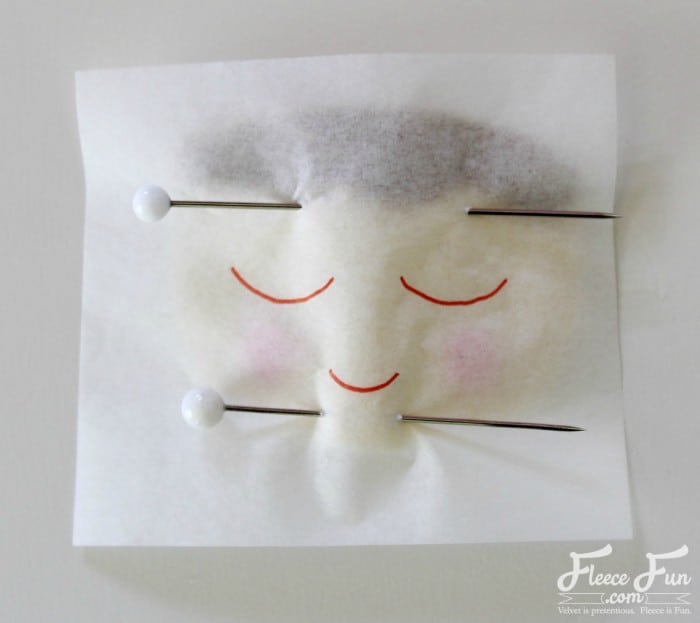
Place this template over your felt face and pin it in place. Be sure that it is centered and positioned like the template image.
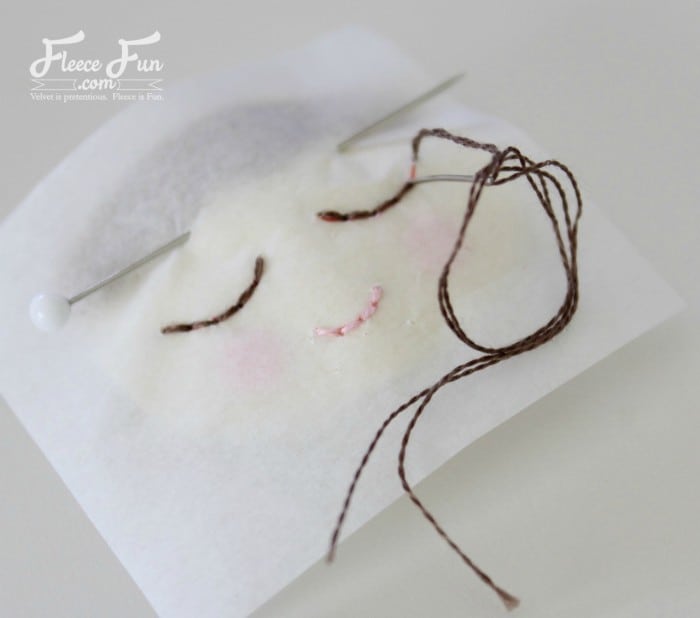
Thread your needle with two strands of pink embroidery floss, and back stitch through the paper over the mouth line. Change threads to brown, and back stitch through the paper over the eyes. When you’re finished, be sure to always secure your stitches well at the back.
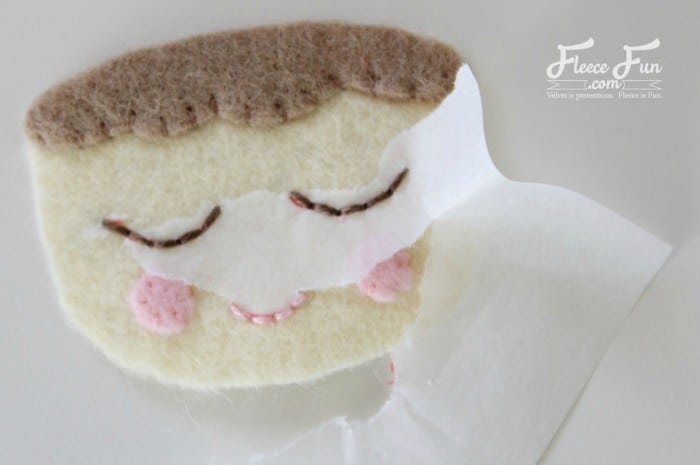
Once the stitching is complete, very gently tear away the tracing paper to reveal the stitching underneath. I carefully use the tip of the needle to tease any remnants of paper out from under the stitching.
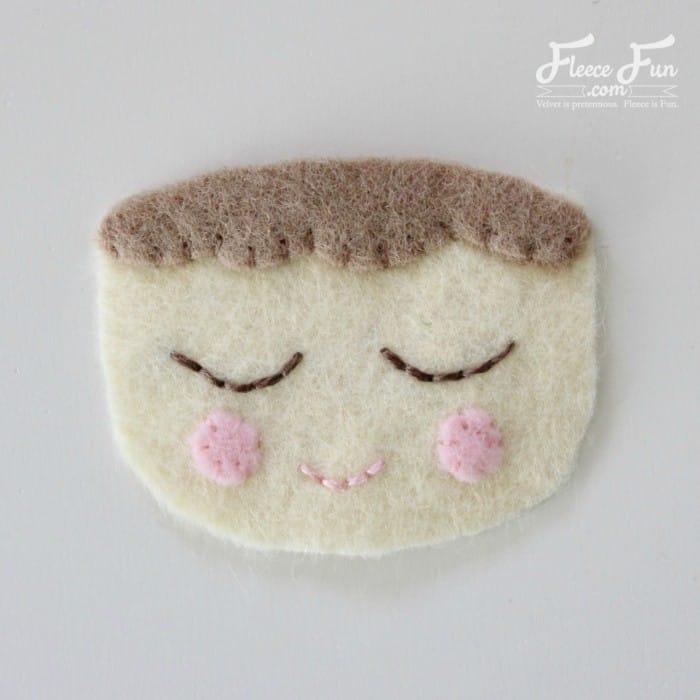
Your elf face is now finished. Lets set it aside.
Step 3 – Stitch the Hat
Lets stitch the hat onto the base piece. Position the red hat over the base and pin it in place. Thread your embroidery needle with two strands of coordinating floss. Starting at one side of the head, blanket stitch the whole way around the top of the hat. Use very small, fine stitches. Be sure to catch the base piece in with your stitching. You won’t need to stitch across the bottom of the hat because it will be covered later with the white hat band. Secure your floss well when you finish.
Step 4 – Assemble the Felt Elf Ornament
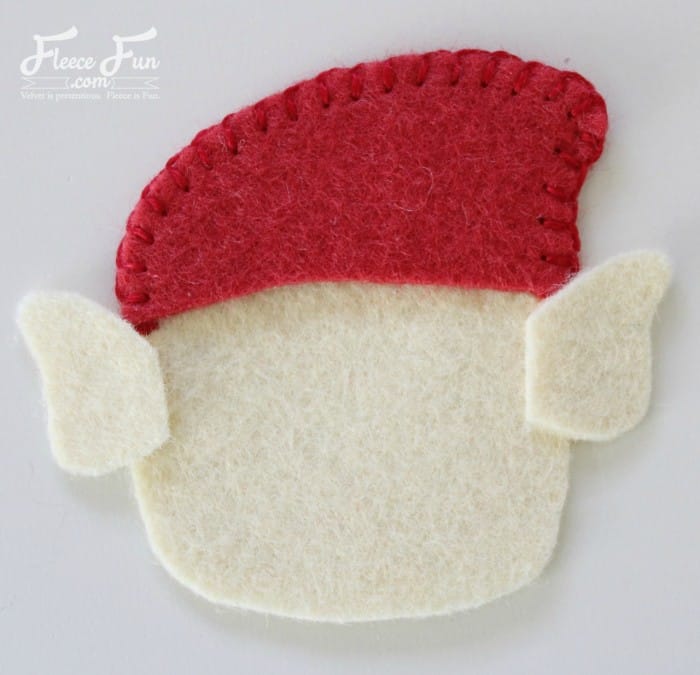
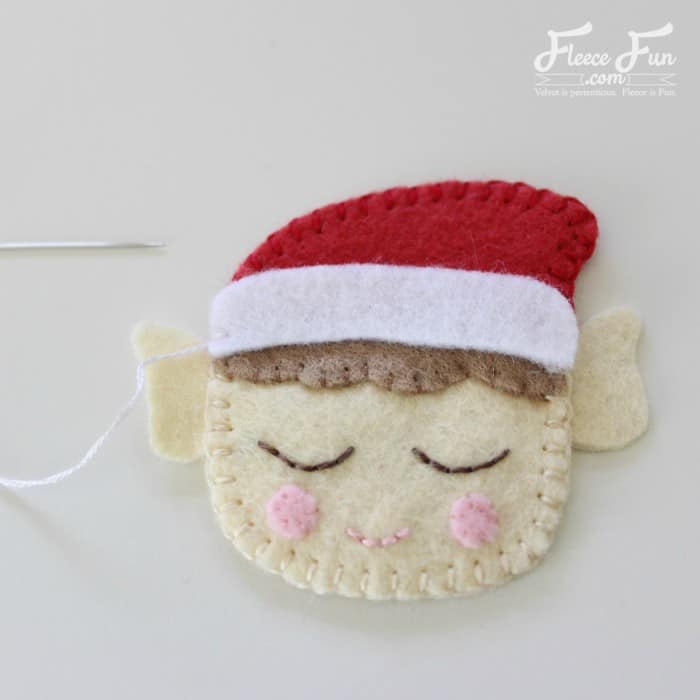
This is the last step of this Felt Elf Tutorial. Arrange your two ears on the base piece just below the red hat. Be sure they overlap sufficiently over the base piece.
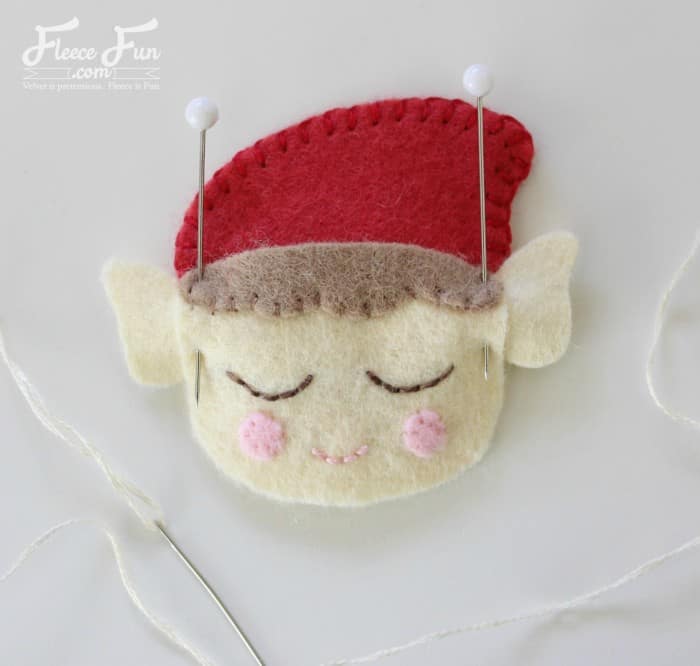
Place your embroidered face piece over the base piece, so that it lines up with the hat and covers the base piece. Pin it carefully over the ears, to help keep them in place while you stitch the face to the base.
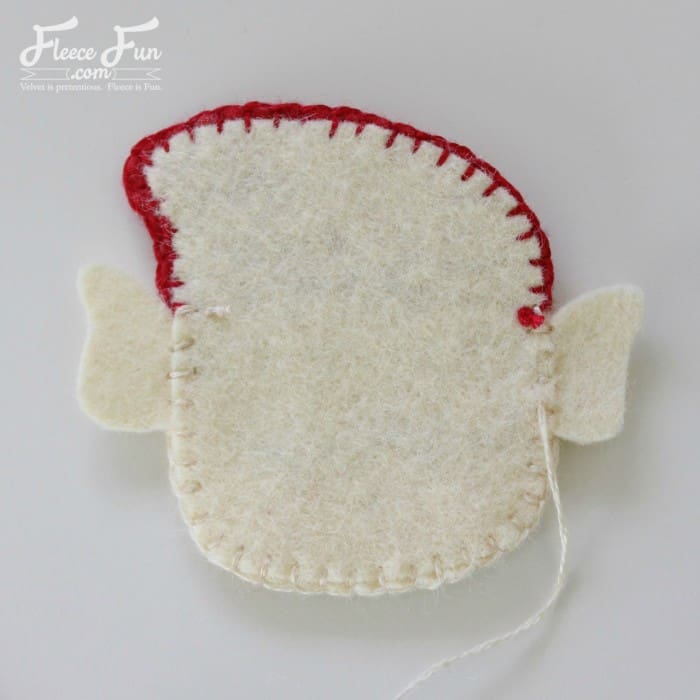
Thread your embroidery needle with two strands of floss to match your skin colour. Using small fine stiches, blanket stitch the head to the base. Start at one side of the head, and stitch through the ears and down around to the other side. Make sure your stitches catch the base felt as you sew. Again, secure your floss well when you finish.
Your stitching should look like this at the back.
Finish the elf by adding the white felt band and pom pom. Lay the white hat band across the elf overlapping both the hat and the hair. Blanket stitch it in place using two strands of white embroidery floss and small, fine stitches. Secure your floss well after you’ve sewn around the whole white band.
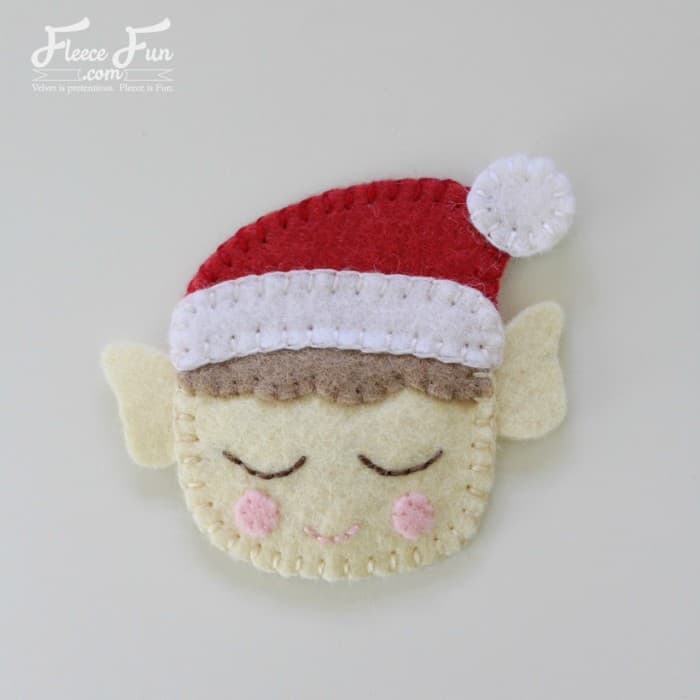
Add a pom pom to the hat by sandwiching the tip of the red hat between the two small white circles of felt. Hold them carefully in place and then stitch the circles together with two strands of white embroidery floss. Secure your stitches well when complete.
Your finished elf will look like this!
Now that you’ve finished the Felt Elf Tutorial, it’s just time to add a ribbon loop to make him into an ornament. Or add a clip to make him into a hair accessory!
Make an Ornament
Cut a short length of narrow ribbon and fold it in half. Secure it to the back of the elf’s hat to make a loop for hanging on the tree. If you’d like a neater finish, add the ribbon loop as you’re stitching the red hat front to the base. Simply slide the ribbon loop between the two layers of felt and be sure to blanket stitch through it as you join the two layers together.

Make a Hair Clip
Cut a length of grosgrain ribbon 12cm (4 7/8”) long. Use your heat sealer or lighter to seal the ends of each piece.
Set up your glue gun and allow it time to heat up. Don’t forget to lay down a work mat.
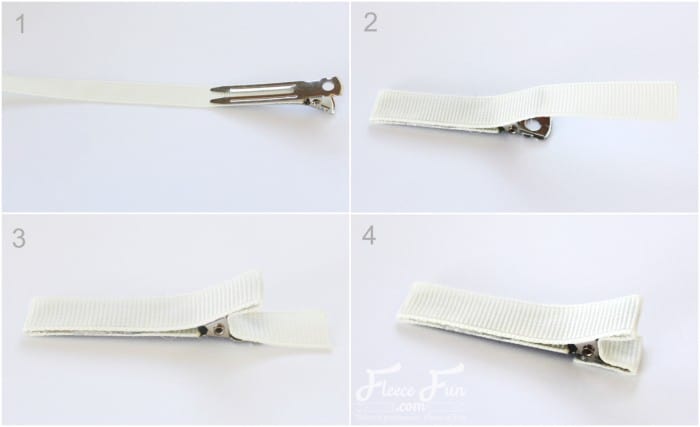
- Open the clip and run some glue along the underside of the top ‘jaw’ of the clip. Slide your ribbon into the open space between the jaws and attach it to the glued area. (This step is seen below in the top left image, where the clip is upside-down. This gives you a better view of where to place the ribbon.
- With your clip facing up, run a length of glue across the top of the clip right to the end of the jaw. Fold your ribbon back over the top and gently smooth it across the top jaw using your thumb.
- Place a small dab of glue on both ends of the inside of the jaws at the back. Be careful not to get any glue near the spring though, or you’ll have a clip that won’t close properly. Gently push the ribbon into the space at the back.
- Lastly put a small dollop of glue on the underside of the clip, just over the space where the circular hole is. Fold the remaining length of ribbon over and press it down gently on the glue to secure.
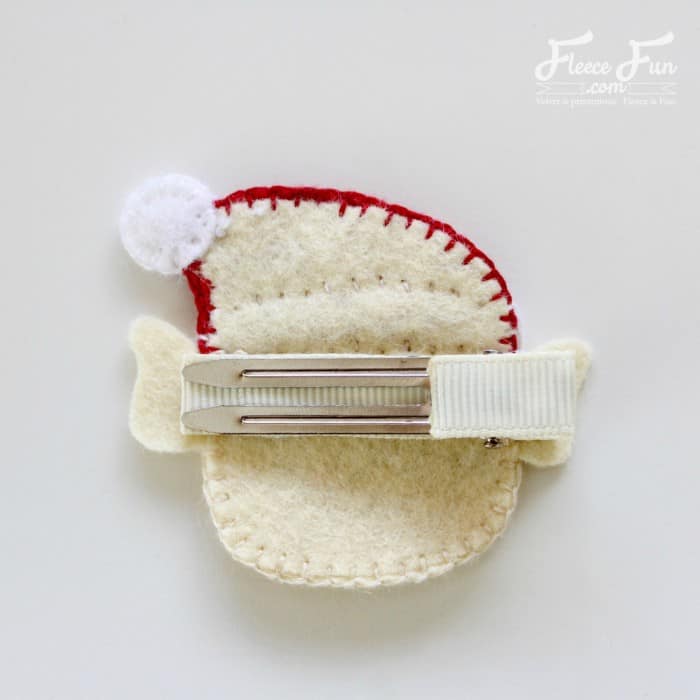
Use some hot glue to carefully secure the clip across the back of the felt elf.
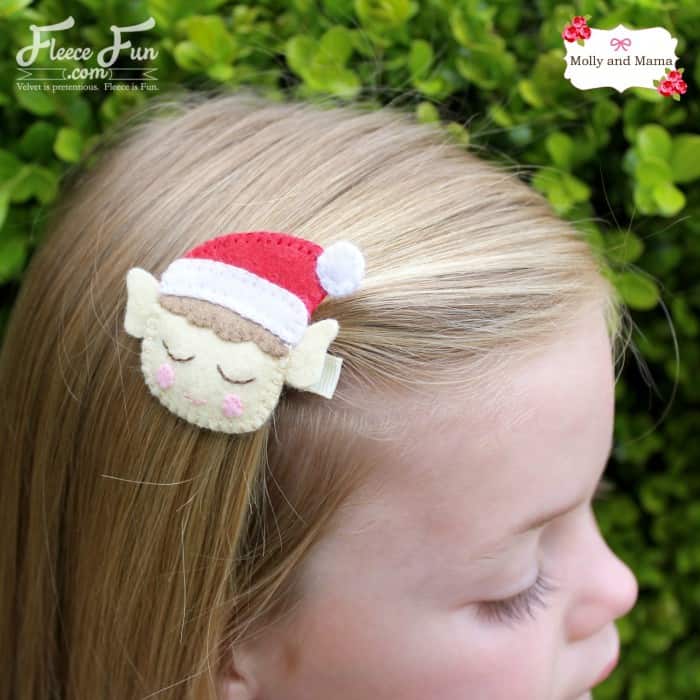
What a gorgeous Hair Accessory for Christmas!
Want to Resize your Elf?
The finished ornament size of this Felt Elf Tutorial is only 6cm (2.5”) across and 5cm (2”) high. If you require a larger elf template for another project, don’t forget that you can always adjust your printer settings. Play around with the sizing until you’re happy.
Ideas for Other Projects
- Stitch your elves in colours that match your Christmas décor. I can’t wait to make some in blue and silver (my current Christmas tree colours).
- Sew a whole collection of elf faces and stitch them to ribbon or string to create a unique and adorable Christmas garland.
- Appliqué your felt elf onto a luggage tag sized piece of felt. Use it as a Christmas present label. You could even personalise it by embroidering the recipients name on the base.
I hope I’ve inspired you to create even more Elf projects. If you’d like to show us what you make, be sure to pop by the Molly and Mama Facebook Page or tag @MollyandMama on Instagram. I’d love to share your work!
Find Out More About Molly and Mama Projects
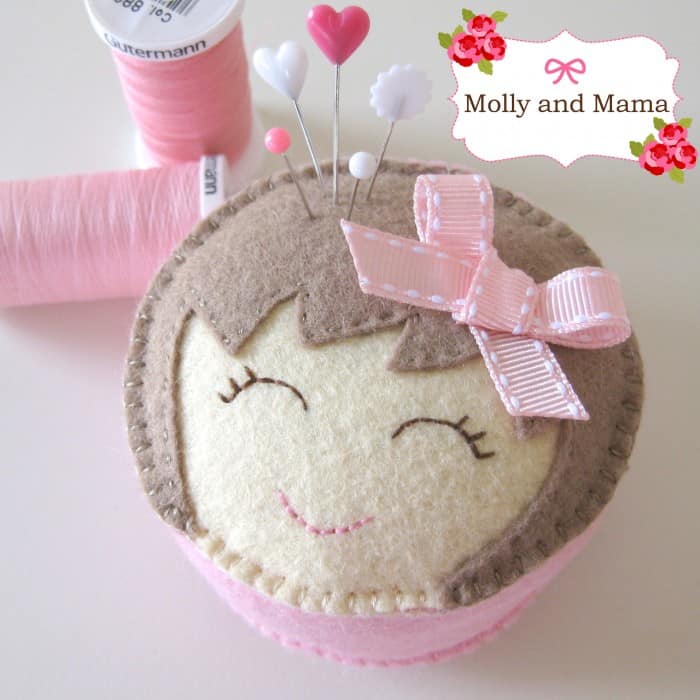
At Molly and Mama you’ll find inspiration for gorgeous felt projects, embroidery hoop art designs and appliqué templates. The Miss Molly Pin Cushion pattern has always been a firm favourite in the store.
You might also like the Sleepy Cloud softie pattern; perfect for nursery décor, baby mobiles and dolly cushions

If you’re looking for free projects and tutorials, pop by the blog . You might like the felt Christmas Mouse Ornament. It’s so sweet!
Thanks so much for reading along. I really hope I have inspired you to get creating for Christmas! Happy stitching, Lauren x
Download THE FREE Felt Elf Tutorial PDF by filling out the form below:
By downloading you are agreeing to pattern terms of use. Click the image below to go to the download form. Or click here.
Ornaments You’ll Like for Christmas
- Reindeer Felt Handmade Ornament DIY
- Let It Snow Embroidery Hoop Ornament DIY
- Christmas Embroidery Designs Noel Hoop Ornament DIY
- Angel Handmade Ornament DIY
- How to Make a Snowman Ornament
- Mini Top Hat Ornament Tutorial
- You can see all of Handmade Ornament Tutorials on this page
- You can see just my Felt Christmas Ornaments here
Explore More Christmas Projects You’ll Love
- Mitten Ornament Pattern
- Printable Holiday Gift Tags
- Mini Holiday Gift Tags
- Ice Skate Ornament DIY
- Wooden Christmas Ornament DIY
- Nutcracker Ornament DIY
- 6 Ways to Engage Kids This Christmas
- 5 Tips for Outdoor Christmas Decorating
- Christmas Ideas
- No-Bake Christmas Wreath Cookies
- Perfect Stocking Stuffers for Sewing Lovers
- Mad Hatter Tea Party Paper Chandelier
- Giant Holly Leaves