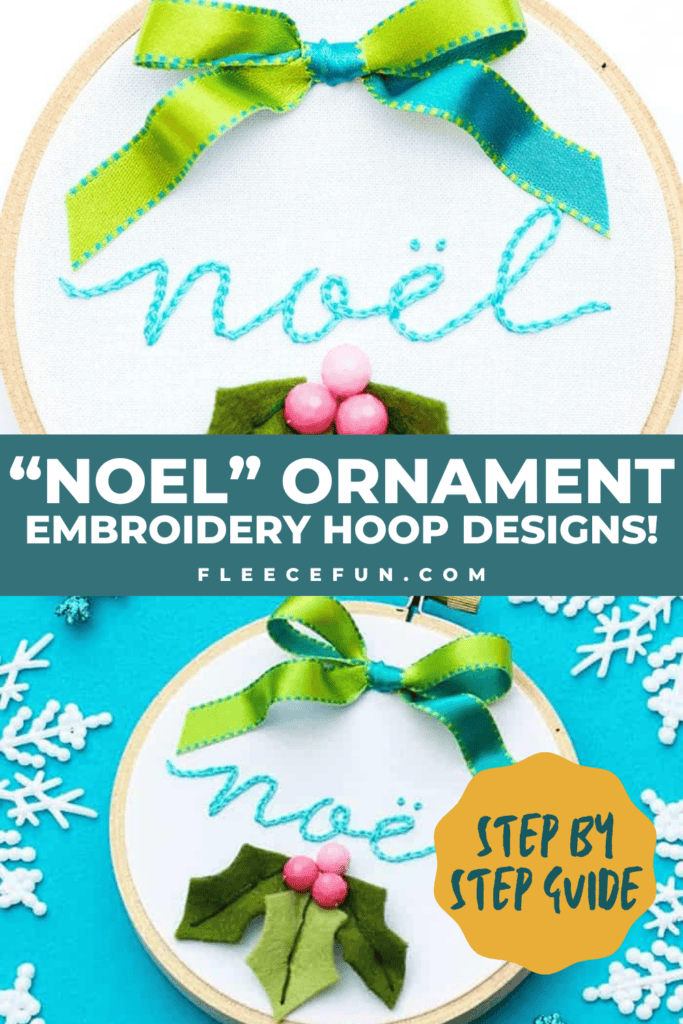
Christmas Embroidery Designs – Noel Hoop Ornament DIY by Lolli and Grace
This content contains affiliate links or sponsored elements, read our Disclosure Policy.


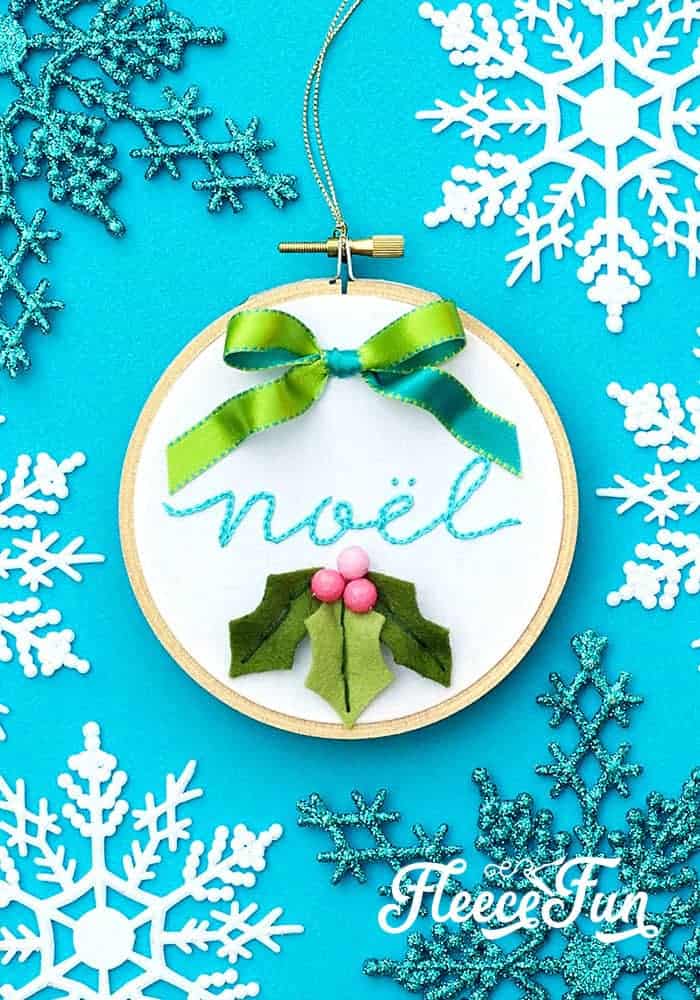
Handmade Gift Idea: Wow this Christmas Embroidery Designs – Noel Hoop DIY makes a wonderful handmade gift. Easy step by step instructions and pictures. I love this handmade Christmas ornament and how beautiful it is, perfect for the holidays.
Hello everyone – my name is Anne Oliver from Lolli and Grace, and I adore all things hand embroidery! My Etsy shop is filled with a variety of lovely embroidery patterns for all different levels of stitchers, and you can find embroidery tips and techniques on my blog at www.lolliandgrace.com.
I also have a really fun and busy Instagram page (@lolliandgrace), which showcases behind-the-scenes photos of what I’m working on, what inspires me, and all the latest patterns I’ve designed. And don’t forget about IGTV – there you can find my embroidery videos that are helpful for both the beginning stitcher and the more experienced embroiderer as well. I promise…all of it is bright, colorful and fun!
Every year I try to make a few handmade ornaments for the holidays. But we all know what a busy time of year it can be, so I like making ornaments that look great but aren’t a HUGE investment of time. I think this one certainly fits that description!
YOU WILL NEED:
- 4-inch embroidery hoop
- 100% cotton fabric (white)
- Air erasable disappearing marker (Dritz’s “The Fine Line” marker is shown here)
- 6” x 9” sheet of each – light green and dark green wool felt (the felt I’ve used here is from Benzie Design on Etsy, and the colors are “Fern” and “Moss”)
- DMC embroidery floss (#890 Dark Green and #3846 Aqua Blue)
- 18 inches of 3/8” wide decorative ribbon
- (3) 8mm beads in the color of your choice for the holly berries
- Felt or decorative card stock for your hoop backing
- 12 inches of cording or ribbon for the ornament hanger
- Cool melt glue gun
- Tape
- Get the free template here.
Embroidery Stitches
- Back Stitch
- Chain Stitch
- French Knot
- Running Stitch
Christmas Embroidery Designs – Noel Hoop Ornament DIY
Step 1 – Preparing The Hoop

Stretch your fabric in the 4 inch hoop, making sure it is stretched very tightly with no wrinkles or saggy spots. Tighten the screw on the hoop as tightly as you can.
Trim the excess fabric around the edge to about 1 inch.
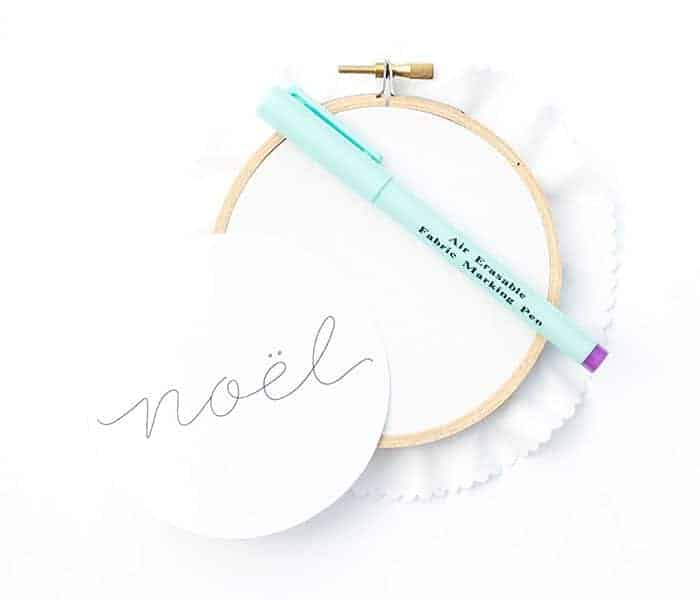
Print the “noël” pattern and cut it out on the dotted line. Place this pattern behind the stretched fabric, making sure it is straight. Tape the pattern in place.
Hold the hoop up to a bright light or sunny window and trace “noël” onto the fabric with the air erasable marker.
Step 2 – Stitching “noël” embroidery design
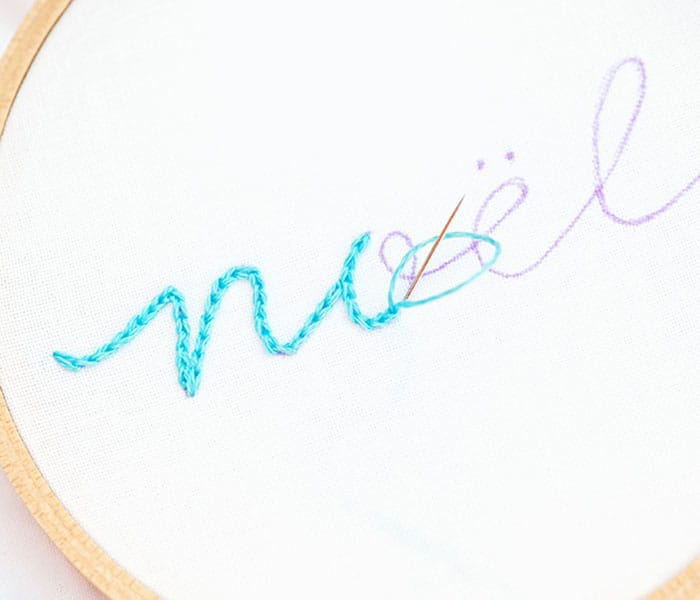
Use 3 strands of DMC #3846 to chain stitch “noël.”
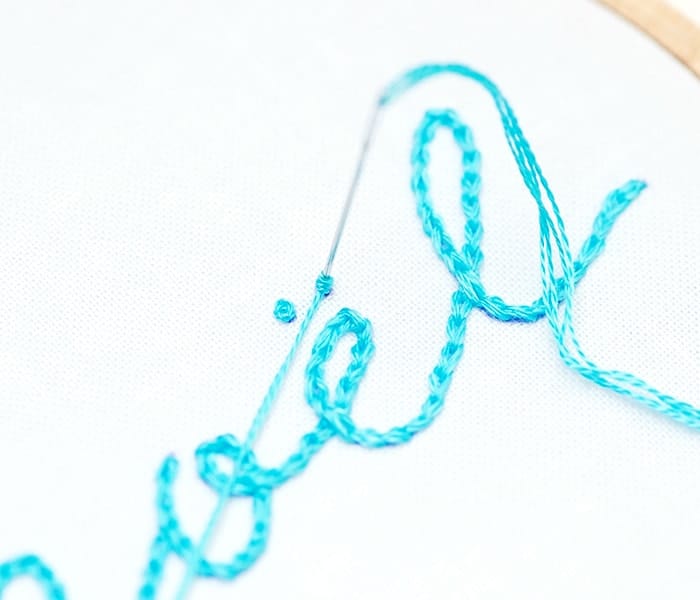
Use 2 strands of the same thread to make two small french knots above the “e” to complete the Christmas “noël” Embroidery Design.
Quick Tip
If you don’t want to make french knots, you can always simply stitch two small “Xs” instead of the french knots.
Step 3 – Making the Holly Leaves
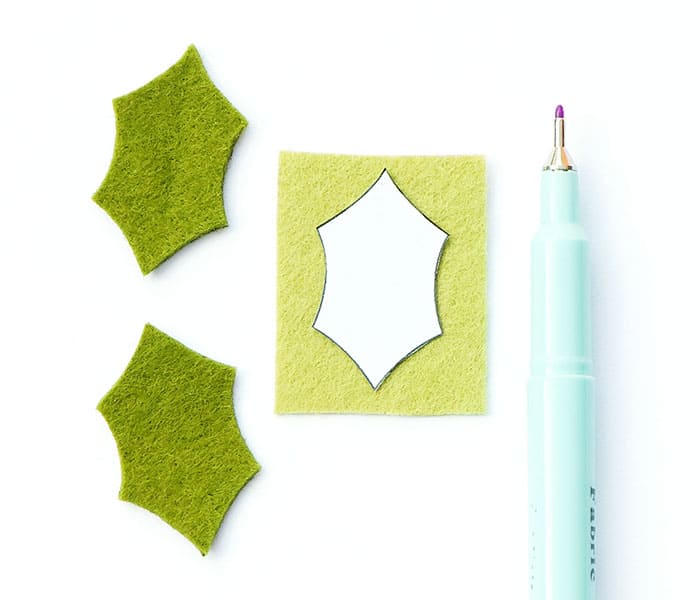
Print and cut out the holly leaf pattern. Trace one leaf onto the light green felt and two leaves onto the dark green felt with the disappearing marker. Then, cut out the leaves.
Quick Tip
If you are unable to see the disappearing marker on the dark green felt, you can use a black Ultra-Fine Sharpie marker instead.
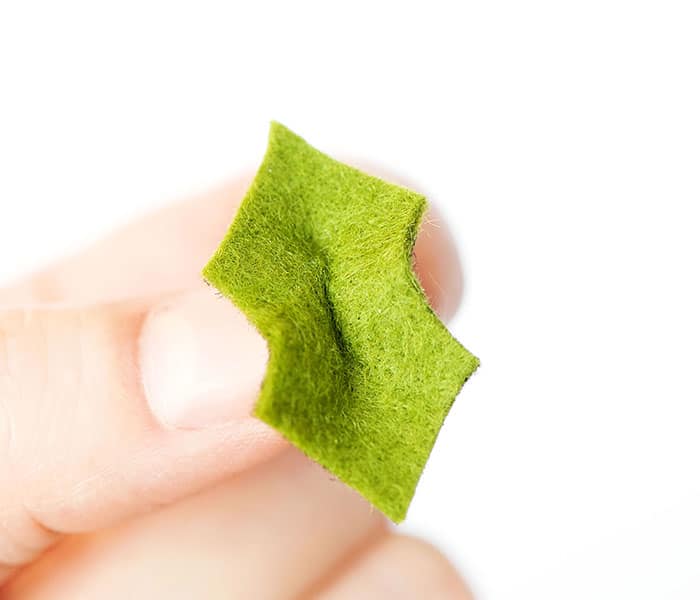
Put a tiny, TINY dot of cool melt glue in the center of each leaf and pinch the felt so the leaf is slightly 3-dimensional.
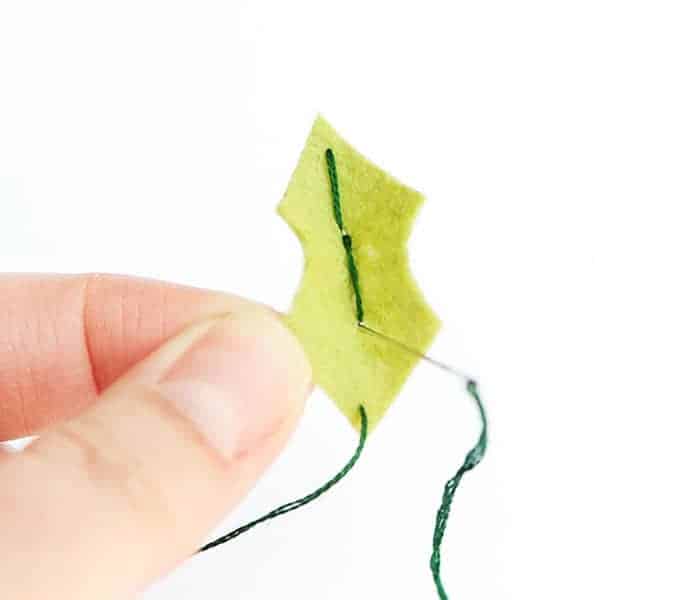
Sew 3 long back stitches along the center of each leaf. These stitches will help to hide any glue that might be showing down the center of the leaf.
Step 4 – Assembling The Hoop

Use the glue gun to glue the three holly leaves in place as shown. Make sure to leave enough space for the beads. Then, sew (3) 8mm beads at the top of the holly leaves.
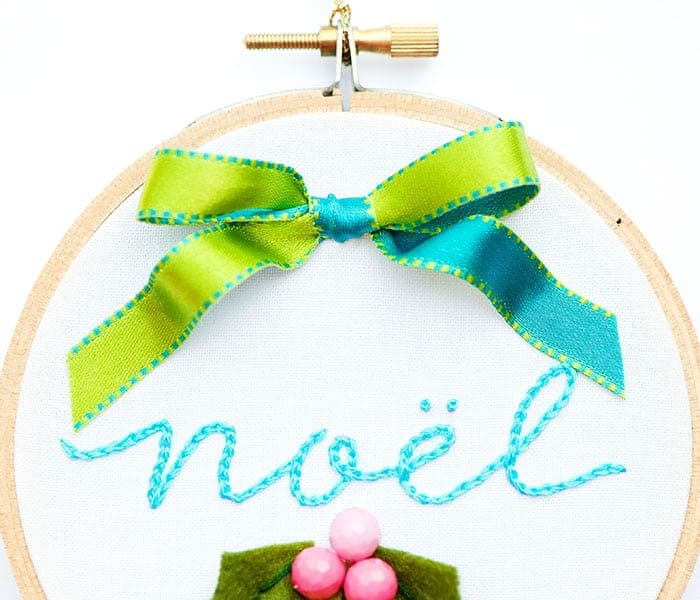
Tie a bow in the center of the 3/8” wide ribbon. Glue the center of the bow above “noël.” Then glue the tails of the bow in place and trim the ends to the desired length.
Step 5 – Add Finishing designs to Complete Your Christmas Embroidery
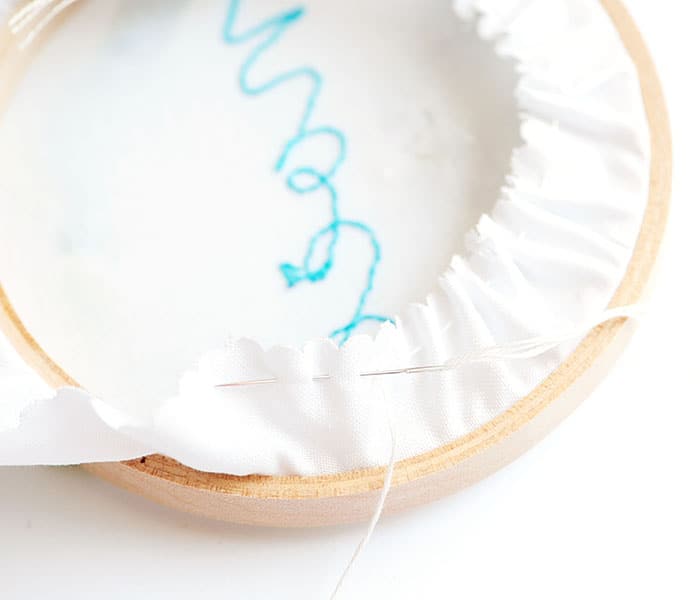
With 3-6 strands of DMC floss (any color), sew a running stitch around the edge of the excess fabric. Pull the stitches to gather the fabric to the center back of the hoop and knot the thread securely.
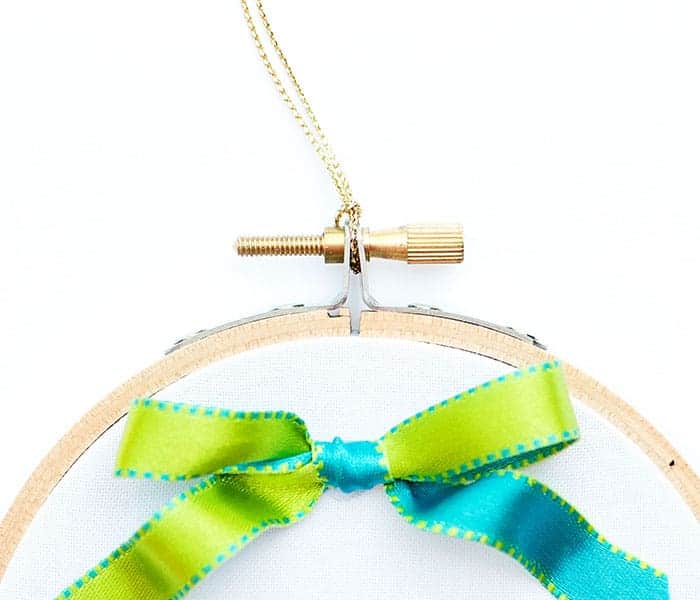
Trace the outside edge of the hoop onto felt or decorative card stock and cut this circle out so it is slightly smaller than your traced line. Glue the felt (or paper) to the back of the hoop. Cut 12 inches of cording or narrow ribbon, tie the ends together and loop it through the screw at the top of the hoop to create the ornament hanger.

Download the Free Christmas Embroidery design Below!
I only approve of Adobe reader. By downloading you are agreeing to pattern terms of use. Fill out the form to have it delivered to your inbox.

More Lolli and Grace Patterns If you enjoyed this project, you might also enjoy one of these PDF patterns from Lolli and Grace (or any one of the many lovely patterns available at www.lolliandgrace.etsy.com).
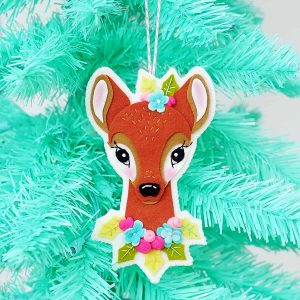
Christmas Fawn Ornament (Also includes instructions for hoop art)

Home, Love and Dreams
Ornaments You’ll Like for Christmas
- Reindeer Felt Handmade Ornament DIY
- Let It Snow Embroidery Hoop Ornament DIY
- Angel Handmade Ornament DIY
- How to Make a Snowman Ornament
- Felt Elf Tutorial
- Mini Top Hat Ornament Tutorial
- You can see all of Handmade Ornament Tutorials on this page
- You can see just my Felt Christmas Ornaments here
Explore More Christmas Projects You’ll Love
- DIY Cloche Ornament
- Felt Gingerbread Man Pattern
- DIY Gnome Ornament
- Santa Ornament DIY
- Ballet Slipper Handmade Ornament
- DIY Homemade Ornament with Gnomes
- Christmas Advent Calendar DIY
- Homemade Christmas Tags
- Cozy Christmas Tall Tree Pillow Tutorial
- Holiday Bath Bombs DIY
- Christmas Tree Pillow
- Christmas Terrarium DIY with Cricut Maker
- Free Christmas Printable Joy World
- Free Christmas Printable for Hot Chocolate
- Free Christmas Printable for Apron