
How to Spray Paint a Pre Lit Christmas Tree (The Easy Way)
This content contains affiliate links or sponsored elements, read our Disclosure Policy.
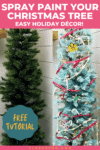

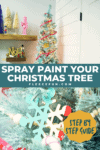
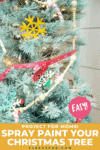
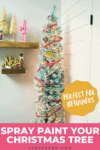

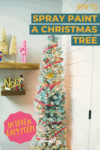
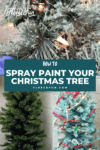
Holiday Project: Learn how to spray paint a pre lit Christmas tree with these easy to follow step by step instructions and photos.
I’m having fun decorating my craft studio for the holiday season. I knew I wanted to have a cute pencil tree in the corner. I looked through the local classifieds and couldn’t find a used tree that would fit the dimensions I needed. So I was thrilled when I found a Black Friday deal at Micheal’s for a 7ft pencil tree. I got home and put it up… and didn’t like it. The size and shape were right but it looked like a black hole sucking all the light in the corner. Not Good.
So I decided that I needed to take some drastic action.
Time to MAKE that tree work.
I decided I would do a little research and spray paint the tree. Honestly this made me a little nervous, because once I started painting the Christmas Tree, there would be no going back, or returns. While I will spray paint something once in a while, I’m not very skilled at it. So I needed to make sure that this project was as dummy proof as possible (for my sake).
YOU WILL NEED:
- 1 Pre lit Christmas tree (check your local classifieds and sales to see if you can get a deal)
- 2-6 Cans of Spray paint ( I used this brand and it worked great! The amount can very depending on the size of tree. My tree was 7 feet tall and a skinny pencil size, and I used 3 cans. 1 white and 2 aqua. So be aware that you might more or less paint depending on your size of tree.)
- Scissors
- Paper Straws
- Masking tape
- Place with proper ventilation/ temperature to spray
- Tarp, spray tent or box
- Time and Patience
- Gloves and clothes you don’t care about
How to Spray Paint a Pre Lit Christmas Tree:
Step 1 – Prepare and Fluff Your Pre-Lit Christmas Tree for Painting
Set up the tree and take time to fluff it out nicely before you spray. This will make it a lot easier to get even coats of paint on and so you don’t have any hidden pockets of sprayed tree that aren’t covered.
Plug in the tree and make sure all the light strands are working before you spray, this is especially important if it’s a new tree – don’t want a faulty tree that you can’t take back!
Step 2 – Keep it in the (color) family
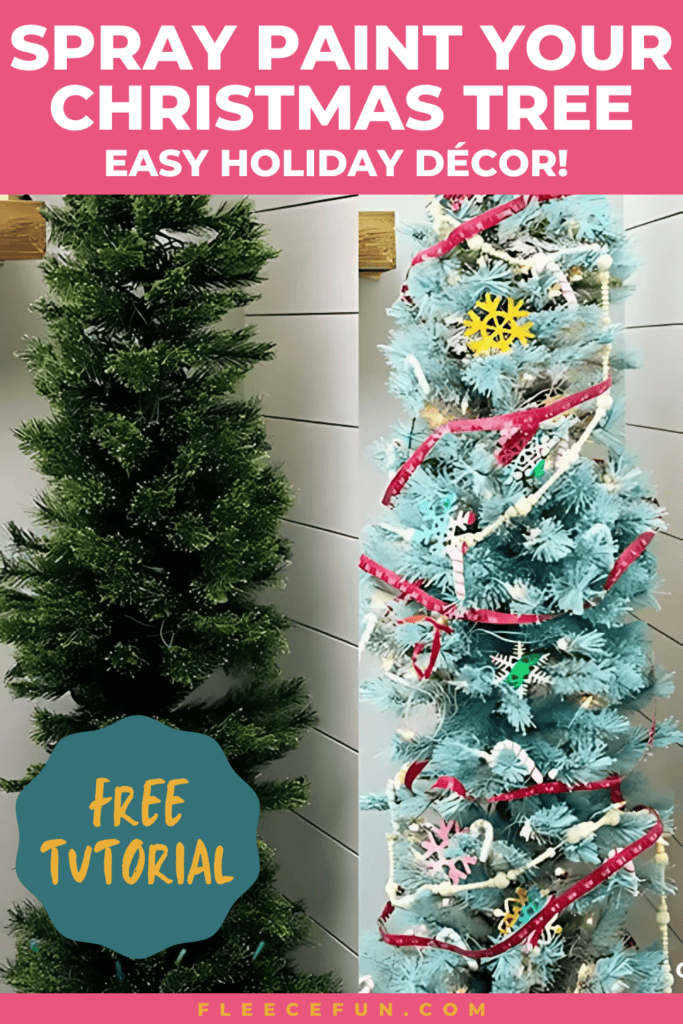
Since I’m not an avid spray painter I shied away from making a pink tree or something really far from green. I new if I didn’t get a nice even coat of paint it would be painfully obvious if a spot was missed. By painting it a minty green I kept it in the “green” family so if some peeked through, it would be hard to spot and no big deal. I also used on can of white spray paint before I added the mint color to give it a lighter base to work with.
Keep it in mind that if you are making the tree lighter than the original color, give it a white base to start. Above you can see the first light coat of white paint over the green next to the top that is still the original color. You can still see the green peaking through, but it lightened parts of it a good amount so the mint color could really be seen.
Step 3 – Cover the Christmas lights (promise it won’t be that bad)
Ok so I can’t take full credit for this idea. But I have tested different versions of this and have come up with the best and easiest way to cover the lights. I got this idea from Skip to my Lou here, but realized 1, you don’t need to use a whole straw for each light and 2, paper straws are so much better and fit the light perfectly!
Cut the straws into sections long enough to cover and bulb and extend past it a little ( about 1/2 inch or more). With the tree plugged in (makes it a lot easier to see all the lights) place the cut straw over each bulb. The plastic straws are just a hair too big and while they worked, could easily be knocked off. But the paper straws were perfect! Paper straws for the win (for once). I did try masking off a few bulbs, but just a few took a long time and with the bulb on it makes the glue on the tape hot and made it more difficult to remove. Boo. Straws all the way for time and ease.
The great part of using this method is that the wires of the lights will be painted the same color as the tree and blend in perfectly!
Step 4 – Outside is best, but mind the temperature for the Spray Paint
So it takes a lot of spray paint to cover the tree and it’s really important to spray in a well ventilated area. I was lucky and it has been unseasonable warm/dry so spraying it outside in a box worked great. But please for your safety, make sure that you have plenty of ventilation and that the place where you are spraying the tree is warm/ dry enough for the paint to work and dry properly.
Step 5 – Many light Coats Make For a Nice Looking Painted Christmas Tree
Since dealing with the tree means dealing with a lot of branches, and layers of needles many light coats is the way to go. What I found worked well is start on the bottom of the tree and work my way to the top. Spray light a coat, go do something else for 15 to 20 minutes then add another coat. Always keep the the spray can moving while you’re painting to avoid getting too much wet paint in one area (causing the needles to clump together – not good). Keep doing this process until you’re happy with the color and coating of the tree.
Step 6 – Give it time to dry/ air out
Even though my Christmas tree was dry fairly quickly, I let it air outside for a while. The smell of new paint was VERY strong and I figured that and hour or two outside would be better for my house.
Step 7 – remove the light covers and finish your spray painted christmas tree
Simply remove the straw covers on the Christmas lights and toss them away. It’s a lot like picking berries. 🙂
On all of the lights I covered with a straw them came off perfectly clean – no paint on them.
I found a couple that I missed covering, but it’s easily fixed by replacing the bulb or scraping the paint off.
Now I have a Christmas tree that is a fun 1950’s mint retro color and I love it!
With some added Christmas decorations to make the color pop, I’m really happy with how it turned out. Now that I know the paper straw trick I think I would be tempted to spray paint a Christmas tree again. But for now I’m happy with this addition to the corner of my studio space.
Projects for the Perfect Christmas Party
- Modern Christmas Wreath DIY Felt
- DIY Christmas Earrings
- Christmas Advent Calendar DIY
- Homemade Christmas Tags
- Cozy Christmas Tall Tree Pillow Tutorial
- 6 Ways to Engage Kids This Christmas
- 5 Tips for Outdoor Christmas Decorating
- Santa Hat How-To
- DIY Santa Hat Headband
- Holiday Bread Wrap
- Mason Jar Cover Gift Idea
Explore More Christmas Projects You’ll Love
- DIY Felt Ornaments Tips, Tricks, and Templates
- Hot Chocolate Printables for Mason Jars
- Gingerbread House Ornaments DIY
- DIY Felt Candy Christmas Tree Ornaments
- Felt Stocking Ornament DIY
- Felt Ornament Pattern: Adorable Reindeer
- Free Ornament Template: Felt Santa
- Reindeer Felt Handmade Ornament DIY
- Let It Snow Embroidery Hoop Ornament DIY
- Holiday Spa Set Tutorial
- Christmas Stocking How-To
- No-Sew Christmas Stocking Patterns
- Free Christmas Printables
- Free Christmas Picture Printables
- Personalized Christmas Pajamas
You have no idea how many trees I’ve passed up during after Christmas sales or thrift stores because the size was right but not the color. I’d love a white or teal table tree, looks like this is the year.
Yay! I’m excited for you – it’s fun to have a tree just the color you want it!
Where do you get paper straws? Great idea for personalized tree.
Found mine at Hobby Lobby. 🙂
Found the fix for my white (yellowed) 6 ft tree with 400 lights I’ve had since 2005. But I used 3/4×1 removable labels. Turned out spectacular. I say mine has the tye-dyed look. Used 3 different paint colors.