
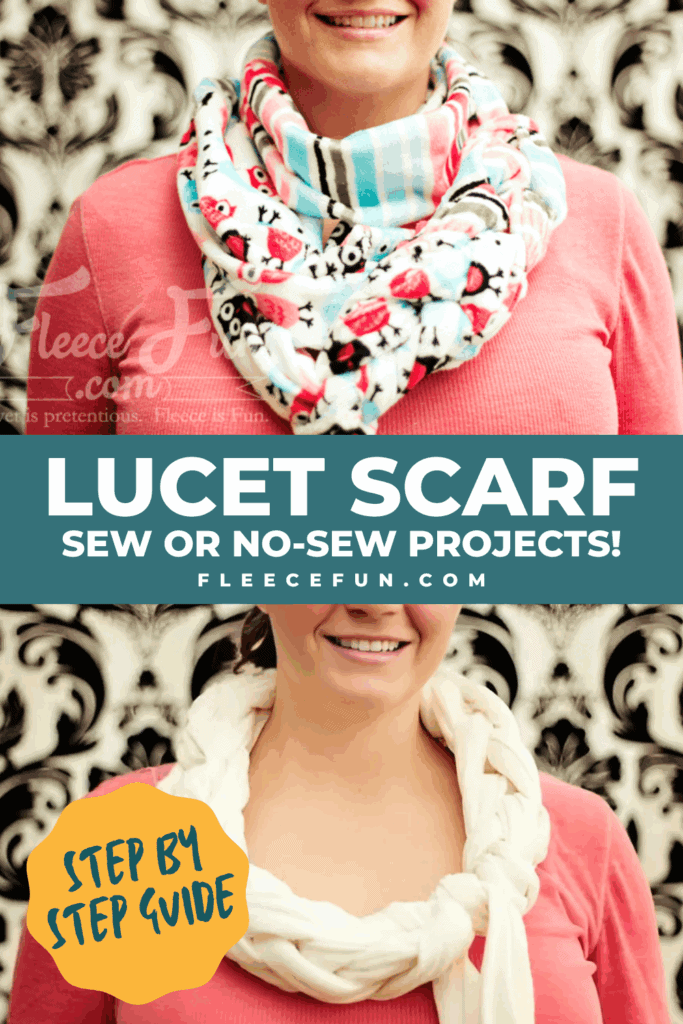
The Lucet Scarf a DIY tutorial {no sew}
This content contains affiliate links or sponsored elements, read our Disclosure Policy.


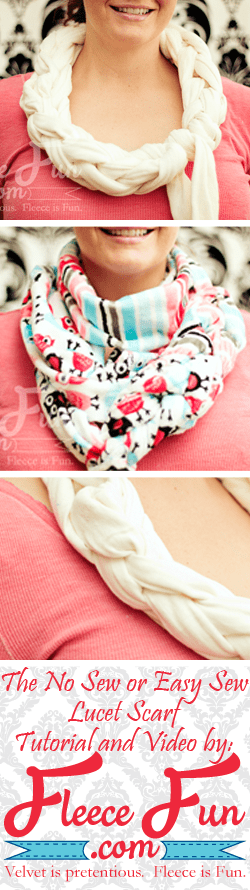
This beautiful DIY Lucet scarf can be a no sew or easy sew project. A fun braid loosely based on the concept of a lucet, this is a great project for a beginner the gives fabulous results (it looks like something you would get from Anthro!) It’s so fast to make you’ll want to several for your friends and family!
Hate The Ads?
This pattern with video and printable instructions is available to members of the Maker’s Studio. The Maker’s Studio is an ad free experience, no video ads, no forms, no zip files, just creating.

YOU WILL NEED:
I bought some t-shirt sheets from my local bargain store and it was a great way to make several scarves and save money – or you can up-cycle some sheets that have seen better days)
No Sew Version:
- 7/8 yard of Jersey knit (60 inches wide) or 7/8 yard of fleece
- Rotary cutter, ruler and mat
- scissors
- Chair or stool (see instructions below)
Easy Sew Version
- 7/8 yard of Cuddle Fabric (or two half yards of coordinating fabric)
- Rotary cutter, ruler and mat
- scissors
- Chair or stool (see instructions below)
- Thread
- Sewing Machine
- Sewing Essentials (pins, scissors, etc.)
No Pattern is needed for this Lucet Scarf – however the terms of pattern use still apply.
Video Tutorial here – written below.

DIy Lucet Scarf tutorial
Step 1 – Cut out the strips of cloth
In order to make the braid we need a really long length of cloth. To make that we’re going to cut a bunch of strips. Take your fabric and cut three 10 inch wide lengths of fabric. So you have 3 strips of fabric that are 60 inches long by 10 inches wide.

If you are using two coordinating fabrics you’ll cut 1 10 inch by 60 inch from each and then 1 10 inch by 30 inch from each of the two fabrics.
Quick Tip
Change up the look by playing with the width of the fabric to make the scarf different.
Step 2 (no sew) – make the fabric one long length
Now it’s time to take the the three strips and make them one really looooooooong strip.
For the no sew version you’ll take the end of one of the strips and cut four strips about 2 to 4 inches in length Do the same to the end of another strip. Then tie the strips together using the fringe you just made. Tie each fringe into a square knot and trim excess to desired length. Roll up into a ball.
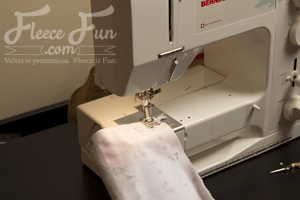
Step 2B (Easy Sew) – make the fabric one long length
Sew the strips together using a .5 inch seam allowance to make it one really long length. If you are using t-shirt or fleece you’re finished since you can leave the edges raw.
If you are using cuddle fabric – just two more things you need to do. After sewing the fabric together in one really long length – fold it in half so right sides are together.

Using a .5 inch seam allowance sew together to make a really loooooong tube. Then turn right side out. Next is weaving the braids to make the Lucet Scarf.
Step 3 (both sew and no sew) – weave the scarf
This is where the video tutorial comes really handy. But I will try my best to explain here.
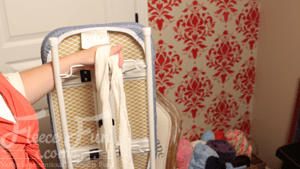
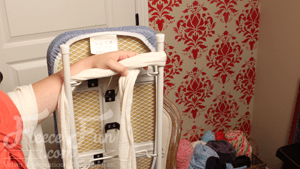
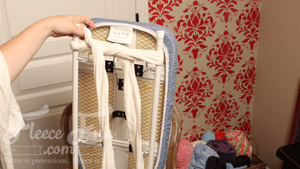
Take your chair, stool (or in my case mini ironing board) and have the two “tines” up and pointing toward you.
With one end hanging down between the two tines make a loop around the left side then cross over to the right and loop around (making a figure 8).
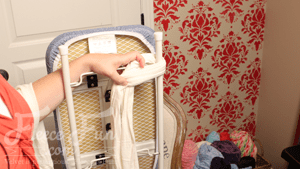
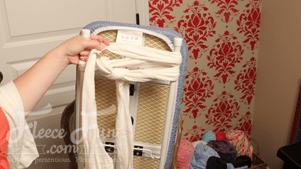
Loop around the left side again,

then the right so you have two loops on each tine.
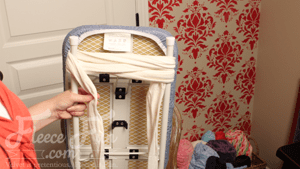
Take the bottom loop on the left and lift it up over the top (second) loop and let it drop to the center. Hang in there! Almost done with this Lucet Scarf!
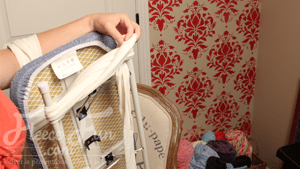
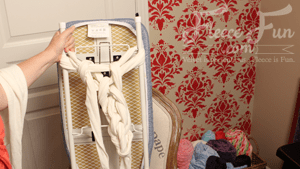
Then take the bottom loop on the right lift it up over the top (second) loop and let it drop to the center.
Tug on center to tighten and give tension. Then weave another figure 8 – once around the left and then the right tine.
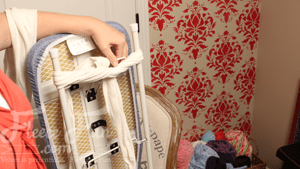
Then lift bottom loop over the loop you just created on the left, and do the same on the right. It will take doing this a few times before it begins to take shape.
Repeat this action until you have make a full braid or as much braid as you like.
Once you are to a stopping point lift both loops up off the tine and pull the remaining fabric through both loops to finish off.
The best part about this is – if you don’t like it it’s really easy to try again until you get the tension and look you want, just undo it.
If you are making the no sew version – you’re finished! Just braid it to the length you want, finish off and you’re good to go.
Step 4 (Easy Sew) – sew the ends together to finish your lucet scarf
If you want to make it an infinity scarf like I did in the cuddle fabric example. You will need to make a shorter braid and then sew the ends together. Be sure to check the length is where you want it to be at before you sew it.
Love this diy lucet scarf? see More Fleece Scarf Tutorials:
- The shirred scarf
- The Fast Fashion scarf (warmth meets a feminine touch)
- The Charmed to meet you Scarf (scrunched scarf)
- Fleece Scarf with Fur Pockets
- Candy stripe scrunch scarf
- Chevron Scarf
- Color Block Scarf
- Saturday Morning Scarf; Fleece and Jersey knit combine for the perfect scarf)
- Bow Infinity Wrap
- The Bubble Scarf
- Want to learn how to Hand Stamp your Scarves?
- You can see all of the Scarf Tutorials Here
More No Sew Projects:
- No Sew Blanket Tutorial (with flannel!)
- How to Make a No Sew Fleece Tie Blanket (better method with templates!)
- How to use the Tie Blanket Ruler!
- How to Make a No Sew Tie Quilt
- No Sew Hobo purse
- Printable Pinwheels for Spring!
- Satin Flower hair clip
- No Sew Fleece Flower
- No Sew Art Smock
- Ragged Tassels (Cute for decorating)
- No sew baby car seat Canopy
- No sew cape
Would love to print directions and supplies needed
Hi Judine,
My site is mobile friendly so that’s not needed (it saves you time and the paper). If you really need a hard copy you can always copy and paste it to a word document for personal use (not to be distributed in any form).
I have done it this way so people will visit my site, which makes it possible for me to continue to offer these patterns for free. =)
That type of weaving is called an “i-cord” – very simple stitch to learn.
Thanks for the idea. I’ve made a few jewelry items with yarn and this stitch, but never considered this. My scarf-wearing daughter will be thrilled.
That’s good t know! Thanks Mary Ellen,
Angel
If you cut your fabric out in a spiral, there is no need to join the ends unless you want to. Just look up ‘how to make t-shirt yarn’ and think bigger 🙂
I’m definitely going to give this a try. It sounds really simple and fun.
Hi Mary –
That’s a great solution. I was just trying to find a way to be more conservative with the fabric. =)