
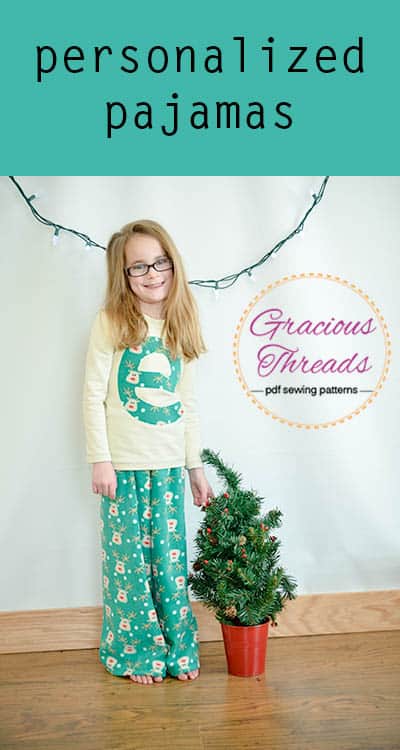
Personalized Christmas Pajamas
This content contains affiliate links or sponsored elements, read our Disclosure Policy.
The weather is getting colder here in northern Canada, and with the ground already covered in snow, there is only one thing on my mind: Christmas! Every year I try to sew my kids a new pair of Christmas pajamas, and I wanted to share the design I came up with for this year.
Things you will need:
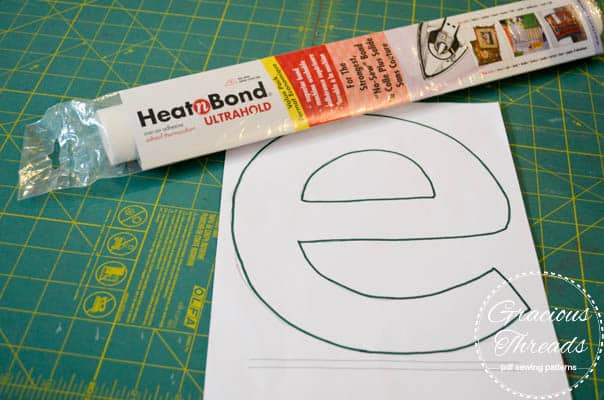
– double sided fusible web such as Heat n’ Bond
– ball point needle and regular sewing supplies
– store bought shirt OR front piece of a shirt your will be sewing up
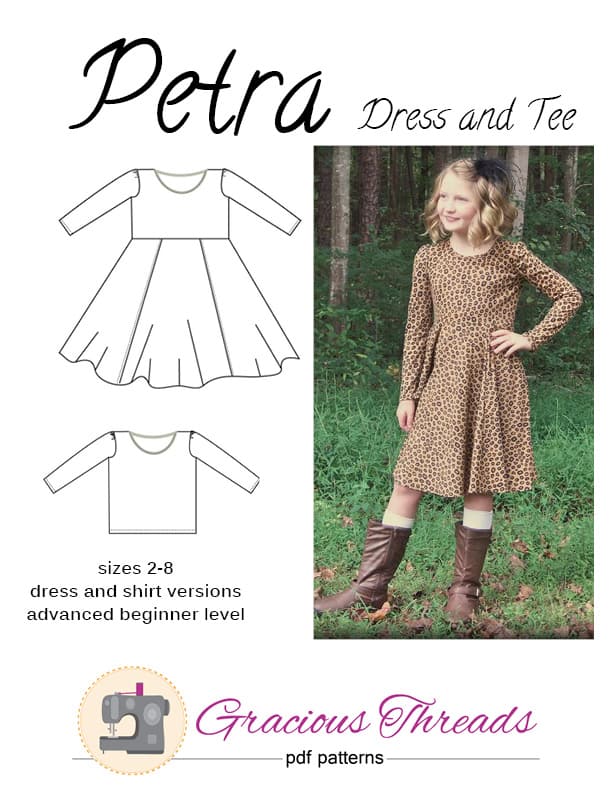
My girls are wearing the Petra Tee, a pattern that can be purchased in my shop (hint, it also makes a perfect holiday dress!). The pants are a free pattern you can find right here at Fleece Fun! I cut size 5/6 for both my girls, but used a larger hem for my younger daughter.
1. Find an image or letter you like. I used my daughters’ first initials and found a font I liked in Microsoft Word. Enlarge the letter to the size you like, and then print it off or trace it directly off the screen (not such a good idea if you have a touch screen!)
2. Your double sided fusible web has two sides: a shiny, plasticy side and a papery side. You will need to trace a REVERSE IMAGE on the papery side. If you don’t trace it in reverse, you’ll end up with it backwards on your shirt. Don’t cut out the letter quite yet.


3. Cut out a piece of the fabric you are using to applique that is the same size as your fusible web. Place the plasticy side of the fusible web against the WRONG side of your fabric. Using an iron temperature that is appropriate to your fabric, iron the fusible web to your fabric. I am using fleece, so I made sure I kept my iron on the ‘synthetic’ setting.

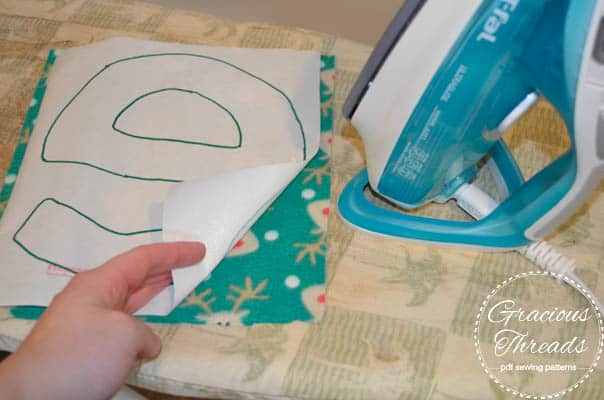
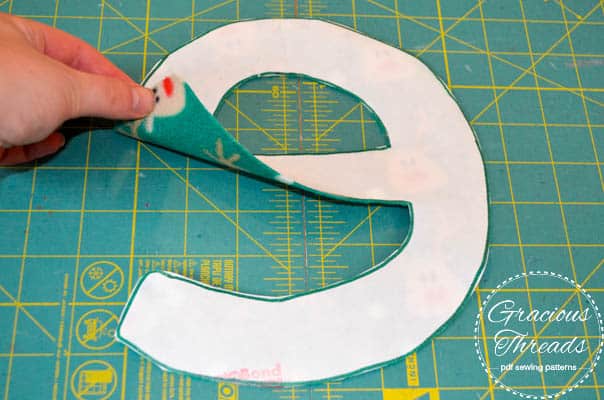
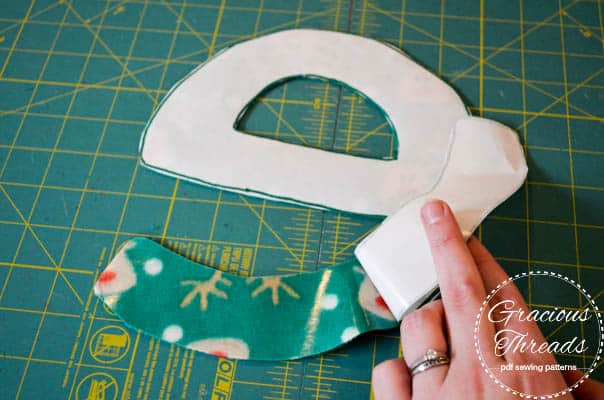
4. Cut out your image and peel off the papery backing of the fusible web. The plasticy part will be left behind on the fabric. This is what will stick your image to the shirt.
5. Iron it onto your shirt or shirt front. I used a press cloth (an old crib sheet!) to be extra sure that my fleece wouldn’t melt.
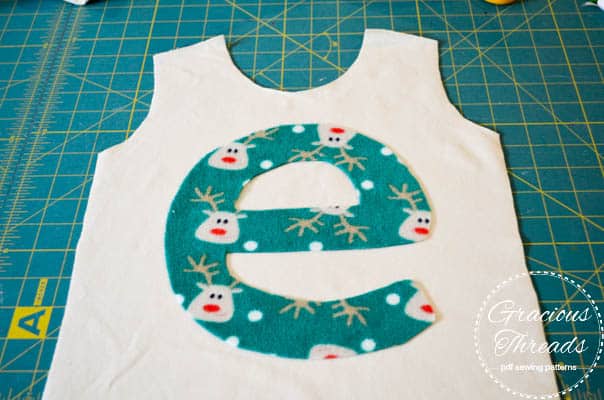
6. Stitch around your image. Since fleece doesn’t fray, you can just use a straight stitch. If you are using a cotton, you will want to use a tight zigzag instead.

NOTE: If your shirt fabric is thin, you may benefit from using a stabilizer behind your image. There are a number of commercial stabilizers designed for machine embroidery that work, otherwise I’ve use a sheet of tissue paper and it works well. Just tear it off after you are done.

My girls are happy, and so am I!
Printables and Cut Crafts this Season!
- Free Christmas Printables
- Holiday Bread Wrap
- Free Christmas Picture Printables
- Free Christmas Printable Joy World
- Free Christmas Printable for Hot Chocolate
- Free Christmas Printable for Apron
- Perfect Stocking Stuffers for Sewing Lovers
- Mad Hatter Tea Party Paper Chandelier
- Printable Handmade Gift Planner
- Hot Chocolate Printables for Mason Jars
Explore More Christmas Projects You’ll Love
- DIY Felt Ornaments Tips, Tricks, and Templates
- Vintage Apron
- Deer Head Pillow
- Advent Calendar Wreath
- Let Us Sew SVG Christmas Décor
- Gingerbread House Ornaments DIY
- DIY Felt Candy Christmas Tree Ornaments
- Felt Stocking Ornament DIY
- Felt Ornament Pattern: Adorable Reindeer
- Free Ornament Template: Felt Santa
- Reindeer Felt Handmade Ornament DIY
- Let It Snow Embroidery Hoop Ornament DIY
- Modern Christmas Wreath DIY Felt
- DIY Christmas Earrings
- How to Spray Paint a Pre-Lit Christmas Tree
- Holiday Spa Set Tutorial
- Christmas Stocking How-To
- No-Sew Christmas Stocking Patterns
You always have the cutest patterns. I love browsing through them.
Thank you so much!