
How to Make a Christmas Stocking (free pattern/ template)
This content contains affiliate links or sponsored elements, read our Disclosure Policy.


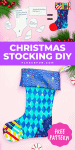


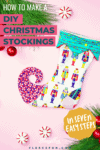
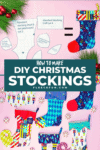
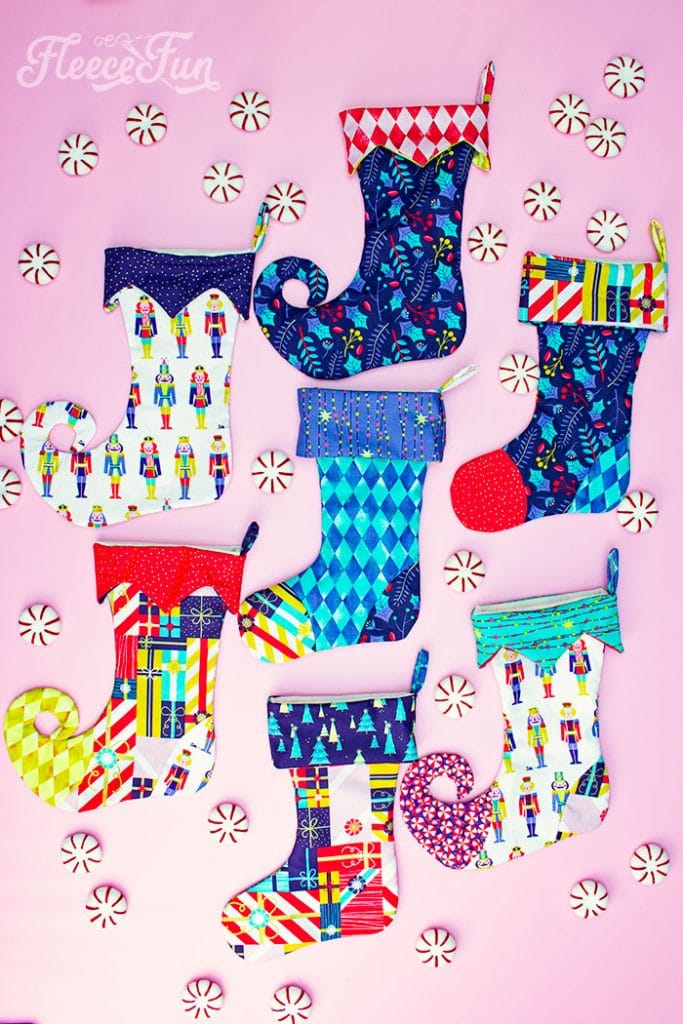
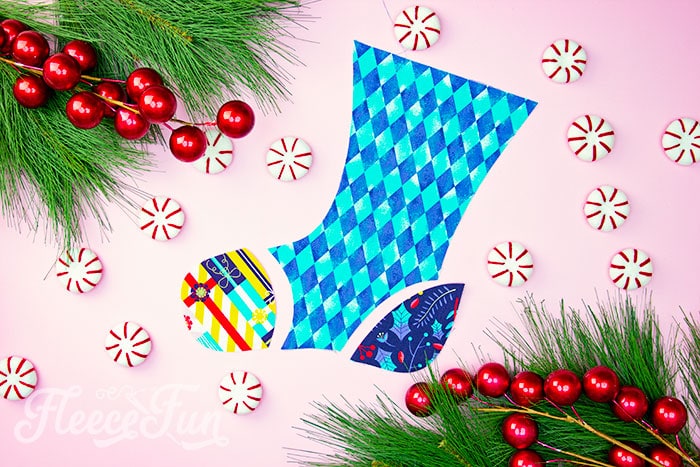
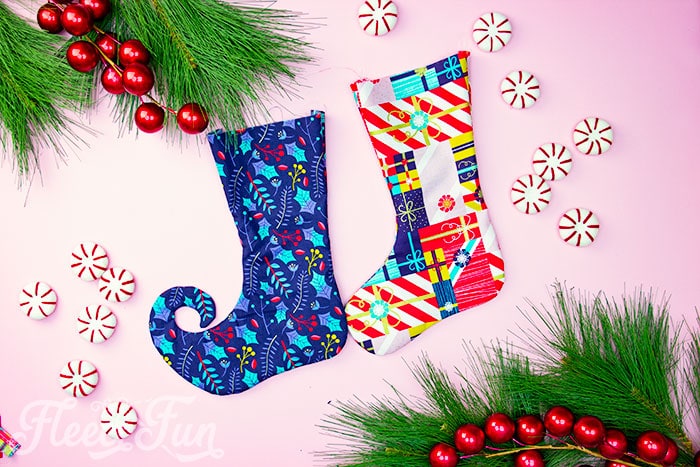
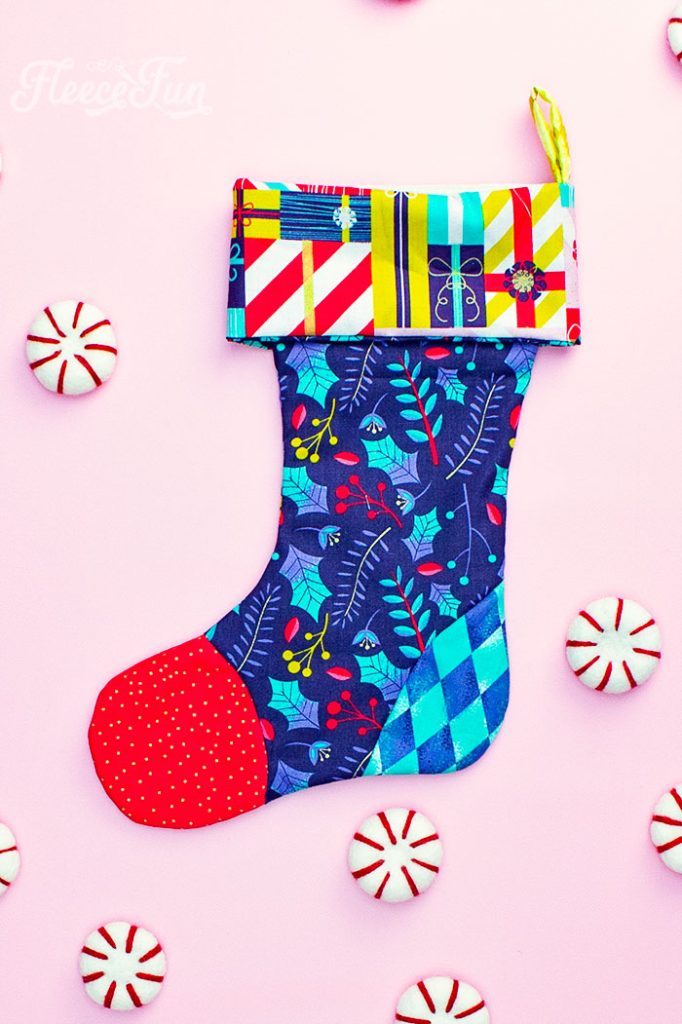
Learn How to Make a Christmas stocking with this free pattern and step by step instructions! This adorable stocking can be made 4 different ways. There is the classic style, the patchwork classic style and a curly toes stocking and a patchwork curly toed stocking.
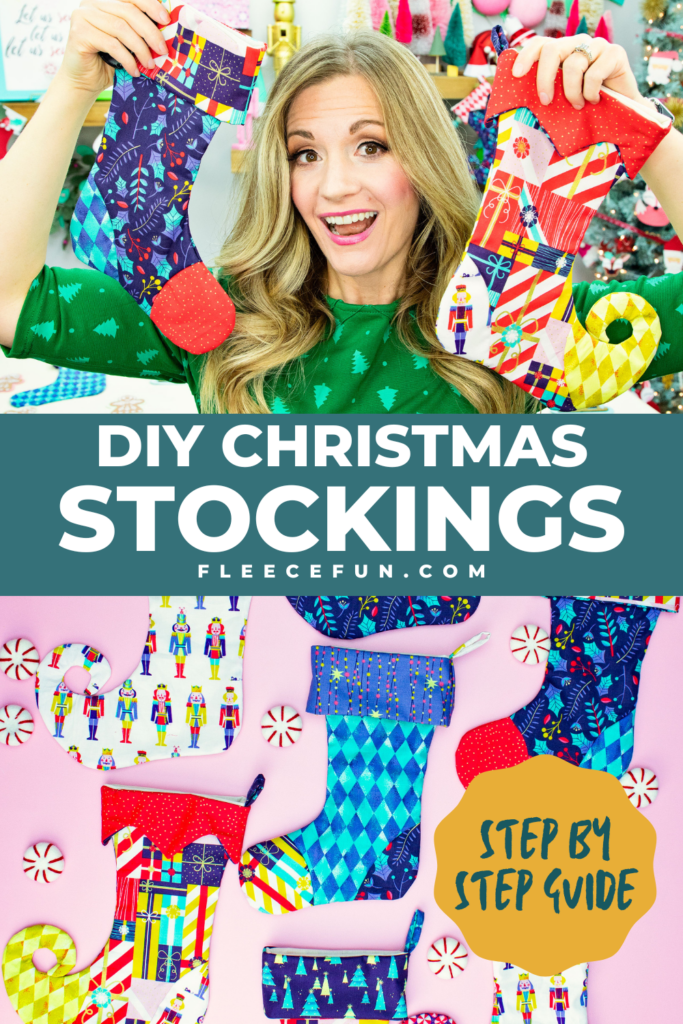
This is a Christmas stocking with a lining. To make The free pdf pattern of the holiday stocking comes in two sizes a 17″ and a 12″. These stockings not only look great by the fireplace, but they also work wrapping for gifts too!

YOU WILL NEED:
- 2/3 yards cotton for large (1/3 for small)
- 1/4 yard cotton for the cuff and patchwork
- thread
- Light iron on interfacing (a must to keep toes from being floppy)
- Sewing Essentials (scissors, pins, etc.)
- Fleece Fun’s free pdf pattern (available by filling out the form here)
How to Make a Christmas Stocking (free pattern/ template) Instructions:

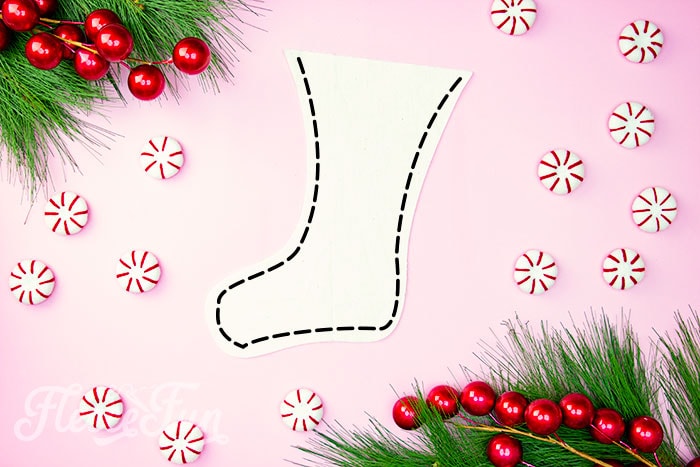
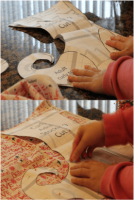
Step 1 – Assemble and Cut out the Free Pattern
Assemble the pattern. If you are unfamiliar with digital patterns and hoe to assemble them you can find instructions here.
Decide on the size of stocking you’re making.

From there you need to decide which style of Christmas stocking you’re going to make.

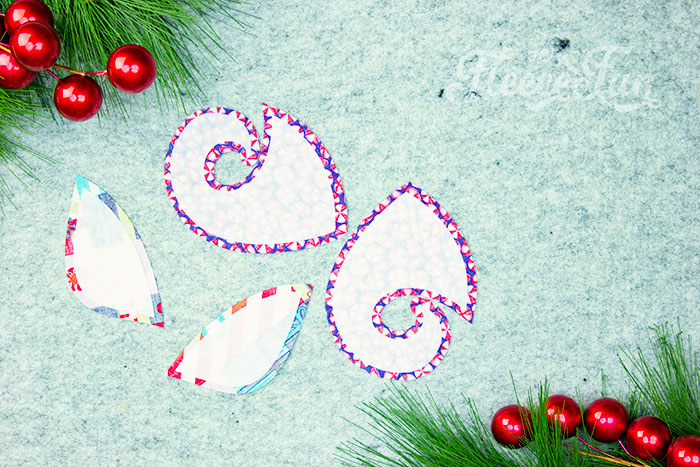
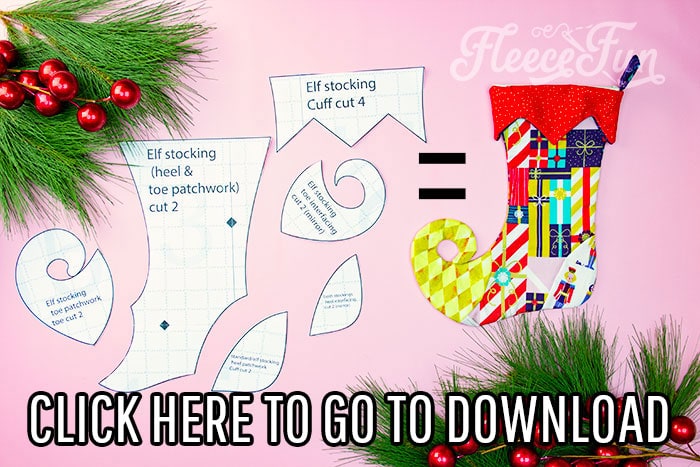
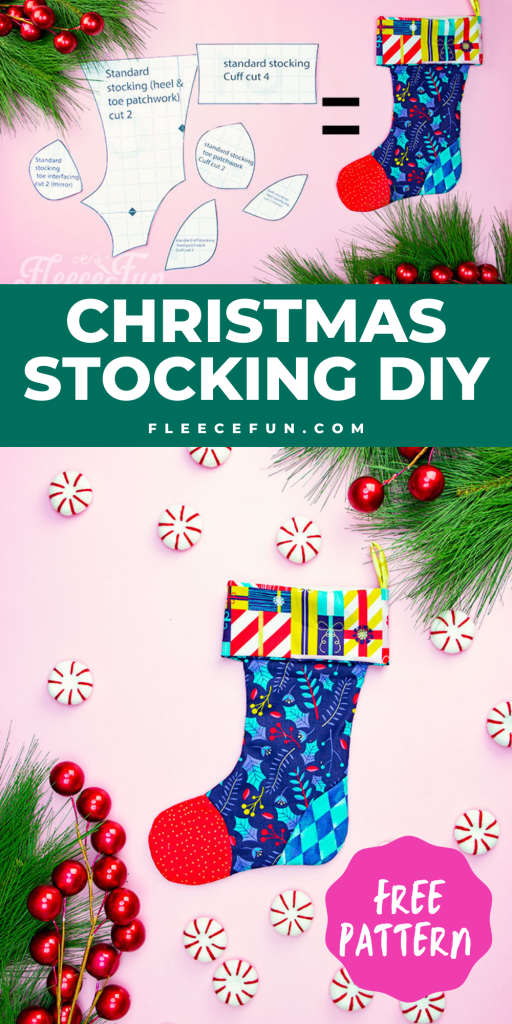
The standard patchwork style stocking needs the toe, heel, body, and cuff. It also needs the toe and heel interfacing pattern pieces.
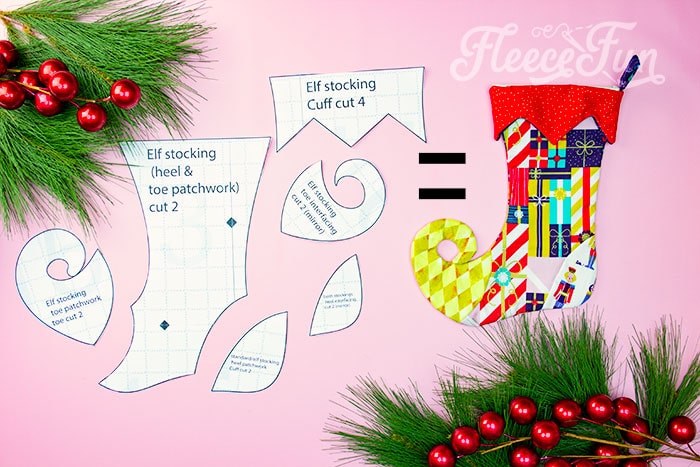
The curly toe (or elf) patchwork style stocking needs the curly toe, heel, body, and pointed cuff. It also needs the curly toe and heel interfacing pattern pieces.

The standard style stocking needs the body, and cuff. It also needs the toe and heel interfacing pattern pieces.

The curly toe (or elf) style stocking needs the body, and pointed cuff. It also needs the curly toe and heel interfacing pattern pieces.

All Christmas stockings no matter what the style need a hanger, and a lining. The lining is the same for all four styles of stocking.
Step 2 – Cut out the Christmas Stocking
Part of the fun with this pattern is that you can really mix patterns from a fabric collection on the stocking. Take some time to plan it out if you’re making several. Cut out items on folded fabric so you get a mirror image. When cutting out the interfacing make sure you cut out a mirror of the shape by cutting on doubled interfacing or flipping the pattern over.
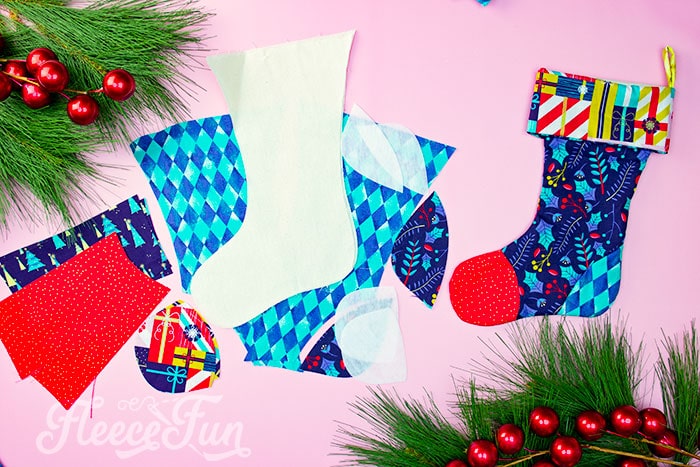
For the standard patchwork stocking you will need to cut out the following from cotton: 2 toe pieces, 2 heel pieces, 4 cuff pieces, 2 main body pieces, 2 lining pieces, and 1 hanger piece. From the fusible interfacing you’ll need to cut out 2 toe pieces and 2 heel pieces.
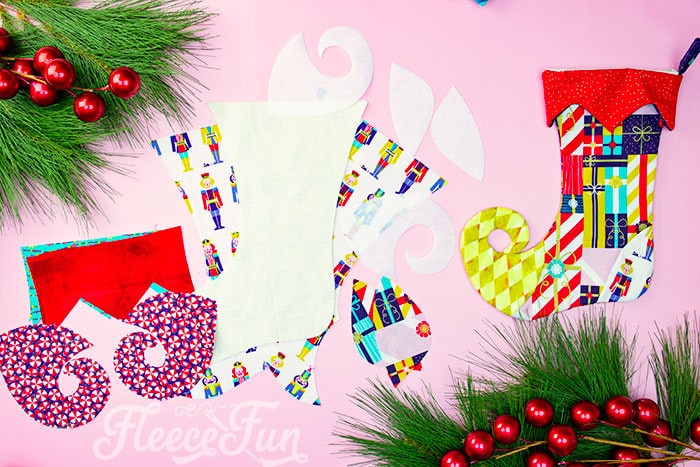
For the elf or curly toed patchwork stocking you will need to cut out the following from cotton: 2 curly toe pieces, 2 heel pieces, 4 pointed cuff pieces, 2 main body pieces, 2 lining pieces, and 1 hanger piece. From the fusible interfacing you’ll need to cut out 2 curly toe pieces and 2 heel pieces.
For the traditional (standard) stocking you will need to cut out the following from cotton: 4 cuff pieces, 2 main body pieces, 2 lining pieces, and 1 hanger piece. From the fusible interfacing you’ll need to cut out 2 toe pieces and 2 heel pieces.
For the elf or curly toed stocking you will need to cut out the following from cotton: 4 pointed cuff pieces, 2 main body pieces, 2 lining pieces, and 1 hanger piece. From the fusible interfacing you’ll need to cut out 2 curly toe pieces and 2 heel pieces.
Whew! Now that it’s all cut out it’s time to prep the pieces.
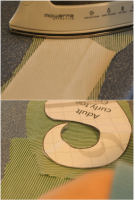
Step 3 – Add the Fusible Interfacing
I know someone will want to skip this step – please don’t do it! The fusible interfacing helps the stocking hand nicely and keep the curly toe from being floppy (and no one wants floppy toes)!
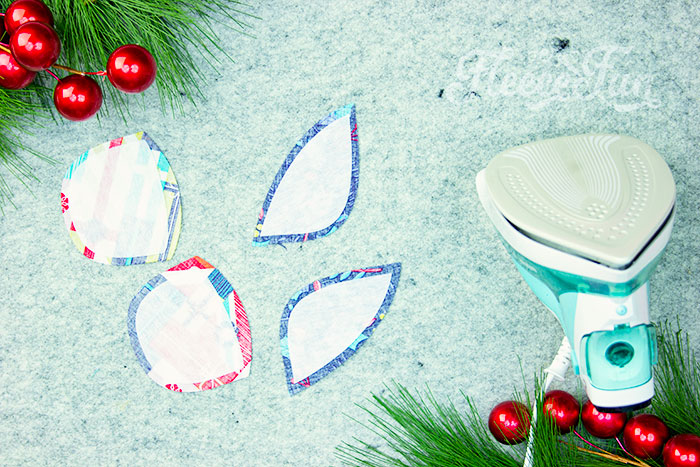
For the traditional patchwork stocking (standard) iron on the interfacing to each of the toes and heels. Center it so there is approximately .25 of an inch all the way around.
For the curly toed patchwork stocking (Elf) iron on the interfacing to each of the toes and heels. Center it so there is approximately .25 of an inch all the way around.
For the traditional Christmas stocking (standard) iron on the interfacing to the toes and heels of the stocking body place it so it is approximately .25 of an inch from the edge.
For the Elf Christmas stocking (Curly toed) iron on the interfacing to the toes and heels of the stocking body place it so it is approximately .25 of an inch from the edge.
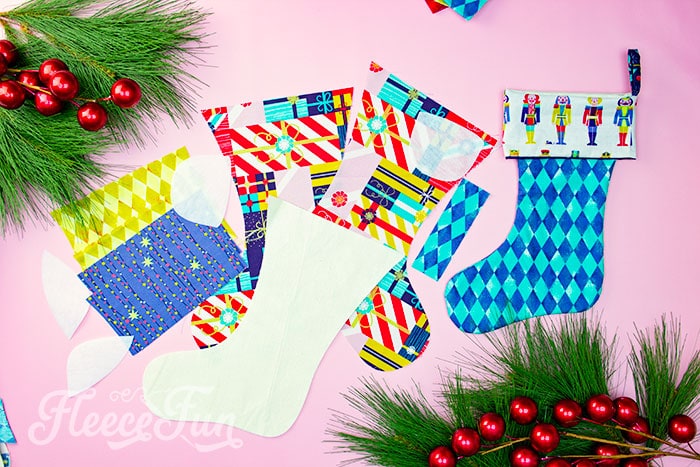
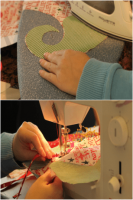
With those pieces prepped we can now start sewing! For the patchwork stockings we have an extra step – if you’re making a stocking that isn’t patchwork you can skip ahead to step 5.
Step 4 – Assemble the Patchwork Christmas Stockings
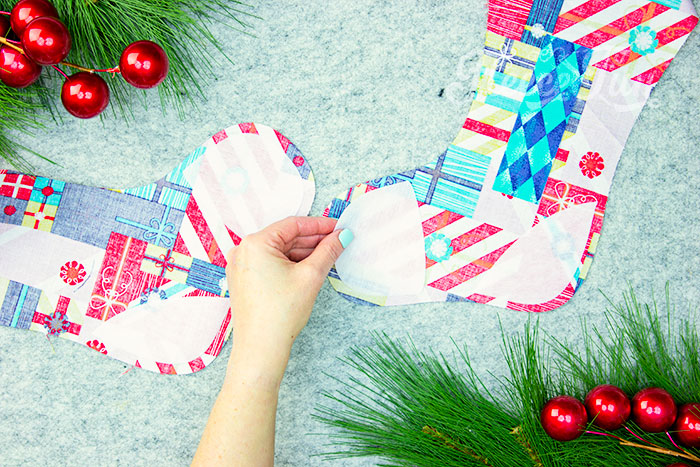
We’ll start with the traditional patchwork stocking. If you are new to sewing or haven’t sewn in a while these seams can appear intimidating. I’ll walk you through it – they can and do sew together – I’ll show you how. Pinning is key to making this work.
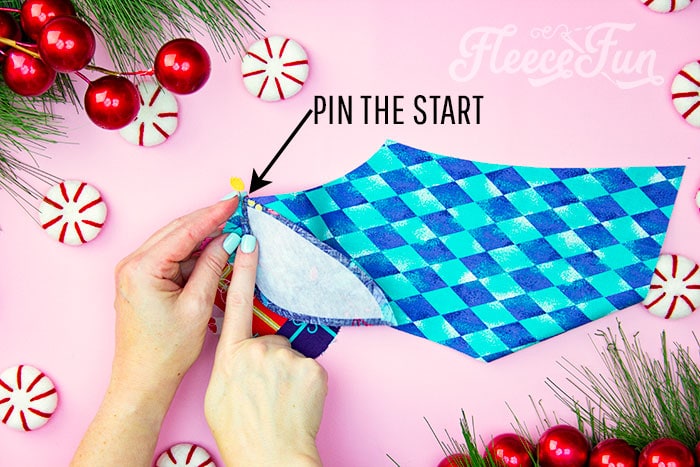
With right sides together, pin together the start of the seam.
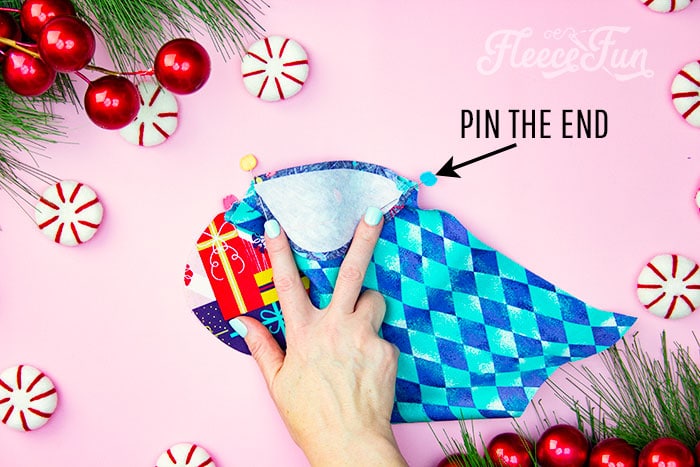
Then pin the end of the seam together.
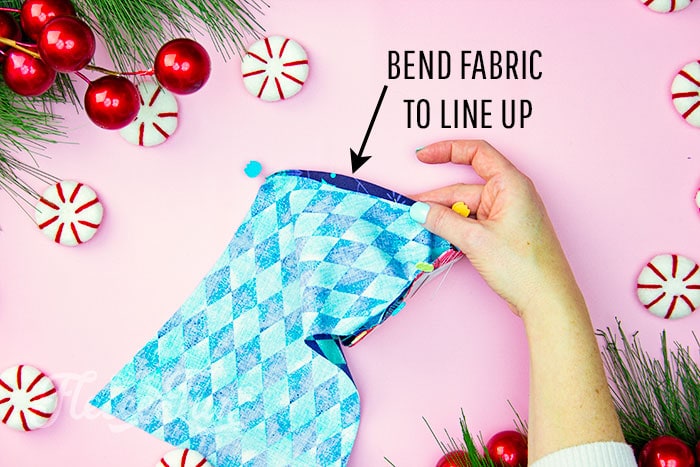
I’m flipping the stocking over so you can see the fabric on the other side. Fabric bends and has “wiggle” room. Pull the fabric up so it meets the edge of the heel piece.
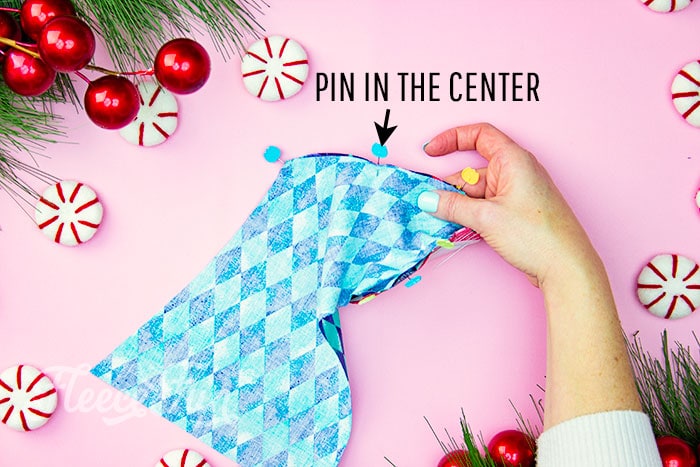
Pin it in the center. From here it’s easy to pin the rest into place. With something like this it’s a good idea to use several pins.
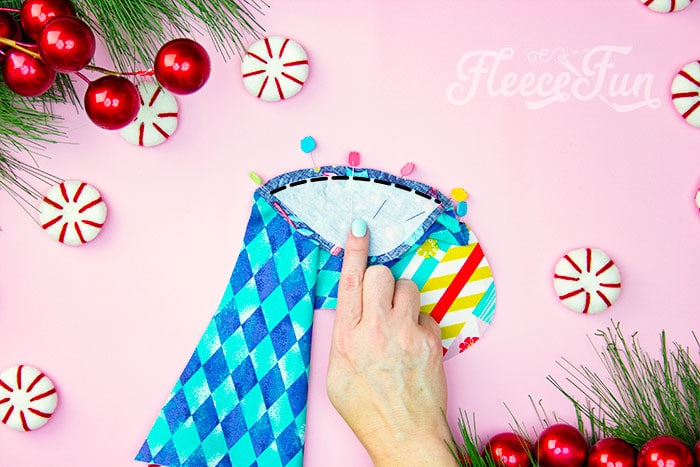
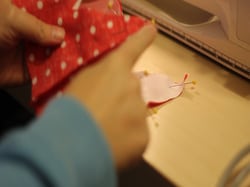
Sew the heel on using a .25 inch seam allowance.

Repeat that same pining process with the toe. Sew into place using a .25 inch seam allowance. Repeat this process with the other half of the stocking.
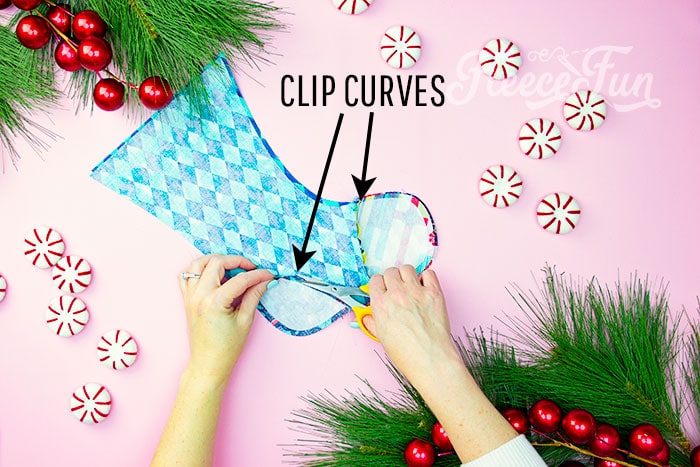
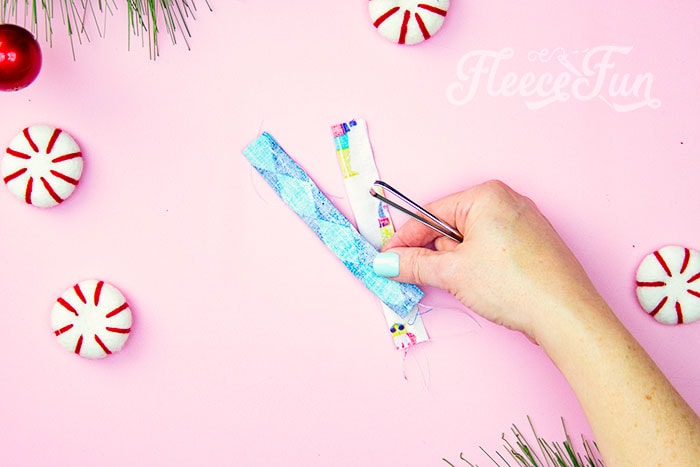
Once both the heel and toe are sewn on, clip the curves of the fabric (be careful not to snip through the seam) so the fabric doesn’t tug the seams and they lay nicely. Do this to both halves.

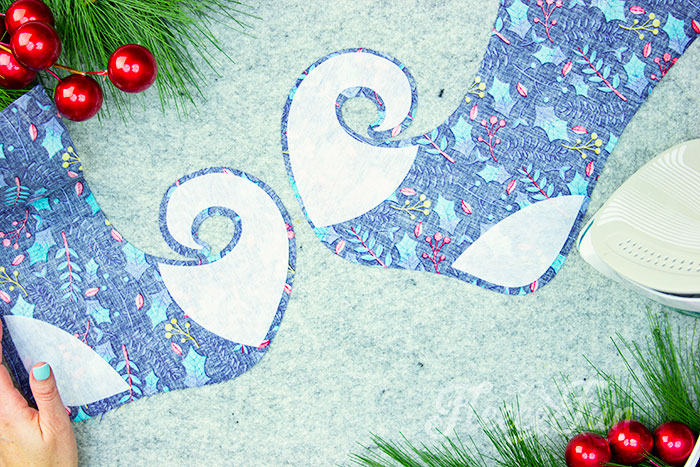
For the Curly toed or Elf Patchwork stocking the process is the same.
With right sides together pin and then sew on the heel, using a .25 inch seam allowance.
Repeat that same pining process with the toe. Sew into place using a .25 inch seam allowance. Repeat this process with the other half (mirrored side) of the stocking.
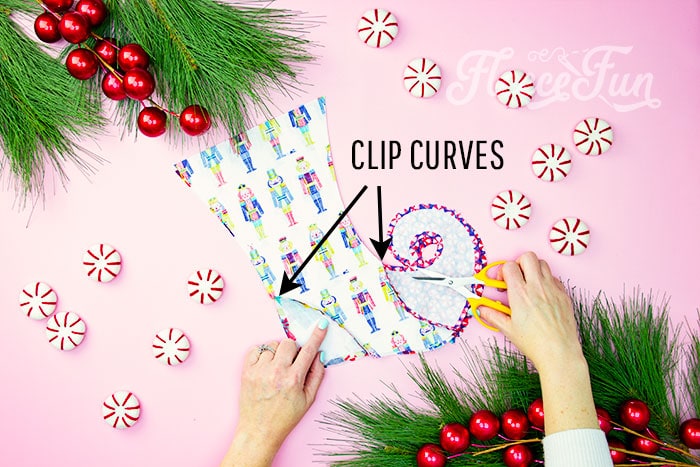
Like the traditional patchwork stocking, once both the heel and toe are sewn on to the curly toed stocking, clip the curves of the fabric (be careful not to snip through the seam) so the fabric doesn’t tug the seams and they lay nicely. Do this to both halves.
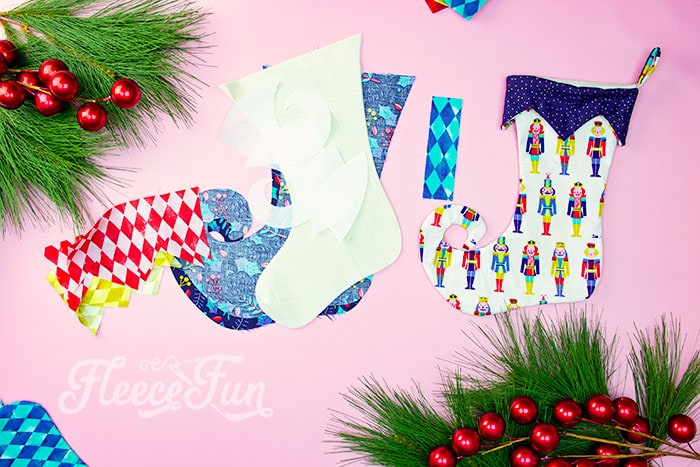
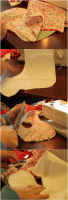
Step 5 – Sew the Body of the Stocking
No matter what style you’re making you will need a lining for the Christmas Stocking.
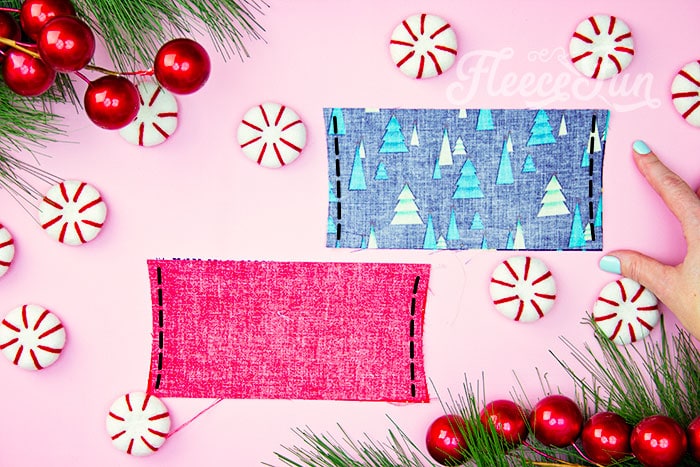
With right sides together, sew the Christmas stocking lining with a .25 inch seam allowance. Set aside.
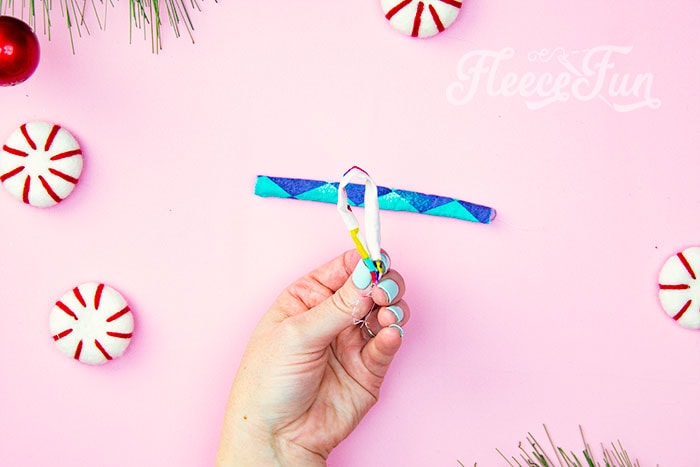
For each stocking you’ll want a hanger. Fold over lengthwise so right sides are touching. Sew together using a .25 inch seam allowance.
Turn the hanger right side out.
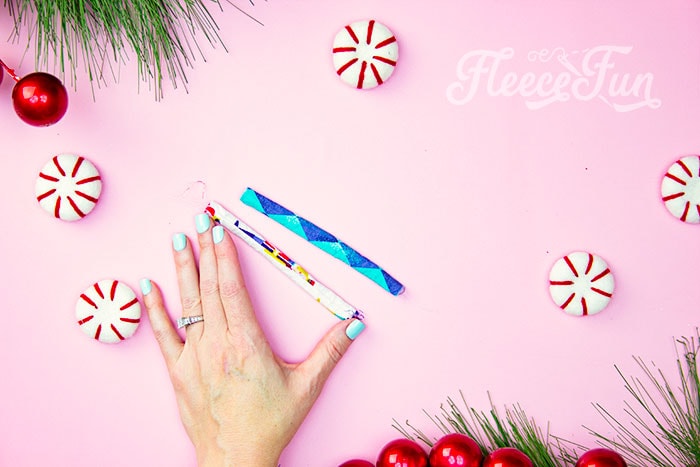
Set the hanger aside.
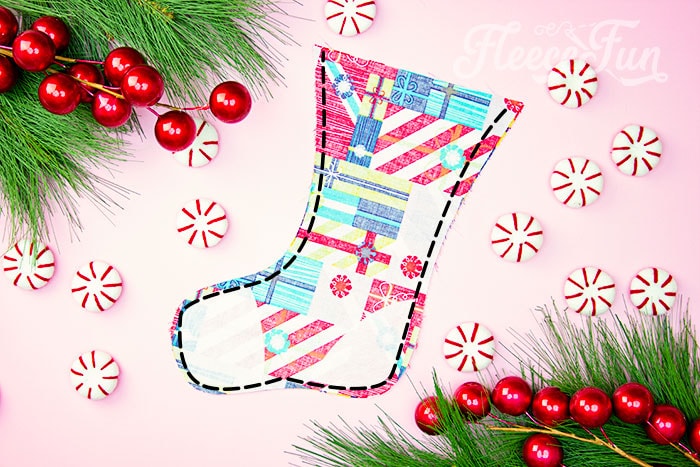
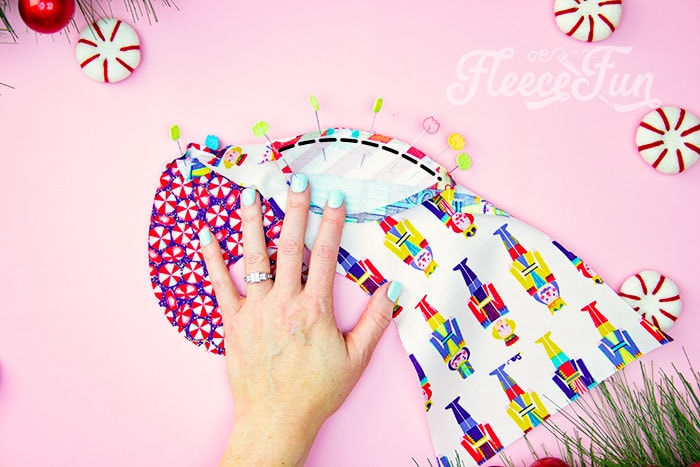
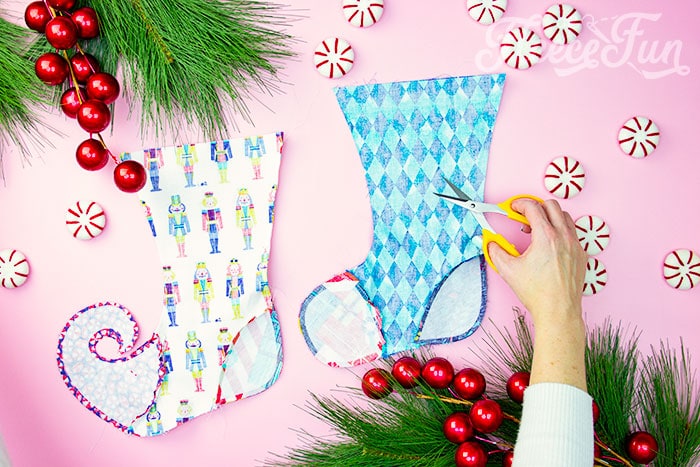
With the patchwork pieces sewn on the traditional patchwork and standard shapes are the same. With right sides together sew together using a .25″ seam allowance, leaving the top open.
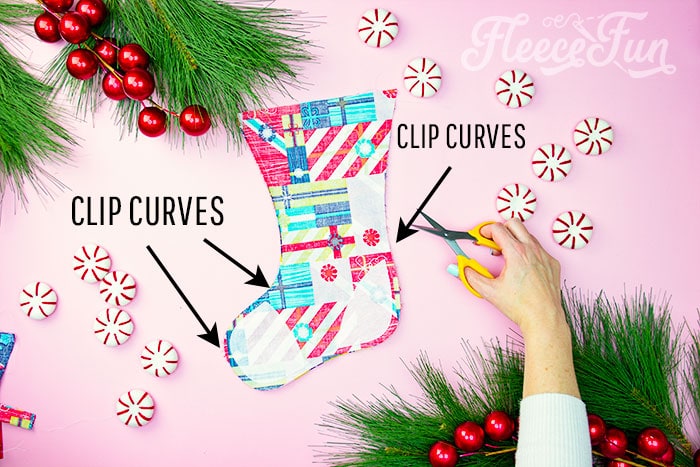
Clip the curves so the fabric doesn’t bunch when turned.
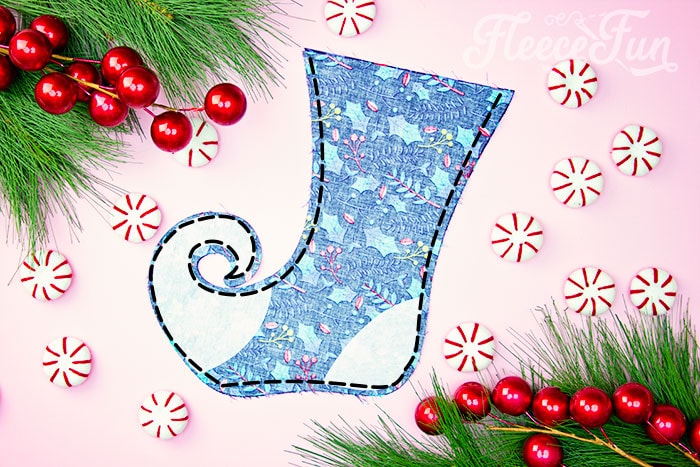
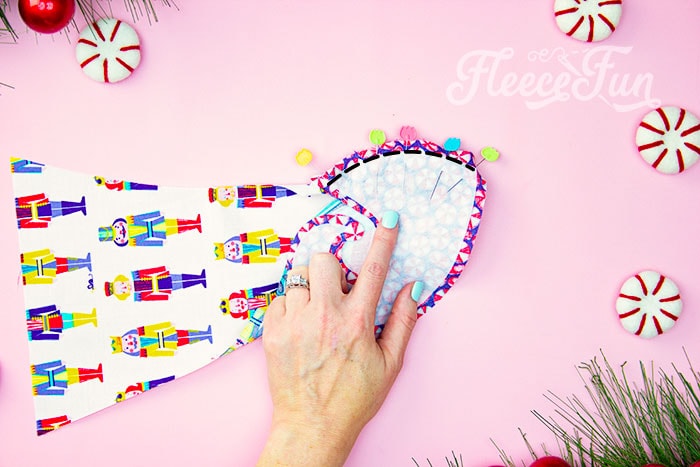
With the patchwork pieces sewn on the Curly toe patchwork and regular Curly toe shapes are the same. With right sides together sew together using a .25″ seam allowance, leaving the top open.
Quick Tip
The curve on the toe can be hard to navigate – TAKE YOUR TIME.
If you feel like you’re losing the curve while sewing. stop sewing, put the needle down in the fabric. Lift the foot and realign the fabric. Put the foot down and continue sewing. Repeat as often as you need to stay on track. Use the interfacing as a guide – especially for the point.
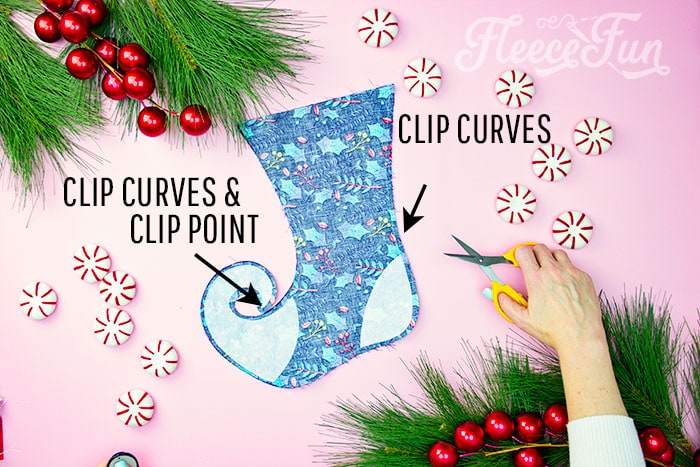
Clip the curves and point so the fabric doesn’t bunch when turned.
Again the since at this point the shape is the same if it’s a patchwork or not the process is the same.
Turn right side out. And set aside.
Step 6 – Sew the Cuff of the Stocking
For the standard or traditional style of stocking (both regular and patchwork): With right sides together, sew the sides of each with a .25″ seam allowance.
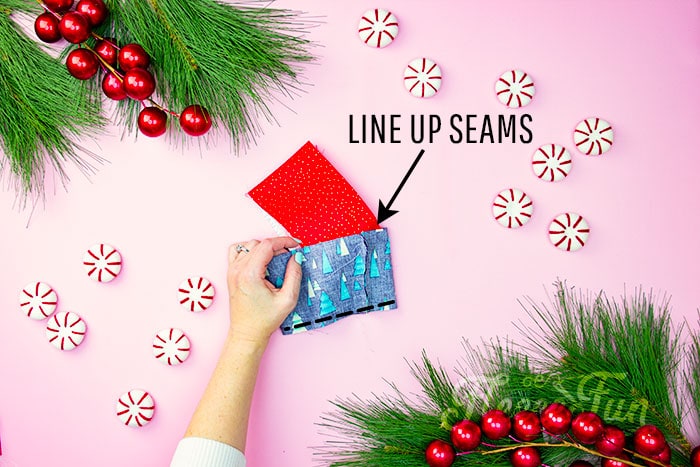
Turn one cuff right side out. Put right side out cuff inside the other so right sides are touching. Line up the Seams on each side. Pin along the bottom ring and sew the two together using a .25″ inch seam allowance forming a tunnel.
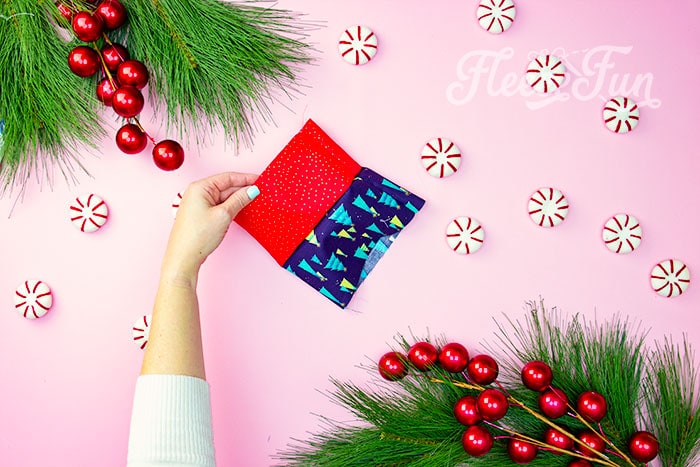
Turn right side out.

Stuff the cuff you want to be on the interior inside the other cuff. Set aside.
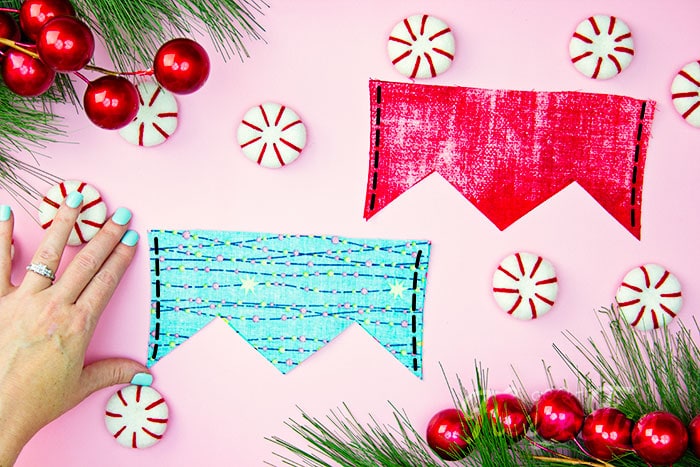
For the curly toe or elf style of stocking (both regular and patchwork): With right sides together, sew the sides of each with a .25″ seam allowance.

Turn one cuff right side out. Put right side out cuff inside the other so right sides are touching. Line up the seams on each side and points.
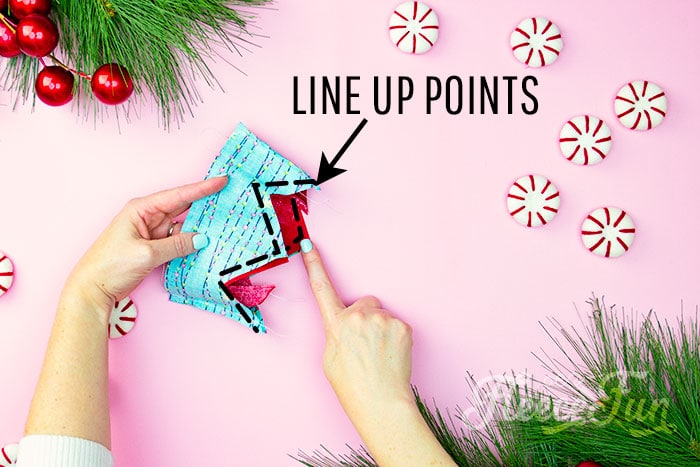
Pin along the bottom and sew the two together using a .25″ inch seam allowance forming a tunnel.
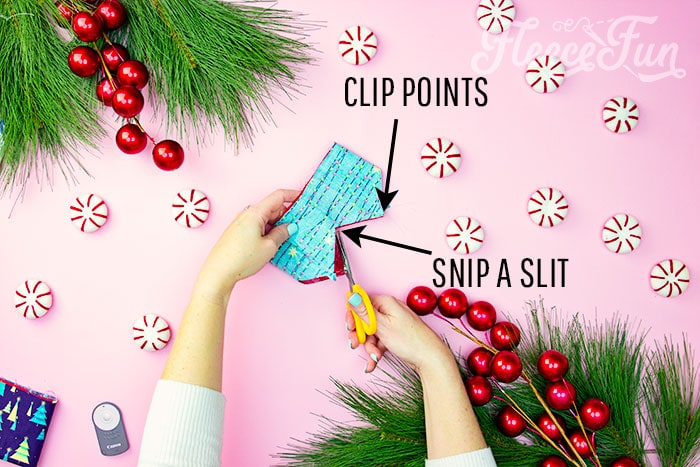
Snip a slit at the point tops and clip the point so they can be sharp when turned.
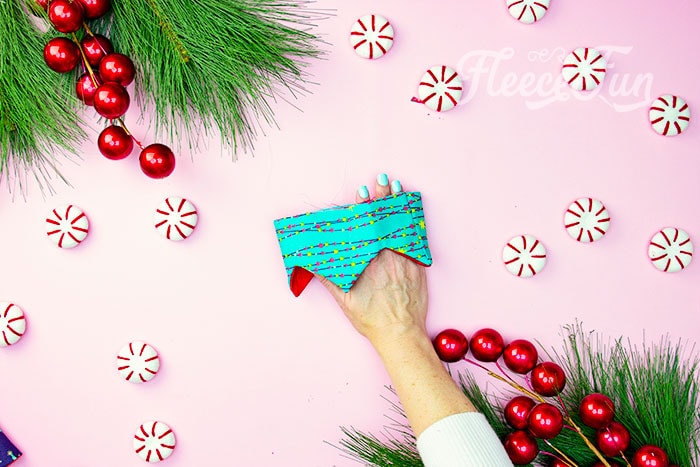
Turn right side out – using a tool to make sure the points are fully turned. Have the side that you want facing out on the Christmas Stocking turned out towards you.
Step 7 – Finish the How to Make a Christmas Stocking
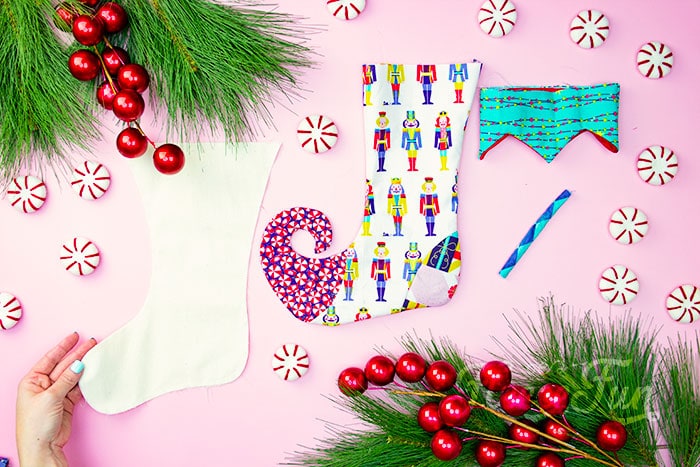
From here on out assemble is the same no matter what style of stocking you’re making. You’ll need the completed pieces of the lining, main stocking body, cuff and hanger.
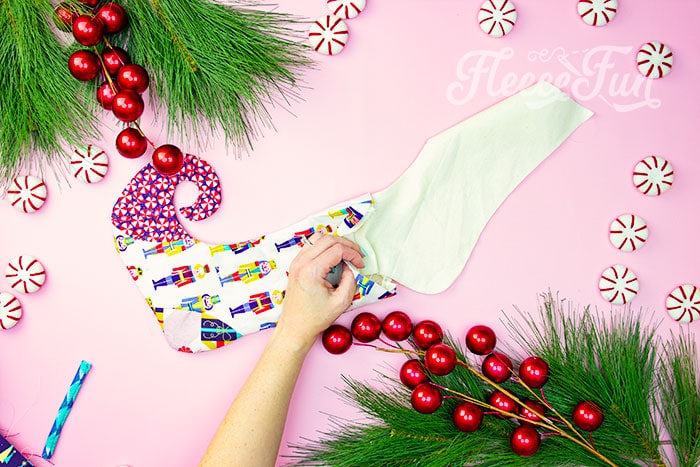
Take the lining (it should still be inside out – right sides touching). Place into the stocking.
Take the hanger and fold it in half.
Place it as the seam over the heel. Pin.
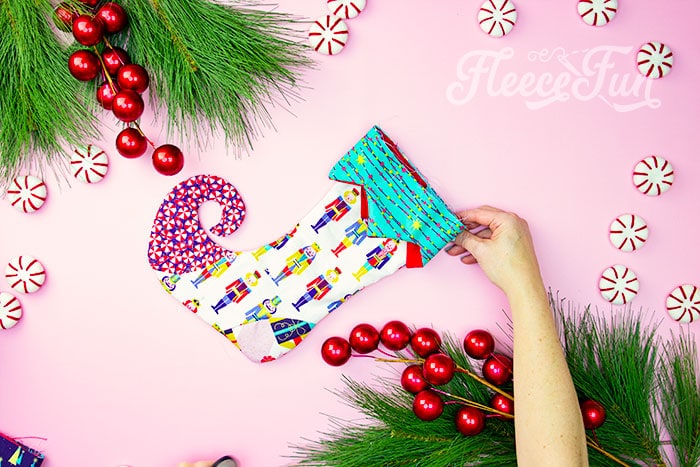
Take the cuff have it turned how you want it to look when it’s finished.
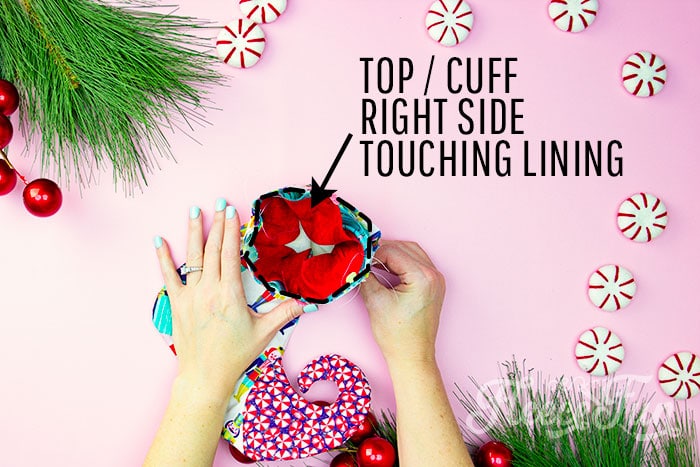
Place the cuff inside the stocking lining up the seams at the unsewn edges with the top. Pin. From the inside out it should be cuff, then hanger then lining, then main stocking body. Sew around the top using a .25″ seam allowance.

Flip the cuff out, hiding the seam. You just made a Christmas stocking!
DOWNLOAD THE FREE PATTERN HERE.
You can get a free copy of Adobe reader here. By downloading you are agreeing to pattern terms of use. Fill out the form by clicking the picture just below to get it sent right to you. Or simply click here to go to the form. Hate the Ads? You can purchase a ad free version of the pattern with printable instructions here.
Christmas Crafts and Recipes for Gifts!
- Holiday Spa Set Tutorial
- No-Sew Christmas Stocking Patterns
- Holiday Bath Bombs DIY
- Christmas Tree Pillow
- Christmas Terrarium DIY with Cricut Maker
- Christmas Ideas
- No-Bake Christmas Wreath Cookies
- Quilted Christmas Table Runner Tutorial
- High Heel Christmas Stocking
- Mason Jar Cover Gift Idea
Explore More Christmas Projects You’ll Love
- DIY Felt Ornaments Tips, Tricks, and Templates
- Vintage Apron
- Deer Head Pillow
- Advent Calendar Wreath
- Let Us Sew SVG Christmas Décor
- Gingerbread House Ornaments DIY
- DIY Felt Candy Christmas Tree Ornaments
- Felt Stocking Ornament DIY
- Felt Ornament Pattern: Adorable Reindeer
- Free Ornament Template: Felt Santa
- Reindeer Felt Handmade Ornament DIY
- Let It Snow Embroidery Hoop Ornament DIY
- Modern Christmas Wreath DIY Felt
- DIY Christmas Earrings
- How to Spray Paint a Pre-Lit Christmas Tree
- Free Christmas Printables
- Free Christmas Picture Printables
- Personalized Christmas Pajamas
How to Make a Christmas Stocking
Materials
- 5/8 yards fleece or felt for large ( 1/3 for small)
- 1/4 yard Fur trim or contrasting material
- 1 spool thread
- 1 Package Iron on Adhesive (like Heat n bond, Wonder Under) for applique (optional)
Instructions
1 – Cut out the Pattern
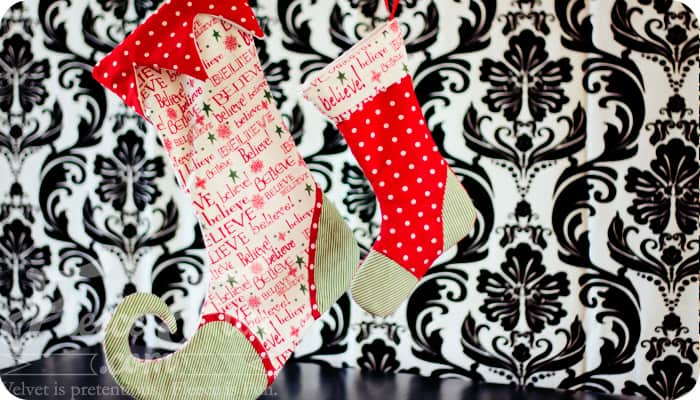
- There are multiple are multiple sizes to this pattern. Pick the size you wish to make. For the advanced version of the stocking we will be making a lining, as well as applique for the toe and heel (the applique is optional)Print up the pattern (you can get assembly instructions here) .Design your stocking – decide what kind of cuff you want to go on your project as well as if you want the applique toe and heel. Once you've decided cut out the pattern pieces you need.Cut out 2 of the stocking (curly toe or basic) Cut out two of the lining in the same size (this will be the basic stocking whether you are making a curly toe or basic stocking). Cut out 4 of the cuff. ( 2 of the main fabric and 2 of the lining.)Cut one hanger (but a ribbon will work as well)Tip: To save money on fabric use a less expensive white muslin for the lining. and underside of the cuff.

- If you are planning on having applique on the toe and the heel, you will need to first apply the iron on adhesive to the wrong side of the fabric. Iron on, remove paper then cut out toe and heel pattern pieces.Tip – be sure that you cut out the pattern in the direction you want your stocking to hang if you are only adding it to one side.
- Iron on the applique pieces and add any other embellishments at this time (i.e. ribbon or satin stitching).

2 – Begin to Sew!
- Trim the toe and snip slits along curves ( taking care not to cut through the seam) Turn exterior stocking right side out, leave lining with right side in. Insert lining into stocking – wrong sides should be together, set aside.

3 – Make the cuff
- With right sides together, sew the sides of the cuff, using a .25 seam allowance. do the same for the cuff lining.Then with right sides together, place the cuff and the cuff lining together and sew the bottoms together using a .25 seam allowance. Trim points and flip right side out.Note: The bottom on the elf stocking is the triangles, the bottom on the basic is smaller than the top.

4 – Bring it all together.
- Take the hanger, and the cuff. Fold hanger in half and pin at the seam above the heel on the inside of the stocking – loop should be towards the bottom.Next take the cuff and place it inside the stocking so the right side is facing in (the right side of the cuff should be touching the wrong side of the stocking).Using a .25 seam allowance sew all the way around the top of the stocking. Then flip cuff right side out and you're finished!

Notes
Download the free pattern here.
You can get a free copy of Adobe reader here. By downloading you are agreeing to pattern terms of use. Click the picture of the pattern envelope to download the .pdf !


Simple version with fleece or felt:
1 – Cut out the pattern
 There are multiple are multiple sizes to this pattern. Pick the size you wish to make.
Print up the pattern (you can get assembly instructions here . Cut out 2 of the stocking (curly toe or basic). For the cuff cut two as well out of a contrasting material (in the example I used fake fur.)
2 – Begin to sew
 Taking the two cuff pieces, place them right sides together and sew the short sides together using a .5 seam allowance. This should make a loop. (if you desire you can turn under the side that will be the bottom of the cuff under .25 inches and sew – but it not necessary for fleece or felt. Set aside.
If you are adding the heel and toe applique you should do that here. If you are using felt or fleece – no adhesive is necessary. If you are using cotton or flannel I recommend using an iron on bonding adhesive, (like Heat and Bond) to keep the applique in place.
Pin the heel and the toe into place. (if using cotton or flannel iron on) then using a zig sag stitch stitch along the inside curve of the heel and the toe – you may want to baste the other edges down – but they will be “sandwiched” between the other stocking side in a moment – so sewing twice is not necessary.
Sew the stocking together. With right sides of the fabric together sew from the top all the way around leaving the top open. Use a .25 inch seam allowance.
3- Put it all together
 Turn stocking right side out. If making the curly toe stocking be sure to trim close to the seam and use something like a crochet hoot to help you turn the toe completely.
Take the hanger, and the cuff. Fold hanger in half and pin at the seam above the heel on the inside of the stocking – loop should be towards the bottom ( or you can use ribbon). Next take the cuff and place it inside the stocking so the right side is facing in (the right side of the cuff should be touching the wrong side of the stocking). Using a .25 seam allowance sew all the way around the top of the stocking. Then flip cuff right side out and you’re finished!
So cute! Thanks =) Can I make this with flannel instead of fleece? I’m online at Joann’s right now and they don’t have a huge selection of Christmas fleece but they have quite a bit of Christmas flannel. Thanks =)
Hi Caddandra,
Flannel will work fine with this pattern. =)
Hi! I LOVE you website! I am currently making the fleece mittens.. For my daughters school as extra pairs! I’m thinking about doing this stocking as well.. I just need the time.. :0) I love this pattern and all your videos are really easy to follow. I’m a new sewer.. So it’s great to have the videos. Just one thought for you, the older videos seemed to be a little easier to follow. I liked it when you would talk as you were showing the video. It made it very clear. Not that this video is not but if you could go back and look at the way you made the mitten video and the hat video, and try to follow the clarity of those, it would wonderful! And I know it seems a bit silly, but even when you talk about the materials needed, it was very easy to watch the screen and HEAR your voice rather than watch you name the materials and then have it flash back and forth. I swear, I’m not crazy, but I actually would go over it again and again, something just worked with the way the others were produced. I LOVE YOUR WEBSITE! The patterns and videos are amazing! It’s been a blast for me to start and finish a project! Thank you soooo much.. I’m a follower for life now! And sewer!!! Yay! Thank you!
The happy sewer!
Hi Beth,
I’m always trying to find different ways of presenting material so people and follow along. Writing tutorials are hard – everyone follows directions differently! I’ll take a look at the videos and see what you mean. Thanks for your input and for being a loyal follower! 🙂
– Angel
These are way too cute! I will be dusting off the sewing machine this weekend. I want to find someone with an embroidery machine to put my grandchildrens names on the cuff part before I sew them together 🙂 Thank you for the pattern
very detailed Thanks
Merci; trop beau