
Aladdin Magic Carpet Costume DIY (Free Pattern)
This content contains affiliate links or sponsored elements, read our Disclosure Policy.
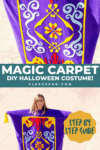

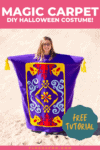

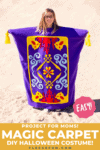


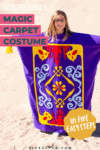
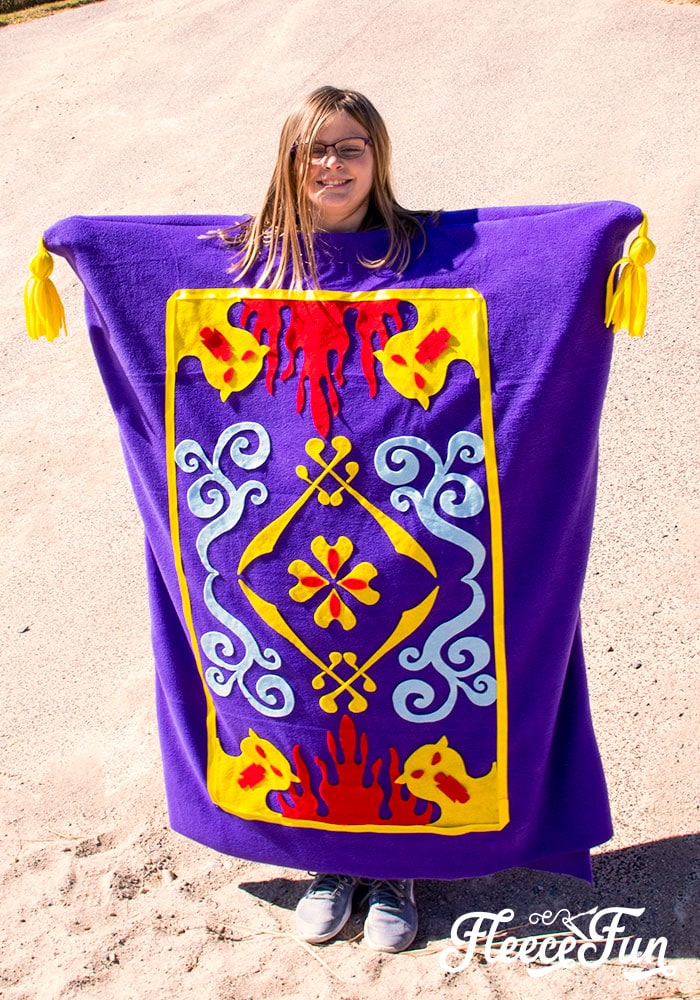
This Aladdin Magic Costume DIY has a free pdf pattern to make this costume easy to put together. This costume can be done without sewing – however with some basic sewing it will come together a lot faster. I’ve included two sizes of the images for the carpet front, one for children and another for adults. This costume is like wearing a giant blanket – so it will keep you warm and toasty while trick or treating.

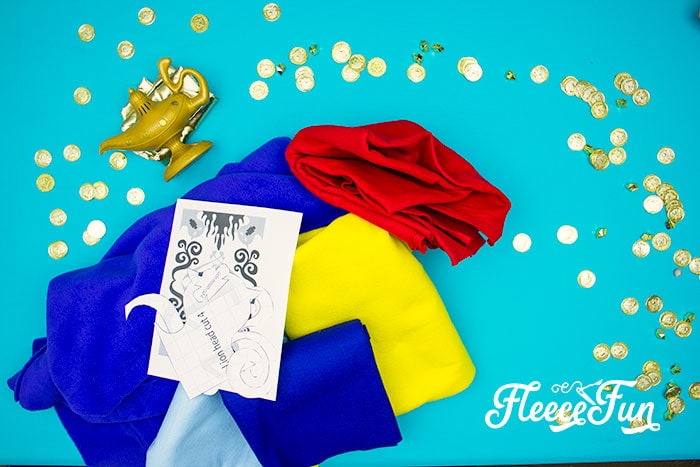
YOU WILL NEED:
- 1/3 yard blue felt
- 2/3 yard yellow felt
- 1/3 yard red felt
- 1 to 2 yards royal blue or purple fleece
- 1 1/2 wood bead or felt ball
- Fabric Glue (I like this kind)
- Glue gun & glue sticks
- Measuring Tape
- Ruler
- Rotary Cutter, ruler, mat
- Cricut Maker (optional, but nice)
- Sewing Machine (optional)
- 3 – 4 yards yellow ribbon
- Get Fleece Fun’s Free pattern here.

And yes there are armholes so you can grab candy!

Aladdin Magic Carpet Costume DIY

Step 1 – Cut Out All The Pieces for the MAGIC CARPET Costume
A HUGE portion of the the time spent on the costume is cutting out these elements. This is one of the main reasons why I recommend using the Cricut Maker to cut out these fiddly bits. I decided to only make the pattern for one side of the carpet to save time, you can double the amounts listed, to have the pattern on both sides, but that will double your work!
If you’re using Design space follow the color coordinated pieces to cut out the things you need.
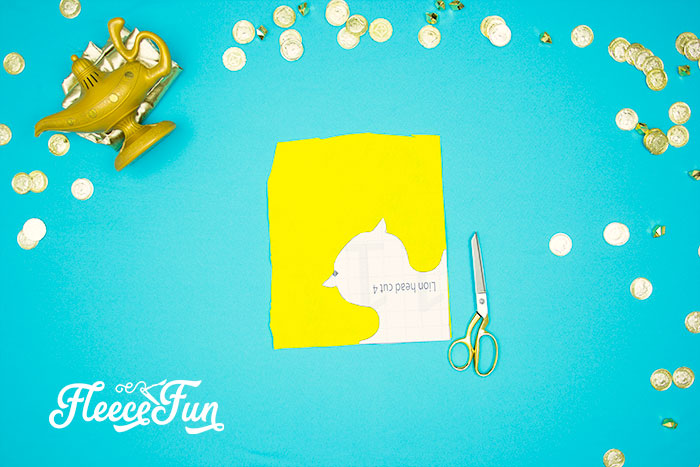
If you choose to cut by hand assemble the pdf pattern, and cut the following:

Cut out 4 of the lion heads in yellow.

Continue to cut 4 swirls in blue.

Cut 4 swords and 8 hilt pieces in yellow.

Cut 4 hearts in yellow, 4 mouths, 8 eyes, and 4 heart drops.

Two Fire sections.
note
For the adult size it’s two pieces if using the SVG file for the Cricut maker.
Quick Tip
To keep the felt items nice and flat I like to store them on a cookie sheet while making the costume.

To measure for the size of the costume. Measure the arm width of the person you are making it for – so arms spread wide – finger tip to finger tip. Then measure from the collar bone to the ankle for the length. Cut two pieces of fleece that height and width, one for the front and one for the back. If you are making the no sew tie version add 12 inches to the width of the fleece and six inches to the height.
Step 2 – Begin to assemble the pieces to the front of the Magic Carpet
First we need to glue on the layered elements of Aladdin’s Magic Carpet. I prefer to use fabric glue for the felt pieces as it dries clear and looks less lumpy than a glue gun, but a hot glue will also work.
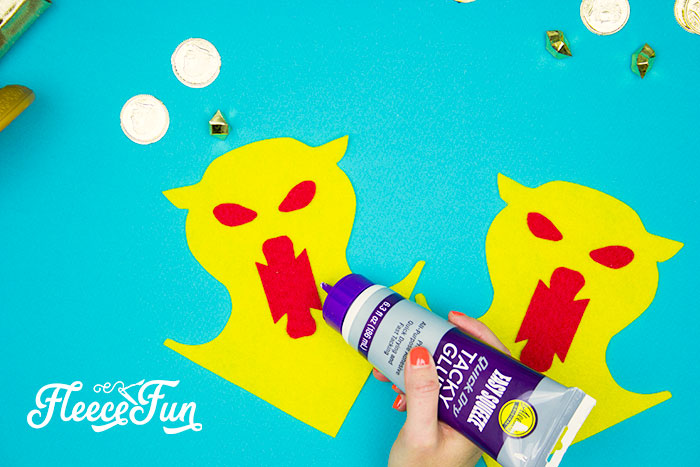
Glue on the eyes and mouth to the lion head.
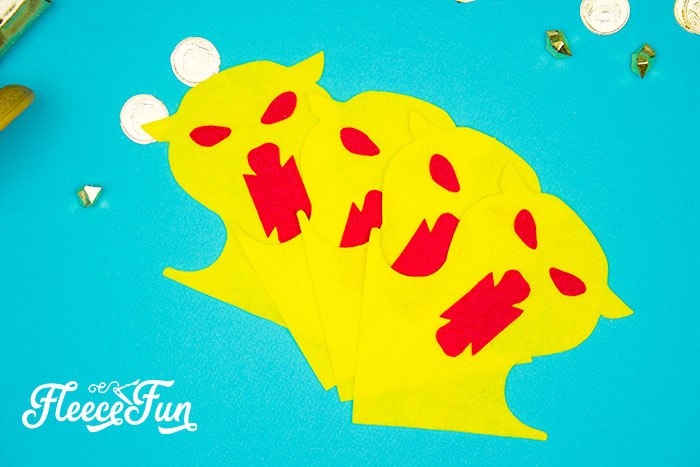
Repeat 3 times.
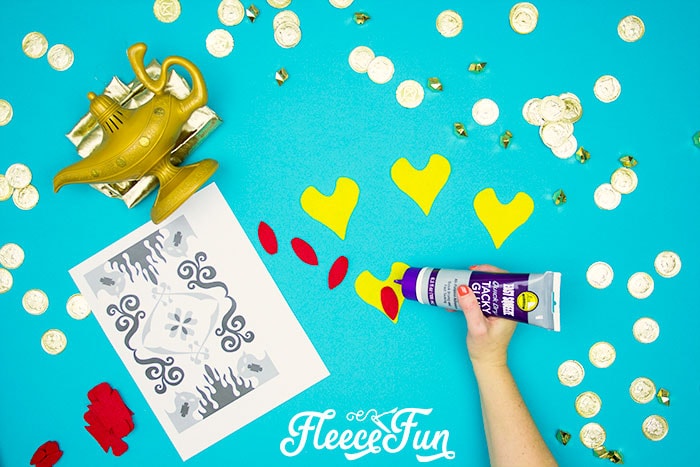
Next glue on the drop center to each of the yellow hearts. Set those items aside.
Step 3 – Make Aladdin’s Magic Carpet Front

Find the center of the fleece front.
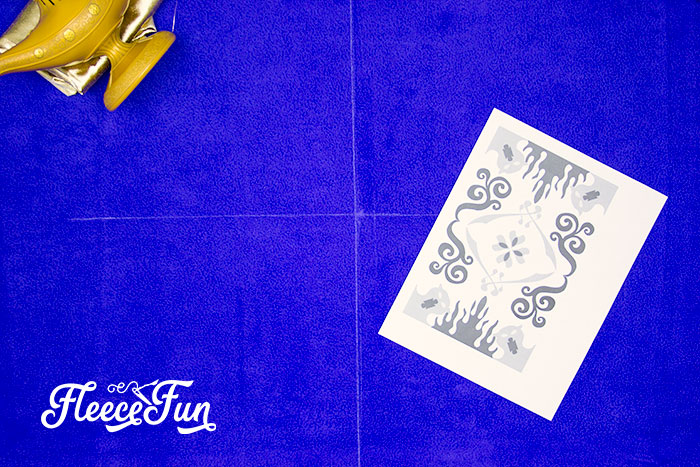
Then mark it with long x and y axis lines to use as reference points. Be sure to have the pattern guide handy to refer to.

Start with the center and work your way out.

Don’t glue it down until you have the pieces laid out. Adjust items if you need to. Then glue down.

Don’t worry if it’s not perfect, just as long as it is roughly the same it will work!

Now add the ribbon as the border, glue down.

As a finishing touch give it a quick swipe with a lint roller to keep the area tidy looking. Dab away reference lines.

Don’t worry if it’s not perfect once it’s on you won’t be able to tell.
Step 4 – DIY the Tassels for the Magic Carpet
When I originally planned this tutorial I figured I would just use store bought tassels, but found they were all too small or didn’t look right next to the bright yellow felt. So I opted to make them, as they fit the more cartoon-y look the costume has. We only need to make two tassels for the upper part of the costume.

From yellow felt cut out several strips that are 1/2 wide.
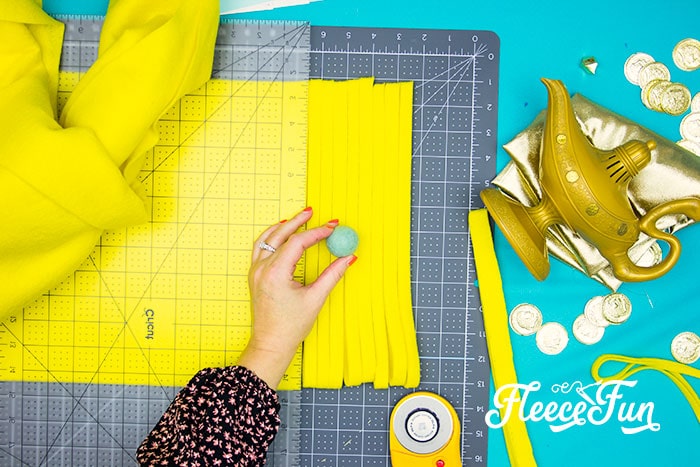
Cut the strips so they are 12″ long. Take the felt ball or bead and cover in the strips.

Once it’s covered and you’re happy with the look take a strip of felt and tie at the bottom. Adjust the tassel and trim the ends to even them up.

To finish add a strip to the top to hang it by. Simply take a strip of felt and loop it under a couple of the top strips. Set aside.
Step 5 – Bring the Magic Carpet Together
For the sew version:
Place the back side of the carpet costume on top of the decorated front, so right sides are touching. Place tassels in the top two corners to get sewn into place.

Using a .5 inch seam allowance sew the costume, leaving opening for arms, feet and head. Since it’s fleece don’t worry about finishing the raw edges. Turn right side out.

For the no sew version place front and back on top of each other WRONG sides touching. Cut strips to be about 1 inch wide by 5 to 6 inches long. Tie as you would a feel blanket, be sure to leave gaps for head, arms and feet (refer to sewing diagram above). Tie tassels to the upper comers.
That’s it! You just completed the Aladdin Magic Carpet Costume DIY.
Download the Free Aladdin Magic Carpet Pattern and SVG
You can get a free copy of Adobe reader here. By downloading you are agreeing to pattern terms of use. Fill out the form to have the zip file sent to your inbox – the file will include the svg and pdf files.

More Girl Costumes!
- Moana Costume Tutorial
- Butterfly Wings Costume
- Belle Costume Tutorial Beauty and the Beast
- Princess Anna Hat Tutorial Free PDF Pattern
- Bonus Craft Tutorial Fall Fairy Costume
- DIY Tiara Free Pattern and SVG File
- Costume Patterns
Costume Tutorials you might like!
- Halloween Dress Up Vest
- How to Make a Birthday Crown Free PDF and SVG File
- Cute Baby Yoda Hat
- Easy Superhero Cape Tutorial
- DIY Mini Top Hat
MORE HALLOWEEN CRAFT PROJECTS:
- How To Build a Pirate Ship Out Of PVC Pipe (Tutorial)
- Trick or Treat Banner DIY
- DIY Mini Witch Hat (No Sew, Free PDF and SVG)
- DIY Halloween Garland – Cute and Funny Bats!
- Free Halloween SVG Decor – Easy And Fun To Make!
- Harry Potter Spell Book DIY
- Glowing Maleficent Staff DIY For the Mistress of All Evil
- Minnie Ears DIY Maleficent Inspired Style (Free Template)
- Halloween Mason Jars or Witch Mason Jars (Free SVG File)
- Free Halloween Printable Treat Box

This is really an interesting article. The carpet costume look fantastic. Thanks for sharing this lovely blog.
I love this costume idea! When I entered my name and email, it wouldn’t allow me to “submit” or “enter”. Am I missing something essential to get this pattern?
Hi Meredith!
I sincerely apologize. The issue has been fixed. Thanks for letting me know!
I subscribed to get the free pattern and I still haven’t received a single email.
Hi Seth, It was sent to you on the 27th – please check your spam folder.
I would like to thank you so much for this costume detail. We have had a pantomime day at work today (I work in a primary school) and my team theme was Aladdin. I decided I wanted something different to the norm and when I saw your costume idea I was blown away. I used a duvet cover as the base and then added felt detail to it using your templates. I put a pipe insulating tube in the top to hold it up and the tassels were made out of a screwed up piece of foil and covered them with yellow crepe paper. I have had so many compliments, the children loved it and would like to thank you for making this available.
Thank you for sharing!