
Nutcracker Ornament DIY (Make a DIY Nutcracker Bar!)
This content contains affiliate links or sponsored elements, read our Disclosure Policy.

Handmade Christmas Ornament idea: This Nutcracker Ornament DIY is easy and fun for all ages. Set up is perfect for a party and everyone can let their creativity shine with this tutorial!
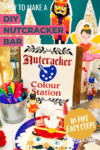
I love making handmade Christmas ornaments like this Nutcracker Ornament DIY! But the thing I love more than making ornaments is making ornaments with others! Today I’m going to show you how to set up a “DIY Nutcracker Bar” that will make for some creative crafting and fun. I’m personally planning on doing this with my family on Christmas eve to help keep excited kids (and let’s be honest adults too) busy.

Growing up my parents would take us to the Nutcracker Ballet every year around Christmas time. I remember dressing up for the ballet and how beautiful and magical it seemed. I think that’s why I love the Nutcracker story. It’s a happy Christmas memory from my childhood.
YOU WILL NEED:
- Blank Wood Nutcracker Ornaments
- Paint or Wood Markers (since it’s for Christmas Eve and I don’t want to deal with paint I’m all about the markers!)
- Permanent adhesive Vinyl pre cut out, weeded and with transfer tape
- The Cricut Design Space File for the Signs
- Faux fur (preferably cut up and ready to go)
- Thread (for hangers)
- Lint roller (a must when working with faux fur)
- Canvas Sign Blanks
- Heat Transfer Vinyl
- Nutcracker Decorations
- Glue gun and Glue sticks
- Tape
- Wood Craft sticks (to help with vinyl transfers)
- The free SVG file (get it by filling out the form)
Nutcracker Ornament DIY
Step 1 – Prep the Items for the Ornaments
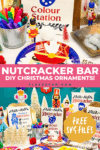
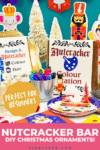
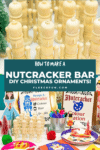
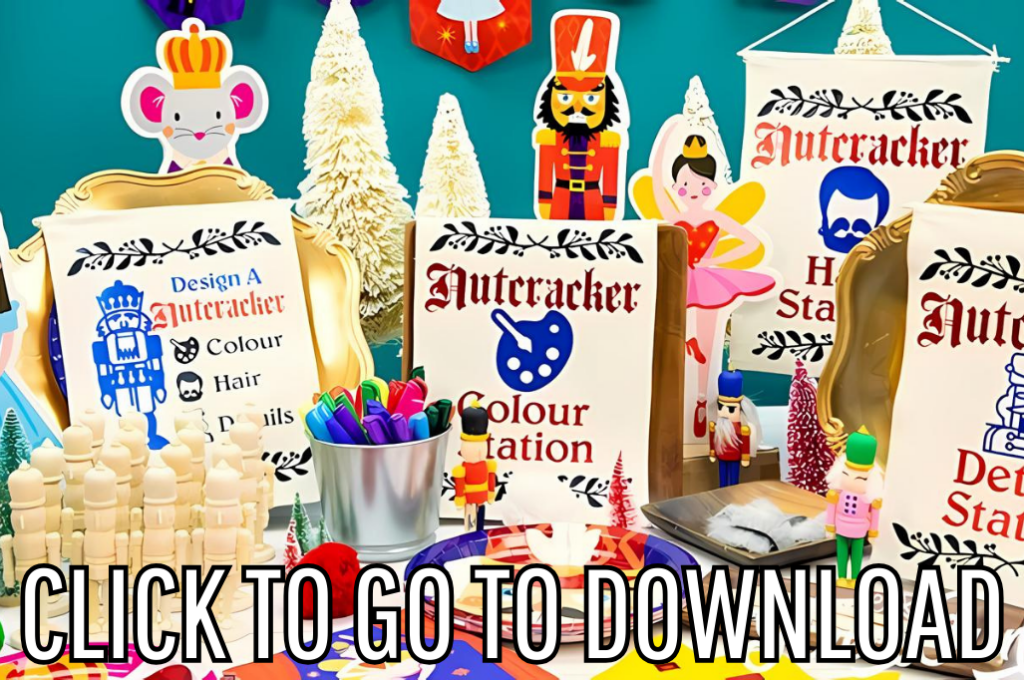
To make this Nutcracker decorating bar as easy as possible I made these signs using Cricut Design space. I also got these cute stand ups, banner and gift boxes. I also love these fluffy yarn balls to toss around the table.
The Nutcracker ornaments are sanded and ready to go so all you need to do is set them out!
Cut out the SVG file in the colors desired. I have a selection of items to go ton the coat and eyes for the nutcrackers. Weed the vinyl and add transfer tape to make it easy for your guests.
Cut out hair and beards for the nutcrackers from the faux fur. Run a lint roller along the edges to make it as clean as possible.
Have tape available so guests can mask off part of the ornament while coloring it to make it neater.
Step 2 – Begin to make a diy Nutcracker
Have the items laid out in the order they are to be assembled.
Grab a nutcracker blank and move onto the color station.
Step 3 – Color the nutcracker (and get creative)
This is where kids and adults can really let their creativity shine.
Have them color the nutcracker ornament DIY using the wood markers.
Let them use the tape to mask off parts of the nutcracker.
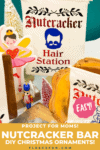
Step 4 – Add the hair to the Nutcracker Ornament DIY
I originally thought that I could get this to work with glue dots, but they refused to stick to the back of the faux fur! While traditional white glue will work the easiest (and most secure) solution is a glue gun. Be sure to have an adult help the littles with this part or be patient with the white glue and let have a little time to dry. It’s fun to add a beard to some of the nutcrackers!
Step 5 – Add the fine details to the Christmas Ornament
Now this is the step where the cute little Nutcracker Ornament REALLY comes alive.
It’s time to add the eyes and a few details to the front of his (or her) coat. I have a large selection of eyes some are layered ( I recommend doing this for your guests in advance – just to make it faster/ easier).
Some are the eyes are very traditional like the ones I put on the red nutcracker.
You will need to do each eye individually because of where the nose is placed.
Some of the eyes are very nontraditional – like these cute eyelashes!
Then add some details to the coat, like 6 buttons, 3 large buttons, or the x shape.
Store the ornaments so they can go home with a guest.
Put your cute ornaments in a little take home box!
Make sure you have each artist sign the bottom of their ornament to avoid confusion. That’s the end of the Nutcracker Ornament DIY.
DOWNLOAD THE SVG FILE BELOW (FILL OUT THE FORM)
By downloading you are agreeing to pattern terms of use. Fill out the form to have the file sent to your inbox.
More Ornaments for your Tree!
- Felt Stocking Ornament DIY
- Felt Ornament Pattern: Adorable Reindeer
- Free Ornament Template: Felt Santa
- Santa Ornament DIY
- Ballet Slipper Handmade Ornament
- DIY Homemade Ornament with Gnomes
- Wooden Christmas Ornament DIY
- Felt Lanterns Handmade Ornament
- You can see all of Handmade Ornament Tutorials on this page
- You can see just my Felt Christmas Ornaments here
Explore More Christmas Projects You’ll Love
- Mitten Ornament Pattern
- Printable Holiday Gift Tags
- Mini Holiday Gift Tags
- Ice Skate Ornament DIY
- How to Make a Snowman Ornament
- Felt Elf Tutorial
- 6 Ways to Engage Kids This Christmas
- 5 Tips for Outdoor Christmas Decorating
- Christmas Ideas
- No-Bake Christmas Wreath Cookies
- Perfect Stocking Stuffers for Sewing Lovers
- Mad Hatter Tea Party Paper Chandelier
- Giant Holly Leaves