
Wooden Christmas Ornament DIY
This content contains affiliate links or sponsored elements, read our Disclosure Policy.
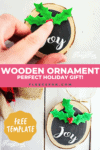
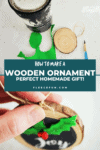


Homemade Christmas Ornament: This farmhouse style wooden Christmas ornament DIY makes for the perfect addition to your holiday décor. Make it for your home or use it as a hostess or neighbor gift. This simple and sweet ornament comes together so easily you might just want to make several in one sitting.

YOU WILL NEED:
- Cricut Maker or Explore Air 2
- 1 4-inch Wood Round
- Black Chalkboard Paint
- Joy Cut Files Cut from Heat Transfer Vinyl
- Green Craft Felt Scraps
- Red polymer Clay
- Holly Leaf Template
- 4-inches Twine, Ribbon or String
- Tools Needed:
- Paintbrush
- Hot Glue Gun and Glue
- Pencil
- Parchment Paper Scrap
- Iron
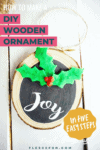
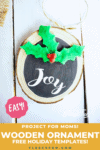
- Get the free template here.
Wooden Christmas Ornament DIY Tutorial
Step 1: Craft the Decorative Berries
Start by making your holly berries. Break off three equal-sized tiny tiny pieces of the red polymer clay and roll them each into a neat ball.
Push them together in a triangle, but don’t squish them, just make sure they’re joined.
Bake per the polymer clay package instructions. Allow to cool completely before handling.
Gather the rest of materials
Step 2: Paint and Prepare the Wood Base
With the black chalkboard paint, paint the interior of the wood round, leaving about ½-inch around the edges clear of paint.
I chose to follow one of the rings, so that my black paint followed the more natural shape of the wood. Allow paint to dry completely.
Step 3: Create “Joy” Letters for the Wooden Christmas Ornament
Cut your “joy” letters on your cutting machine. Remember to mirror the letters if you are using a heat transfer vinyl. I always forget to do that, so learn from my mistakes.
Weed the vinyl so it’s ready to go.
Preheat your iron while you place the letters on the ornament in the desired location.
Cover the letters in parchment paper.
Iron the letters down through the parchment paper.
Remove parchment paper and the clear backing from the letters.
Step 4 – Make the Holly Leaves
Trace three holly leaf shapes from the Wooden Christmas Ornament template onto the green craft felt and cut them out. (I’ve also included the leaf SVG in the file if you want to cut it out using your Cricut Maker)
Add a spine to the leaves with pencil. You’re just adding shadow for depth, so it does not have to be perfect.
Step 5 – Finish Up the Wooden Ornament
Hot glue the leaves in place above the joy letters on the ornament.
Affix the holly berries to the leaves where they meet.
Tie a knot in your twine or ribbon to make a loop.
Hot glue the knot to the top of the ornament.
Allow hot glue to dry completely.
Enjoy you Wooden Ornament.
DOWNLOAD THE free wooden christmas ornament SVG FILE BELOW (FILL OUT THE FORM)
By downloading you are agreeing to pattern terms of use. Fill out the form to have the file sent to your inbox.

More Ornaments for your Tree!
- Felt Stocking Ornament DIY
- Felt Ornament Pattern: Adorable Reindeer
- Free Ornament Template: Felt Santa
- Santa Ornament DIY
- Ballet Slipper Handmade Ornament
- DIY Homemade Ornament with Gnomes
- Nutcracker Ornament DIY
- Felt Lanterns Handmade Ornament
- You can see all of Handmade Ornament Tutorials on this page
- You can see just my Felt Christmas Ornaments here
Explore More Christmas Projects You’ll Love
- Mitten Ornament Pattern
- Printable Holiday Gift Tags
- Mini Holiday Gift Tags
- Ice Skate Ornament DIY
- How to Make a Snowman Ornament
- Felt Elf Tutorial
- 6 Ways to Engage Kids This Christmas
- 5 Tips for Outdoor Christmas Decorating
- Christmas Ideas
- No-Bake Christmas Wreath Cookies
- Perfect Stocking Stuffers for Sewing Lovers
- Mad Hatter Tea Party Paper Chandelier
- Giant Holly Leaves