
How to Make a Birthday Crown (Free PDF and SVG file)
This content contains affiliate links or sponsored elements, read our Disclosure Policy.
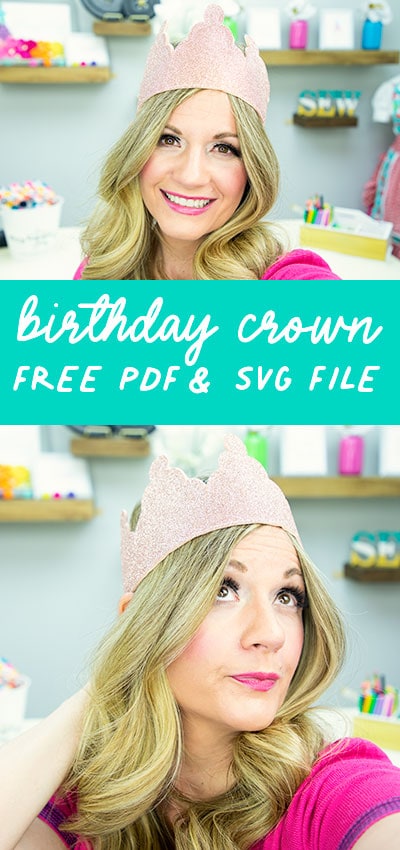

How to make a birthday crown is perfect for your little one’s next celebration!  This cute crown can be made from felt, but also can be made from craft foam, cardboard, cardstock, etc. Sky’s the limit with what you can do. Use this tutorial as a jumping off point to make something wonderful for your kiddo (or heck even yourself!) I love making it our of felt, because it folds flat for easy storage ( perfect for a dress up box)
For this project you will need:
12” by 19” piece of felt (or craft foam, cardboard, cardstock, paper etc.) I like to buy my felt here.
19 by 6 inch scrap of iron on interfacing
8 inches fold over elastic
Crystals/ Jewels (optional)
Sewing Essentials (scissors, pins, etc.)
Cricut Maker (Optional)
Fabric Grip Mat (Optional)
Fleece Fun’s Free pattern and SVG file here.


How to make a birthday crown (Free Pattern) Instructions:

Step 1 – Cut out the pieces to the crown
 Once you’ve gathered all your materials it’s time to cut out the elements.
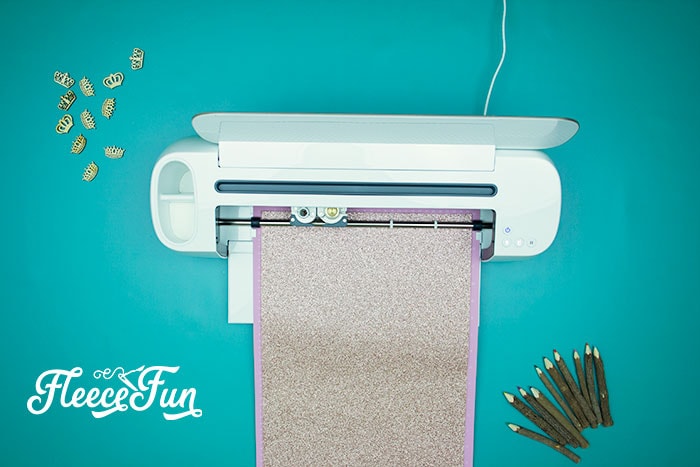 Using the free SVG or pdf pattern provided cut out 2 of the crown from felt (this will be the interior and exterior).
 Then cut out 1 of the interfacing.
Note: if you’re making it out of craft foam or cardstock you’ll just need to cut 2 of the tiara
For the fabric crown cut two 4 inch strips of fold over elastic.
For other materials cut a 2 inch by 6 inch strip to place the crown on the head.
Step 2 – Begin to make the Crown
If you aren’t sewing the crown, you can skip this step.
 Time to make the crown sandwich.
 Place the interfacing (glue side down) and iron onto one of the felt exterior pieces. Center it so there is a border all around the interfacing.
 Next line up the other exterior piece on top of the piece with the interfacing.
Step 3 – Sew around the crown
 Pin or clip the crown together.
Using an edging foot, sew around the crown.
Step 4 – Add some embellishments to your crown
 Using a glue gun, glue on embellishments. I opted for some jewels on my regular felt version but you could use a number of things. For the felt you can use HTV, embroidery, beads, jewelry charms, buttons, etc. Just look around your house or junk drawer – I bet you can find everything your need! I decided that the glitter rose gold was plenty sparkly on it’s own – and didn’t add jewels
Step 4 – Make the birthday crown wearable
 Now that you’re done decorating it’s time to add the elastic to the back so you can wear it. Sew it on on side.
 Then sew it to the other. Place the birthday crown on your head and let the party begin!

TO DOWNLOAD THE Crown PDF Pattern IN CLICK THE PICTURE BELOW:
By downloading the pattern you are agreeing to our terms of use.

To get the pdf and SVG files fill out the form:
More Fun Costumes for Boys!:
- Easy Donut Costume DIY Free Pattern
- No Sew Knight Costume DIY Tutorial
- Best Aladdin Costume DIY Free Vest Pattern
- Halloween Dress Up Vest
- Costume Patterns
More Costume Tutorials you might like!
- Aladdin Magic Carpet Costume DIY Free Pattern
- Bonus Craft Tutorial Fall Fairy Costume
- DIY Tiara Free Pattern and SVG File
- Easy Superhero Cape Tutorial
More Cricut Maker Projects:
- 4th of July Pinwheel Wreath
- Cute Craft Room Trash Can DIY
- DIY Felt Flower Art
- Saving for Disney Money Jar
- Softie Baby Book DIY
- “Let Us Sew” SVG File
- Christmas Terrarium DIY
- How to Decorate a Notebook
- How to Sew a Quilt
- Pin the Tail on the Turkey Game
- Stocking Advent Calendar
- Cricut Maker Cover Tutorial
- Halloween Mason Jars
- Luggage Tag DIY
- How to Make a Paper Chandelier
- You Can See All of Fleece Fun’s Cricut Projects Here
- Is it time to upgrade your Cricut Machine?